














SWTOR Smuggler Classic Venture Guide

The Smuggler Classic Venture in Star Wars: The Old Republic is a fun, challenging, long-term way of playing the game and exploring all its facets while levelling up a brand new Smuggler from level 1 on Ord Mantell, all the way up to level 50 on Ilum. You’ll be expected to fight, explore, gear up, and hunt down unique foes, all while taking extra damage during fights and levelling up at a pace that’s more in line with levelling up at the launch of the game. This mode also introduces a bunch of new special items you’ll pick up off of glowing golden enemies that will give you special boosts or temporary challenges as you play in Classic mode, and of course has unique rewards just for the Imperial Agent.

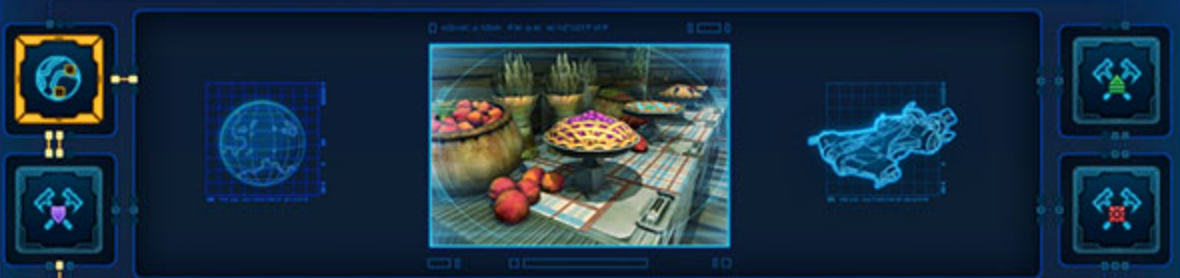
All of this information is from the Public Test Server. There is a good chance much of it may change before the Classic Ventures system is released in 8.0 which the developers are aiming to release at the end of 2026! Many of the screenshots are also from the unfinished Public Test Server – you can see many unfinished graphics, labels, and objectives there. My favorite is the pie image placeholders.

How to Start
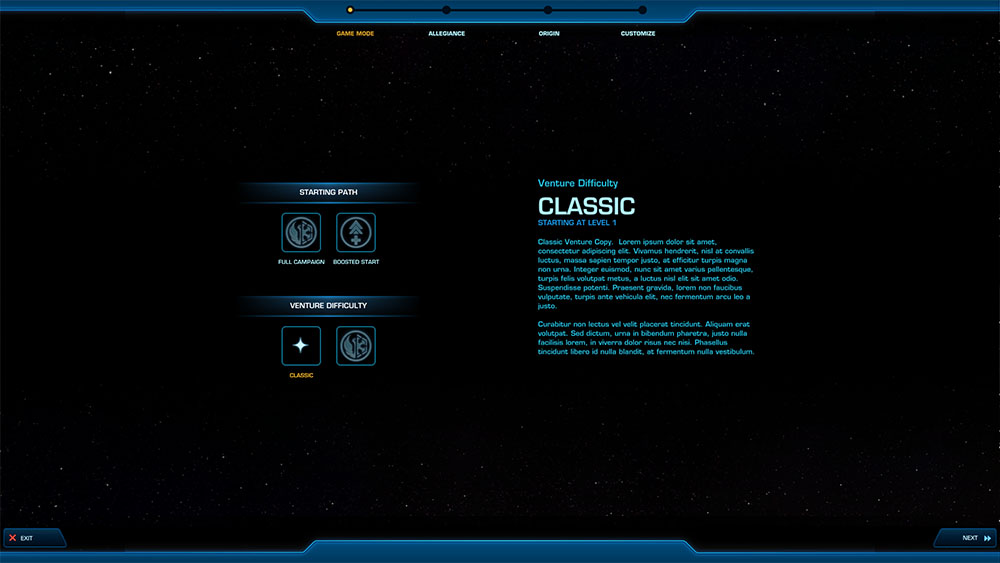
To start a new Classic Venture, choose Classic when you go to create a character (rather than the Full Campaign, which is what you would pick for a normal new character.)
Ventures are only available to subscribers, and that includes the Smuggler Classic Venture. Free-to-play players will not be able to start venture characters, and preferred players will not be able to continue playing any venture characters they have made until they re-subscribe.

Choose a Combat Style

When you go to create a Classic Venture Imperial Agent, you will notice that you only have two options for your Combat Style – the Scoundrel or the Gunslinger. In the normal game, you have a lot more options, but these were the two options available at the launch of the game, and during a Classic Venture, you’ll only be able to pick between these two styles. This means you can not play a Smuggler as an Operative, Sniper, Vanguard, Commando, Mercenary or Powertech while playing a classic venture.
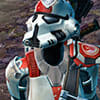
Scoundrel

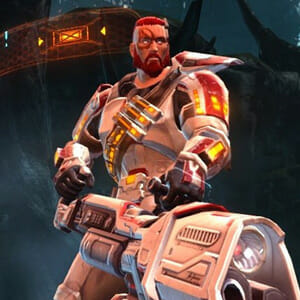
The Scoundrel doesn’t have time for politeness or a fair fight. In addition to their trusty blaster, the Scoundrel packs a stealth belt, a scattergun and a med pack–everything they needs to get in, knock the enemy for a loop and get out alive. Being invisible works best, but even when Sith fly through the air waving Lightsabers all they get to do is look surprised as the Scoundrel’s scattergun sends them back the way they came. The Scoundrel always shoots first. In addition to their trusty blaster, Scoundrels pack a stealth belt, scattergun, and med pack—everything needed to get in, knock the enemy for a loop, and get out alive.

The Scoundrel wields a Blaster Pistol and a scattergun, and can switch between three different Disciplines: Sawbones, Scrapper, and Ruffian. The Scoundrel acts as a Damage or Healer role in combat.

Sawbones

As an Underworld figure armored with the latest advances in medical technology, the Sawbones Scoundrel is a crucial ally. From healing a single target to many at once, distributing emergency medpacs and clouds of healing kolto, the Sawbones ensures that their crew will endure throughout the heat of battle.

Scrapper

Holding no punches, the Scrapper Scoundrel never backs down from a fight – so long as said fight is on their terms. Able to hide from the fray, the Scrapper can sucker punch and bludgeon their adversary, ducking back out before things get too hairy and biding their time until the moment is right to scrap once more.

Ruffian

Never shy about taking advantage of any opportunity, the Ruffian is a rough-and-tumble Scoundrel able to handle any fight, big or small. Inciting chaos with a shrapnel bomb and then coming in close for a shot at point-blank range, the Ruffian Scoundrel makes devious moves that keep their enemies reeling.

  • Role: Healer
  • Weapon: Blaster Pistol
  • Distance: Long Range
  • Mirror: Operative – Medicine
  • Role: Damage
  • Type: Burst Damage
  • Weapon: Blaster Pistol
  • Distance: Melee Range
  • Mirror: Operative – Concealment
  • Role: Damage
  • Type: Damage Over Time
  • Weapon: Blaster Pistol
  • Distance: Short Range
  • Mirror: Operative – Lethality
+ Read More
+ Read More
+ Read More

Sawbones for New Players

  • Sawbones is a healer style, which makes it harder to learn than a damage class for most new players
  •  Most players recommend to level as a damage discipline, then switch to healer when you are ready for group content
  • All three healer styles are not too hard to start healing with, just select a player and heal with a green ability
  • However Scoundrel Heals has a second resource to manage called Upper Hand, which makes it slightly trickier to start with

Scrapper for New Players

  • Scrapper is punching range, which means you must be very close to your enemy to attack, but you have a jump ability and roll to help you close the gap between you and your enemy
  • This style is very mobile and you can easily run and jump around while fighting without any issues!
  • Most abilities can simply be used, you only need to learn to activate a few of them
  • Scrapper is pretty easy to learn the basics of compared to other disciplines.

Ruffian for New Players

  • Ruffian is a damage-over-time discipline which means you need to build up your attacks over time, layering them together, which makes it slightly harder to learn than burst discipline which do damage right away
  • This style is very mobile and you can easily run and jump around while fighting without any issues!
  •  Most abilities can simply be used, you only need to learn to activate a few of them
  • Scrapper takes slightly longer to learn than other disciplines, but is easier to get really good at compared to many other disciplines

Cool Abilities

  • Sawbones focuses heavily on healing-over-time. Sawbones excel at group healing.
  • Kolto Waves, large group heal
  •  Slow-release Medpack, heals your target over time and can be used on any number of targets
  •  Kolto Cloud, heals your target and additional targets nearby
  • Stealth, to sneak past enemies, the only healer with stealth available
  • Smuggle, group stealth (optional)
  • Dirty Kick, short stun (optional)
  • Scamper, roll forwards quickly
  • Trick Move, jump to an enemy (optional)
  • Flash Grenade, group stun/distraction (optional)
  • Surrender, drop all your money and lose enemies’ attention

Cool Abilities

  • The Scrapper style focuses on punching enemies in the face, big or small. It’s a fast and fluid discipline.
  • Stealth, to sneak past enemies
  • Smuggle, group stealth (optional)
  • Dirty Kick, short stun (optional)
  • Scamper, roll forwards quickly
  • Trick Move, jump to an enemy (optional)
  • Flash Grenade, group stun/distraction (optional)
  • Surrender, drop all your money and lose enemies’ attention

Cool Abilities

  • Stealth, to sneak past enemies
  • Smuggle, group stealth (optional)
  • Dirty Kick, short stun (optional)
  • Scamper, roll forwards quickly
  • Trick Move, jump to an enemy (optional)
  • Flash Grenade, group stun/distraction (optional)
  • Surrender, drop all your money and lose enemies’ attention

Gunslinger

Master of the trick shot, the first to dive for cover and willing to take advantage of every opportunity, the Gunslinger and his dual blasters are the perfect team. The Gunslinger can shoot out a man’s legs to keep him from charging, blind him so he can’t get to his weapons or inflict serious injuries for maximum distraction. There’s a right target for ending every disagreement and the Gunslinger knows them like the inside of his ship.

The Gunslinger wields dual blaster pistols, and can switch between three different Disciplines: Sharpshooter, Saboteur, and Dirty Fighting. The Gunslinger acts as a Damage role in combat.

Sharpshooter

Armed with the steely fortitude required to set up the perfect shot, the Sharpshooter is the Gunslinger at its most devious. Aiming from distant cover, the Sharpshooter goes for a devestating opening salvo, following up with vicious trick shots and penetrating rounds, putting a definitive end to the fight they started.

Saboteur

One of the perks of being a Saboteur is access to all the latest tools of any trade – including the many high-tech charges and grenades in the Saboteur Gunslinger’s arsenal. Able to wreak havoc on their intended target from a safe distance, the Saboteur is a craft, resourceful and incendiary master of mayhem.

Dirty Fighting

As a Gunslinger who finds nothing honorable about losing in a scrap, the Dirty Fighting Gunslinger doesn’t pull punches. Lobbed bombs and cheap shots are just a sampling of the Dirty Fighting Gunslinger’s bag of cruel tricks that can cause their target untold continuous suffering while the Gunslinger stands back with a satisfied smile.

  • Role: Damage
  • Type: Burst Damage
  • Weapon: Double Blaster Pistols
  • Distance: Long Range
  • Mirror: Sniper – Marksmanship
  • Role: Damage
  • Type: Damage Over Time
  • Weapon: Double Blaster Pistols
  • Distance: Long Range
  • Mirror: Sniper – Engineering
  • Role: Damage
  • Type: Damage Over Time
  • Weapon: Double Blaster Pistols
  • Distance: Long Range
  • Mirror: Sniper – Virulence
+ Read More
+ Read More
+ Read More

Sharpshooter for New Players

  • Sharpshooter has you take cover and not move. Cover makes Sharpshooter a very difficult class for newer gamers to learn, as many fights require moving around – but you can ignore the cover mechanic while learning Sharpshooter if you want.
  • Sharpshooter is long range – if you can handle the cover mechanic, you can hit targets very, very far away compared to most classes which makes it easier to find targets to hit than short-range classes.
  • Sharpshooter is the simplest of the three Gunslinger disciplines – using a very basic move set, you can get away with using only 4 abilities if you aren’t worried about doing max damage.
  • I was originally intimidated by the number of abilities Sharpshooter had, but found it very easy and intuitive to play once I read a guide and it felt there was less to memorize than many other disciplines.

Saboteur for New Players

  • Saboteur requires that you take cover and not move for many of your abilities to work well. Cover makes Saboteur a very difficult class for newer gamers to learn, as many fights require moving around.
  • Saboteur is long range – if you can handle the cover mechanic, you can hit targets very, very far away compared to most classes which makes it easier to find targets to hit than short-range classes.
  • When I was learning Saboteur, I found it was easy to learn the basics of, but harder to fully learn than the other two Gunslinger disciplines.

Dirty Fighting for New Players

  • Dirty Fighting requires that you take cover and not move for many of your abilities to work. Cover makes Dirty Fighting a very difficult class for newer gamers to learn, as many fights require moving around – but you can ignore the cover mechanic while learning Dirty Fighting if you want as all but one ability can still be used out of cover.
  •   Dirty Fighting is long range – if you can handle the cover mechanic, you can hit targets very, very far away compared to most classes which makes it easier to find targets to hit than short-range classes.
  •  If you are able to watch your debuff timers, this discipline is decently easy to learn with a guide.

Cool Abilities

  •  Sharpshooter focuses on long range pistol attacks, taking advantage of a free attack available after every main attack, and taking advantage of their large number of buffs.
  • Hunker Down, become immoveable
  • Hightail It, roll and go into cover
  • Scrambling Shield, large group shield (optional)
  • Bombing Run, your ship attacks for you (optional)
  • Flash Grenade, group stun/distraction (optional)

Cool Abilities

  • Saboteur is all about shooting things, throwing grenades, and setting things on fire!
  • Hunker Down, become immoveable
  • Hightail It, roll and go into cover
  • Scrambling Shield, large group shield (optional)
  • Bombing Run, your ship attacks for you (optional)
  • Flash Grenade, group stun/distraction (optional)

Cool Abilities

  • Dirty Fighting focuses on making sure you have Vital Shot and Shrap Bomb debuffs on your current target before using Wounding Shots, a channeled ability that is your weakest attack on its own, but generating the biggest hits you can do if supported by your Damage over Time abilities at the right time.
  • Hunker Down, become immoveable
  • Hightail It, roll and go into cover
  • Scrambling Shield, large group shield (optional)
  • Bombing Run, your ship attacks for you (optional)
  • Flash Grenade, group stun/distraction (optional)

Ventures

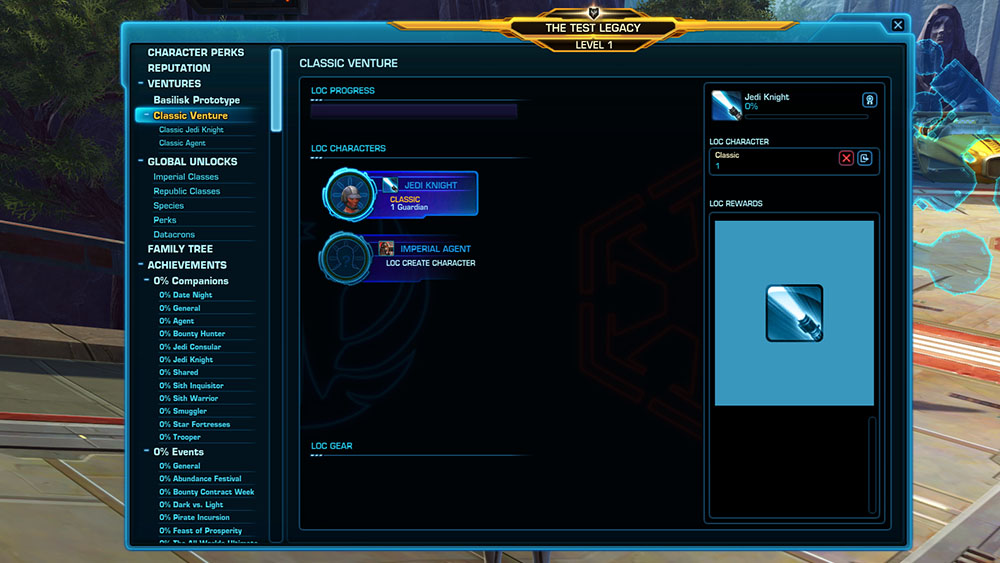
Once you have created your Classic Venture character, you can open your Legacy Panel (N key on your keyboard by default), and select your new character in Classic Ventures, which will be on the menu on the left under Ventures.

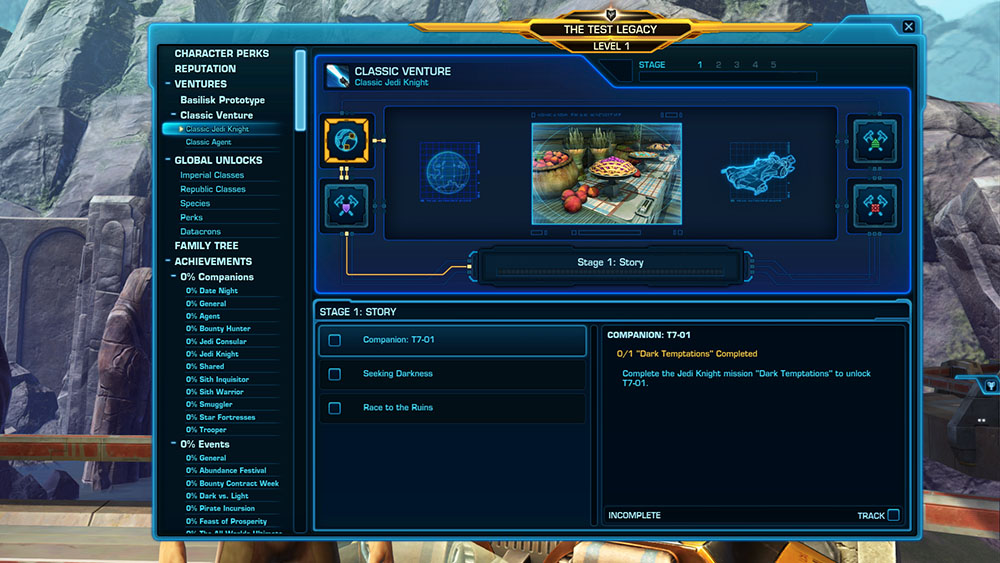
After selecting your character, you can then see the objectives to complete!

Gold Enemies

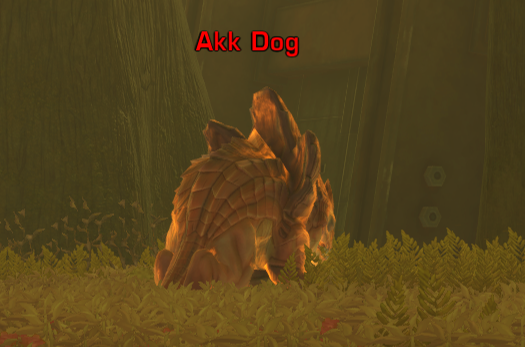
As you play your venture character, keep your eyes open for unique glowing gold enemies scattered around the map. All enemies have a chance of dropping special venture-only items, but golden glowing enemies have a higher chance of giving you special buffs, venture currency, or challenge items.

Venture Buffs

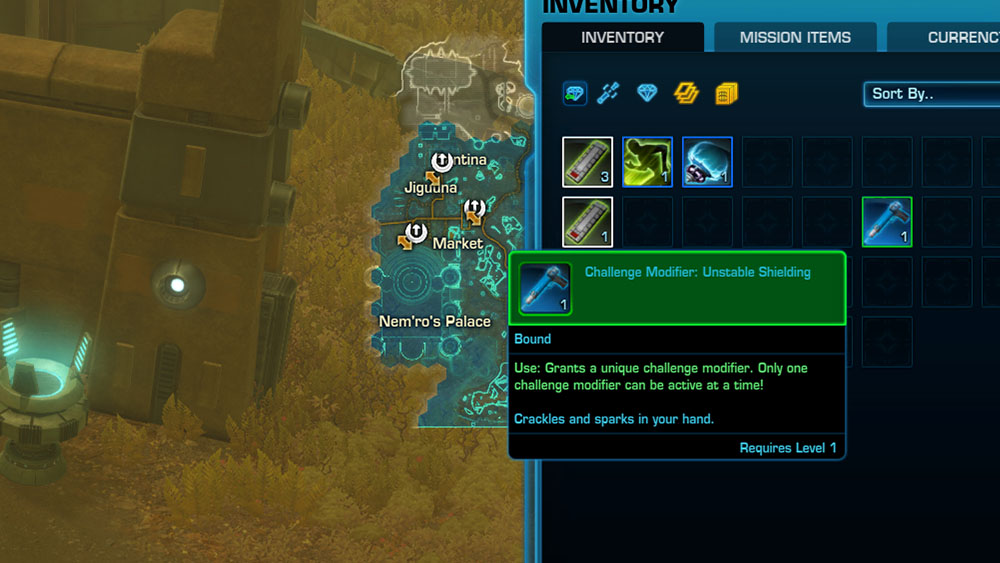
While playing, keep an eye on your inventory! In addition to the normal gear, credits, or other randomized loot you would get from enemies, you can also get venture-specific items to use on your venture character. These include challenge items, grenades, and treasure finding gear. See the Classic Venture Items Buffs, Boosts, and Grenade Preview on the PTS (Public Test Server) guide to see what they do.

Classic Venture Items Buffs, Boosts, and Grenade Preview on the PTS (Public Test Server)


Objectives

The Smuggler’s venture objectives will send you to complete some interesting additional objectives that you might not see if all you were doing was your main class story, and the first section focuses on exploring Ord Mantell and Coruscant.

The Smuggler is not yet on the PTS (Public Test Server) as Classic Ventures yet. These are some objectives based on the Jedi Knight’s objectives, which are up for testing on the PTS. These are only projected objectives, and may not be correct or what comes out on live in the 8.0 expansion. Some are in testing on the Public Test Server, and some are not. Some objectives may be added later, and others may be removed or changed. The Public Test Server system also uses leftover categories, icons, and reward points from the previous venture – so you may see some placeholders or un-named sections and categories.

Set 1
Category 1

  • Race to the Ruins: Complete the Smuggler class mission “Race to the Ruins” on Coruscant
  • Seeking Darkness: Complete the Smuggler mission “Seeking Darkness” on Ord Mantell.
  • Stage 1: Story: Complete all Stage 1: Story Milestones.
  • Companion: Corso Riggs: Complete the Smuggler mission “Dark Temptations” to unlock Corso Riggs.

Category 2

  • Stage 1: Exploration: Complete all Stage 1: Exploration Milestones.
  • Coruscant Dynamic Encounters: Complete 20 Dynamic Encounters on Coruscant.
  • Ord Mantell Dynamic Encounters: Complete 10 Dynamic Encounters on Ord Mantell.
  • Exploring Coruscant: Discover the following points of interest on Coruscant: SD-0’s platform in the Old Galactic Market and Dark Sith Anev Xydes in the Jedi Temple.
  • Exploring the Fleet: Discover the following points of interest on the Republic Fleet: the Command Deck Bridge of the Telos and the Republic Museum on the Gav Daragon.
  • Exploring Ord Mantell: Discover the following points of interest on Ord Mantell: Bloodskin’s Bone Pit in Flesh Raider Territory and the monument in the Ruins of Kaleth.

Category 3

  • Stage 1: Combat: Complete all Stage 1: Combat Objectives.
  • Esseles Venturer: Complete the Flashpoint “The Esseles” on any difficulty mode.
  • Flesh Raiders in the Gnarls: Defeat 25 Flesh Raiders in the Gnarls on Ord Mantell.
  • Ancient Droids on Ord Mantell: Defeat 25 ancient Ord Mantellian droids on Ord Mantell.
  • Gangsters in Black Sun Territory: Defeat Black Sun Thugs, Minions, and Bruisers in Black Sun Territory on Coruscant.
  • Guild Combatants in the Old Galactic Market: Defeat 1Guild Thugs, Gunmen, and Triggermen in the Old Galactic Market on Coruscant.
  • Justicars on Coruscant: Defeat Justicar Militiamen, Guards, and Riflemen in Justicar Territory on Coruscant.
  • Imperial Forces in the Jedi Temple: Defeat Imperial Soldiers and Shock Smugglers in the Jedi Temple on Coruscant.

Category 4

  • Stage 1: General: Complete all Stage 1: General Milestones.
  • Learning Crew Skills: Learn and use any Crew Skill.
  • Gathering Skills: Harvest 50 gathering nodes of any type.
  • Gear Up: Rating 50: Equip items of rating 50 or higher in the Head, Chest, Legs, and Weapon slots.

Set 1 Meta

  • Stage 1: Complete all Stage 1 Objectives.

Set 2
Category 1

  • Facing Lord Nefarid: Complete the Smuggler mission “Facing Lord Nefarid” on Alderaan.
  • Showdown with Lord Sadric: Complete the Smuggler mission Showdown with Lord Sadric” on Nar Shaddaa.
  • The Rescue: Complete the Smuggler mission “The Rescue” on Taris.
  • The Sand Demon’s Lair: Complete the Smuggler mission “The Sand Demon’s Lair” on Tatooine.
  • Stage 2: Story: Complete all Stage 2: Story Milestones.

Category 2

  • Stage 2: Exploration: Complete all Stage 2: Exploration Milestones.
  • Tatooine Dynamic Encounters: Complete 25 Dynamic Encounters on Tatooine.
  • Exploring Alderaan: Discover the following points of interest on Alderaan: Datacron in the Sunny Vale of the Juran Mountains and Supreme Commander Nayel’s location in Castle Panteer.
  • Exploring Nar Shaddaa: Discover the following points of interest on Nar Shaddaa: the High Roller Lounge in Club Vertica and Bruan the Durasteel Fist in the Imperial Intelligence Gadget Warehouse.
  • Exploring Taris: Discover the following points of interest on Taris: Ryssa Jadeonar’s Hideout in the Olaris Wilderness and the Rakghoul Overlord’s Lair in the Tularan Marsh.
  • Exploring Tatooine: Discover the following points of interest on Tatooine: the Sarlacc Pit in the Dune Sea and Kortawa the Hunt Master’s location in the Severin Mesa Windfarms.
  • Alderaan Planetary Arc: Complete the Planetary Arc on Alderaan, which beings with the mission “Scorched Planet.”
  • Nar Shaddaa Planetary Arc: Complete the Planetary Arc on Nar Shaddaa, which begins with the mission “When Diplomacy Fails.”
  • Taris Planetary Arc: Complete the Planetary Arc on Taris, which begins with the mission “Reclaiming What’s Ours.”
  • Tatooine Planetary Arc: Complete the Planetary Arc on Tatooine, which begins with the mission “Timely Arrival.”

Category 3

  • Stage 2: Combat: Complete all Stage 2: Combat Milestones.
  • Rakghouls in the Sliding Plate: Defeat 50 Rakghouls in the Sliding Plate of the Sinking City on Taris.
  • Imperial Forces in the Industrial Sector: Defeat 50 Imperial Security Forces in the Industrial Sector on Nar Shaddaa.
  • Geonosians on Tatooine: Defeat 50 Geonosians on Tatooine.
  • Wildlife on Alderaan: Defeat 50 Manka Cats, Vorn Tigers, or Kath Hounds on Alderaan.
  • Space Combat Missions: Complete 2 Space Missions.

Category 4

  • Companion Item Gifting: Gift 10 Items to any of your Companions.
  • Stage 2: General: Complete all Stage 2: General Milestones
  • Item Crafting: Use Crew Skills to craft any 10 items.
  • Gear Up: Rating 85: Equip items of rating 85 or higher in the Head, Chest, Legs, and Weapon slots.
  • Junk Disposal: Sell Junk via your Companion 5 Times.

Set 2 Meta

  • Stage 2: Complete all Stage 2 Objectives.

Set 3
Category 1

  • The Spoils of War: Complete the Smuggler class mission “The Spoils of War” on Balmorra.
  • The Price of Victory: Complete the Smuggler class mission “The Price of Victory” on Hoth.
  • The Emperor’s Wrath: Complete the Smuggler class mission “The Emperor’s Wrath” on Quesh.
  • Stage 3: Story: Complete all Stage 3 Story Objectives.

Category 2

  • Stage 3: Exploration: Complete all Stage 3 Exploration Objectives.
  • Hoth Dynamic Encounters: Complete 25 Dynamic Encounters on Hoth.
  • Exploring Balmorra: Discover the folllowing points of interest on Balmorra: Xoltyr N’lson’s location in the Stillwater Estuary of the Markaran Plains and the Imperial Colonel’s location in the Balmorran Arms Factory of the Sundari Flatlands.
  • Exploring Hoth: Discover the folllowing points of interest on Hoth: Zakxon Gewchi’s Hidden Camp in the Tauntaun Ridge of Icefall Plains and the Nerf Datapad in the Drossrock Mountains of Glacial Fissure.
  • Exploring Quesh: Discover the folllowing points of interest on Quesh: the Datacron in the Three Families War Camp and the Datacron in the Republic Mining Camp.
  • Balmorra Planetary Arc: Complete the Planetary Arc on Balmorra, which begins with the mission “From the Wreckage.”
  • Balmorra Planetary Arc: Complete the Planetary Arc on Balmorra, which begins with the mission “From the Wreckage.”
  • Hoth Planetary Arc: Complete the Planetary Arc on Hoth, which begins with the mission “Power Vacuum.”
  • Quesh Planetary Arc: Complete the Planetary Arc on Quesh, which starts with the mission “Quesh Inoculation.”

Category 3

  • Stage 3: Combat: Complete all Stage 3 Combat Objectives.
  • Maelstrom Prison Venturer: Complete the Flashpoint “Maelstrom Prison” on any difficulty mode.
  • Taral V Venturer: Complete the Flashpoint “Taral V” on any difficulty mode.
  • Imperial Forces near Sobrik: Defeat 100 Imperial Forces around Sobrik on Balmorra.
  • Cartel Forces on Quesh: Defeat 50 Cartel Forces on Quesh.
  • Wampas in the Big Sink: Defeat 25 Wampas in the Big Sink of the Clabburn Tundra on Hoth.

Category 4

  • Stage 3: General: Complete all Stage 3 General Objectives.
  • Accumulating Wealth: Earn 50,000 credits.
  • Improving Crew Skills: Gain ranks in any Crew Skill.
  • Gear Up: Rating 115: Equip items of rating 115 or higher in the Head, Chest, Legs, and Weapon slots.
  • Crew Skill Missions: Complete 10 Crew Skill Missions with your Companions.

Set 3 Meta

  • Stage 3: Complete all Stage 3 Objectives.

Set 4
Category 1

  • Impending Doom: Complete the Smuggler story mission “Impending Doom” on Belsavis.
  • Mutual Assured Destruction: Complete the Smuggler story mission “Mutual Assured Destruction” on Corellia.
  • Visions of Light and Darkness: Complete the Smuggler story mission “Visions of Light and Darkness” on Voss.
  • Stage 4: Story: Complete all Stage 4 Story Objectives.

Category 2

  • Stage 4: Exploration: Complete all Stage 4 Exploration Objectives.
  • Exploring Belsavis: Discover the following points of interest on Belsavis: the Lavaflow Traverse in The Tomb and the Lost Cavern in the High Security Section.
  • Exploring Corellia: discover the following points of interest on Corellia: the Datacron inside Port Pevaria in the Government District and Skrall’s location in Containment Hills of Axial Park.
  • Exploring Voss: Discover the following points of interest on Voss: the Tower of Prophecy in Seeker’s Hill and Gormak Chief Bruiser’s location on Fest Otur Island in the Pelath-Ri Marches.
  • Belsavis Planetary Arc: Complete the Planetary Arc on Belsavis, which begins with the mission “A Belsavis Welcome.”
  • Corellia Planetary Arc: Complete the Planetary Arc on Corellia, which begins with the mission “Blockade Runner.”
  • Voss Planetary Arc: Complete the Planetary Arc on Voss, which begins with the mission “Need to Impress.”

Category 3

  • Stage 4: Combat: Complete all Stage 4 Combat Objectives.
  • Directive Seven Venturer: Complete the Flashpoint “Directive Seven” on any difficulty.
  • Gamorreans in the Tusker Glade: Defeat 50 Gamorrean Forces in the Tusker Glade of the High Security Section on Belsavis.
  • Gormak Forces on Voss: Defeat 100 Gormak Forces on Voss.
  • Czerka Forces on Corellia: Defeat 100 Czerka Forces on Corellia.
  • More Space Combat Missions: Complete 2 Space Combat Missions.

Category 4

  • Stage 4: General: Complete all Stage 4 General Objectives.
  • Daily Login Rewards: Log in on three days and claim daily login rewards.
  • Gear Up: Rating 150: Equip items of rating 150 or higher in the Head, Chest, Legs, and Weapon slots.
  • Home Decorating: Collect and place a Decoration in your Stronghold.
  • House Party: Visit another player’s Stronghold.

Set 4 Meta

  • Stage 4: Complete all Stage 4 Objectives.

Set 5
Category 1

  • Stage 5: Story: Complete all Stage 5 Story Objectives.
  • Black Hole Crisis: Complete the mission “[WEEKLY] Black Hole Crisis”.
  • Section X Crisis: Complete the mission “[WEEKLY] Section X Crisis.”
  • Ilum Planetary Arc: Complete the Planetary Arc on Ilum, which begins with the mission “Crystal Ball.”

Category 2

  • Stage 5: Exploration: Complete all Stage 5 Exploration Objectives.
  • Ilum Dynamic Encounters: Complete 25 Dynamic Encounters on Ilum.
  • Exploring The Black Hole: Discover the following points of interest in The Black Hole: the Communication Tower in the Administration District and the HyperMatter Engineering Facility.
  • Exploring Ilum: Discover the following points of interest on Ilum: the Gree Sphere in The Circle of the Western Ice Shelf and the White Adegan Crystal in the Western Jedi Ruins of the Eastern Ice Shelf.
  • Exploring Section X: Discover the following points of interest in Section X: The Fatality’s Cargo Deck and the Inner Sanctum of the Aurora Cannon Facility.

Category 3

  • Stage 5: Combat: Complete all Stage 5 Combat Objectives.
  • False Emperor Venturer: Complete the Flashpoint “The False Emperor” on any difficulty.
  • Battle of Ilum Venturer: Complete the Flashpoint “The Battle of Ilum” on any difficulty mode.
  • Imperial Forces in the Southern Sleetlands: Defeat 50 Imperial Forces in the Southern Sleetlands of the Eastern Ice Shelf on Ilum.
  • Torvix Gang in The Black Hole: Defeat 50 Torvix Gang Forces in The Black Hole.
  • Dread Guard in Section X: Defeat 50 Dread Guard Forces in Section X.

Category 4

  • Stage 5: General: Complete all Stage 5 General Objectives.
  • Conquesting Champion: Earn Conquest Points by completing Conquest objectives.
  • [craft items]:
  • Event Participant: Complete one of the listed Conquest objectives during an event. Bounty Contracts: License to Hunt // Feast of Prosperity: Hutts-treme Epicure // Relics of the Gree: Critical Missions // Life Day: Come Here, You Big Lug! // Nar Nightlife: Graced by the Emperor // Rakghoul Resurgence: Critical Missions // Abundance Festival: Egg Hunt // Swoop Rally: Course Completion // Dantooine: Daily Missions (Pirate Incursion)
  • Gear Up: Rating 170: Equip items of rating 170 or higher in the Head, Chest, Legs, and Weapon slots.
  • Personal Conquests: Complete any Personal Conquest.

Set 5 Meta

  • Stage 5: Complete all Stage 5 Objectives.

Rewards

At the moment, the developers have not revealed what the new rewards will be, and they are not on the Public Test Server. The developers have said there will be 16 unique sets of rewards, 1 for each class for each venture type (Classic and Expert), plus overarching meta rewards for completing everything.

We do also know that there will be something called Expert Gear Unlocks – but we know very little about these yet except they will be powerful gear upgrades to help us get through the more difficult venture tasks.

Thank you...

Thank you to these players who have submitted cool screenshots of their Imperial Agent characters:

@saoirse_ie (Main Image & Operative), @MagSulDeruyter (Marksmanship), @MagSulDeruyter (Virulence), @kivurikardok (Operative), @Darth_Amarth (Medicine), @JacksonM95 (Engineering), @BeardMan_Roy (Sniper), @M3KON_ (Combat), @M3KON_ (Armor & Weapons), @loreleif, Swtorista (Concealment), Swtorista (Lethality), Swtorista (companions)

Thank you to these players who have submitted cool screenshots of their Trooper characters:

@Failtasmagoria (Main Image), @ravendas2_0 (blue armor red hair), Pathrik I think (aqua glow), @OurManOnEarth (Species), @agentcupholder (Gunnery), @phyreblade (Combat Medic), @agentcupholder (Story), @PanagiotisLial1 (Commando), @DBSaitre (Assault Specialist), @tomlewookie (Plasmatech), @Caelvin_Dulany (Vanguard), Swtorista (Shield Specialist), @tomlewookie (Armor & Weapons), @adsinmalgusland (Combat), @phyreblade (Companions)

Thank you to these players who have submitted cool screenshots of their Smuggler characters:

@AlexDGeslin (Gunslinger), @rebelrealcanon (Ruffian), @Kayeri (Scoundrel & Main Image), @adsinmalgusland (Story), @phyreblade (Sawbones), @Nathswtor (Saboteur), @PequeClonSW (Dirty Fighting), @MagSulDeruyter (Scrapper), @WardenVakarian (Species), @gh0uldude (Combat), @gh0uldude (Armor & Weapons), Swtorista (Sharpshooter), @MagSulDeruyter (Nar Shaddaa), Swtorista (Companions)

Thank you to these players who have submitted cool screenshots of their Bounty Hunter characters:

@M3KON_ (Main Image), @adsinmalgusland (Species), @ShintarCommando (Advanced Prototype), @rebelrealcanon (Combat), @Kayeri (Powertech), @DHGamerMR (Armor & Weapons), @JamieD1138 (Innovative Ordnance), @phyreblade (Bodyguard), @SkyKard (Shield Tech), @GatoHacker (Story),  @Nyethux (Purotech), Swtorista (Arsenal), Swtorista (Mercenary), Swtorista (Companions)

Thank you to these players who helped look over the summaries for their favorite tech disciplines:

@Eksys, @ASadiablo, @CT7056, PatrikOfHavoc, Daghdha, Aflixion Starr, @TodayinTor, @DumaarShay, @BinaryNine, @Duccisan, @gh0uldude, @Kagetheorc, @Encurez, @zer0_pe,

Thank you to Zahk for writing the initial round of 5-button rotations, Merlyn for providing first-look feedback, and Mark Biggs for giving a final lookover of the rotations.

  And finally thank you to Zahk who helped type up all the 1,000+ abilities in the game for each class so we could make the summaries and the basic class guides for each discipline, and helped with testing and formatting for this page!

Learn Your Class
Combat StyleDisciplineRoleDisciplineCombat Style
SentinelWatchman DOT DamageAnnihilationMarauder
Combat Burst DamageCarnage
Concentration Burst DamageFury
GuardianDefenseTankImmortalJuggernaut
Vigilance DOT (AOE) DamageVengeance
Focus Burst DamageRage
ShadowKinetic CombatTankDarkness
Assassin
Infiltration Burst DamageDeception
Serenity DOT DamageHatred
SageSeer HealerCorruptionSorcerer
Telekinetics Burst DamageLightning
Balance DOT DamageMadness
VanguardShield SpecialistTankShield
Tech
Powertech
Plasmatech DOT DamagePyrotech
Tactics
Burst DamageAdvanced Prototype
CommandoCombat Medic HealerBodyguardMercenary
Gunnery Burst DamageArsenal
Assault Specialist DOT DamageInnovative Ordnance
ScoundrelSawbones HealerMedicineOperative
Scrapper Burst DamageConcealment
Ruffian DOT DamageLethality
GunslingerSharpshooter Burst DamageMarksmanshipSniper
Saboteur DOT DamageEngineering
Dirty Fighting DOT DamageVirulence
Learn Your Mirror
Combat StyleDisciplineRoleDisciplineCombat Style
VanguardShield SpecialistTankShield
Tech
Powertech
Plasmatech DamagePyrotech
Tactics
DamageAdvanced Prototype
CommandoCombat Medic HealerBodyguardMercenary
Gunnery DamageArsenal
Assault Specialist DamageInnovative Ordnance
ScoundrelSawbones HealerMedicineOperative
Scrapper DamageConcealment
Ruffian DamageLethality
GunslingerSharpshooter DamageMarksmanshipSniper
Saboteur DamageEngineering
Dirty Fighting DamageVirulence
SentinelWatchman DamageAnnihilationMarauder
Combat DamageCarnage
Concentration DamageFury
GuardianDefenseTankImmortalJuggernaut
Vigilance DamageVengeance
Focus DamageRage
ShadowKinetic CombatTankDarkness
Assassin
Infiltration DamageDeception
Serenity DamageHatred
SageSeer HealerCorruptionSorcerer
Telekinetics DamageLightning
Balance DamageMadness