














 Defense
 Vigilance
 Seer
Seer


 How to Craft
 Choose a Crew Skill
 Armormech
 Armstech
 Artifice
 Biochem
 Cybertech
 Synthweaving
 How to Craft Fast
 Gathering Guide
 Rare Materials Guide
 White Materials Guide
 Jawa Junk
 Augments
 Medpacs, Stims and Adrenals
 Synthweaving Crafting Tree



 Crafted Decorations
 Crafted Mounts
 Crafted Dyes
 Crafted Crystals
 Events Calendar
 Galactic Seasons
 PvP Seasons
 Bounty Event
 Double XP Event
 Feast of Prosperity
 Gree Event
 Life Day
 Nightlife Event
 Pirate Incursion Event
 Rakghoul Event
 Spring Abundance Festival
 Swoop Event
 Accessibility HubAll Accessibility guides and info
 DeafPlaying while deaf or hearing-impaired
 BlindPlaying while visually impaired or with low vision
 ColorblindPlaying with colorblindness and settings options
 AnxietyPlaying with general anxiety or social anxiety


 Jedi Knight
 Jedi Consular
 Trooper
 Smuggler
 Sith Warrior
 Sith Inquisitor
 Bounty Hunter
 Imperial Agent
 Bounty Hunter
 Imperial Agent
 Jedi
Jedi Jedi Consular
 Jedi Knight
 Sith
Sith Sith Inquisitor
 Sith Warrior
 Smuggler
 Trooper
 Legacy Gear
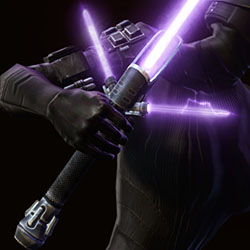 Lightsabers
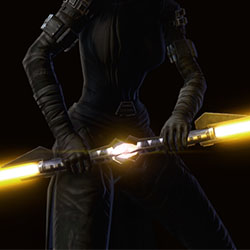 Double-Bladed Lightsabers
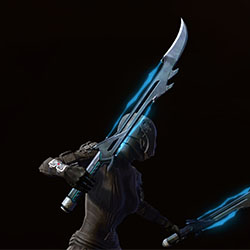 Vibroswords
 Double-Bladed Vibroswords
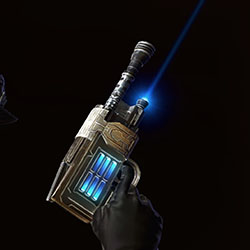 Blaster Pistols
 Blaster Rifles
 Sniper Rifles
 Blaster Cannons

Athiss is a Flashpoint in Star Wars: The Old Republic that you can run with friends, or with other random players through the groupfinder in Veteran Mode or Master Mode.
Contents
Athiss

A millennium ago the planet Athiss was a Sith sanctuary that held the sanctuary of Vodal Kressh, a powerful Sith Lord and among the greatest alchemists the Empire had ever known. Vodal was a powerful and ambitious Sith, but he was also utterly mad. So much so that after his death the Emperor ordered Kressh’s sanctum sealed, and the planet declared a forbidden zone. Now something stirs on the planet’s surface once again. A Republic archaeological team discovered the planet while on a survey mission, and began to excavate the ancient Sith ruins. During their study of the ruins the strike team has discovered something powerful, feeding on the Dark Side power that emanates from the ruins. Now both the Republic and the Empire are scrambling together strike teams to make their way to the planet, confront the threat and make sure that it never leaves the abandoned world.
How to Start
Athiss is a Flashpoint meant to be played at almost any time during your levelling or story path, and isn’t a big part of the main story line. You can encounter it in the story part way through your class story, or play it outside of the story with a group in Veteran or Master mode.

Use the tabs above for instructions for how to enter the flashpoint in the story line, and how to enter it in Solo (Story) mode, Veteran mode, and Master mode by faction.
- Story: No “story” version available.
- Solo: No “solo” version available.
- Veteran: Lvl 15-80
- Veteran Groupfinder: Lvl 17-80
- Master Mode: Lvl 50-80 †
- Master Mode Groupfinder: Lvl 80

Story/Solo – Republic Instructions


Unfortunately, there is no story or solo version of the Athiss Flashpoint. You can watch the very short introductory cutscene by yourself, but without a group, you likely won’t be able to finish the Flashpoint in any of its available modes.
Athiss has a Veteran mode, which is designed for 4 players level 15-80. However, if you are higher level, and have a higher skill level, gear level, and companion influence level, you may be able to run the entire Flashpoint solo with some patience and practice. Otherwise, you will need to run this Flashpoint with a group you put together in general chat, or through the group finder.
To learn more about where to pick up the introductory quest to see the start of the story, or to learn how to run it through the groupfinder, see the other tabs.
How to see the Introductory Quest Solo
Step 1 – On the Republic Fleet, take the eastern elevator to the Dropship Launch Hangar level


Step 2 – Pick up the quest from the terminal on the Dropship Launch Hangar level

If you are level 80, it will give you the option to choose between Veteran and Master. If you are below level 80, you will automatically be given then Veteran mode quest.
You next options are:
- head on inside the nearby colorful door for Athiss and try to solo it even though it is designed for 4 players
- put together a group in general chat to run Athiss
- try to run Athiss through the group finder
- drop the quest for now, and come back later with a group or when you are more confident that you can solo it
Story/Solo – Imperial Instructions

Unfortunately, there is no story or solo version of the Athiss Flashpoint. You can watch the very short introductory cutscene by yourself, but without a group, you likely won’t be able to finish the Flashpoint in any of its available modes.
Athiss has a Veteran mode, which is designed for 4 players level 15-80. However, if you are higher level, and have a higher skill level, gear level, and companion influence level, you may be able to run the entire Flashpoint solo with some patience and practice. Otherwise, you will need to run this Flashpoint with a group you put together in general chat, or through the group finder.
To learn more about where to pick up the introductory quest to see the start of the story, or to learn how to run it through the groupfinder, see the other tabs.
How to see the Introductory Quest Solo
Step 1 – On the Imperial Fleet, take the western elevator to the Dropship Launch Hangar level


Step 2 – Pick up the quest from the terminal on the Dropship Launch Hangar level

If you are level 80, it will give you the option to choose between Veteran and Master. If you are below level 80, you will automatically be given then Veteran mode quest.
You next options are:
- head on inside the nearby colorful door for Athiss and try to solo it even though it is designed for 4 players
- put together a group in general chat to run Athiss
- try to run Athiss through the group finder
- drop the quest for now, and come back later with a group or when you are more confident that you can solo it
Veteran – Republic Instructions


Athiss has a repeatable 4-player Veteran version. It is meant to be completed by a group with any type of Republic characters in it, you do not necessarily need a tank or healer to complete it. You will likely also have good luck with 2 players and 2 companions, or 3 players and 1 companion.

Group Finder: If you want to queue up and enter Athiss in veteran mode through the group finder, you will need to be level 17-80 and not currently on any Athiss Flashpoint quests or it won’t show up as an option in the group finder. If you are level 17-80, click the icon of “three little people” on the bottom right of your screen which will open the Activity Finder Window. Then choose the Group tab in the Activity Finder.
Filter: If you want to specifically run Athiss and not a random Flashpoint, make sure to choose Veteran Flashpoints, then click the Filter button the right and narrow your choices down to just Athiss before pressing Join Queue. Joining the queue will put you in line to be matched with random players to play Athiss with.

Groupfinder flashpoints do NOT show the cutscenes. To see the cutscenes related to this Flashpoint, you must enter it manually by walking in the door.

Bring a Friend in the Groupfinder: You can queue up with a group of 2, 3, or 4 players in the group finder. If you have a full group of 4, it will bring you straight to the Flashpoint with your full group. If you have 2 or 3 players in your group, the group finder will match you with other random players until you have a full group – but you’ll always be paired with your friends who started off in your group, and will not be split up.

Veteran Manual Entry (Republic): To enter this Flashpoint manually, you must go to the Athiss’s Flashpoint entrance, which is located on the Republic Fleet, and you need to take the eastern fleet elevator to the Dropship Launch Hangar level, and pick it up from a terminal. It will have a short cutscene to explain the story of the Flashpoint presented by Satele Shan.
Bring a Friend Manually: Veteran Mode Flashpoints are not meant to be completed alone, though highly-skilled, highly-geared, high-level players might be able to. To bring friends along for this Veteran Flashpoint, they’ll need to pick up the Veteran Mode quest from the terminal – or you can pick up the quest and share it with them, but they’ll still need to walk in the door manually. Characters walking in the door need to be level 15+.
Step 1 – On the Republic Fleet, take the eastern elevator to the Dropship Launch Hangar level
Step 2 – Pick up the quest from the terminal on the Dropship Launch Hangar level
If you are level 80, it will give you the option to choose between Veteran and Master. If you are below level 80, you will automatically be given then Veteran mode quest.
You can then head on inside the nearby colorful door for Athiss.
Veteran – Imperial Instructions
Athiss has a repeatable 4-player Veteran version. It is meant to be completed by a group with any type of Imperial characters in it, you do not necessarily need a tank or healer to complete it. You will likely also have good luck with 2 players and 2 companions, or 3 players and 1 companion.
Group Finder: If you want to queue up and enter Athiss in veteran mode through the group finder, you will need to be level 17-80 and not currently on any Athiss Flashpoint quests or it won’t show up as an option in the group finder. If you are level 17-80, click the icon of “three little people” on the bottom right of your screen which will open the Activity Finder Window. Then choose the Group tab in the Activity Finder.
Filter: If you want to specifically run Athiss and not a random Flashpoint, make sure to choose Veteran Flashpoints, then click the Filter button the right and narrow your choices down to just Athiss before pressing Join Queue. Joining the queue will put you in line to be matched with random players to play Athiss with.
Groupfinder flashpoints do NOT show the cutscenes. To see the cutscenes related to this Flashpoint, you must enter it manually by walking in the door.
Bring a Friend in the Groupfinder: You can queue up with a group of 2, 3, or 4 players in the group finder. If you have a full group of 4, it will bring you straight to the Flashpoint with your full group. If you have 2 or 3 players in your group, the group finder will match you with other random players until you have a full group – but you’ll always be paired with your friends who started off in your group, and will not be split up.
Veteran Manual Entry (Imperial): To enter this Flashpoint manually, you must go to the Athiss’s Flashpoint entrance, which is located on the Imperial Fleet, and you need to take the western fleet elevator to the Dropship Launch Hangar level, and pick it up from a terminal. It will have a short cutscene to explain the story of the Flashpoint presented by Darth Malgus.
Bring a Friend Manually: Veteran Mode Flashpoints are not meant to be completed alone, though highly-skilled, highly-geared, high-level players might be able to. To bring friends along for this Veteran Flashpoint, they’ll need to pick up the Veteran Mode quest from the terminal – or you can pick up the quest and share it with them, but they’ll still need to walk in the door manually. Characters walking in the door need to be level 15+.
Step 1 – On the Imperial Fleet, take the western elevator to the Dropship Launch Hangar level
Step 2 – Pick up the quest from the terminal on the Dropship Launch Hangar level
If you are level 80, it will give you the option to choose between Veteran and Master. If you are below level 80, you will automatically be given then Veteran mode quest.
You can then head on inside the nearby colorful door for Athiss.
Master – Republic Instructions

Master Mode is the hardest version of Athiss. It is meant to be completed by a high-level high-skilled group at level 80. Most teams will want a Tank, Healer and two Damage characters.
Group Finder: If you want to queue up and enter Athiss in Master Mode through the group finder, you will need to be level 80 and not currently on any Athiss Flashpoint quests or it won’t show up as an option in the group finder. If you are level 80, click the icon of “three little people” on the bottom right of your screen which will open the Activity Finder Window. Then choose the Group tab in the Activity Finder.
Filter: If you want to specifically run Athiss and not a random Flashpoint, make sure to choose Master Flashpoints, then click the Filter button the right and narrow your choices down to just Athiss before pressing Join Queue. Joining the queue will put you in line to be matched with random players to play Athiss with.
Groupfinder flashpoints do NOT show the cutscenes. To see the cutscenes related to this Flashpoint, you must enter it manually by walking in the door.
Bring a Friend in the Groupfinder: You can queue up with a group of 2, 3, or 4 players in the group finder. If you have a full group of 4, it will bring you straight to the Flashpoint with your full group. If you have 2 or 3 players in your group, the group finder will match you with other random players until you have a full group – but you’ll always be paired with your friends who started off in your group, and will not be split up. Your friends all need to be level 80 too.
Master Manual Entry (Republic): To enter this Flashpoint manually, you must go to the Athiss’s Flashpoint entrance, which is located on the Republic Fleet at the eastern elevator to the Dropship Launch Hangar level.
Bring a Friend Manually: Master Mode Flashpoints are not meant to be completed alone, and are designed for level 80 players who are comfortable with their role and class. To bring friends along for this Master Flashpoint, they’ll need to pick up the Master Mode quest from the questgiver – or you can pick up the quest and share it with them, but they’ll still need to walk in the door manually while you’re in a group. Level 50-80 characters can technically enter Master Mode flashpoints, but all the enemies are level 80, and they will die very quickly.
Step 1 – On the Republic Fleet, take the eastern elevator to the Dropship Launch Hangar level
Step 2 – Pick up the quest from the terminal on the Dropship Launch Hangar level
If you are level 80, it will give you the option to choose between Veteran and Master. If you are below level 80, you will automatically be given then Veteran mode quest.
You can then head on inside the nearby colorful door for Athiss.
Master – Imperial Instructions
Master Mode is the hardest version of Athiss. It is meant to be completed by a high-level high-skilled group at level 80. Most teams will want a Tank, Healer and two Damage characters.
Group Finder: If you want to queue up and enter Athiss in Master Mode through the group finder, you will need to be level 80 and not currently on any Athiss Flashpoint quests or it won’t show up as an option in the group finder. If you are level 80, click the icon of “three little people” on the bottom right of your screen which will open the Activity Finder Window. Then choose the Group tab in the Activity Finder.
Filter: If you want to specifically run Athiss and not a random Flashpoint, make sure to choose Master Flashpoints, then click the Filter button the right and narrow your choices down to just Athiss before pressing Join Queue. Joining the queue will put you in line to be matched with random players to play Athiss with.
Groupfinder flashpoints do NOT show the cutscenes. To see the cutscenes related to this Flashpoint, you must enter it manually by walking in the door.
Bring a Friend in the Groupfinder: You can queue up with a group of 2, 3, or 4 players in the group finder. If you have a full group of 4, it will bring you straight to the Flashpoint with your full group. If you have 2 or 3 players in your group, the group finder will match you with other random players until you have a full group – but you’ll always be paired with your friends who started off in your group, and will not be split up. Your friends all need to be level 80 too.
Master Manual Entry (Imperial): To enter this Flashpoint manually, you must go to the Athiss’s Flashpoint entrance, which is located on the Imperial Fleet on the NOTHING, at the western elevator to the Dropship Launch Hangar level.
Bring a Friend Manually: Master Mode Flashpoints are not meant to be completed alone, and are designed for level 80 players who are comfortable with their role and class. To bring friends along for this Master Flashpoint, they’ll need to pick up the Master Mode quest from the questgiver – or you can pick up the quest and share it with them, but they’ll still need to walk in the door manually while you’re in a group. Level 50-80 characters can technically enter Master Mode flashpoints, but all the enemies are level 80, and they will die very quickly.
Step 1 – On the Imperial Fleet, take the western elevator to the Dropship Launch Hangar level
Step 2 – Pick up the quest from the terminal on the Dropship Launch Hangar level
If you are level 80, it will give you the option to choose between Veteran and Master. If you are below level 80, you will automatically be given then Veteran mode quest.
You can then head on inside the nearby colorful door for Athiss.
Bosses

This Flashpoint has three boss fights – Professor Ley’arsha, The Beast of Vodal Kressh and the final boss, the Prophet of Vodal Kressh.
In Veteran Mode when you have multiple players you can use the medpacs scattered around the bosses. Right-click them to heal yourself. If you are alone in Veteran mode, they will not work.

The following boss info is mainly for Veteran mode – Master Mode tactics are pretty much the same.
Professor Ley’arsha

If you get a purple circle around your feet, run away from the group.

Stay out of the green goop left behind by the purple circles.

The Beast of Vodal Kressh

Put your back against a wall so you don’t get knocked back far away if the boss is attacking you.

Bonus Boss: Ancient Abomination (Master Mode Only)

Only available in Master Mode, from bonus quest Secondary Targets (Bonus) after defeating 85 Athiss enemies.

Just be careful, he has a knockback, and a big red conal, and the team should behind him with the tank in front.

Prophet of Vodal Kressh

Throughout the fight a random player will be targeted with red Living Fire. That player needs to run away from the red fire.

Master Mode Only: The green debuff Crushing Affliction in the final boss can’t be ignored and must be cleansed (anyone with a cleanse should cleanse themselves, or healers need to cleanse or heal through it.)

Bonus Quest (Master Mode Only)
The Bonus quest for Athiss is only available in Master Mode – it does not exist in Veteran Mode.
The bonus quest is called Secondary Targets (Bonus) and unlocks the bonus boss, these are the steps:
- Defeat Enemies 85 in the Athiss Flashpoint – you need to defeat a lot of the enemies in the Flashpoint, but not every single one you see. You can do this all the way until the final boss – any enemy counts, and the bonus boss is right before the final boss.
- Disturb the Ancient Offerings – a blue glowing chest in the final map of the tombs
- Defeat the Ancient Abomination

Ancient Offering – same place as the Bonus boss on the map
The bonus boss – he’s not hard, he just has a lot of health and knockbacks so put your back to a wall if you are his target
Crew Skills
Having certain crew skills allow you and your group to skip enemies or get a boost during Athiss!


Elevator – Slicing
If you have Slicing, you can slice the Elevator Controls and unlock the functioning elevator at the beginning of the Flashpoint to get down to the tombs more easily. Most group just jump down the broken elevator shaft instead though.

Previously required Slicing level 80 (Slicing 450 in Master Mode), now only requires Slicing level 1.
Snarlroot – Bioanalysis

If you have Bioanalysis, you can pick up the glowing blue onion-shaped plants called Snarlroot and get a an akk dog called Alchemical Snarler that can help you in battle!

Once you right-click the glowing blue plant, it will add the item to your Mission Items inventory, where you can right-click the item to summon the Snarler.

There are four of the Snarlroot plants hidden around the Athiss flashpoint, in the Ruins of Kressh map.

Each player can only have one dog out at a time, but you can stock pile the items. If your dog dies early, you can right–click the buff to remove it from your character, then right-click the second item to summon a second dog. The dogs only last about three minutes then they disappear. The Broken Droid will over-ride the Alchemical Snarler, you can’t have both at once.

Previously required Bioanalysis 75 (Bioanalysis 450 in Master Mode), now only requires Bioanalysis level 1. Onion dog.
Explosives or Ancient Actuator – Archaeology
If you have Archaeology, you can unlock the locked glowing blue door without having to get the explosives to the south by clicking the Ancient Actuator, which for some reason does not glow, it looks like a yellow lamp.


… otherwise you need to get the explosives marked on the map below.

Previously required Archaeology 75 (Archaeology 450 in Master Mode), now only requires Archaeology level 1.
There is also a second similar skip later in the flashpoint – after The Beast of Vodal Kressh, head down into the tomb behind it. Instead of taking the longer path to your left, a player with Archaeology can interact with the small crystal pictured above to open a shortcut that skips quite a bit. There’s no explosive satchel this time, so without archeology you’re going the long way around.
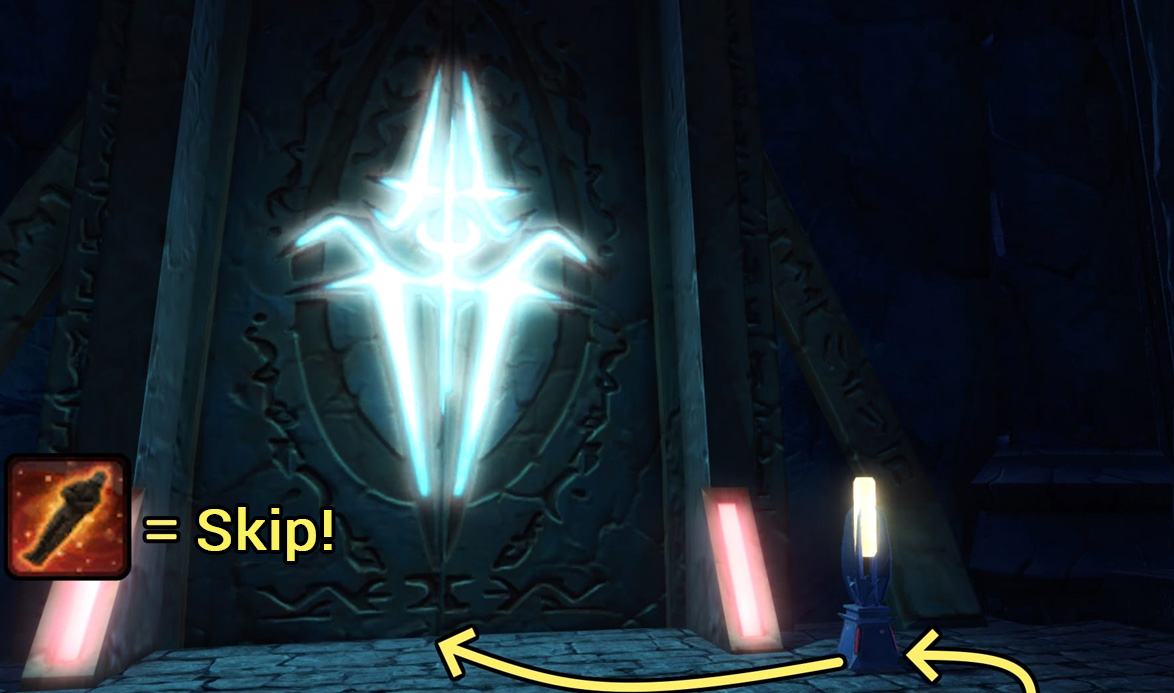
Previously required Archaeology 120 (Archaeology 450 in Master Mode), now only requires Archaeology level 1.
Lost Cultural Artifact – Archaeology
If you have Archaeology, you can right-click the Lost Cultural Artifact hidden in a collapsed tomb cave up a set of stair to the north of the blue door where you set the explosives. It is out of the way though, and not on the main path. It gives your team a buff:
Wrath of the Ancients – Damage done increased by 5%, lasts 10 minutes. Applies to your group too.

There’s another Lost Cultural Artifact with a different buff on the Ruins of Kressh map. This one is also out of the way though, off of the main path. You can stack these two buffs.
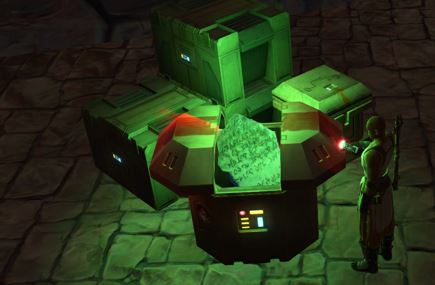
Blessing of the Ancients – Heal 1% health every 6 seconds, lasts 10 minutes. Applies to your group too.
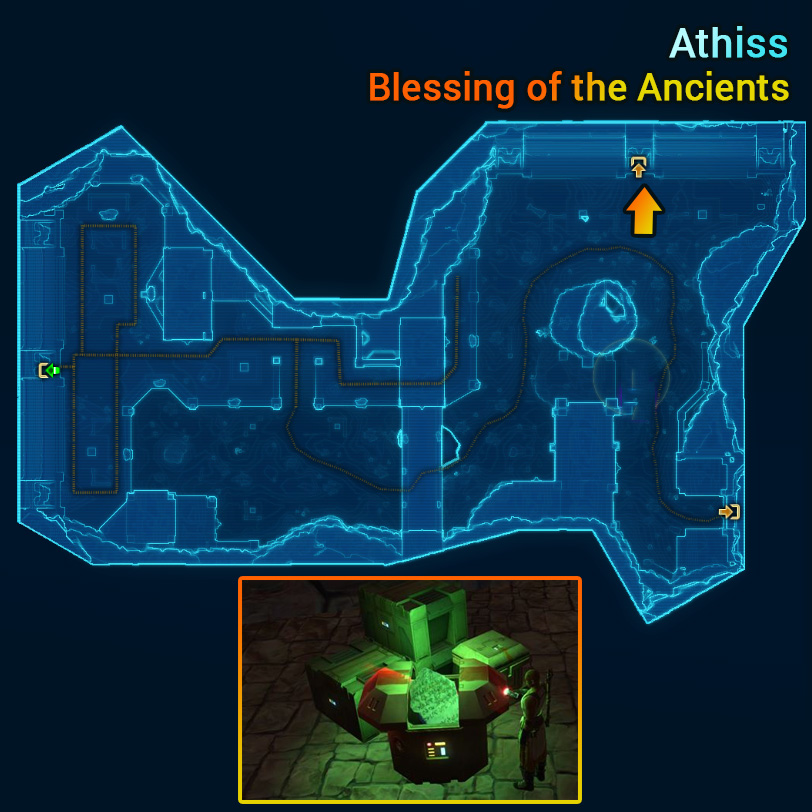
Previously required Archaeology level 125 (Archaeology 450 in Master Mode), now only requires Archaeology level 1.
Broken Droid – Scavenging
If you have Scavenging, you can right-click the glowing blue droid on the ground south of the area past the locked door – but he is out of the way in the wrong directive of the quest objective, so most groups do not go into this room.

If you get him, he will fight along-side you for 10 minutes or until he dies. He does not know how to stealth.

There is a second scavenging droid in a cave in the Ruins of Kressh map.

Previously required Scavenging 75 (Scavenging 450 in Master Mode), now only requires Scavenging level 1.
Hidden Chests
These hidden chests often contain free crafting materials or a piece of Fitted armor or other similar small rewards. No crew skills are needed to get them.

First Chest – The open area after the first boss, in a little tomb in the corner – this is quite out of the way from the main path towards the quest objectives, so most groups skip it.

Second Chest – The open area after the first boss, up on the ledge – this is very out of the way from the main path towards the quest objectives, so most groups skip it.
Skips
What follows are a quick gallery of images depicting specific walking routes that may save you some time by avoiding enemies during the flashpoint – certain routes will be highlighted as the main “community routes” that you’ll probably see players in random activity-finder groups try to do – if you only practice one skip out of all of these, make it the community one! All of the following images are done without stealth or without a sleep dart/mind maze from a stealth character, so anyone can attempt them. If you fail to slip by unnoticed or see your team has attacked the enemies – always pull back from these routes and go back to help them defeat them! These may save time if everyone does them, but nothing makes a flashpoint slower than running ahead and not helping others to get out of combat again.
Solo Stealth: If you are playing Athiss alone and are on a Stealth character, or are in a full group of stealthers, you can skip pretty much every enemy except for the bosses.
Skip #1

Pretty obvious and not really a skip per se, but make sure when you load in that you just head straight for the big pit and hop down – the droids along the sides aren’t necessary.
Skip #2 – Crewskill: Archeology

This is a crew skill skip! Once at the bottom of the excavation shaft you will have two doorways to go through – one has a room cast in a sort of orange light, and the other is more green. The south door pictured here does NOT need to be entered meaning you do NOT have to fight the creatures beyond if someone in your group has the Archeology skill.
With this, they can interact with a little crystal by the door later on in the flashpoint to pop it open. Otherwise, this is unskippable and you’ll need to come in here for some explosives first.
Previously required Archaeology 75 (Archaeology 450 in Master Mode), now only requires Archaeology level 1.
Skip #3 – Community Skip

This skip is seen in almost every group – run under the legs of this statue to ensure you aren’t pulling any of the creatures. They can patrol, but so long as you hug the right-side wall you probably won’t aggro them even if they come closer.
Skip #4 – OLD COMMUNITY SKIP, DEPRECATED.

This is left here in the guide just to warn any veteran players – the dreaded corner jump onto a ledge that skips two packs of enemies before the first boss has had it’s invisible wall extended upwards and is no longer doable – don’t waste any time thinking “wow, i used to be much better at this jump!”, lots of new players struggled with this and got left behind, so it was patched out.
Skip #5 – Community Skip

Once exiting into an outdoor area, stick to the left wall to get around the first pack of hunters. You’ll see just as many players do this as the statue-leg skip earlier, even if it only skips one group.
Skip #6

Once you get off the forest floor and start climbing a ramp up to the ruins, you’ll see a huge pack of hunters around a monument around the corner to your left. Before the pillar (offscreen to the right in the image), jump from the ramp to this stone ledge and run along the left side of it. BEWARE of the silver-level Tomb-Dweller Warrior in this image, as he runs laps around the monument and will definitely see you. If you meet him in the left corner though, you can fight him alone without the other 5 enemies butting in.
Skip #7 – Crewskill: Archeology

This is a crew skill skip! After The Beast of Vodal Kressh, head down into the tomb behind it. Instead of taking the longer path to your left, an archeology player can interact with the small crystal pictured above to open a shortcut that skips quite a bit. There’s no explosive satchel this time, so without archeology you’re going the long way around.
Previously required Archaeology120 (Archaeology 450 in Master Mode), now only requires Archaeology level 1.
Skip #8

If you didn’t have the crewskill skip available, you’ll go through an extra room or two of these temple guardians. They have massive amounts of HP and can take forever to fight, so running along the upper lip near these statues can pass by at least 2 of them. There’s a third that patrols up and down the staircases that you may need to defeat depending on where he’s at when you get here.
Skip #9

With no sleep dart handy, the fight against the disciple on the right is inevitable. However, run under the statue’s legs and you won’t have to fight the Guardian in the center. The disciple casts a lot – I recommend interrupting a cast so that he will follow you in melee back into the cubby hole by the statue’s base, because there’s another patrolling guardian that may catch you.
Master Mode

Master Mode Athiss is almost exactly the same as Veteran Mode Athiss, except for these differences:
- The enemies are stronger and have more health
- There is the bonus quest to kill 85 enemies, then a bonus boss in the last tomb right before the boss
- The first two bosses don’t seem to have more mechanics, final boss may have new purple circles
- The sith in the later tomb have strong stealth detection, you cant sleep-dart/skip them in Master Mode
- The final boss, The Prophet of Vodal, does have some important differences:
The green debuff Crushing Affliction in the final boss can’t be ignored (anyone with a cleanse should cleanse themselves, or healers need to cleanse or heal through it.)
And watch your feet – the purple circles hurt in Master Mode.

Rewards
In addition to the usual rewards of XP, credits, gear and end-game currency, Athiss has the following rewards available.
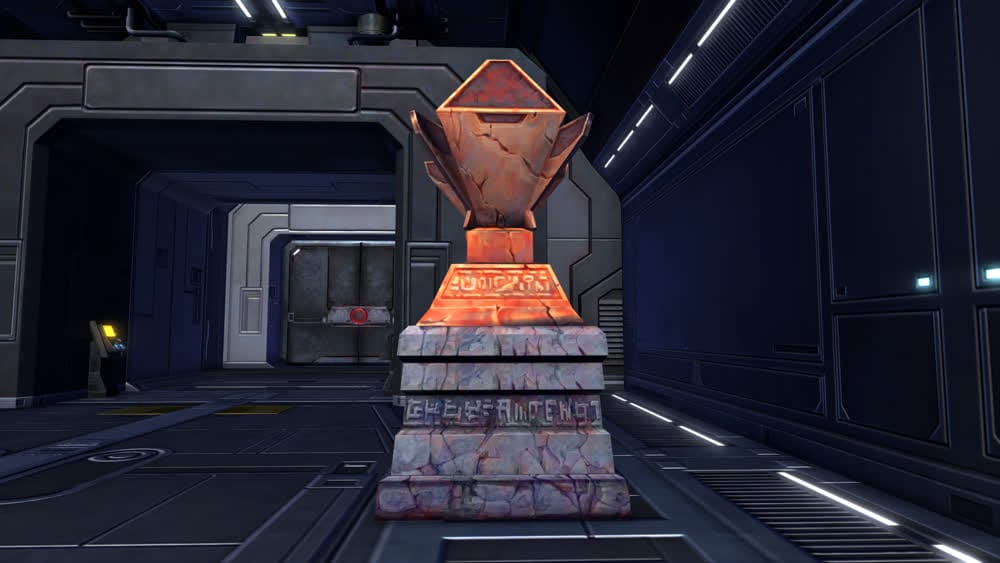
The Ancient Burial Urn decoration drops from Athiss. I do not have any details on what types of enemies or bosses this decoration drops from specifically, or what modes it drops from, just that it drops from the Athiss flashpoint. It can also be bought and sold on the GTN.
Achievements

Defeating the final boss in Veteran Mode will get you the Trophy: Prophet of Vodal (Story) decoration.

Defeating the final boss in Master Mode 25 times will get you the Trophy: Prophet of Vodal (Master) decoration.
Veteran
 Defeat Professor Ley’arsha Defeated Professor Ley’arsha in the Athiss flashpoint.
 Defeat The Beast of Vodal Kressh Defeated the Beast of Vodal Kressh in the Athiss flashpoint.
 Defeat The Prophet of Vodal Kressh Defeated the Prophet of Vodal Kressh in the Athiss flashpoint. Reward: Trophy: Prophet of Vodal (Story)
 Survived the Tomb Defeated all three bosses in the Athiss flashpoint.
Master
- Defeat Professor Ley’arsha (Master) Defeated Professor Ley’arsha in the Athiss flashpoint on Master Difficulty.
- Advanced: Defeat Professor Ley’arsha (Master) Defeated Professor Ley’arsha in the Athiss flashpoint 10 times on Master Difficulty.
- Elite: Defeat Professor Ley’arsha (Master) Defeated Professor Ley’arsha in the Athiss flashpoint 25 times on Master Difficulty.
- Defeat The Beast of Vodal Kressh (Master) Defeated the Beast of Vodal Kressh in the Athiss flashpoint on Master Difficulty.
- Advanced: Defeat The Beast of Vodal Kressh (Master) Defeated the Beast of Vodal Kressh in the Athiss flashpoint 10 times on Master Difficulty.
- Elite: Defeat The Beast of Vodal Kressh (Master) Defeated the Beast of Vodal Kressh in the Athiss flashpoint 25 times on Master Difficulty.
- Defeat The Prophet of Vodal Kressh (Master) Defeated the Prophet of Vodal Kressh in the Athiss flashpoint on Master Difficulty.
- Advanced: Defeat The Prophet of Vodal Kressh (Master) Defeated the Prophet of Vodal Kressh in the Athiss flashpoint 10 times on Master Difficulty.
- Elite: Defeat The Prophet of Vodal Kressh (Master) Defeated the Prophet of Vodal Kressh in the Athiss flashpoint 25 times on Master Difficulty.
 Defeat Ancient Abomination (Master) Defeated the Ancient Abomination in the Athiss flashpoint on Master Difficulty.
- Advanced: Defeat Ancient Abomination (Master) Defeated the Ancient Abomination 10 times in the Athiss flashpoint on Master Difficulty.
- Elite: Defeat Ancient Abomination (Master) Defeated the Ancient Abomination 25 times in the Athiss flashpoint on Master Difficulty.
- Survived the Tomb (Master) Defeated all three bosses in the Athiss flashpoint on Master Difficulty.
- Advanced: Survived the Tomb (Master) Defeated all three bosses in the Athiss flashpoint on Master Difficulty 10 times.
- Elite: Survived the Tomb (Master) Defeated all three bosses in the Athiss flashpoint on Master Difficulty 25 times. Reward: Trophy: Prophet of Vodal (Master)
Objectives
- Enter the Excavated Tomb
- Open the Sealed Door
- Search for the Surviving Explorers
- Defeat Professor Ley’arsha
- Disable the Ray Shield
- Search for the Tomb of Vodal Kressh
- Defeat the Beast of Vodal Kressh
- Search for the Burial Chamber
- Defeat the Prophet of Vodal Kressh
- Collect the Artifacts of Vodal Kressh
 Questions or comments? Feel free to send me a message on Twitter



 Discord
  Email swtorista@gmail.com
 Bluesky @swtorista.com
 Reddit /u/swtorista
 Twitch Swtorista
 Youtube
 Patreon
 Twitter @swtorista