


 How to Craft
 Choose a Crew Skill
 Armormech
 Armstech
 Artifice
 Biochem
 Cybertech
 Synthweaving

 Gathering Guide
 Rare Materials Guide
 White Materials Guide
 Jawa Junk
 Augments
 Medpacs, Stims and Adrenals
 Synthweaving Crafting Tree


 Crafted Decorations
 Crafted Mounts
 Crafted Dyes
 Crafted Crystals
 Events Calendar
 Galactic Seasons
 PvP Seasons
 Bounty Event
 Double XP Event
 Feast of Prosperity
 Gree Event
 Life Day
 Nightlife Event
 Pirate Incursion Event
 Rakghoul Event
 Spring Abundance Festival
 Swoop Event

 Jedi Knight
 Jedi Consular
 Trooper
 Smuggler
 Sith Warrior
 Sith Inquisitor
 Bounty Hunter
 Imperial Agent
 Bounty Hunter
 Imperial Agent
 Jedi Consular
 Jedi Knight
 Sith Inquisitor
 Sith Warrior
 Smuggler
 Trooper
 Legacy Gear
 Lightsabers
 Double-Bladed Lightsabers
 Vibroswords
 Double-Bladed Vibroswords
 Blaster Pistols
 Blaster Rifles
 Sniper Rifles
 Blaster Cannons
Star Wars: The Old Republic offers two different space combat modes – Galactic Starfighter, which is an intense and indepth free-flight 12-vs-12 player-vs-player combat mode, and old school space missions, which are solo space missions on rails that have been around since the launch of the game. The solo space combat missions range from being a fun and relaxing minigame to incredibly hard missions that very few players have completed. In this video, we’ll be going over how to play space missions, what order to do the missions in, where to get ship upgrades and equipment, and tips on how to play.
Update March 2021: All Space Missions Operations (the ones that often require you to play multiple space missions) now reward a reputation item! This means you can earn reputation slowly each day without having to run the very-difficult heroic space missions. The bug where space missions reputation items were sometimes disappearing has also been fixed.
Contents
- How to Start
- Free-to-Play
- Controls
- Reputation
- Fleet Commendations
- Rewards
- Ship Equipment & Upgrades
- Missions
- Republic Missions
- Fondor Escort
- Javaal Fleet Action
- Balosar Outpost
- Makem Te Assault
- Archenar Interception
- Llanic Station Strike
- Syvris Evacuation
- Kovor Ice Field
- Pakuuni Defense
- Drexel Sweep
- Hydian Way Blockade
- Zosha Advance
- Kalee Fortification
- The Impossible Sector
- Thanium Disruption
- Hypori Escort
- Baros Ambush
- New Cov Ice Field
- Ardis Outpost Fortification
- Regnant Station Assault
- Imperial Missions
- Jabiim Escort
- Saleucami Fleet Action
- Cartel Listening Station
- Sarapin Assault
- Nez Peron Sweep
- Ezran Outpost
- Taspan Ambush
- Mugaar Ice Field
- Skaross Fortification
- Sullust Interception
- Polith Minefield
- Clouds of Vondoru
- Aeten Defense
- Ascendancy Barrier
- Cha Raaba Assault
- Lorta Escort
- Duma Strike
- Kanz Minefield
- Kabal Station Defense
- Far Cradle Strike
- Achievements
How to Start
To start your first space mission, all you need to do is right click the small blue terminal on your ship with a yellow quest symbol over it, usually located near the bridge of your ship. Players receive their ship after completing their second planet, Dromund Kaas imperial side and Coruscant Republic side, and you can do space missions as low as level 12 once you have your ship.

Using the terminal will play a short introductory cutscene where you’ll be invited to join an elite squadron, and you’ll automatically be given your first space combat mission. To start your first mission, right click your galaxy map on the bridge of your ship. The mission will be marked with a yellow triangle on your map and labelled with its name, and you can click it to get started, then click Travel Now. The first mission is fun and relaxing and you don’t need any ship equipment or upgrades. After you finish your first mission, unfortunately the path to the next mission is not very clear – so I’ve put together a guide later in this video about what order you should do the next missions in.

Free-to-Play
If you are on a Free-to-Play or preferred account, you can play up to ten Space Missions per character per week. Then you will have to wait for the week to reset, or do space missions on a second character instead. Apart from this restriction, Free-to-Play and Preferred players have access to all the same Space Missions and rewards as Subscribers, except ship equipment bought form the vendor costs more than a Subscriber would pay in in-game currency and commendations. Unlike normal purple-bordered gear, Ship Equipment is not restricted by the Artifact Authorization unlock, which means you can equip the best Ship Equipment in the game even if you’re a free-to-play player.

Controls
Once you start your first mission, space combat controls are incredibly simple compared to the rest of the game.

Movement
Moving your ship in space combat is very easy, as half the work is taken care of you by the space combat being on rails – this means your ship will make a basic flight path without you even doing anything. There is no throttle controls – you’ll simply move forward automatically. You’ll be able to move your ship within the confines of your screen by moving your mouse in the direction of the screen you want your ship to move in to. You can also use the WASD keys to move if you prefer. Movement is used mainly to dodge asteroids or other obstacles, and to avoid enemy fire. If you see blaster fire coming from the left of the screen, you can move your ship to the right to avoid it.
Barrel Roll
Your space bar will cause your ship to do a barrel roll, which is a defensive maneuver you can use to avoid enemy fire. You can combine it with moving around the screen with your mouse to avoid even more blaster bolts coming your way.
Blasters
To fire your blasters and attack enemy ships, hover your mouse over your target and right click. Where your mouse is is where your blaster bolt will lead, so if you’re used to more complicated space games, you don’t need to lead your target and aim ahead in these simplified space missions. You can also hold down your left mouse button for continuous fire. You have unlimited ammo when it comes to blaster fire. Some enemies only need a shot or two to go down, like basic fighter ships, while other enemies need many shots to go down. It’s good to get in the habit of figuring out how many shots an enemy target needs, so you can hit them with your blasters that many times, then instead of continuing to fire at them until you see them explode, move on to the next target once you’ve reached that number of shots. When you first start off with no equipment, basic enemy fighters will take two clicks worth of damage and then they’ll spiral off and explode.
Missiles
Your missiles are strong attacks you can use to take out more difficult targets. To use a missile, right click on a target. This will place a blue circle around the target, and the missile will auto-lock on to the target and be fired at it. You do not need to keep your mouse on the target after your fire the missile and can move on to other targets if you want. You can also fire multiple missiles at multiple targets at once by right clicking and dragging your mouse over the targets – this is great if you want to hit targets that are all clumped together in one spot. You can also misss with your missiles, so don’t shoot them off into empty space.

You’ll have a limited amount of missiles based on your ship’s equipment, and you can see how many missile you have on the bottom right of your screen. You start off with 20 if you don’t have any equipment yet.

The four yellow missiles on the bottom right of your screen represent how many missiles you have loaded up. You can have up to four loaded at a time. So if you use all four at once, you’ll need to wait for them to regenerate before you can fire another missile. If you’re right clicking a target, and no missile is firing, it’s usually because your missiles bay is empty and needs a few seconds to load up with missiles again.

Most targets don’t require missiles, but missiles can help you take down targets that have more health faster. You don’t need to use missiles on basic enemies, as you can simply shoot them down with a few shots. You can save your missile for targets with a yellow border around them which are your main missions objectives,

or you can use them on targets with orange circles around them that have more health like large turrets, shields, or engines.

As you upgrade your ships equipment over time, you’ll also receive additional abilities. A majority of these upgrades can be purchased from the Starship Upgrades vendor in the Galactic Trade Network section of the Republic or Imperial fleet, in the cages on the outside of the ring. If you are just starting out, I actually highly recommend not upgrading your ship at all until you start finding the missions difficult, as there’s a really fun sense of progression in upgrading your ship over time. Back in the day, this was achieved by playing space missions as you levelled up, since the equipment pieces were all level gated. These days, you’ll want to replicate this sense of progression by not over gearing your ship for the easier missions. Returning to the easier missions later with lots of upgrades can be a lot of fun, as many have hidden objectives, and there’s a big difference in completing them with a basic ship versus one that’s fully upgraded.
Shields
You can get your first ship shield and shield regenerator at character level 16 for 650 credits each. Your shield protects your ship form taking damage, and can regenerate your shield over time if you have a shield regenerator. Your shields are represented by a blue ring around the icon of your ship on the bottom left of your screen. If the blue shields circle runs out, then any shots your ship takes will hurt its health, represented by the red bar beside your ship’s icon. If your health reaches zero, you lose the mission.

You can let your ship’s shield regenerate if you stop firing your blaster.
Power Conversion Module
Once your character is level 25, and you have earned 30 Fleet Commendations by doing the dailies, or at level 50 if you have 200,000 credits, you can buy a Power Conversion Module for your ship that will let you switch your power between your shields and your blasters. This is not needed for the earlier missions, but becomes very important in the later missions.

1 Key – Power to Blasters: Your 1 key on your keyboard will switch your power to your blasters, which will cause you blast cannons to do more damage, but your shield regeneration will be cut in half.
2 Key – Power to Shields: Your 2 key on your keyboard will switch your power to your shields, which will boost your shield regeneration significantly, but it will cause your blast cannons to do very little damage.
To regenerate your shields normally, once you have a shield equipped, you just stop firing. With a Power Conversion module, you can stop firing and press your 2 key to regenerate your shields faster. When your shields are good to go you can switch over to your blasters again by pressing your 1 key.
If you want to go back to a balanced mode, you can re-press the last 1 or 2 key you pressed. You can see if either one is active by a small blue bar at the bottom of the icon on the bottom left.
Both off: 
Power to Blasters Active: 
Power to Shields Active: 
Electronic Warfare Pod
Once your character is level 35, and you have earned 90 Fleet Commendations by doing the dailies, or at level 50 if you have many credits for the GTN, you can buy an Electronic Warfare Pod for your ship that will let you jam the enemy ships and turrets, causing enemies to not be able to target you for ten or fifteen seconds. To activate your jammers, press the 3 key on your keyboard. You can still get hit by stray shots, but you’ll be shot a lot less while you have the glowing yellow aura around your ship. You can use this once every 2 minutes and 30 seconds. In some missions you’ll want to save it for specific parts of the route, while in other missions you can use it whenever you’re in a pickle. Most missions range between 3 to 5 minutes so you’ll only get to use it once or twice per space mission.
EMP Generator
Once your character is level 35, and you have earned 150 Fleet Commendations by doing the dailies, or at level 50 if you have many credits for the GTN, you can buy an EMP Generator for your ship. Your EMP is an extremely powerful attack that does a large amount of damage to nearby enemies (and allies). To activate your EMP, press the 4 key on your keyboard. This will send a pulse attack out all around your ship that will damage anything within range. You can only use your EMP attack once every 4 minutes, so in most missions you’ll only be able to use it once per fight, so time is wisely.
Proton Torpedos
Once your character is level 50, and you have earned 50 Fleet Commendations by doing the dailies, you can buy Proton Torpedos for your ship. Proton Torpedos are a special type of missile for your ship for attacking large, often hidden, targets. to use your normal missiles, you simply right click your target to lock on and fire. To fire a Proton Torpedo, you click and hold your right mouse button on your target and a new type of red targeting circle will appear as the torpedo locks on. It will flash a different symbol once locked on, and you can release to fire. Proton torpedos only work on certain targets and will not work on basic enemies or basic large ship turrets or shields. Your only have 4 proton torpedos, and they are represented by a purple triangle shape on the bottom right of your screen.

Reputation
Reputation is a way of gaining favor with different groups by completing quests for them. As you level up your reputation rank, more rewards for that reputation track become available. The solo space combat reputation was one of the earliest reputation groups added, and for a long time, you could only ear reputation from the very difficult heroic space missions. It has been updated however, so now you can also earn reputation by doing easier missions too.
There are a few different ways to earn Space Reputation.
-
 Heroic Space Missions one-time, x6 (Fastest but expensive and difficult): The first is to complete each of the six one-time heroic space missions, which will each reward you with a blue reputation item. This set of six missions can only be done once per level 50+ character, and you’ll need to gear up each character’s ship who does it, so it’s not very efficient when it comes to tokens and credits, but could be a fast way to go through the reputation track. This gets you about 3,700 Reputation points per character as a subscriber.
 -
Heroic Space mission Operations, daily (Faster but difficult): The second way to earn space reputation is through the heroic daily operations. To unlock these dailies that give you a blue reputation item, first you need to run the one-time heroic space mission associated with that operation. Which heroic operation is actually available each day depends on the day of the week, and a different heroic operation becomes available every day. Sundays also offer a special two-mission heroic operation that gives a purple reputation item too, so running both missions on Sunday will get you a little more than normal days. If you have not completed the matching one-time space mission for the heroic operation of the day, you won’t see the operation show up until you complete it even if its on the correct day. You can run these dailies on as many level 50 characters as you have ships geared up, so if you really like space missions, and are good at the heroic ones, you can run these on multiple characters per day for some great reputation. I’ve heard a few players say they like to run the heroic operations on two characters per day which is pretty reasonable if it’s something you enjoy. The heroic operations get you about 630 Reputation points per character as a subscriber for each heroic operation per character.
 Normal Space Missions Operations, daily (Slow but Easier): In the past, only the hardest normal space mission operation would reward a reputation item, and the others were useless when it came to gaining reputation. Now however, all operation missions reward at least a green reputation item. So if you’re struggling with the heroic missions, or just enjoy the normal space missions, you can still run them to gain reputation at a slow pace. If you’ve played all the space missions at least once, in addition to the heroic operation you may have available if you’ve done the heroics, there will be eight normal operations playable a day. Some operations only require one space missions, while most require two to complete. Funny enough, the first operation, which is called Operation Midnight Freedom Republic side and Operation Silent Roar Imperial side, only require one mission, and its the easiest mission at that. So if you’re looking to level up your Space reputation at a slow but steady pace, you could run that first operation once a day, on one or multiple characters. The great part about this mission is that it is almost impossible to fail it, so it’s a very friendly mission compared to the others. A single operation gets you 270 reputation points per mission per character. Alternatively, you could run each of the eight daily operations, which would get you around 2,000 reputation points per day per character, but it will take you quite a while, as there are fourteen actual missions to run.
It’s completely up to you how you want to try and gain Reputation – unlike many of the other Reputation tracks, it will depend a lot on how difficult you find the heroic missions. If you can complete them without failing after practicing a while, they’re by far the most efficient method. But if you can’t complete them, or fail a lot, or just dislike them, you can either do your favorite normal missions once a day as time allows, or if you have lots of time you can do the full set of normal operation missions on as many character per day as you have time. Whatever option you choose, make sure not to burn yourself out, as the space missions are not limited by time and I’ve slowly been working on mine for almost ten years now.
Reputation Items
-
Green Reputation Item: 270 Reputation Points + 10% Guild XP boost, 135 for Free-to-play
- Blue Reputation Item: 630 Reputation Points + 10% Guild XP boost, 315 for Free-to-play
-
 Purple Reputation Item: 1750 Reputation Points + 10% Guild XP boost, 875 for Free-to-play
Reputation Ranks
- Outsider – 0 Reputation
- Newcomer – 0/5,000 Reputation (5,000 total points needed)
- Friend – 0/7,500 Reputation (12,500 total points needed)
- Hero – 0/10,000 Reputation (22,500 total points needed)
- Champion – 0/20,000 Reputation (untested) (42,500 total points needed)
- Legend – 0/30,000 Reputation (untested) (72,500 total points needed)
To see your current space reputation, press Y on your keyboard or choose Legacy from the menu at the top of the screen, and in the Reputation section hover over the Republic Hyperspace Armada or the Imperial First Mobile Fleet. You can only earn 12,000 reputation per week. Unlike most Reputation tracks, Space reputation items usually go into your inventory, where you need to right-click them to consume them.

Fleet Commendations
The rest of the rewards only cost Fleet Commendations, and do not have a reputation requirement. Fleet commendations can be earned by completing the one-time quests as well as the daily Operation quests. Unfortunately, Fleet Commendations are not legacy-bound, so you can only spend them on the character you earned them on. You can see how many Fleet Comms your character has in the currency tab in your inventory. If you complete all the original one-time space missions, you’ll earn 38 commendations, and for each of the heroic one-time missions, you’ll earn 20 commendations for each one. After that, you can earn commendations from the different repeatable daily quests. If you ran through all the original dailies, which would be fourteen missions, you can earn 100 commendations per day, 700 a week, and doing a heroic daily will get you can extra 40 commendations per day and 80 on Sundays for 320 a week. So if you ran every space operation every day for a week, you’d earn 1,020 commendations total. I do not recommend running this many though, and instead I recommend once you have played all the one-time space missions, just play the chosen heroic space mission for the day for a good amount of fleet comms and reputation. If you aren’t up to playing once a day per week, you can also log in, go to your ship and pick up the heroic Operation of the day, and then play all the operations on the weekend, as they will stay in your quest log even after the chosen day has passed.
![]()
If what you’re looking for is the Fleet Commendation rewards and don’t care about the space missions themselves, you may want to check out Galactic Starfighter, the space player-vs-player mode, as its Daily and Weekly quests also reward Fleet Commendations. There is a terminal section of the fleet you can pick them up from, and the Daily rewards 50 Fleet Commendations for playing 2 matches or winning 1, and the Weekly has you play 10 or win 5 matches and gives you 300 Fleet commendations. If you played and won a match or two every day of the week for the daily plus an extra three matches to make the weekly, you could earn 650 Fleet commendations per week per character.
Rewards
There are not very many rewards for space Missions compared to the other Reputation tracks. However, the Space Mission reputation rewards are probably some of the rarest reputation rewards you will see in the game as so few players have mastered the difficult space missions that reward you with reputation points!


Titles
- Hero of Deep Space: Hero rank reputation (legacy title)
- Hyperspace Legend: Legend rank reputation (legacy title)
- Republic Ace: Completed all original Republic space missions (legacy title, Republic characters only)
- Imperial Ace: Completed all original Imperial space missions (legacy title, Republic characters only)
- Flyboy: Complete a space mission (male character title)
- Flygirl: Complete a space mission (female character title)
- The Pilot: Complete Syvris Evacuation (Republic) or Taspan Ambush (Empire) (character title)
- Hot Shot Pilot: Complete the final original space mission, The Impossible Sector (Republic) or Ascendancy Barrier (Empire) (character title)
Completing the first mission Fondor Escort Republic side and Jabiim Escort Imperial side will also each grant you an easy 20 Cartel Coins through achievements. As far as I can tell there are no hidden achievements and no additional rewards from achievements, though there are some fun achievements that will ask you to complete the hidden bonus objectives in the different space missions.
Callsigns
When you pick up your first space mission, your character is assigned a call sign. Here’s all the call signs for each class. These are for fun and aren’t referenced anywhere else in the game.
- Smuggler: Ace (aka Crackerjack)
- Trooper: Meteor
- Jedi Knight: Shield
- Jedi Consular: Guardian
- Sith Inquisitor: Rage
- Sith Warrior: Tempest
- Imperial Agent: Nightshrike
- Bounty Hunter: Scree
Mount
Tirsa Champion
Requires Legend Reputation Rank with the Republic Hyperspace Armada / Imperial First Mobile Fleet, costs 500,000 Credits, Mount, legacy-bound so you can buy it on one character and send it to another of your characters, but it can only be used on 1 character

Armor
Deep Space Starfighter Helmet
Requires Champion Reputation Rank with the Republic Hyperspace Armada / Imperial First Mobile Fleet, costs 250,000 Credits, Armor, legacy-bound


Hyperspace Hotshot Armor
Requires Hero Reputation Rank with the Republic Hyperspace Armada / Imperial First Mobile Fleet, costs 250,000 Credits, Armor, legacy-bound


Pilot’s Armor
No reputation needed, costs  60 Fleet Commendations Armor, Binds on Pickup


Civilian Pilot Armor
No reputation needed, costs 60 Fleet Commendations Armor, Binds on Pickup


Republic Pilot Armor
No reputation needed, costs 200 Fleet Commendations Armor, Binds on Pickup, Republic-side only


Imperial Pilot Armor
No reputation needed, costs 200 Fleet Commendations Armor, Binds on Pickup, Imperial-side only


Decorations
Starship: Imperial Scout
Costs 500 Fleet Commendations – Decoration, purchasable from the Starfighter & PvP Decoration Vendor in the Strongholds section of the fleet on Imperial side only, can also be bought and sold on the GTN

Propaganda: Starfighter Kiosk (Imperial)
Costs 250 Fleet Commendations – Decoration, purchasable from the Starfighter & PvP Decoration Vendor in the Strongholds section of the fleet on Imperial side only, can also be bought and sold on the GTN

Propaganda: Imperial Striker
Costs 150 Fleet Commendations – Decoration, purchasable from the Starfighter & PvP Decoration Vendor in the Strongholds section of the fleet on Imperial side only, can also be bought and sold on the GTN

Propaganda: Imperial Scout
Costs 150 Fleet Commendations – Decoration, purchasable from the Starfighter & PvP Decoration Vendor in the Strongholds section of the fleet on Imperial side only, can also be bought and sold on the GTN

Starship: Republic Scout
Costs 500Fleet Commendations – Decoration, purchasable from the Starfighter & PvP Decoration Vendor in the Strongholds section of the fleet on Republic side only, can also be bought and sold on the GTN

Propaganda: Starfighter Kiosk (Republic)
Costs 250 Fleet Commendations – Decoration, purchasable from the Starfighter & PvP Decoration Vendor in the Strongholds section of the fleet on Republic side only, can also be bought and sold on the GTN

Propaganda: Republic Gunship
Costs 150 Fleet Commendations – Decoration, purchasable from the Starfighter & PvP Decoration Vendor in the Strongholds section of the fleet on Republic side only, can also be bought and sold on the GTN

Propaganda: Republic Striker
Costs 150 Fleet Commendations – Decoration, purchasable from the Starfighter & PvP Decoration Vendor in the Strongholds section of the fleet on Republic side only, can also be bought and sold on the GTN

Stronghold Label: Starfighter’s Lounge
Costs 500 Fleet Commendations – Title for your Stronghold
Rewards List
| Item | Reputation | Cost | Description |
|---|---|---|---|
| Deep Space Starfighter Helmet | Champion | 250,000 Credits | Armor, legacy-bound |
| Hyperspace Hotshot Belt | Hero | 5,750 Credits | Armor, legacy-bound |
| Hyperspace Hotshot Boots | Hero | 7,750 Credits | Armor, legacy-bound |
| Hyperspace Hotshot Bracer | Hero | 5,750 Credits | Armor, legacy-bound |
| Hyperspace Hotshot Gloves | Hero | 7,750 Credits | Armor, legacy-bound |
| Hyperspace Hotshot Pants | Hero | 9,400 Credits | Armor, legacy-bound |
| Hyperspace Hotshot Vestplate | Hero | 9,400 Credits | Armor, legacy-bound |
| Hyperspace Hotshot Visor | Hero | 9,400 Credits | Armor, legacy-bound |
| Tirsa Champion | Legend | 500,000 Credits | Mount, legacy-bound |
| Pilot's Boots | None | 60 Fleet Commendations | Armor, Binds on Pickup |
| Pilot's Gloves | None | 60 Fleet Commendations | Armor, Binds on Pickup |
| Pilot's Helmet | None | 70 Fleet Commendations | Armor, Binds on Pickup |
| Pilot's Pants | None | 70 Fleet Commendations | Armor, Binds on Pickup |
| Pilot's Tunic | None | 80 Fleet Commendations | Armor, Binds on Pickup |
| Civilian Pilot Belt | None | 60 Fleet Commendations | Armor, Binds on Pickup |
| Civilian Pilot Boots | None | 60 Fleet Commendations | Armor, Binds on Pickup |
| Civilian Pilot Gloves | None | 60 Fleet Commendations | Armor, Binds on Pickup |
| Civilian Pilot Helmet | None | 70 Fleet Commendations | Armor, Binds on Pickup |
| Civilian Pilot Jacket | None | 80 Fleet Commendations | Armor, Binds on Pickup |
| Civilian Pilot Pants | None | 70 Fleet Commendations | Armor, Binds on Pickup |
| Republic Pilot Belt | None | 200 Fleet Commendations | Armor, Binds on Pickup, Republic-side only |
| Republic Pilot Boots | None | 200 Fleet Commendations | Armor, Binds on Pickup, Republic-side only |
| Republic Pilot Gloves | None | 200 Fleet Commendations | Armor, Binds on Pickup, Republic-side only |
| Republic Pilot Helmet | None | 225 Fleet Commendations | Armor, Binds on Pickup, Republic-side only |
| Republic Pilot Jacket | None | 250 Fleet Commendations | Armor, Binds on Pickup, Republic-side only |
| Republic Pilot Pants | None | 225 Fleet Commendations | Armor, Binds on Pickup, Republic-side only |
| Imperial Pilot Belt | None | 200 Fleet Commendations | Armor, Binds on Pickup, Imperial-side only |
| Imperial Pilot Boots | None | 200 Fleet Commendations | Armor, Binds on Pickup, Imperial-side only |
| Imperial Pilot Gloves | None | 200 Fleet Commendations | Armor, Binds on Pickup, Imperial-side only |
| Imperial Pilot Helmet | None | 225 Fleet Commendations | Armor, Binds on Pickup, Imperial-side only |
| Imperial Pilot Jacket | None | 250 Fleet Commendations | Armor, Binds on Pickup, Imperial-side only |
| Imperial Pilot Pants | None | 225 Fleet Commendations | Armor, Binds on Pickup, Imperial-side only |
| Starship: Imperial Scout | None | 500Fleet Commendations | Decoration, purchasable from the vendor on Imperial side only, can also be bought and sold on the GTN |
| Propaganda: Starfighter Kiosk (Imperial) | None | 250 Fleet Commendations | Decoration, purchasable from the vendor on Imperial side only, can also be bought and sold on the GTN |
| Propaganda: Imperial Striker | None | 150 Fleet Commendations | Decoration, purchasable from the vendor on Imperial side only, can also be bought and sold on the GTN |
| Propaganda: Imperial Scout | None | 150 Fleet Commendations | Decoration, purchasable from the vendor on Imperial side only, can also be bought and sold on the GTN |
| Starship: Republic Scout | None | 500Fleet Commendations | Decoration, purchasable from the vendor on Republic side only, can also be bought and sold on the GTN |
| Propaganda: Starfighter Kiosk (Republic) | None | 250 Fleet Commendations | Decoration, purchasable from the vendor on Republic side only, can also be bought and sold on the GTN |
| Propaganda: Republic Gunship | None | 150 Fleet Commendations | Decoration, purchasable from the vendor on Republic side only, can also be bought and sold on the GTN |
| Propaganda: Republic Striker | None | 150 Fleet Commendations | Decoration, purchasable from the vendor on Republic side only, can also be bought and sold on the GTN |
| Stronghold Label: Starfighter's Lounge | None | 500 Fleet Commendations | Title for your Stronghold |
| Ancient Artifact Storage Box | None | 300 Fleet Commendations | Contains old crafting materials, not worth it |
| Inheritance Gloves Construction Kit | None | 200 Fleet Commendations | Legacy vendors, can be bought with credits |
| Inheritance Belt Construction Kit | None | 100 Fleet Commendations | Legacy vendors, can be bought with credits |
| Inheritance Wrists Construction Kit | None | 100 Fleet Commendations | Legacy vendors, can be bought with credits |
| Major Fleet Requisition Grant [Legacy] | None | 400 Fleet Commendations | Galactic Starfighter currency |
| Major Ship Requisition Grant [Legacy] | None | 350 Fleet Commendations | Galactic Starfighter currency |
| Minor Fleet Requisition Grant [Legacy] | None | 40 Fleet Commendations | Galactic Starfighter currency |
| Minor Ship Requisition Grant [Legacy] | None | 120 Fleet Commendations | Galactic Starfighter currency |
| Fleet Requisition Grant [Legacy] | None | 75 Fleet Commendations | Galactic Starfighter currency |
| Blast Condenser | None | 350 Fleet Commendations | Ship Equipment |
| Deflection Amplifier | None | 350 Fleet Commendations | Ship Equipment |
| Durasteel Armor | None | 350 Fleet Commendations | Ship Equipment |
| EMP Generator | None | 150 Fleet Commendations | Ship Equipment |
| Electronic Warfare Pod | None | 90 Fleet Commendations | Ship Equipment |
| Improved Electromagnetic Pulse | None | 350 Fleet Commendations | Ship Equipment |
| Laser Cannons | None | 350 Fleet Commendations | Ship Equipment |
| Power Conversion Module | None | 30 Fleet Commendations | Ship Equipment |
| Proton Torpedo Tube | None | 50 Fleet Commendations | Ship Equipment |
| Schematic: Concussion Missile Magazine | None | 500 Fleet Commendations | Ship Equipment Crafting |
| Schematic: Deflector Shield | None | 500 Fleet Commendations | Ship Equipment Crafting |
| Schematic: Improved Electronic Warfare Pod | None | 350 Fleet Commendations | Ship Equipment Crafting |
Ship Equipment & Upgrades
As you progress through the space missions, you’ll find they get harder and harder, and you’ll eventually need to upgrade your ship’s equipment which will make your ship stronger. Whne space missions were first launched, the idea was that you’d play space missions as you levelled up, and you’d be gated in which equipment you should use by your character’s level. However, if you’re jumping in to space missions at a high level, you’ll technically be able to equip some of the best space mission equipment right away if you have enough credits. However, this makes the early space missions ridiculously easy and removes a lot of the fun and progression, so I highly recommend not upgrading your ship at all until you reach a space mission you can’t pass, and then only upgrade your gear by one level from the vendor, and only pick up the special upgrades including the EMP and Torpedos after you have done a full run of the space missions without them.


A majority of your ship upgrades can be purchased from the Ship Upgrades vendor in the Galactic Trade Market section of the fleet, some are a reward from specific missions, while others can be crafted and bought and sold on the GTN. You don’t need to upgrade your ship for the early missions, but the later missions will absolutely require that you upgrade your ship as much as you can. The basic ship upgrades for tier 1, 3 and 5 are available directly form the vendor for a small amount of credits. The in between upgrades, 2 and 4, are crafted, but I recommend skipping them all together. The tier 6 upgrades are crafted, and the tier 7 upgrades, the best ship gear in the entire game, are available through a combination of the vendor with fleet comms, the vendor for credits, and from crafting and the GTN. You’ll also get the grade 2, 4, and 6 Beam Charger equipment exclusively from the one-time space missions. You can complete the original space missions with grade 5 gear, you don’t need the special crafted grade 6 and 7 gear. I do however recommend picking up a Power Conversion Module once you get about 5 missions in, which costs either 20 Fleet Commendations, or 200,000 Credits, from the vendor, which will let you switch power between shields and blasters. After you’ve played through once, have fun going through the earlier missions a second time and doing the daily repeatable quests as well as all the hidden bonus objectives with your upgraded ship.
Grade 7 Ship Upgrades
Once you have finished the original round of space missions, you’ll want to fully upgrade your ship gear as much as possible to go in to what’s known as the heroic space missions. These are the level 50 space missions, and it’s recommended to go in to these with as much Grade 7 ship gear as you can get. They are incredibly hard and many players get stuck on them. The Grade 7 ship upgrades are a bit confusing so we’ll get through them one by one. If you can’t afford them you can try it with the Grade 6 equipment that comes from crafting, but I have not tested this.

Your Proton Torpedo Tube, if you haven’t picked it up yet, can only be bought with 50 Fleet Commendations from the vendor.
![]()
Your Grade 7 Beam Generator, Shield Regenerator, Beam Charger, Ship Armor and EMP can all be bought from the vendor for 350 Fleet Commendations, which is quite steep. However, these items are not bound, so if you have credits, you might be able to buy these from the GTN from other players who are looking to convert their Fleet Commendations in to credits. If you’re in a guild, you may want to check in with any players who do Galactic Starfighter if they’re willing to pick up any of the Fleet Commendation equipment for you for a discount compared to the GTN, as GSF players may have more Fleet Commendations than they know what to do with. GSF is also a great way to earn Fleet Commendations if you’d rather buy them for 350 Fleet Commendations per piece and avoid the multi-million price tag on the GTN. You get 50 commendations from the short GSF daily, 300 for the weekly, can can earn a total of 650 Fleet Commendations per week on your character. If you want to earn Fleet Commendations from the old school space missions, you can earn 100 per day by doing all eight of the daily operation missions, which is a total of 14 space missions, and 700 commendations per week, or if you have limited time, you can run just the hardest two operations, which is the last three original space missions, for 40 Fleet Commendations per day and 280 a week.
![]()
![]()
![]()
![]()
![]()
- Blast Condenser: Beam Generator – 350 Fleet Commendations / GTN
- Deflection Amplifier: Shield Regenerator – 350 Fleet Commendations / GTN
- Laser Cannons: Beam Charger – 350 Fleet Commendations / GTN
- Durasteel Armor: Ship Armor – 350 Fleet Commendations / GTN
- Improved Electromagnetic Pulse (EMP) – 350 Fleet Commendations / GTN
The rest of the Grade 7 ship equipment is crafted by Cybertech crafters who have gotten the schematic. The schematics are incredibly expensive, at 350 to 500 Commendations each. These are not extremely expensive on the GTN, so if you don’t care about crafting, I recommend saving your commendations and just buying them from the GTN instead.
![]()
![]()
![]()
- Concussion Missile Magazine: Missile Magazine – Crafted / GTN
- Deflector Shield: Energy Shield – Crafted / GTN
- Improved Electronic Warfare Pod: Electronic Warfare Pod (8th Slot) – Crafted / GTN
![]()
The final piece, your Improved Power Conversion Module, can be bought directly from the vendor for 200,000 credits. Be aware that some players try to pull a scam where they buy it from the vendor then sell it on the GTN for millions of credits, to sell it to players who don’t realize you can get it directly from the vendor.
Here’s how much I spent in pure credits upgrading my ship to Grade 7 on the Star Forge server near the end of 2020:
- Concussion Missile Magazine – 1 mill
- Deflector Shield – 1 mill
- Improved Electronic Warfare Pod – 1 mill
- Blast Condenser – 33 mill (only 1 for sale) or 350 fleet commendations
- Deflection Amplifier – 35 mill (only 1 for sale) or 350 fleet commendations
- Laser Cannons – 32 mill (only 2 for sale) or 350 fleet commendations
- Durasteel Armor – 30 mill (only 2 for sale) or 350 fleet commendations
- Improved Electromagnetic Pulse – 34 mill (only 2 for sale) or 350 fleet commendations
- Improved Power Conversion Module – 200,000 from vendor
- Proton Torpedo Tube – 50 Fleet Commendations from vendor
Here’s what I spent on upgrade my ship to Grade 6 on the Star forge server near the end of 2020 on a budget:
- ArMek Ship Armor – 200k
- Hoersch-Kessel Shield Regenerator – 300k
- Kuat Drive Yards Missile Magazine – 200k
- Quellegh Industrial Energy Shield – 250k
- Rendili Hyperworks Beam Generator – free from quest [Republic] Space Combat: Kalee Fortification / [Imperial] Space Combat: Aeten Defense
- Sienar Systems Beam Charger – 325k
- Improved Power Conversion Module – 200k from vendor
- Proton Torpedo Tube – 50 Fleet Commendations from vendor
- Improved Electronic Warfare Pod – 300k
- EMP Generator 150 Commendations / Improved Electromagnetic Pulse – 350 commendations or 40 mill
Ship Equipment List
| Icon | Upgrade | Grade | Type | Cost / Source | Level | Description |
|---|---|---|---|---|---|---|
| Grade 1 Beam Charger | 1 | Beam Charger | 600 Credits | 15 | Ship blasters deliver 40 damage per bolt. | |
| Grade 1 Beam Generator | 1 | Beam Generator | 500 Credits | 14 | Ships blasters fire 5 shots per second. | |
| Grade 1 Energy Shield | 1 | Energy Shield | 650 Credits | 16 | Ship has shields that absorb 150 damage. | |
| Grade 1 Missile Magazine | 1 | Missile Magazine | 700 Credits | 17 | Ship missile bay now holds 40 missiles. | |
| Grade 1 Shield Regenerator | 1 | Shield Regenerator | 650 Credits | 16 | Ship shields regenerate 5 toughness per second. | |
| Grade 1 Ship Armor | 1 | Ship Armor | 500 Credits, or one-time level 34 mission [Republic] Space Combat: Fondor Escort / [Imperial] Space Combat: Jabiim Escort | 14 | Ship toughness is set to 2000. | |
| Grade 2 Beam Charger | 2 | Beam Charger | one-time level 20 mission [Republic] Space Combat: Archenar Interception / [Imperial] Space Combat: Nez Peron Sweep | 20 | Ship blasters deliver 45 damage per bolt. Increases ship toughness by 50. | |
| Grade 2 Beam Generator | 2 | Beam Generator | Crafted / GTN | 19 | Ships blasters fire 6 shots per second. Increases shield absorption by 25. | |
| Grade 2 Energy Shield | 2 | Energy Shield | Crafted / GTN | 21 | Ship has shields that absorb 175 damage. Increases blaster damage per bolt by 3. | |
| Grade 2 Missile Magazine | 2 | Missile Magazine | Crafted / GTN | 22 | Ship missile bay now holds 50 missiles. Increases ship toughness by 50. | |
| Grade 2 Shield Regenerator | 2 | Shield Regenerator | Crafted / GTN | 21 | Ship shields regenerate 7 toughness per second. Increases Shield absorbtion by 25. | |
| Grade 2 Ship Armor | 2 | Ship Armor | Crafted / GTN | 18 | Ship toughness is set to 2100. Increases blaster damage per bolt by 3. | |
| Grade 3 Beam Charger | 3 | Beam Charger | 3250 Credits | 26 | Ship blasters deliver 60 damage per bolt. | |
| Grade 3 Beam Generator | 3 | Beam Generator | 2,750 Credits | 24 | Ships blasters fire 7 shots per second. | |
| Grade 3 Energy Shield | 3 | Energy Shield | 3,750 Credits | 28 | Ship has shields that absorb 300 damage. | |
| Grade 3 Missile Magazine | 3 | Missile Magazine | 4,600 Credits | 31 | Ship missile bay now holds 80 missiles. | |
| Grade 3 Shield Regenerator | 3 | Shield Regenerator | 4,000 Credits | 29 | Ship shields regenerate 15 toughness per second. | |
| Grade 3 Ship Armor | 3 | Ship Armor | 2,550 Credits | 23 | Ship toughness is set to 2500. | |
| Grade 4 Beam Charger | 4 | Beam Charger | one-time level 34 mission [Republic] Space Combat: Pakuuni Defense / [Imperial] Space Combat: Skaross Fortification | 34 | Ship blasters deliver 45 damage per bolt. Increases ship toughness by 50. | |
| Grade 4 Beam Generator | 4 | Beam Generator | Crafted / GTN | 33 | Ships blasters fire 8 shots per second. Increases shield absorption by 25. | |
| Grade 4 Energy Shield | 4 | Energy Shield | Crafted / GTN | 36 | Ship has shields that absorb 325 damage. Increases blaster damage per bolt by 4. | |
| Grade 4 Missile Magazine | 4 | Missile Magazine | Crafted / GTN | 37 | Ship missile bay now holds 90 missiles. Increases ship toughness by 50. | |
| Grade 4 Shield Regenerator | 4 | Shield Regenerator | Crafted / GTN | 36 | Ship shields regenerate 17 toughness per second. Increases Shield absorbtion by 25. | |
| Grade 4 Ship Armor | 4 | Ship Armor | Crafted / GTN | 32 | Ship toughness is set to 2650. Increases blaster damage per bolt by 4. | |
| Grade 5 Beam Charger | 5 | Beam Charger | 17,200 Credits | 40 | Ship blasters deliver 80 damage per bolt. | |
| Grade 5 Beam Generator | 5 | Beam Generator | 16,350 Credits | 39 | Ships blasters fire 9 shots per second. | |
| Grade 5 Energy Shield | 5 | Energy Shield | 18,100 Credits | 41 | Ship has shields that absorb 500 damage. | |
| Grade 5 Missile Magazine | 5 | Missile Magazine | 19,000 Credits | 42 | Ship missile bay now holds 120 missiles. | |
| Grade 5 Shield Regenerator | 5 | Shield Regenerator | 18,100 Credits | 41 | Ship shields regenerate 25 toughness per second. | |
| Grade 5 Ship Armor | 5 | Ship Armor | 15,550 Credits | 38 | Ship toughness is set to 3000. | |
| Sienar Systems Beam Charger | 6 | Beam Charger | Crafted / GTN | 46 | Ship blasters deliver 90 damage per bolt. Increases ship toughness by 50. | |
| Rendili Hyperworks Beam Generator | 6 | Beam Generator | one-time level 34 mission [Republic] Space Combat: Kalee Fortification / [Imperial] Space Combat: Aeten Defense | 44 | Ship blasters fire 10 shots per second. Increases shield absorption by 25. | |
| Quellegh Industrial Energy Shield | 6 | Energy Shield | Crafted / GTN | 47 | Ship has shields that absorb 550 damage. Increases blaster damage per bolt by 5. | |
| Kuat Drive Yards Missile Magazine | 6 | Missile Magazine | Crafted / GTN | 49 | Ship missile bay now holds 150 missiles. Increases ship toughness by 50. | |
| Hoersch-Kessel Shield Regenerator | 6 | Shield Regenerator | Crafted / GTN | 47 | Ship shields regenerate 30 toughness per second. Increases Shield absorbtion by 25. | |
| ArMek Ship Armor | 6 | Ship Armor | Crafted / GTN | 43 | Ship toughness is set to 3250. Increases blaster damage per bolt by 5. | |
| Blast Condenser | 7 | Beam Generator | 350 Fleet Commendations for Subscribers / 437 Fleet Commendations for Free to Play & Preferred / GTN | 50 | Ship blasters fire 6 shots per second. Increases blaster damage per bolt by 100. | |
| Deflection Amplifier | 7 | Shield Regenerator | 350 Fleet Commendations for Subscribers / 437 Fleet Commendations for Free to Play & Preferred / GTN | 50 | Ship shields regenerate 40 toughness per second. | |
| Laser Cannons | 7 | Beam Charger | 350 Fleet Commendations for Subscribers / 437 Fleet Commendations for Free to Play & Preferred / GTN | 50 | Ship blasters deliver 100 damage per bolt. | |
| Durasteel Armor | 7 | Ship Armor | 350 Fleet Commendations for Subscribers / 437 Fleet Commendations for Free to Play & Preferred / GTN | 50 | Ship toughness is set to 4000. | |
| Concussion Missile Magazine | 7 | Missile Magazine | Crafted / GTN | 50 | Ship missile bay now holds 100 missiles. Increases missile damage to 500. | |
| Deflector Shield | 7 | Energy Shield | Crafted / GTN | 50 | Ship has shields that absorb 800 damage. | |
| Power Conversion Module | - | Power Conversion Module (10th Slot) | 30 Fleet Commendations for Subscribers / 37 Fleet Commendations for Free to Play & Preferred / GTN | 20 | Option 1 - Shield Regeneration is boosted significantly, but blast cannons deal very little damage. Option 2 - Blast cannons deal more damage, but shield regeneration rate is cut in half. | |
| Improved Power Conversion Module | 7 | Power Conversion Module (10th Slot) | 200,000 Credits / GTN | 50 | Option 1 - Blast cannons deal more damage, but shield regeneration is cut in half. Option 2 - Shield regeneration is boosted significantly, but blast cannons deal very little damage. | |
| Electronic Warfare Pod | - | Electronic Warfare Pod (8th Slot) | 90 Fleet Commendations for Subscribers / 112 Fleet Commendations for Free to Play & Preferred / GTN | 35 | Enemies cannot target you for 10 seconds. | |
| Improved Electronic Warfare Pod | 7 | Electronic Warfare Pod (8th Slot) | Crafted / GTN | 50 | Enemies cannot target you for 15 seconds. | |
| EMP Generator | - | EMP Generator (9th Slot) | 150 Fleet Commendations for Subscribers / 187 Fleet Commendations for Free to Play & Preferred | 45 | Deliver a large amount of damage to nearby enemies and allies. | |
| Improved Electromagnetic Pulse | 7 | EMP Generator (9th Slot) | 350 Fleet Commendations for Subscribers / 437 Fleet Commendations for Free to Play & Preferred / GTN | 50 | Delivers a massive amount of damage to nearby enemies and allies. The blast will remove all shields. | |
| Proton Torpedo Tube | - | Proton Torpedos (7th Slot) | 50 Fleet Commendations for Subscribers / 62 Fleet Commendations for Free to Play & Preferred / No GTN | 50 | Ship now holds 4 proton torpedoes. Right click and hold reticule over target until target-lock, then release. |
Missions
There are fourteen original space missions, and 6 more very difficult heroic missions. These missions are named differently on Imperial and Republic side, but are essentially the same once you jump in to them except for the types of ships you are flying and fighting. To access the replayable space missions, go to your galaxy map on your ship, zoom in to a sector by clicking it, then clicking a space missions on the map. These missions by themselves only reward credits and xp.
In addition to the replayable missions that you access through the galaxy map, there’s also a one-time mission from the terminal on your ship to complete each of the different space missions once. These one-time quests reward you with space commendations, which can be spent on rewards and equipment. Some of these one-time quests also reward you with ship equipment upgrades. The most difficult one-time quests also reward reputation. If you are a low level, more missions will show up on your terminal as you level up, all the way up until level 50. You can see the suggested level in the list below, but the quest will likely pop up on your terminal before then, and you can complete it early if you want, the only thing holding you back might be your ship equipment.

Unfortunately, in the mission terminal, the missions are not sorted in the way that you are supposed to complete them. Here’s the actual order of the missions in terms of level and difficulty.
As you complete those one-time missions, you’ll also unlock daily missions called Operations, that will require you to complete one or more specific space missions, and are a repeatable way to earn commendations. To unlock an Operation, you need to first do the one-time missions associated with that Operation. Then you can do the Operation itself. If you’re just starting out, you can choose to simply go through all the one-time missions in order from easiest to hardest, or you can stop and complete the Operations as you unlock them. So if you’re trying to go through the entire space combat path in a day including the daily repeatable Operations, you’d actually end up repeating many of the missions twice, which can actually be a lot of fun as you get better at them. If you need a list of the correct path to unlock the missions and earn rewards, check the description of this video for a link to the written guide.
WARNING: There is a nasty bug when you reach the later space missions and space operations that reward you with Reputation items. If you accept the mission rewards while you are still in space, you will not get the Reputation added to your Reputation points. The work-around is to press your ESC key to escape out of the rewards, then press ESC again to open the menu, then leave the space battle. You can then safely accept the reward once you are back in the main game. The reputation items are the green and blue bordered items with a green or blue star on the top right of the item icon.


Space Missions
| Republic | Imperial | Level | Upgrades |
|---|---|---|---|
 Fondor Escort Fondor Escort |  Jabiim Escort Jabiim Escort | 12 | 0+ |
| Javaal Fleet Action | Saleucami Fleet Action | 12 | 0+ |
| Balosar Outpost | Cartel Listening Station | 12 | 0+ |
| Makem Te Assault | Sarapin Assault | 20 | 1+ |
| Archenar Interception | Nez Peron Sweep | 20 | 1+ |
| Llanic Station Strike | Ezran Outpost | 28 | 1+ |
| Syvris Evacuation | Taspan Ambush | 28 | 1+ |
| Kovor Ice Field | Mugaar Ice Field | 34 | 3+ |
| Pakuuni Defense | Skaross Fortification | 34 | 3+ |
| Drexel Sweep | Sullust Interception | 40 | 3+ |
| Hydian Way Blockade | Polith Minefield | 40 | 3+ |
| Zosha Advance | Clouds of Vondoru | 44 | 5+ |
| Kalee Fortification | Aeten Defense | 44 | 5+ |
| The Impossible Sector | Ascendancy Barrier | 48 | 5+ |
| Thanium Disruption | Cha Raaba Assault | 50 | 7 |
| Hypori Escort | Lorta Escort | 50 | 7 |
| Baros Ambush | Duma Strike | 50 | 7 |
| New Cov Ice Field | Kanz Minefield | 50 | 7 |
| Ardis Outpost Fortification | Kabal Station Defense | 50 | 7 |
| Regnant Station Assault | Far Cradle Strike | 50 | 7 |
Republic One-time Space Missions
| Icon | Mission | Level | Comms | Rep. | Ship | Extra Rewards |
|---|---|---|---|---|---|---|
 | Space Combat: Fondor Escort | 12 | 1 | None | 0+ | Grade 1 Ship Armor, Complimentary Major XP Boost |
| Space Combat: Javaal Fleet Action | 12 | 1 | None | 0+ | |
| Space Combat: Balosar Outpost | 12 | 1 | None | 0+ | |
| Space Combat: Makem Te Assault | 20 | 1 | None | 1+ | |
| Space Combat: Archenar Interception | 20 | 1 | None | 1+ | Grade 2 Beam Charger |
| Space Combat: Llanic Station Strike | 28 | 3 | None | 1+ | |
| Space Combat: Syvris Evacuation | 28 | 3 | None | 1+ | |
| Space Combat: Kovor Ice Field | 34 | 3 | None | 3+ | |
| Space Combat: Pakuuni Defense | 34 | 3 | None | 3+ | Grade 4 Beam Charger |
| Space Combat: Drexel Sweep | 40 | 3 | None | 3+ | |
| Space Combat: Hydian Way Blockade | 40 | 3 | None | 3+ | |
| Space Combat: Zosha Advance | 44 | 5 | None | 5+ | Complimentary Major XP Boost |
| Space Combat: Kalee Fortification | 44 | 5 | None | 5+ | Rendili Hyperworks Beam Generator (Grade 6) |
| Space Combat: The Impossible Sector | 48 | 5 | None | 5+ | |
| Space Combat: Thanium Disruption | 50 | 20 | Blue | 7 | |
| Space Combat: Hypori Escort | 50 | 20 | Blue | 7 | |
| Space Combat: Baros Ambush | 50 | 20 | Blue | 7 | |
| Space Combat: New Cov Ice Field | 50 | 20 | Blue | 7 | |
| Space Combat: Ardis Outpost Fortification | 50 | 20 | Blue | 7 | |
| Space Combat: Regnant Station Assault | 50 | 20 | Blue | 7 |
Imperial One-time Space Missions
| Icon | Mission | Level | Comms | Rep. | Ship | Extra Rewards |
|---|---|---|---|---|---|---|
 | Space Combat: Jabiim Escort | 12 | 1 | None | 0+ | Grade 1 Ship Armor, Complimentary Major XP Boost |
| Space Combat: Saleucami Fleet Action | 12 | 1 | None | 0+ | |
| Space Combat: Cartel Listening Station | 12 | 1 | None | 0+ | |
| Space Combat: Sarapin Assault | 20 | 1 | None | 1+ | |
| Space Combat: Nez Peron Sweep | 20 | 1 | None | 1+ | Grade 2 Beam Charger |
| Space Combat: Taspan Ambush | 28 | 3 | None | 1+ | |
| Space Combat: Ezran Outpost | 28 | 3 | None | 1+ | |
| Space Combat: Mugaar Ice Field | 34 | 3 | None | 3+ | |
| Space Combat: Skaross Fortification | 34 | 3 | None | 3+ | Grade 4 Beam Charger |
| Space Combat: Sullust Interception | 40 | 3 | None | 3+ | |
| Space Combat: Polith Minefield | 40 | 3 | None | 3+ | |
| Space Combat: Clouds of Vondoru | 44 | 5 | None | 5+ | Complimentary Major XP Boost |
| Space Combat: Aeten Defense | 44 | 5 | None | 5+ | Rendili Hyperworks Beam Generator (Grade 6) |
| Space Combat: Ascendancy Barrier | 48 | 5 | None | 5+ | |
| Space Combat: Cha Raaba Assault | 50 | 20 | Blue | 7 | |
| Space Combat: Duma Strike | 50 | 20 | Blue | 7 | |
| Space Combat: Far Cradle Strike | 50 | 20 | Blue | 7 | |
| Space Combat: Kabal Station Defense | 50 | 20 | Blue | 7 | |
| Space Combat: Kanz Minefield | 50 | 20 | Blue | 7 | |
| Space Combat: Lorta Escort | 50 | 20 | Blue | 7 |
Republic Daily Space Missions
| Icons | Weekly Mission | Level | Missions | Comms | Reputation |
|---|---|---|---|---|---|
 | Operation Midnight Freedom | 20 | Fondor Escort | 5 | Green |
| Operation Searing Light | 24 | Balosar Outpost, Javaal Fleet Action | 7 | Green |
| Operation Noble Gambit | 27 | Archenar Interception, Makem Te Assault | 8 | Green |
| Operation Ardent Wave | 32 | Syvris Evacuation, Llanic Station Strike | 11 | Green |
| Operation Glory Cyclone | 36 | Pakuuni Defense, Kovor Ice Field | 14 | Green |
| Operation Sunder Zero | 40 | Hydian Way Blockade, Drexel Sweep | 15 | Green |
| Operation Grand Nova | 44 | Kalee Fortification, Zosha Advance | 20 | Green |
| Operation New Eclipse | 48 | Impossible Sector | 20 | Green |
| Operation Regnant Station Assault (Tuesday) | 50 | Regnant Station Assault | 40 | Blue |
| Operation Ardis Outpost Fortification (Wednesday) | 50 | Ardis Outpost Fortification | 40 | Blue |
| Operation New Cov Ice Field (Thursday) | 50 | New Cov Ice Field | 40 | Blue |
| Operation Baros Ambush (Friday) | 50 | Baros Ambush | 40 | Blue |
| Operation Hypori Escort (Saturday) | 50 | Hypori Escort | 40 | Blue |
| Operation Thanium Disruption (Sunday) | 50 | Thanium Disruption | 40 | Blue |
| Operation Clean Sweep (Sunday) | 50 | Thanium Disruption, Baros Ambush | 80 | Purple & Blue |
Imperial Daily Space Missions
| Icon | Daily | Level | Missions | Comms | Reputation |
|---|---|---|---|---|---|
 | Operation Silent Roar | 20 | Jabiim Escort | 5 | v |
| Operation Echo Quake | 24 | Saleucami Fleet Action, Cartel Listening Station | 7 | Green |
| Operation Eternal Domain | 27 | Nez Peron Sweep, Sarapin Assault | 8 | Green |
| Operation Molten Splinter | 32 | Taspan Ambush, Ezran Outpost | 11 | Green |
| Operation Rising Fury | 36 | Skaross Fortification, Mugaar Ice Field | 14 | Green |
| Operation Sweeping Menace | 40 | Polith Minefield, Sullust Interception | 15 | Green |
| Operation Raging Dawn | 44 | Aeten Defense, Clouds of Vondoru | 20 | Green |
| Operation Ascendant Pride | 48 | Ascendancy Barrier | 20 | Green |
| Operation Far Cradle Strike (Tuesday) | 50 | Far Cradle Strike | 40 | Blue |
| Operation Kabal Station Defense (Wednesday) | 50 | Kabal Station Defense | 40 | Blue |
| Operation Kanz Minefield (Thursday) | 50 | Kanz Minefield | 40 | Blue |
| Operation Duma Strike (Friday) | 50 | Duma Strike | 40 | Blue |
| Operation Lorta Escort (Saturday) | 50 | Lorta Escort | 40 | Blue |
| Operation Cha Raaba Assault (Sunday) | 50 | Cha Raaba Assault | 40 | Blue |
| Operation Foe Smasher (Sunday) | 50 | Cha Raaba Assault, Duma Strike | 80 | Purple & Blue |
Republic Missions
Fondor Escort

Character Level: 12
Recommended Ship Upgrades: 0+
Objectives
- Escort the Shuttle to Safety
Bonus Missions
- Defend the Shuttle from Fighters (Bonus): Destroy the Mark VI Interceptors 0/25
- Disable the Enemy Fleet (Bonus): Destroy the Frigate Turrets 0/20
This is the first mission, and you will receive the one-time mission for it the first time you do the cutscene from the space missions terminal on your ship.
There is an achievement for completing all of the bonuses for this mission and for completing the mission itself.
Escort the Shuttle to Safety
To defend your shuttle, who is marked with a green circle, take down any fighters or turrets shooting at it.

Defend the Shuttle from Fighters (Bonus)
Shoot twenty-five of the fighters down.

Disable the Enemy Fleet (Bonus)
Shoot twenty of the red-circle turrets on the medium-sized frigate ships not the turrets on the giant ships.
Becomes available when you shoot your first turret – only appears if your character is level 28 or higher

Knock Out the Enemy Command (Bonus)
There may be a bonus objective called… Knock Out the Enemy Command (Bonus): Take Out the Enemy Command Center: 0/1
However it is almost impossible to take out the ship in the Republic version, and there is no achievement for it in the achievements list. There is an achievement for the Imperial version in Jabiim Escort.
I'm doing the old-school SWTOR Space missions. I heard on the first Republic one, Fondor Escort, there's a hidden bonus objective called "Knock Out the Enemy Command" where you take down the big ship with a Proton Torpedo. I don't see it in achievements. Is it still possible?
byu/swtorista inswtor
Javaal Fleet Action

Character Level: 12
Recommended Ship Upgrades: 0+
Objectives
- Bring Down the X-70B Phantom
- Shoot Down Mark VII interceptors 0/5
Bonus Missions
- Neutralize the Enemy Fleet (Bonus) 0/50: Take out the Interceptors and the Turrets
- Expose Enemy Frigates (Bonus) 0/8: Take out the Shield Generators
- Take Down the Enemy Command Center (Bonus): Destroy the large ship
There is an achievement for completing all of the bonuses for this mission and for completing the mission itself.
Bring Down the X-70B Phantom
The Phantom is a large ship with a gold border that shows up in a pack of ships. It will take quite a few missiles to take down.

Shoot Down Mark VII interceptors
Only about 7 of the special gold circle interceptors show up during the fight, so make sure to shoot them down quickly. You don’t need missiles for them especially the pairs of two you can just shoot down.

Neutralize the Enemy Fleet (Bonus)
Take out the Interceptors and the Turrets
Becomes visible as a bonus the first ship or turret you take down.

The turrets are the red circles on the medium sized frigate ships.

Expose Enemy Frigates (Bonus)
The shield generators are located on the top of the medium-sized ships, in the back, and have an orange circle around them, you need to destroy eight shield generators, you will need to use missiles for this. The frigate ships will circle back around if you miss them the first time. The shield generators are also near the orange-circle engines which are on the back of the ship, and there’s a larger turret with an orange circle in the front of the ship, neither of those are considered shield generators. Becomes visible the first shield generator you take down.

Take Down the Enemy Command Center (Bonus)
The enemy command center shows up on the large Imperial dreadnaught ship that appears near the end of the space battle. The command center is located on the top of the ship in the very back and requires a proton torpedo to destroy. You have a lot of time to lock on to it so there’s no rush.

Balosar Outpost

Character Level: 12
Recommended Ship Upgrades: 0+
Objectives
- Destroy the Station’s Turrets 0/12: (Missiles Useful)
- Destroy the Station’s Shield Generator’s 0/2: (Missiles Useful)
- Destroy the Station’s Hangars 0/3: (Missiles Useful)
- Destroy the Station’s Antennae 0/3: (Missiles Useful)
Bonus Missions
- Neutralize Imperial Interceptors (Bonus): Shoot Down Mark VI Interceptors 0/60
- Clear the Defense Grid (Bonus):
- Neutralize the Defense Satellites 0/4
- Blast the Frigate Turrets 0/20
- Take Out the Communication Array (Bonus): Destroy the communication array on the bottom of the station
There is an achievement for completing all of the bonuses for this mission and for completing the mission itself.
Destroy the Station’s Turrets
The turrets are the gold bordered targets around the ring of the station. You don’t need missiles. You don’t need to hit them all, just twelve of them.

Destroy the Station’s Shield Generator’s
The shield generators are in the center of the station. Sometimes they are awkward to hit, so make sure your cursor is red before shooting or firing a missile. You don’t need missiles. You only need to get two of four.

Destroy the Station’s Hangars
The hangars are the four entrances to the station on the corners. You don’t need missiles. There’s two turrets beside each one and they are easy to mix up. You only need to get three of four.

Destroy the Station’s Antennae
The antennae are on the top of the station. You don’t need missiles. You only need to get three of four.

Neutralize Imperial Interceptors (Bonus)
Appears when you shoot your first small ship.

Clear the Defense Grid (Bonus)
Fun bonus. The turrets are the red circles on the medium sized frigate ships, and the sattelites are hidden around the map. There are only four satellites, so it’s important to shooot them when you see them. You don’t need missiles for either of these.


Take Out the Communication Array
This hidden bonus to take out the communication array is located under the station. You must use a proton torpedo to destroy it if you have proton torpedos equipped, but if you don’t have proton torpedos yet, you can use normal missiles to take it down. You’ll make a total of three passes by it, so you have three chances to hit it with missiles. You’ll only get this objective once per day, so if you replay this mission on the same day, you can still shoot down the communications array but you won’t get any credit for it and no bonus objective will pop up.

Makem Te Assault

Character Level: 20
Recommended Ship Upgrades: 1+ (you can do it without upgrades)
Objectives
- Neutralize the Capital Ship’s Shield Generators 0/4
- Take Out the Capital Ship’s Turrets 0/14
Bonus Missions
- Clear the Support Ships (Bonus): Destroy Interceptors and the Frigate Turrets 0/75
- Disable the Support Fleet (Bonus):
- Destroy the Frigate Engines 0/6
- Destroy the Frigate Shield Generators 0/5
- Disable the Command Ship (Bonus): Destroy the large ship
There is an achievement for completing all of the bonuses for this mission and for completing the mission itself.
Neutralize the Capital Ship’s Shield Generators
The shield generators are four gold-bordered targets on the top of the large capital ship, near the back. You don’t need to use missiles but they are helpful.

Take Out the Capital Ship’s Turrets
The capital ship’s turrets are in clusters on the top and the bottom of the large capital ship. You don’t need to use missiles but they are helpful.

Clear the Support Ships (Bonus)
Destroy Interceptors and the Frigate Turrets 0/75 (appears after you shoot your first small ship or turret)

Turrets

Disable the Support Fleet (Bonus):
Destroy six Frigate Engines and six Destroy five Frigate Shield Generators
Shield generators have orange circles and are on the top back of the frigate ship, they require missiles because they are shielded

Engines are on the back of the frigate ships, they’re the big blue circles with blue flames coming out of them, they have an orange circle around them but it’s often hard to see

Disable the Command Ship (Bonus)
The hidden bonus is to disable the command ship. The target is an orange circle in the very back of the large ship, on the top center of the ship. You must use a single proton torpedo to destroy it if you have proton torpedos equipped, but if you don’t have proton torpedos yet, you can use normal missiles to take it down. You’ll make a ton passes by it, so you have plenty of chances to hit it with missiles. You’ll only get this objective once per day, so if you replay this mission on the same day, you can still shoot down the command ship but you won’t get any credit for it and no bonus objective will pop up.

Archenar Interception

Character Level: 20
Recommended Ship Upgrades: 1+ (you can do it without upgrades)
Objectives
- Neutralize Mark VI Interceptors 0/60
Bonus Missions
- Disable Imperial Destroyer (Bonus): Take Out the Turrets 0/12
- Wipe Out Imperial Forces (Bonus): Shoot Down Mark VI Interceptors 0/40
- Knock Out the Enemy Command Center (Bonus): Use a proton torpedo on the large ship
There is an achievement for completing all of the bonuses for this mission and for completing the mission itself.
Neutralize Mark VI Interceptors
Shoot down the small ships without crashing in to asteroids.

The firsts few are marked with yellow bordered circles to make it clear they’re the objective, but the rest do not have a circle to mark them even though they are still the main objective.

Wipe Out Imperial Forces
After you shoot down 60 small ships for the main objective, a bonus will show up to shoot down 40 more of the same type of ship.
Disable Imperial Destroyer (Bonus)
The turrets for the bonus are the red circles on the top and bottom of the large ship.

Knock Out the Enemy Command Center
The hidden bonus is to knock out the enemy command center. The target is an orange circle in the very back of the large ship, on the top center of the ship. You must use a single proton torpedo to destroy it if you have proton torpedos equipped, but if you don’t have proton torpedos yet, you can use normal missiles to take it down. You’ll make at least two passes past it, so you have multiple chances to hit it with missiles. You’ll only get this objective once per day, so if you replay this mission on the same day, you can still shoot down the command ship but you won’t get any credit for it and no bonus objective will pop up.

Llanic Station Strike

Character Level: 28
Recommended Ship Upgrades: 1+ (you can do it without upgrades)
Objectives
- Destroy the Station’s Turrets 0/12: (Missiles Useful)
- Destroy the Station’s Shield Generator’s 0/2: (Missiles Useful)
- Destroy the Station’s Hangars 0/4: (Missiles Useful)
- Destroy the Station’s Antennae 0/4: (Missiles Useful)
Bonus Missions
- Neutralize Imperial Interceptors (Bonus): Shoot Down Mark VI Interceptors 0/60
- Clear the Defense Grid (Bonus):
- Neutralize the Defense Satellites 0/4
- Blast the Frigate Turrets 0/20
- Take Out the Communication Array (Bonus): Destroy the communication array on the bottom of the station
There is an achievement for completing all of the bonuses for this mission and for completing the mission itself.
Destroy the Station’s Turrets
The turrets are the gold bordered targets around the ring of the station. You don’t need missiles. You don’t need to hit them all, just twelve of them.
Destroy the Station’s Shield Generator’s
The shield generators are in the center of the station. Sometimes they are awkward to hit, so make sure your cursor is red before shooting or firing a missile. You don’t need missiles. You only need to get two of four of these.
Destroy the Station’s Hangars
The hangars are the four entrances to the station on the corners. You don’t need missiles. There’s two turrets beside each one and they are easy to mix up. You need to get all four.
Destroy the Station’s Antennae
The antennae are on the top of the station. You don’t need missiles. You need to get all four.
Neutralize Imperial Interceptors (Bonus)
Appears when you shoot your first small ship.
Clear the Defense Grid (Bonus)
Fun bonus. The turrets are the red circles on the medium sized frigate ships, and the sattelites are hidden around the map. There are only four satellites, so it’s important to shooot them when you see them. You don’t need missiles for either of these.
Take Out the Communication Array
This hidden bonus to take out the communication array is located under the station. You must use a proton torpedo to destroy it if you have proton torpedos equipped, but if you don’t have proton torpedos yet, you can use normal missiles to take it down. You’ll make a total of three passes by it, so you have three chances to hit it with missiles. You’ll only get this objective once per day, so if you replay this mission on the same day, you can still shoot down the communications array but you won’t get any credit for it and no bonus objective will pop up.
Syvris Evacuation

Character Level: 28
Recommended Ship Upgrades: 1+
Objectives
- Escort the Defector Shuttle to Safety
Bonus Missions
- Neutralize the Capital Ships (Bonus): Destroy the Turrets 0/40
- Defend the Shuttle (Bonus): Take Out the Mark VI Interceptors 0/40
- Disable the Command Ship (Bonus): Destroy the large ship at the beginning
There is an achievement for completing all of the bonuses for this mission and for completing the mission itself.
Escort the Defector Shuttle to Safety
Shoot down anything trying to hurt your green circle shuttle.

Defend the Shuttle (Bonus)
Shoot down the small ships. Appears when you take out your first small ship.

Neutralize the Capital Ships (Bonus)
The turrets for the bonus are the red circles on the top and bottom of the large ship.
Appears when you shoot your first turret.

Disable the Command Ship
The hidden bonus is to disable the command ship. The target is an orange circle in the very back of the large ship, on the top center of the ship. You must use a single proton torpedo to destroy it. The ship does not reappear later in the mission so make sure to use your torpedo early when you see it near the beginning of the mission. Unlike the other hidden command ship hidden bonuses, you won’t be able to take this one out with missiles if you do not have a proton torpedo, as you do not get a second pass to hit it with enough missiles to destroy it. You’ll only get this objective once per day, so if you replay this mission on the same day, you can still shoot down the command ship but you won’t get any credit for it and no bonus objective will pop up.

Kovor Ice Field

Character Level: 34
Recommended Ship Upgrades: 3+
Objectives
- Defeat a Fury-class Imperial Interceptor
- Shoot Down Ace Mark VI Interceptors 0/7
Bonus Missions
- Neutralize the Enemy Fleet (Bonus): Blow Up the Interceptors and the Turrets 0/65
- Expose Capital Frigates (Bonus): Destroy the Shield Generators 0/10
- Take Down the Enemy Command Center (Bonus): Destroy the large ship
There is an achievement for completing all of the bonuses for this mission and for completing the mission itself.
Defeat a Fury-class Imperial Interceptor
This strong ship will appear partway through the mission in a pack of enemies. Use missiles to take it down.

Shoot Down Ace Mark VI Interceptors
Only eight of the gold circle ships show up during the fight, and you need to take down a total of seven, so prioritize them when you see them.

Neutralize the Enemy Fleet (Bonus)
Appears after you blow up your first small ship or turret.

The turrets are the red circles on the medium sized frigate ships.
Expose Capital Frigates (Bonus)
Destroy ten Shield Generators on the medium sized frigates, which are the orange circles on the top of the back of the ship, they require missiles.

Take Down the Enemy Command Center
The hidden bonus is to take down the enemy command center. The target is an orange circle in the very back of the large ship, on the top center of the ship. You must use a single proton torpedo to destroy it. The ship does not reappear later in the mission so make sure to use your torpedo early when you see it near the beginning of the mission. Unlike the other hidden command ship hidden bonuses, you won’t be able to take this one out with missiles if you do not have a proton torpedo, as you do not get a second pass to hit it with enough missiles to destroy it. You’ll only get this objective once per day, so if you replay this mission on the same day, you can still shoot down the command ship but you won’t get any credit for it and no bonus objective will pop up.

Pakuuni Defense

Character Level: 34
Recommended Ship Upgrades: 3+
Objectives
- Shoot Down Extinction Bombers 0/50
Bonus Missions
- Clear the Imperial Escort (Bonus): Take Down Mark VII Interceptors 0/30
- Disable the Frigate Shields (Bonus): Incapacitate the Shield Generators 0/4
- Destroy the Enemy Command (Bonus): Destroy the large ship near the end
There is an achievement for completing all of the bonuses for this mission and for completing the mission itself.
Shoot Down Extinction Bombers
Marked with a yellow border and appears in packs.

Clear the Imperial Escort (Bonus)
Shoot down normal ships for the bonus. Appears after you shoot your first small ship.

Disable the Frigate Shields (Bonus)
The shield generators are the orange circles on the top of the medium sized frigate ships in the back, you need missiles. Appears after you destroy your first shield generator.

Destroy the Enemy Command (Bonus)
The hidden bonus is to take down the enemy command center. The target is an orange circle in the very back of the large ship, on the top center of the ship. You must use a single proton torpedo to destroy it. The ship only appears at the very end of the mission, so when you are facing it, make sure to use your Proton Torpedo. If you do not have Proton Torpedoes yet you will not be able to complete this bonus as the mission does not give you enough time to hit the command center with missiles. You’ll only get this objective once per day, so if you replay this mission on the same day, you can still shoot down the command ship but you won’t get any credit for it and no bonus objective will pop up.

Drexel Sweep

Character Level: 40
Recommended Ship Upgrades: 3+
Objectives
- Neutralize Ace Mark VII Interceptors 0/60: (Missiles Useful)
Bonus Missions
- Disable the Imperial Destroyer (Bonus): Take Out the Turrets 0/12
- Knock out the Enemy Command Center (Bonus): Destroy the large ship
There is an achievement for completing all of the bonuses for this mission and for completing the mission itself.
Neutralize Ace Mark VII Interceptors
Destroy the small ships and don’t crash in to asteroids.

The first few are marked with a yellow border to point out that the are the quest objective, but the rest do not have a yellow border after that.

There’s no bonus to take out additional interceptors.
Disable the Imperial Destroyer (Bonus)
The turrets for the bonus are the red circles on the top and bottom of the large ship. These are fun to use an EMP on.

Knock out the Enemy Command Center (Bonus)
The hidden bonus is to take down the enemy command center. The target is an orange circle in the very back of the large ship, on the top center of the ship. You must use a single proton torpedo to destroy it. The ship only appears twice during the mission, so when you are facing it, make sure to use your Proton Torpedo. If you do not have Proton Torpedoes yet, you can use normal missiles to destroy the command center if you have strong enough missiles, just make sure to focus on it both times you pass it. You’ll only get this objective once per day, so if you replay this mission on the same day, you can still shoot down the command ship but you won’t get any credit for it and no bonus objective will pop up.

Hydian Way Blockade

Character Level: 40
Recommended Ship Upgrades: 3+
Objectives
- Disable a Bay on the Minelayer
- Blast the Minelayer’s Engines 0/2
- Punch through the Mines 0/150
Bonus Missions
- Disable Fighter Tenders (Bonus): Destroy Fighter Tender Engines 0/4
- Neutralize Heavy Fighters (Bonus): Shoot Down Plug-6 Heavy Fighters 0/4
There is an achievement for completing all of the bonuses for this mission and for completing the mission itself.
Disable a Bay on the Minelayer
The bays are on the top of the minelayer, which is only available at the very end of the minefield route. There’s two of them, you only need to destroy one. Use missiles.

Blast the Minelayer’s Engines
The engines on the minelayer are on the back of the minelayer, only available at the very end of the minefield route. you need to destroy both. Use missiles.

Punch through the Mines
Destroy 150 mines in the minefields, if you have an EMP it’s a lot of fun to use in the middle of a minefield.

Disable Fighter Tenders (Bonus)
The engines for the fighter tenders bonus are the larger ships, each one has three engines on the back you can target, missiles are suggested. Don’t confuse these ships for the minelayer which is the main objective, these are just tenders. Appears when you destroy your first engine.

Neutralize Heavy Fighters (Bonus)
The heavy fighter, the Plug-6 ships, appear throughout the fight. At one point two appear at the same time so make sure to get them both. You need to shoot down four for the bonus. The later ones you need to shoot down only appear once you get close to the large minelayer ship.

Zosha Advance

Character Level: 44
Recommended Ship Upgrades: 5+
Objectives
- Neutralize the Capital Ship’s Shield Generators 0/4
- Take Out the Capital Ship’s Turrets 0/20
Bonus Missions
- Clear the Support Ships (Bonus): Destroy Ace Mark VI Interceptors and the Frigate Turrets 0/75
- Disable the Command Ship (Bonus): Use a proton torpedo on the large ship
There is an achievement for completing all of the bonuses for this mission and for completing the mission itself.
Neutralize the Capital Ship’s Shield Generators
The four shield generators are on the top back of the large ship. The quest says to use torpedoes but you do not need torpedoes.
Take Out the Capital Ship’s Turrets
The capital ship’s turrets are in clusters on the top and the bottom of the large capital ship. You don’t need to use missiles but they are helpful.
Clear the Support Ships (Bonus)
Destroy small ships and turrets

The turrets are the red circles on the medium sized ships
Disable the Command Ship (Bonus)
The hidden bonus is to disable the command ship. The target is an orange circle in the very back of the large ship, on the top center of the ship. You must use a single proton torpedo to destroy it if you have proton torpedos equipped, but if you don’t have proton torpedos yet, you can use normal missiles to take it down. You’ll make a ton passes by it, so you have plenty of chances to hit it with missiles. You’ll only get this objective once per day, so if you replay this mission on the same day, you can still shoot down the command ship but you won’t get any credit for it and no bonus objective will pop up.
Kalee Fortification

Character Level: 44
Recommended Ship Upgrades: 5+
Objectives
- Shoot Down Ace Extinction Bombers 0/50
Bonus Missions
- Clear the Imperial Escort (Bonus): Take Down Ace Mark VII Interceptors 0/30
- Disable the Frigate Shields (Bonus): Destroy the Shield Generators 0/4
There is an achievement for completing all of the bonuses for this mission and for completing the mission itself.
Shoot Down Ace Extinction Bombers
The Extinction Bombers show up in packs and have a gold circle.

Clear the Imperial Escort (Bonus)
Take down 30 small ships.

Disable the Frigate Shields (Bonus)
The frigate shields for the bonus are the orange circles on the top of the medium sized ships. Most of the frigates in this mission are quite far away so make sure to shoot them when you see them instead of waiting to get closer.

The Impossible Sector

Character Level: 48
Recommended Ship Upgrades: 5+
Objectives
- Disable a Bay on the Minelayer
- Destroy the Minelayer’s Engines 0/2
- Destroy the Mines 0/150
Bonus Missions
- Disable Fighter Tenders (Bonus): Destroy Fighter Tender Engines 0/4
- Neutralize Heavy Fighters (Bonus): Shoot Down Plug-6 Heavy Fighters 0/4
Disable a Bay on the Minelayer
The bays are on the top of the minelayer, which is only available at the very end of the minefield route. There’s two of them, you only need to destroy one. Use missiles.
Destroy the Minelayer’s Engines
The engines on the minelayer are on the back of the minelayer, only available at the very end of the minefield route. you need to destroy both. Use missiles.
Destroy the Mines
Destroy 150 mines in the minefields, if you have an EMP it’s a lot of fun to use in the middle of a minefield.
Disable Fighter Tenders (Bonus)
The engines for the fighter tenders bonus are the larger ships, each one has three engines on the back you can target, missiles are suggested. Don’t confuse these ships for the minelayer which is the main objective, these are just tenders. Appears when you destroy your first engine.
Neutralize Heavy Fighters (Bonus)
The heavy fighter, the Plug-6 ships, appear throughout the fight. At one point two appear at the same time so make sure to get them both. You need to shoot down four for the bonus. The last plug fighters show up near the end of the mission near the large minelayer ship.
Thanium Disruption

Character Level: 50
Recommended Ship Upgrades: 7
Objectives
- Take Out the Shuttle
- Eliminate the Mandalorian Commander
- Destroy the Imperial Frigate
Bonus Missions
- No Pilot Stands a Chance (Bonus): Destroy Mercenary Ships 0/4
Thanium Disruption is one of the six extremely difficult heroic solo on-rails space missions in Star Wars: The Old Republic. To run this mission, you’ll want to be level 50 or higher, and have fully upgraded your ship with Grade 7 upgrades and Proton Torpedoes. If you can’t afford the Grade 7 equipment, you can complete these with Grade 6 equipment, but it is quite hard. Take a look at the equipment section of this guide if you haven’t geared up yet. You’ll want to have completed the easier space missions before you run this one, and can pick it up from the space missions quest terminal on your ship. In this mission, you’ll need to destroy two strong ships with a gold border around them and a frigate, while navigating a minefield and an asteroid field. They key to the mission is maximizing your time on the two ships with gold circles around them, and making good use of your Warfare pod that makes you untargettable and your EMP to take out the mines and frigate turrets. I found this mission to be the most frustrating of the six heroic space missions.
The mission starts of with a ton of asteroids to avoid. You’ll likely crash in to these a few times as you learn the route. There will also be two strong mercenary ships. Your goal is to destroy them while not crashing, and no losing any of your ship health. Switch your power to blasters with the 1 key, and shoot and missile those ships whenever they peek out behind the asteroids. As soon as they’re done, switch power to shields, and make your way around the asteroids until you reach the minefield.
At the first minefield patch, there are less mines than the second section, so instead of using our EMP and Warfare pod here, we’ll instead keep our shields up and avoid as much damage as possible by not shooting, pressing spacebar to do a barrel roll, and move our ship in a whirlpool circle around the screen to avoid as many shots as we can from the first set of mines. There’s going to be a Miner Tender in here, you can ignore it. You don’t need to shoot the mines.
After the first patch of mines, you’ll see the thicker second patch that has a large yellow target in it, that’s the Frigate for the mission objective. As you make your way towards the second patch, trail your mouse over the smaller gold circle, that’s the shuttle When your curror turns red, fire off all your missiles on the shuttle.
Once you reach the second patch of mines, as soon as the mines start shooting at you, activate your Electronic Warfare Pod with your 3 key to avoid all the shots form the mines. While heading towards the large gold circle frigate, target the top back of the frigate with your missiles, to take down the shield generators, as they can’t be hit with the EMP as they are shielded. They take about two missiles each and there’s two of them. If you have extra time, hit the other orange targets which are the engines on the back of the ship and the orange circle at the nose of the ship. The more of the orange circles you destroy earlier the easier it is later. Don’t worry about the red circle You can also shoot at the smaller gold circle ship that’s flying away, and should be focusing hard on it once you pass the frigate.
Once you get close to the Frigate with the gold circle, use your EMP with your 4 key, which will destroy a ton of the mines and the turrets on the Frigate.
After that, it’s mostly a matter of focusing on the two gold ships and not crashing your ship on the asteroids path. During this chase sequence, you’ll mostly want to be in shield mode shooting missiles. However, when possible and your shields are full, flip over your power to blasters to get some extra shots on your two gold ships, otherwise you might not have enough time to destroy them before the mission ends. You will absolutely need to do this if you’re trying to do the bonus, which is to destroy a total of four of the Mercenary ships. You can also use your 3 key to make yourself untargettable and switch your power to blasters for a while when it comes back up after you used it the first time. You’ll also want to target the frigate’s remaining circles when you see it, and make sure it gets fully destroyed before you run out of time, I usually just point my mouse towards it and fire off missile with right click, since it’s usually hard to see the circles it has left at that point. You can continue targeting the frigate even as it speeds away at the end.
There’s one asteroid that I always crash on, you’ll make a hard turn around the left side of asteroid, go under an asteroid, and then go over one, but you’ll often clip the top of that third asteroid in the path you’re going over. To avoid this, after going around the left of the first asteroid, go tightly under the second one with as little room between you and it as possible, and that will give you enough time to clear the top of the third asteroid if you pull up immediately after you clear the second asteroid. This asteroid is probably the hardest part of the entire mission.
There are no achievements for this mission, but there are some codex entries for the bonuses.
My friend Aravail made a video guide with his tips,

No Pilot Stands a Chance (Bonus)
Destroy Mercenary Ships 0/4, two at the beginning and two after the frigate
Hypori Escort

Character Level: 50
Recommended Ship Upgrades: 7
Objectives
- Protect the Gilded Meteor
- Destroy Enemy Sith Ships 0/3
- Destroy Bridge on the Destroyer
Bonus Missions
- Eliminate Enemy Frigates (Bonus): Destroy Imperial Frigates 0/4
- Annihilate the Enemy (Bonus): Destroy Imperial Fighters 0/70
Hypori Escort is one of the six extremely difficult heroic solo on-rails space missions in Star Wars: The Old Republic. To run this mission, you’ll want to be level 50 or higher, and have fully upgraded your ship with Grade 7 upgrades and Proton Torpedoes. If you can’t afford the Grade 7 equipment, you can complete these with Grade 6 equipment, but it is quite hard. Take a look at the equipment section of this guide if you haven’t geared up yet. You’ll want to have completed the easier space missions before you run this one, and can pick it up from the space missions quest terminal on your ship. This mission is quite easy compared to the other six heroic space missions. In this mission, you will need to destroy three enemy ships, and destroy the bridge of the large ship. As a bonus, you can take down four frigates, and shoot down 70 small fighter ships.
At the very beginning of the mission, there are three frigates cruising around, use your missiles on their shield generators and blast down as much of them as you can, especially if you want the bonus. At the very least least take out their turrets, the red circles, to protect your escort ship.
When you see the bridge of the large ship, make sure to fire your torpedo, it will take two torpedo hits in two separate runs.
When the Sith ships show up, focus on them, as they do a lot of damage.
If you want to do the bonus to shoot down 70 small fighters, you’ll need to start early, but a majority of the ships are located at the end, which is where you’ll probably want to make use of your warfare pod to protect yourself, or while you’re fighting the Sith ships.
You can use your EMP on the rush of fighters at the very end, or when you are over the large ship making your torpedo runs.
There are no achievements for this mission, but there are some codex entries for the bonuses.
Baros Ambush

Character Level: 50
Recommended Ship Upgrades: 7
Objectives
- Destroy Bridge on the Destroyer
- Destroy Corvette Class Ships 0/2
- Destroy Enemy Frigates 0/4
Bonus Missions
- Cripple Their Forces (Bonus): Destroy Imperial Bombers 0/12
- Annihilate The enemy (Bonus): Destroy Imperial Fighters 0/60
Baros Ambush is one of the six extremely difficult heroic solo on-rails space missions in Star Wars: The Old Republic. To run this mission, you’ll want to be level 50 or higher, and have fully upgraded your ship with Grade 7 upgrades and Proton Torpedoes. If you can’t afford the Grade 7 equipment, you can complete these with Grade 6 equipment, but it is quite hard. Take a look at the equipment section of this guide if you haven’t geared up yet. You’ll want to have completed the easier space missions before you run this one, and can pick it up from the space missions quest terminal on your ship. In this mission, you’ll need to destroy a bridge on a large ship, two corvettes with a lot of health, and four enemy frigates. As a bonus, you can destroy 12 of the bombers which are the stronger small ships often accompanying the corvettes, and destroy 60 normal small fighter ships.
You can use your EMP at the very beginning once all three ships become visible, then you just need to take down the orange circles on those frigates, using missiles for the shield generators. You can fairly easily destroy three of the four frigates in the beginning of the fight, which will leave you available to chase down the first corvette with blasters and missiles once it appears. For the frigate objective, to destroy a frigate, you need to destroy every target on it including the shields, engines and all turrets.
A good time to use your warfare pod is when you see a large pack of bombers with the second corvette. That way you can switch power to blasters and shoot them down.
You can hit the bridge with a torpedo fairly early in the fight, the second time you see it, it’s in the distance. Make sure to hit it a total of two times with torpedos, I usually hit it at the end in the final run past it.
You can use your EMP again near the end of the fight, one place you could use it is in the two frigates at the end, to get your final frigate if you already shot the three frigates at the beginning. There’s a frigate on the left and a frigate on the right, it’s easier to ignore the left one and fovus on the right one as you loop back around right behind it.
If you are trying to do the 60 fighters bonus, you will need to be very diligent with shooting down the small ships.
There are no achievements for this mission, but there are some codex entries for the bonuses.
New Cov Ice Field

Character Level: 50
Recommended Ship Upgrades: 7
Objectives
- Destroy Defense Clusters 0/4
Destroy Minelayer
Destroy the Satellite Hardpoint
Bonus Missions
- No Pilot stands a Chance (Bonus): Destroy Sith Ships 0/1
- Annihilate The enemy (Bonus): Destroy Imperial Fighters 0/80
- Eliminate Enemy Frigates (Bonus): Destroy Imperial Frigates 0/2
New Cov Ice Field is one of the six extremely difficult heroic solo on-rails space missions in Star Wars: The Old Republic. To run this mission, you’ll want to be level 50 or higher, and have fully upgraded your ship with Grade 7 upgrades and Proton Torpedoes. If you can’t afford the Grade 7 equipment, you can complete these with Grade 6 equipment, but it is quite hard. Take a look at the equipment section of this guide if you haven’t geared up yet. You’ll want to have completed the easier space missions before you run this one, and can pick it up from the space missions quest terminal on your ship. In this mission, you’ll need to destroy shielded clusters, destroy a protected satellite, and blow up a minelayer ship. This mission is all about timing and hitting your main targets whenever you see them available.
The clusters are groups of seven targets with gold circles around them, they look like a bunch of floating mines with a cannisters in the center. These targets can only be hurt by missiles as they are shielded. If you are using the Kuat Drive Yards Missile Magazine, Grade 6, you will need to carefully focus on the clusters, as you’ll need to hit each gold bordered target with two missiles, and you only have time to shoot about five each time you pass a cluster. As you fly, even when you are not facing a cluster, keep your eyes open on the corners of the screen to see if a cluster comes within range, even if it’s only briefly, to get another missile off, and you’ll have 150 missiles total. If you’re using the Concussion Missile Magazine, Grade 7, the mission is very different, and you’ll instead focus on hitting each of the cluster mines with one missile and the cannister in the center with two missiles. Don’t waste missiles or you’ll find yourself short, so save them for the clusters, the shield generators on the frigates for the bonus, the Sith ship, and the satellite. For all other targets, including the satellite shield generators, small ships, and all other frigate targets, use your blasters instead.
For the satellite, it’s protected by shield generators. You’ll need to shoot down the shield generators before you can hurt the satellite. You can use your EMP on the shield generators as well, or you can save it to use on the satellite itself once it is unprotected. You only get a limited amount of time on the satellite, so apart from the clusters, the satellite should be your second priority target even when you’re chasing down the Sith ship.
The minelayer is actually the easiest part of this entire mission and you can actually destroy it with your blasters in a single run if you focus your fire, and if you don’t destroy it the first time you see it you’ll easily blow it up the second time you see it.
Don’t forget to make use of your Electronic Warfare Pod, I used mine most when chasing down the Sith ship as it does a lot of damage, and you can shift power to your blasters and take out a big chunk of its health while your warfare pod is protecting you. The Sith ship is the strong ship that appears halfway through and you chase it around ice asteroids, it’s shaped like the Imperial Sith class ship.
If you want to do the frigate bonus, you need to completely destroy two frigates and all of their targets, including their shields, engines, and all turrets.
There are no achievements for this mission, but there are some codex entries for the bonuses.
Ardis Outpost Fortification

Character Level: 50
Recommended Ship Upgrades: 7
Objectives
- Destroy Bombers 0/30
- Destroy an Enemy Command Bridge
- Take Out Imperial Frigates 0/3
Bonus Missions
- No Pilot Stands A Chance (Bonus): Destroy Sith Ships 0/3
- Annihilate the Enemy (Bonus): Destroy Imperial Fighters 0/50
Ardis Outpost is one of the six extremely difficult heroic solo on-rails space missions in Star Wars: The Old Republic. To run this mission, you’ll want to be level 50 or higher, and have fully upgraded your ship with Grade 7 upgrades and Proton Torpedoes. If you can’t afford the Grade 7 equipment, you can complete these with Grade 6 equipment, but it is quite hard. Take a look at the equipment section of this guide if you haven’t geared up yet. You’ll want to have completed the easier space missions before you run this one, and can pick it up from the space missions quest terminal on your ship. In this mission, you’ll need to destroy 30 of the powerful bombers with yellow circles, destroy the command bridge on a dreadnought, and take out three frigates. As a bonus, you can also destroy three of the strong Sith ships, and destroy 50 of the basic ships.
You’ll need almost all of your missiles for the gold circle bombers and for the shields on the back of the frigates, so whenever possible, use your blasters instead. This includes on the first and second set of gold circle bombers that show up, on frigate targets that aren’t shield generators, and on normal fighter ships.
You’ll be able to take out the Enemy Command Bridge very early in the fight with two Proton Torpedo hits. As soon as you get within range of the bridge, fire a Torpedo, then use your EMP if you want once you are close enough to the medium sized frigate, then fire your torpedo again, and that should destroy the bridge and get it out of the way. You’ll get quite a few chances to destroy the frigates, I suggest focusing on firing missiles at the shield generators on the top of the frigates, there’s two and each one takes two missiles. The rest of the targets can be taken out with blaster fire.
The hardest part of this mission is the Sith ship and the bombers. The Sith ship has a lot of health and hits very hard, and the bombers have a lot of health. The first two rounds of bombers you can take out with your blasters to save missiles. When the third round appears, there will be many bombers in multiple waves, and you will want to put your power to blasters and shoot as many as you can, and prepare to use your EMP. When the next wave gets close to you and you’re facing the space station, use your EMP to hurt a bunch of the bombers at once. Don’t rely on just your missiles and stay in shield mode, as if you do that it will take you nine missile per bomber and you’ll only be able to take down one or two per wave.
For the Sith Ships, you need to focus on putting your shields up, using your missiles, and shooting them with your power to blasters when they aren’t directly shooting at you. There are some gaps you can take advantage of where the Sith ship is shooting but not hitting you.
Don’t forget to mop up the last of any frigates when you aren’t shooting gold border bombers. You need to fully take down three frigates and all their targets, including their shields, engines and all their turrets.
There are no achievements for this mission, but there are some codex entries for the bonuses.
Regnant Station Assault

Character Level: 50
Recommended Ship Upgrades: 7
Objectives
- Destroy Imperial Command Bridge
Destroy Communications Array
Destroy Defense Satellites 0/8
Bonus Missions
- No Pilot Stands a Chance (Bonus): Destroy the Sith Ship
- Eliminate Enemy Frigates (Bonus): Destroy Imperial Frigates 0/4
- Annihilate the Enemy (Bonus): Destroy Imperial Fighters 0/40
Regnant Station Assault is one of the six extremely difficult heroic solo on-rails space missions in Star Wars: The Old Republic. To run this mission, you’ll want to be level 50 or higher, and have fully upgraded your ship with Grade 7 upgrades and Proton Torpedoes. If you can’t afford the Grade 7 equipment, you can complete these with Grade 6 equipment, but it is quite hard. Take a look at the equipment section of this guide if you haven’t geared up yet. You’ll want to have completed the easier space missions before you run this one, and can pick it up from the space missions quest terminal on your ship. In this mission, you’ll need to destroy a command bridge, a communications array on the bottom of the space station, and blow up eight satellites. For the bonus, you can destroy the Sith ship when it appears, completely destroy four medium sized frigates, and shoot down 40 normal fighter ships. This is my favorite heroic space mission and I believe it is the second easiest of the six.
This mission has a lot of objectives. As you fly, you’ll be keeping your eyes open for satellites to shoot at, while avoiding crashing in to the shipping containers.
When you see the communications array come in to view under the space station, lock a torpedo on to it. It will take two torpedos, and you’ll come back around a second time. The second time the communications array is hard to target, so wait until your cursor turns red before trying to lock on. Taking down the enemy command bridge on the big ship is the same thing, just watch for the bridge to appear with a gold circle and shoot it with a torpedo twice in separate runs.
There’s an evil shipping crate that will try and murder you partway through. You’ll know this is about to happen when you’re flying over and above the space station, facing a bunch of shipping crates, there’s a frigate behind them, and the Sith ship shows up in the middle of the screen. Pull up hard after you pass the first shipping crate to avoid hitting the second evil shipping crate.
A fun time to use your EMP is while you are chasing the Sith ship for the first time after the evil shipping crate, you’ll turn towards the space station, and a ton of small fighters will rush you. You can use your warfare pod to avoid their fire and shoot them all down, and / or your EMP to wipe them all out. If you don’t manage the destroy the Sith Ship here for the bonus, it will reappear later and you can chase it around some shipping crates when there’s no other objectives nearby. If you want to do the frigates bonus, make sure to take full advantage of thefrigates at the beginning of the mission and then work on any other ones you see as you go, and save enough missiles to take down the frigate’s shield generators.
There are no achievements for this mission, but there are some codex entries for the bonuses.
Imperial Missions
Jabiim Escort

Character Level: 12
Recommended Ship Upgrades: 0+
Objectives
- Escort the Shuttle to Safety
Bonus Missions
- Defend the Shuttle from Fighters (Bonus): Destroy the Talon Fighters 0/25
- Cripple the Enemy Fleet (Bonus): Destroy the Frigate Turrets 0/20
This is the first mission, and you will receive the one-time mission for it the first time you do the cutscene from the space missions terminal on your ship.
There is an achievement for completing all of the bonuses for this mission and for completing the mission itself.
Escort the Shuttle to Safety
To defend your shuttle, who is marked with a green circle, take down any fighters or turrets shooting at it.
Defend the Shuttle from Fighters (Bonus)
Shoot twenty-five of the fighters down.

Disable the Enemy Fleet (Bonus)
Shoot twenty of the red-circle turrets on the medium-sized frigate ships not the turrets on the giant ships.
Becomes available when you shoot your first turret – only appears if your character is level 28 or higher

Annihilate the Enemy Command (Bonus)
This hidden bonus to annihilate the enemy command is located on the top center of the large republic ship. You must use a proton torpedo to destroy it if you have proton torpedos equipped, but if you don’t have proton torpedos yet, you can use normal missiles to take it down. You’ll make multiple passes by it, so you have multiple chances to hit it with missiles. You’ll only get this objective once per day, so if you replay this mission on the same day, you can still shoot down the large ship but you won’t get any credit for it and no bonus objective will pop up.

Saleucami Fleet Action

Character Level: 12
Recommended Ship Upgrades: 0+
Objectives
- Eliminate the BT-7 Thunderclap
- Destroy Red Talon Fighters 0/5
Bonus Missions
- Suppress the Enemy Fleet (Bonus) 0/50: Take out the Interceptors and the Turrets
- Expose Enemy Frigates (Bonus) 0/8: Destroy the Shield Generators
- Disable the Enemy Command Ship (Bonus): Destroy the large ship
There is an achievement for completing all of the bonuses for this mission and for completing the mission itself.
Eliminate the BT-7 Thunderclap
The Thunderclap is a large ship with a gold border that shows up in a pack of ships. It will take quite a few missiles to take down.

Destroy Red Talon Fighters
Only about 7 of the special gold circle fighters show up during the fight, so make sure to shoot them down quickly. You don’t need missiles for them especially the pairs of two you can just shoot down.

Suppress the Enemy Fleet (Bonus)
Take out the Fighters and the Turrets
Becomes visible as a bonus the first ship or turret you take down.

The turrets are the red circles on the medium sized frigate ships.

Expose Enemy Frigates (Bonus)
The shield generators are located inside the middle medium-sized ships, in the back, and have an orange circle around them, you need to destroy eight shield generators, you will need to use missiles. The frigate ships will circle back around if you miss them the first time. The shield generators are also near the orange-circle engines which are on the back of the ship, and some orange turrets, which makes them very difficult to hit. Becomes visible the first shield generator you take down.

Disable the Enemy Command Ship (Bonus)
The enemy command center shows up on the large Republic ship that appears near the end of the space battle. The command center is located on the top of the ship in the very back and requires a proton torpedo to destroy. You have a lot of time to lock on to it so there’s no rush.

Cartel Listening Station

Character Level: 12
Recommended Ship Upgrades: 0+
Objectives
- Destroy the Station’s Turrets 0/12: (Missiles Useful)
- Destroy the Station’s Shield Generator’s 0/2: (Missiles Useful)
- Destroy the Station’s Hangars 0/3: (Missiles Useful)
- Destroy the Station’s Antennae 0/3: (Missiles Useful)
Bonus Missions
- Eliminate Enemy Fighters (Bonus): Obliterate the Talon Fighters 0/60
- Eradicate Enemy Defenses (Bonus):
- Destroy the Defense Satellites 0/4
- Destroy the Frigate Turrets 0/20
- Cripple Republic Communications (Bonus): Destroy the communication array on the bottom of the station
There is an achievement for completing all of the bonuses for this mission and for completing the mission itself.
Destroy the Station’s Turrets
The turrets are the gold bordered targets around the ring of the station. You don’t need missiles. You don’t need to hit them all, just twelve of them.
Destroy the Station’s Shield Generator’s
The shield generators are in the center of the station. Sometimes they are awkward to hit, so make sure your cursor is red before shooting or firing a missile. You don’t need missiles. You only need to get two of four.
Destroy the Station’s Hangars
The hangars are the four entrances to the station on the corners. You don’t need missiles. There’s two turrets beside each one and they are easy to mix up. You only need to get three of four.
Destroy the Station’s Antennae
The antennae are on the top of the station. You don’t need missiles. You only need to get three of four.
Eliminate Enemy Fighters (Bonus)
Appears when you shoot your first small ship.

Eradicate Enemy Defenses (Bonus)
Fun bonus. The turrets are the red circles on the medium sized frigate ships, and the sattelites are hidden around the map. There are only four satellites, so it’s important to shoot them when you see them. You don’t need missiles for either of these.

Cripple Republic Communications (Bonus)
This hidden bonus to take out the communication array is located under the station. You must use a proton torpedo to destroy it if you have proton torpedos equipped, but if you don’t have proton torpedos yet, you can use normal missiles to take it down. You’ll make a total of three passes by it, so you have three chances to hit it with missiles. You’ll only get this objective once per day, so if you replay this mission on the same day, you can still shoot down the communications array but you won’t get any credit for it and no bonus objective will pop up.
Sarapin Assault

Character Level: 20
Recommended Ship Upgrades: 1+ (you can do it without upgrades)
Objectives
- Obliterate the Capital Ship’s Shield Generators 0/4
- Decimate the Capital Ship’s Turrets 0/14
Bonus Missions
- Vanquish the Enemy Fleet (Bonus): Destroy the Fighters and the Frigate Turrets 0/75
- Disable the Supporting Fleet (Bonus):
- Destroy the Frigate Engines 0/6
- Destroy the Frigate Shield Generators 0/5
- Eliminate the Enemy Command (Bonus): Destroy the large ship
There is an achievement for completing all of the bonuses for this mission and for completing the mission itself.
Obliterate the Capital Ship’s Shield Generators
The shield generators are four gold-bordered targets on the top of the large capital ship, near the back. You don’t need to use missiles but they are helpful.

Decimate the Capital Ship’s Turrets
The capital ship’s turrets are in clusters on the top and the bottom of the large capital ship. You don’t need to use missiles but they are helpful.

Vanquish the Enemy Fleet (Bonus)
Destroy Fighters and the Frigate Turrets 0/75 (appears after you shoot your first small ship or turret)

Turrets

Disable the Supporting Fleet (Bonus)
Destroy six Frigate Engines and six Destroy five Frigate Shield Generators
Shield generators have orange circles and are on the top back of the frigate ship, they require missiles because they are shielded

Another view of the engines

Engines are on the back of the frigate ships, they’re the big blue circles with yellow flames coming out of them, they have an orange circle around them but it’s often hard to see

Eliminate the Enemy Command (Bonus)
The hidden bonus is to disable the command ship. The target is an orange circle in the center of the large ship, on the top of the ship. You must use a single proton torpedo to destroy it if you have proton torpedos equipped, but if you don’t have proton torpedos yet, you can use normal missiles to take it down. You’ll make a ton passes by it, so you have plenty of chances to hit it with missiles. You’ll only get this objective once per day, so if you replay this mission on the same day, you can still shoot down the command ship but you won’t get any credit for it and no bonus objective will pop up.

Nez Peron Sweep

Character Level: 20
Recommended Ship Upgrades: 1+ (you can do it without upgrades)
Objectives
- Neutralize Mark VI Interceptors 0/60
Bonus Missions
- Disable Imperial Destroyer (Bonus): Take Out the Turrets 0/12
- Wipe Out Imperial Forces (Bonus): Shoot Down Mark VI Interceptors 0/40
- Knock Out the Enemy Command Center (Bonus): Use a proton torpedo on the large ship
There is an achievement for completing all of the bonuses for this mission and for completing the mission itself.
Neutralize Mark VI Interceptors
Shoot down the small ships without crashing in to asteroids.

The firsts few are marked with yellow bordered circles to make it clear they’re the objective, but the rest do not have a circle to mark them even though they are still the main objective.

Wipe Out Imperial Forces
After you shoot down 60 small ships for the main objective, a bonus will show up to shoot down 40 more of the same type of ship.
Disable Imperial Destroyer (Bonus)
The turrets for the bonus are the red circles on the top and bottom of the large ship.

Knock Out the Enemy Command Center
The hidden bonus is to knock out the enemy command center. The target is an orange circle in the very back of the large ship, on the top center of the ship. You must use a single proton torpedo to destroy it if you have proton torpedos equipped, but if you don’t have proton torpedos yet, you can use normal missiles to take it down. You’ll make at least two passes past it, so you have multiple chances to hit it with missiles. You’ll only get this objective once per day, so if you replay this mission on the same day, you can still shoot down the command ship but you won’t get any credit for it and no bonus objective will pop up.

Ezran Outpost

Character Level: 28
Recommended Ship Upgrades: 1+ (you can do it without upgrades)
Objectives
- Destroy the Station’s Turrets 0/12: (Missiles Useful)
- Destroy the Station’s Shield Generator’s 0/2: (Missiles Useful)
- Destroy the Station’s Hangars 0/4: (Missiles Useful)
- Destroy the Station’s Antennae 0/4: (Missiles Useful)
Bonus Missions
- Eliminate Enemy Fighters (Bonus): Obliterate the Talon Fighters 0/60
- Erradicate Enemy Defense (Bonus):
- Destroy the Defense Satellites 0/4
- Destroy the Frigate Turrets 0/20
- Cripple Republic Communications (Bonus): Destroy the communication array on the bottom of the station
There is an achievement for completing all of the bonuses for this mission and for completing the mission itself.
Destroy the Station’s Turrets
The turrets are the gold bordered targets around the ring of the station. You don’t need missiles. You don’t need to hit them all, just twelve of them.
Destroy the Station’s Shield Generator’s
The shield generators are in the center of the station. Sometimes they are awkward to hit, so make sure your cursor is red before shooting or firing a missile. You don’t need missiles. You only need to get two of four of these.
Destroy the Station’s Hangars
The hangars are the four entrances to the station on the corners. You don’t need missiles. There’s two turrets beside each one and they are easy to mix up. You need to get all four.
Destroy the Station’s Antennae
The antennae are on the top of the station. You don’t need missiles. You need to get all four.
Eliminate Enemy Fighters (Bonus)
Appears when you shoot your first small ship.
Erradicate Enemy Defense (Bonus)
Fun bonus. The turrets are the red circles on the medium sized frigate ships, and the satellites are hidden around the map. There are only four satellites, so it’s important to shooot them when you see them. You don’t need missiles for either of these.
Cripple Republic Communications (Bonus)
This hidden bonus to take out the communication array is located under the station. You must use a proton torpedo to destroy it if you have proton torpedos equipped, but if you don’t have proton torpedos yet, you can use normal missiles to take it down. You’ll make a total of three passes by it, so you have three chances to hit it with missiles. You’ll only get this objective once per day, so if you replay this mission on the same day, you can still shoot down the communications array but you won’t get any credit for it and no bonus objective will pop up.
Taspan Ambush

Character Level: 28
Recommended Ship Upgrades: 1+
Objectives
- Escort the Defector Shuttle to Safety
Bonus Missions
- Neutralize the Capital Ships (Bonus): Destroy the Turrets 0/40
- Defend the Shuttle (Bonus): Take Out the Mark VI Interceptors 0/40
- Disable the Command Ship (Bonus): Destroy the large ship at the beginning
There is an achievement for completing all of the bonuses for this mission and for completing the mission itself.
Escort the Defector Shuttle to Safety
Shoot down anything trying to hurt your green circle shuttle.
Defend the Shuttle (Bonus)
Shoot down the small ships. Appears when you take out your first small ship.

Neutralize the Capital Ships (Bonus)
The turrets for the bonus are the red circles on the top and bottom of the large ship.
Appears when you shoot your first turret.

Disable the Command Ship
The hidden bonus is to disable the command ship. The target is an orange circle in the very back of the large ship, on the top center of the ship. You must use a single proton torpedo to destroy it. The ship does not reappear later in the mission so make sure to use your torpedo early when you see it near the beginning of the mission. Unlike the other hidden command ship hidden bonuses, you won’t be able to take this one out with missiles if you do not have a proton torpedo, as you do not get a second pass to hit it with enough missiles to destroy it. You’ll only get this objective once per day, so if you replay this mission on the same day, you can still shoot down the command ship but you won’t get any credit for it and no bonus objective will pop up.

Mugaar Ice Field

Character Level: 34
Recommended Ship Upgrades: 3+
Objectives
- Eliminate the Corellian Defender
- Destroy Ace Red Talon Fighters 0/7
Bonus Missions
- Suppress the Enemy Fleet (Bonus): Obliterate the Fighters and the Turrets 0/65
- Expose the Enemy Frigates (Bonus): Destroy the Shield Generators 0/10
- Take Down the Enemy Command Center (Bonus): Destroy the large ship
There is an achievement for completing all of the bonuses for this mission and for completing the mission itself.
Eliminate the Corellian Defender
This strong ship will appear partway through the mission in a pack of enemies. Use missiles to take it down.

Destroy Ace Red Talon Fighters
Only eight of the gold circle ships show up during the fight, and you need to take down a total of seven, so prioritize them when you see them.

Suppress the Enemy Fleet (Bonus)
Appears after you blow up your first small ship or turret.

The turrets are the red circles on the medium sized frigate ships.

Expose the Enemy Frigates (Bonus)
Destroy ten Shield Generators on the medium sized frigates, which are the orange circles on the top of the back of the ship, they require missiles. Imperial side this bonus mission is quite hard. There’s only a total of ten shield generators to destroy so you have to hit them all as they come. Some you will get multiple longer passes at, but the second frigate you see will only show up for a brief second, then again for another brief moment a few seconds later and you need to hit the shield generators with multiple missiles without accidentally targeting the engines or turrets.

Take Down the Enemy Command Center
The hidden bonus is to take down the enemy command center. The target is an orange circle in the very back of the large ship, on the top center of the ship. You must use a single proton torpedo to destroy it. The ship does not reappear later in the mission so make sure to use your torpedo early when you see it near the beginning of the mission. Unlike the other hidden command ship hidden bonuses, you won’t be able to take this one out with missiles if you do not have a proton torpedo, as you do not get a second pass to hit it with enough missiles to destroy it. You’ll only get this objective once per day, so if you replay this mission on the same day, you can still shoot down the command ship but you won’t get any credit for it and no bonus objective will pop up.
 `
`
Skaross Fortification

Character Level: 34
Recommended Ship Upgrades: 3+
Objectives
- Intercept Raven Bombers 0/50
Bonus Missions
- Obliterate the Republic Escort (Bonus): Destroy Red Talon Fighters 0/30
- Disable the Frigate Shields (Bonus): Destroy the Shield Generators 0/4
- Destroy the Republic Command (Bonus): Destroy the large ship near the end
There is an achievement for completing all of the bonuses for this mission and for completing the mission itself.
Intercept Raven Bombers
Marked with a yellow border and appears in packs.

Obliterate the Republic Escort (Bonus)
Shoot down normal ships for the bonus. Appears after you shoot your first small ship.

Disable the Frigate Shields (Bonus)
The shield generators are the orange circles on the top of the medium sized frigate ships in the back, you need missiles. Appears after you destroy your first shield generator.

Destroy the Republic Command (Bonus)
The hidden bonus is to take down the enemy command center. The target is an orange circle in the very back of the large ship, on the top center of the ship. You must use a single proton torpedo to destroy it. The ship only appears at the very end of the mission, so when you are facing it, make sure to use your Proton Torpedo. If you do not have Proton Torpedoes yet you will not be able to complete this bonus as the mission does not give you enough time to hit the command center with missiles. You’ll only get this objective once per day, so if you replay this mission on the same day, you can still shoot down the command ship but you won’t get any credit for it and no bonus objective will pop up.

Sullust Interception

Character Level: 40
Recommended Ship Upgrades: 3+
Objectives
- Exterminate Ace Talon Fighters 0/60: (Missiles Useful)
Bonus Missions
- Incapacitate the Destroyer (Bonus): Obliterate the Turrets 0/12
- Annihilate the Enemy Command Center (Bonus): Destroy the large ship
There is an achievement for completing all of the bonuses for this mission and for completing the mission itself.
Exterminate Ace Talon Fighters
Destroy the small ships and don’t crash in to asteroids.

The first few are marked with a yellow border to point out that the are the quest objective, but the rest do not have a yellow border after that.
There’s no bonus to take out additional fighters.
Incapacitate the Destroyer (Bonus)
The turrets for the bonus are the red circles on the top and bottom of the large ship. These are fun to use an EMP on.

Annihilate the Enemy Command Center (Bonus)
The hidden bonus is to take down the enemy command center. The target is an orange circle in the very back of the large ship, on the top center of the ship. You must use a single proton torpedo to destroy it. The ship only appears twice during the mission, so when you are facing it, make sure to use your Proton Torpedo. If you do not have Proton Torpedoes yet, you can use normal missiles to destroy the command center if you have strong enough missiles, just make sure to focus on it both times you pass it. You’ll only get this objective once per day, so if you replay this mission on the same day, you can still shoot down the command ship but you won’t get any credit for it and no bonus objective will pop up.

Polith Minefield

Character Level: 40
Recommended Ship Upgrades: 3+
Objectives
- Disable a Bay on the Minelayer
- Cripple the Minelayer’s Engines 0/2
- Destroy the Mines 0/150
Bonus Missions
- Incapacitate Fighter Tenders (Bonus): Destroy Fighter Tender Engines 0/4
- Defeat Heavy Fighters (Bonus): Eliminate Plug-6 Heavy Fighters 0/4
There is an achievement for completing all of the bonuses for this mission and for completing the mission itself.
Disable a Bay on the Minelayer
The bays are on the top of the minelayer, which is only available at the very end of the minefield route. There’s two of them, you only need to destroy one. Use missiles.
Cripple the Minelayer’s Engines
The engines on the minelayer are on the back of the minelayer, only available at the very end of the minefield route. you need to destroy both. Use missiles.
Destroy the Mines
Destroy 150 mines in the minefields, if you have an EMP it’s a lot of fun to use in the middle of a minefield.
Incapacitate Fighter Tenders (Bonus)
The engines for the fighter tenders bonus are the larger ships, each one has three engines on the back you can target, missiles are suggested. Don’t confuse these ships for the minelayer which is the main objective, these are just tenders. Appears when you destroy your first engine.
Defeat Heavy Fighters (Bonus)
The heavy fighters, the Plug-6 ships, appear throughout the fight. At one point two appear at the same time so make sure to get them both. You need to shoot down four for the bonus. The later ones you need to shoot down only appear once you get close to the large minelayer ship.
Clouds of Vondoru

Character Level: 44
Recommended Ship Upgrades: 5+
Objectives
- Obliterate the Capital Ship’s Shield Generators 0/4
- Decimate the Capital Ship’s Turrets 0/20
Bonus Missions
- Vanquish the Enemy Fleet (Bonus): Destroy Ace Talon Fighters and the Frigate Turrets 0/75
- Eliminate the Republic Command (Bonus): Use a proton torpedo on the large ship
There is an achievement for completing all of the bonuses for this mission and for completing the mission itself.
Obliterate the Capital Ship’s Shield Generators
The four shield generators are on the top back of the large ship. The quest says to use torpedoes but you do not need torpedoes.
Decimate the Capital Ship’s Turrets
The capital ship’s turrets are in clusters on the top and the bottom of the large capital ship. You don’t need to use missiles but they are helpful.
Vanquish the Enemy Fleet (Bonus)
Destroy small ships and turrets
The turrets are the red circles on the medium sized ships
Eliminate the Republic Command (Bonus)
The hidden bonus is to disable the command ship. The target is an orange circle in the very back of the large ship, on the top center of the ship. You must use a single proton torpedo to destroy it if you have proton torpedos equipped, but if you don’t have proton torpedos yet, you can use normal missiles to take it down. You’ll make a ton passes by it, so you have plenty of chances to hit it with missiles. You’ll only get this objective once per day, so if you replay this mission on the same day, you can still shoot down the command ship but you won’t get any credit for it and no bonus objective will pop up.
Aeten Defense

Character Level: 44
Recommended Ship Upgrades: 5+
Objectives
- Intercept Ace Raven Bombers 0/50
Bonus Missions
- Obliterate the Republic Escort (Bonus): Intercept Ace Red Talon Fighters 0/30
- Disable the Frigate Shields (Bonus): Disable the Shield Generators 0/4
There is an achievement for completing all of the bonuses for this mission and for completing the mission itself.
Intercept Ace Raven Bombers
The Extinction Bombers show up in packs and have a gold circle.

Obliterate the Republic Escort (Bonus)
Take down 30 small ships. There’s not very many of these ships so start early if you want the bonus and don’t leave it until the end.
Disable the Frigate Shields (Bonus)
The frigate shields for the bonus are the orange circles on the top of the medium sized ships. Most of the frigates in this mission are quite far away so make sure to shoot them when you see them instead of waiting to get closer.

You can also destroy the large ship but there’s no bonus for it.

Ascendancy Barrier
Character Level: 48
Recommended Ship Upgrades: 5+
Objectives
- Disable a Bay on the Minelayer
- Destroy the Minelayer’s Engines 0/2
- Destroy the Mines 0/150
Bonus Missions
- Incapacitate Fighter Tenders (Bonus): Destroy Fighter Tender Engines 0/4
- Defeat Heavy Fighters (Bonus): Eliminate Ace Plug-6 Heavy Fighters 0/4
Disable a Bay on the Minelayer
The bays are on the top of the minelayer, which is only available at the very end of the minefield route. There’s two of them, you only need to destroy one. Use missiles.
Destroy the Minelayer’s Engines
The engines on the minelayer are on the back of the minelayer, only available at the very end of the minefield route. you need to destroy both. Use missiles.
Destroy the Mines
Destroy 150 mines in the minefields, if you have an EMP it’s a lot of fun to use in the middle of a minefield.
Incapacitate Fighter Tenders (Bonus)
The engines for the fighter tenders bonus are the larger ships, each one has three engines on the back you can target, missiles are suggested. Don’t confuse these ships for the minelayer which is the main objective, these are just tenders. Appears when you destroy your first engine.
Defeat Heavy Fighters (Bonus)
The heavy fighter, the Ace Plug-6 ships, appear throughout the fight. At one point two appear at the same time so make sure to get them both. You need to shoot down four for the bonus. The last plug fighters show up near the end of the mission near the large minelayer ship.
Cha Raaba Assault

Character Level: 50
Recommended Ship Upgrades: 7
Objectives
- Take Out the Shuttle
- Eliminate the Mandalorian Commander
- Destroy the Republic Frigate
Bonus Missions
- No Pilot Stands a Chance (Bonus): Destroy Mercenary Ships 0/4
Thanium Disruption is one of the six extremely difficult heroic solo on-rails space missions in Star Wars: The Old Republic. To run this mission, you’ll want to be level 50 or higher, and have fully upgraded your ship with Grade 7 upgrades and Proton Torpedoes. If you can’t afford the Grade 7 equipment, you can complete these with Grade 6 equipment, but it is quite hard. Take a look at the equipment section of this guide if you haven’t geared up yet. You’ll want to have completed the easier space missions before you run this one, and can pick it up from the space missions quest terminal on your ship. In this mission, you’ll need to destroy two strong ships with a gold border around them and a frigate, while navigating a minefield and an asteroid field. They key to the mission is maximizing your time on the two ships with gold circles around them, and making good use of your Warfare pod that makes you untargettable and your EMP to take out the mines and frigate turrets. I found this mission to be the most frustrating of the six heroic space missions.
The mission starts of with a ton of asteroids to avoid. You’ll likely crash in to these a few times as you learn the route. There will also be two strong mercenary ships. Your goal is to destroy them while not crashing, and no losing any of your ship health. Switch your power to blasters with the 1 key, and shoot and missile those ships whenever they peek out behind the asteroids. As soon as they’re done, switch power to shields, and make your way around the asteroids until you reach the minefield.
At the first minefield patch, there are less mines than the second section, so instead of using our EMP and Warfare pod here, we’ll instead keep our shields up and avoid as much damage as possible by not shooting, pressing spacebar to do a barrel roll, and move our ship in a whirlpool circle around the screen to avoid as many shots as we can from the first set of mines. There’s going to be a Miner Tender in here, you can ignore it. You don’t need to shoot the mines.
After the first patch of mines, you’ll see the thicker second patch that has a large yellow target in it, that’s the Frigate for the mission objective. As you make your way towards the second patch, trail your mouse over the smaller gold circle, that’s the shuttle When your curror turns red, fire off all your missiles on the shuttle.
Once you reach the second patch of mines, as soon as the mines start shooting at you, activate your Electronic Warfare Pod with your 3 key to avoid all the shots form the mines. While heading towards the large gold circle frigate, target the top back of the frigate with your missiles, to take down the shield generators, as they can’t be hit with the EMP as they are shielded. They take about two missiles each and there’s two of them. If you have extra time, hit the other orange targets which are the engines on the back of the ship and the orange circle at the nose of the ship. The more of the orange circles you destroy earlier the easier it is later. Don’t worry about the red circle You can also shoot at the smaller gold circle ship that’s flying away, and should be focusing hard on it once you pass the frigate.
Once you get close to the Frigate with the gold circle, use your EMP with your 4 key, which will destroy a ton of the mines and the turrets on the Frigate.
After that, it’s mostly a matter of focusing on the two gold ships and not crashing your ship on the asteroids path. During this chase sequence, you’ll mostly want to be in shield mode shooting missiles. However, when possible and your shields are full, flip over your power to blasters to get some extra shots on your two gold ships, otherwise you might not have enough time to destroy them before the mission ends. You will absolutely need to do this if you’re trying to do the bonus, which is to destroy a total of four of the Mercenary ships. You can also use your 3 key to make yourself untargettable and switch your power to blasters for a while when it comes back up after you used it the first time. You’ll also want to target the frigate’s remaining circles when you see it, and make sure it gets fully destroyed before you run out of time, I usually just point my mouse towards it and fire off missile with right click, since it’s usually hard to see the circles it has left at that point. You can continue targeting the frigate even as it speeds away at the end.
There’s one asteroid that I always crash on, you’ll make a hard turn around the left side of asteroid, go under an asteroid, and then go over one, but you’ll often clip the top of that third asteroid in the path you’re going over. To avoid this, after going around the left of the first asteroid, go tightly under the second one with as little room between you and it as possible, and that will give you enough time to clear the top of the third asteroid if you pull up immediately after you clear the second asteroid. This asteroid is probably the hardest part of the entire mission.
There are no achievements for this mission, but there are some codex entries for the bonuses.
My friend Aravail made a video guide with his tips for the Republic version of this missions.
No Pilot Stands a Chance (Bonus)
Destroy Mercenary Ships 0/4, two at the beginning and two after the frigate
Lorta Escort

Character Level: 50
Recommended Ship Upgrades: 7
Objectives
- Protect the D-1Z Bomber
- Destroy Enemy Jedi Ships 0/3
- Destroy Bridge on the Destroyer
Bonus Missions
- Eliminate Enemy Frigates (Bonus): Destroy Republic Frigates 0/4
- Annihilate the Enemy (Bonus): Destroy Republic Fighters 0/70
Hypori Escort is one of the six extremely difficult heroic solo on-rails space missions in Star Wars: The Old Republic. To run this mission, you’ll want to be level 50 or higher, and have fully upgraded your ship with Grade 7 upgrades and Proton Torpedoes. If you can’t afford the Grade 7 equipment, you can complete these with Grade 6 equipment, but it is quite hard. Take a look at the equipment section of this guide if you haven’t geared up yet. You’ll want to have completed the easier space missions before you run this one, and can pick it up from the space missions quest terminal on your ship. This mission is quite easy compared to the other six heroic space missions. In this mission, you will need to destroy three enemy ships, and destroy the bridge of the large ship. As a bonus, you can take down four frigates, and shoot down 70 small fighter ships.
At the very beginning of the mission, there are three frigates cruising around, use your missiles on their shield generators and blast down as much of them as you can, especially if you want the bonus. At the very least least take out their turrets, the red circles, to protect your escort ship.
When you see the bridge of the large ship, make sure to fire your torpedo, it will take two torpedo hits in two separate runs.
When the Sith ships show up, focus on them, as they do a lot of damage.
If you want to do the bonus to shoot down 70 small fighters, you’ll need to start early, but a majority of the ships are located at the end, which is where you’ll probably want to make use of your warfare pod to protect yourself, or while you’re fighting the Sith ships.
You can use your EMP on the rush of fighters at the very end, or when you are over the large ship making your torpedo runs.
There are no achievements for this mission, but there are some codex entries for the bonuses.
Duma Strike

Character Level: 50
Recommended Ship Upgrades: 7
Objectives
- Destroy Bridge on the Destroyer
- Destroy the Corvette Class Ships 0/2
- Destroy Enemy Frigates 0/4
Bonus Missions
- Cripple Their Forces (Bonus): Destroy Republic Bombers 0/12
- Annihilate The enemy (Bonus): Destroy Republic Fighters 0/60
Baros Ambush is one of the six extremely difficult heroic solo on-rails space missions in Star Wars: The Old Republic. To run this mission, you’ll want to be level 50 or higher, and have fully upgraded your ship with Grade 7 upgrades and Proton Torpedoes. If you can’t afford the Grade 7 equipment, you can complete these with Grade 6 equipment, but it is quite hard. Take a look at the equipment section of this guide if you haven’t geared up yet. You’ll want to have completed the easier space missions before you run this one, and can pick it up from the space missions quest terminal on your ship. In this mission, you’ll need to destroy a bridge on a large ship, two corvettes with a lot of health, and four enemy frigates. As a bonus, you can destroy 12 of the bombers which are the stronger small ships often accompanying the corvettes, and destroy 60 normal small fighter ships.
You can use your EMP at the very beginning once all three ships become visible, then you just need to take down the orange circles on those frigates, using missiles for the shield generators. You can fairly easily destroy three of the four frigates in the beginning of the fight, which will leave you available to chase down the first corvette with blasters and missiles once it appears. For the frigate objective, to destroy a frigate, you need to destroy every target on it including the shields, engines and all turrets.
A good time to use your warfare pod is when you see a large pack of bombers with the second corvette. That way you can switch power to blasters and shoot them down.
You can hit the bridge with a torpedo fairly early in the fight, the second time you see it, it’s in the distance. Make sure to hit it a total of two times with torpedos, I usually hit it at the end in the final run past it.
You can use your EMP again near the end of the fight, one place you could use it is in the two frigates at the end, to get your final frigate if you already shot the three frigates at the beginning. There’s a frigate on the left and a frigate on the right, it’s easier to ignore the left one and fovus on the right one as you loop back around right behind it.
If you are trying to do the 60 fighters bonus, you will need to be very diligent with shooting down the small ships.
There are no achievements for this mission, but there are some codex entries for the bonuses.
Kanz Minefield

Character Level: 50
Recommended Ship Upgrades: 7
Objectives
- Destroy Defense Clusters 0/4
Destroy Minelayer
Destroy the Satellite Hardpoint
Bonus Missions
- No Pilot stands a Chance (Bonus): Destroy Jedi Ships 0/1
- Annihilate The Enemy (Bonus): Destroy Republic Fighters 0/80
- Eliminate Enemy Frigates (Bonus): Destroy Republic Frigates 0/2
New Cov Ice Field is one of the six extremely difficult heroic solo on-rails space missions in Star Wars: The Old Republic. To run this mission, you’ll want to be level 50 or higher, and have fully upgraded your ship with Grade 7 upgrades and Proton Torpedoes. If you can’t afford the Grade 7 equipment, you can complete these with Grade 6 equipment, but it is quite hard. Take a look at the equipment section of this guide if you haven’t geared up yet. You’ll want to have completed the easier space missions before you run this one, and can pick it up from the space missions quest terminal on your ship. In this mission, you’ll need to destroy shielded clusters, destroy a protected satellite, and blow up a minelayer ship. This mission is all about timing and hitting your main targets whenever you see them available.
The clusters are groups of seven targets with gold circles around them, they look like a bunch of floating mines with a cannisters in the center. These targets can only be hurt by missiles as they are shielded. If you are using the Kuat Drive Yards Missile Magazine, Grade 6, you will need to carefully focus on the clusters, as you’ll need to hit each gold bordered target with two missiles, and you only have time to shoot about five each time you pass a cluster. As you fly, even when you are not facing a cluster, keep your eyes open on the corners of the screen to see if a cluster comes within range, even if it’s only briefly, to get another missile off, and you’ll have 150 missiles total. If you’re using the Concussion Missile Magazine, Grade 7, the mission is very different, and you’ll instead focus on hitting each of the cluster mines with one missile and the cannister in the center with two missiles. Don’t waste missiles or you’ll find yourself short, so save them for the clusters, the shield generators on the frigates for the bonus, the Sith ship, and the satellite. For all other targets, including the satellite shield generators, small ships, and all other frigate targets, use your blasters instead.
For the satellite, it’s protected by shield generators. You’ll need to shoot down the shield generators before you can hurt the satellite. You can use your EMP on the shield generators as well, or you can save it to use on the satellite itself once it is unprotected. You only get a limited amount of time on the satellite, so apart from the clusters, the satellite should be your second priority target even when you’re chasing down the Sith ship.
The minelayer is actually the easiest part of this entire mission and you can actually destroy it with your blasters in a single run if you focus your fire, and if you don’t destroy it the first time you see it you’ll easily blow it up the second time you see it.
Don’t forget to make use of your Electronic Warfare Pod, I used mine most when chasing down the Sith ship as it does a lot of damage, and you can shift power to your blasters and take out a big chunk of its health while your warfare pod is protecting you. The Sith ship is the strong ship that appears halfway through and you chase it around ice asteroids, it’s shaped like the Imperial Sith class ship.
If you want to do the frigate bonus, you need to completely destroy two frigates and all of their targets, including their shields, engines, and all turrets.
There are no achievements for this mission, but there are some codex entries for the bonuses.
Kabal Station Defense

Character Level: 50
Recommended Ship Upgrades: 7
Objectives
- Destroy Bombers 0/30
- Annihilate an Enemy Command Bridge
- Oblitereate Republic Frigates 0/3
Bonus Missions
- No Pilot Stands A Chance (Bonus): Destroy Republic Ships 0/3
- Annihilate the Enemy (Bonus): Destroy Repubic Fighters 0/50
Ardis Outpost is one of the six extremely difficult heroic solo on-rails space missions in Star Wars: The Old Republic. To run this mission, you’ll want to be level 50 or higher, and have fully upgraded your ship with Grade 7 upgrades and Proton Torpedoes. If you can’t afford the Grade 7 equipment, you can complete these with Grade 6 equipment, but it is quite hard. Take a look at the equipment section of this guide if you haven’t geared up yet. You’ll want to have completed the easier space missions before you run this one, and can pick it up from the space missions quest terminal on your ship. In this mission, you’ll need to destroy 30 of the powerful bombers with yellow circles, destroy the command bridge on a dreadnought, and take out three frigates. As a bonus, you can also destroy three of the strong Sith ships, and destroy 50 of the basic ships.
You’ll need almost all of your missiles for the gold circle bombers and for the shields on the back of the frigates, so whenever possible, use your blasters instead. This includes on the first and second set of gold circle bombers that show up, on frigate targets that aren’t shield generators, and on normal fighter ships.
You’ll be able to take out the Enemy Command Bridge very early in the fight with two Proton Torpedo hits. As soon as you get within range of the bridge, fire a Torpedo, then use your EMP if you want once you are close enough to the medium sized frigate, then fire your torpedo again, and that should destroy the bridge and get it out of the way. You’ll get quite a few chances to destroy the frigates, I suggest focusing on firing missiles at the shield generators on the top of the frigates, there’s two and each one takes two missiles. The rest of the targets can be taken out with blaster fire.
The hardest part of this mission is the Sith ship and the bombers. The Sith ship has a lot of health and hits very hard, and the bombers have a lot of health. The first two rounds of bombers you can take out with your blasters to save missiles. When the third round appears, there will be many bombers in multiple waves, and you will want to put your power to blasters and shoot as many as you can, and prepare to use your EMP. When the next wave gets close to you and you’re facing the space station, use your EMP to hurt a bunch of the bombers at once. Don’t rely on just your missiles and stay in shield mode, as if you do that it will take you nine missile per bomber and you’ll only be able to take down one or two per wave.
For the Sith Ships, you need to focus on putting your shields up, using your missiles, and shooting them with your power to blasters when they aren’t directly shooting at you. There are some gaps you can take advantage of where the Sith ship is shooting but not hitting you.
Don’t forget to mop up the last of any frigates when you aren’t shooting gold border bombers. You need to fully take down three frigates and all their targets, including their shields, engines and all their turrets.
There are no achievements for this mission, but there are some codex entries for the bonuses.
Far Cradle Strike

Character Level: 50
Recommended Ship Upgrades: 7
Objectives
- Destroy Republic Command Bridge
Destroy Communications Array
Destroy Defense Satellites 0/8
Bonus Missions
- No Pilot Stands a Chance (Bonus): Destroy the Republic Ship
- Eliminate Enemy Frigates (Bonus): Destroy Republlic Frigates 0/4
- Annihilate the Enemy (Bonus): Destroy Republic Fighters 0/40
Regnant Station Assault is one of the six extremely difficult heroic solo on-rails space missions in Star Wars: The Old Republic. To run this mission, you’ll want to be level 50 or higher, and have fully upgraded your ship with Grade 7 upgrades and Proton Torpedoes. If you can’t afford the Grade 7 equipment, you can complete these with Grade 6 equipment, but it is quite hard. Take a look at the equipment section of this guide if you haven’t geared up yet. You’ll want to have completed the easier space missions before you run this one, and can pick it up from the space missions quest terminal on your ship. In this mission, you’ll need to destroy a command bridge, a communications array on the bottom of the space station, and blow up eight satellites. For the bonus, you can destroy the Sith ship when it appears, completely destroy four medium sized frigates, and shoot down 40 normal fighter ships. This is my favorite heroic space mission and I believe it is the second easiest of the six.
This mission has a lot of objectives. As you fly, you’ll be keeping your eyes open for satellites to shoot at, while avoiding crashing in to the shipping containers.
When you see the communications array come in to view under the space station, lock a torpedo on to it. It will take two torpedos, and you’ll come back around a second time. The second time the communications array is hard to target, so wait until your cursor turns red before trying to lock on. Taking down the enemy command bridge on the big ship is the same thing, just watch for the bridge to appear with a gold circle and shoot it with a torpedo twice in separate runs.
There’s an evil shipping crate that will try and murder you partway through. You’ll know this is about to happen when you’re flying over and above the space station, facing a bunch of shipping crates, there’s a frigate behind them, and the Sith ship shows up in the middle of the screen. Pull up hard after you pass the first shipping crate to avoid hitting the second evil shipping crate.
A fun time to use your EMP is while you are chasing the Sith ship for the first time after the evil shipping crate, you’ll turn towards the space station, and a ton of small fighters will rush you. You can use your warfare pod to avoid their fire and shoot them all down, and / or your EMP to wipe them all out. If you don’t manage the destroy the Sith Ship here for the bonus, it will reappear later and you can chase it around some shipping crates when there’s no other objectives nearby. If you want to do the frigates bonus, make sure to take full advantage of thefrigates at the beginning of the mission and then work on any other ones you see as you go, and save enough missiles to take down the frigate’s shield generators.
There are no achievements for this mission, but there are some codex entries for the bonuses.
Achievements
Completing all the original Republic space missions once will get you the “Republic Ace” legacy title, and completing all the original Imperial space missions will get you the “Imperial Ace” legacy title. There’s also an achievement for completing all the bonus objectives in those missions. There are no achievements for the harder heroic space missions.

- Complete all Republic space missions
- Complete all Imperial space missions
- Complete Fondor Escort (Republic)
- Complete all the Fondor Escort bonus objectives (Republic)
- Complete Javaal Fleet Action (Republic)
- Complete all the Javaal Fleet Action bonus objectives (Republic)
- Complete Balosar Outpost (Republic)
- Complete all the Balosar Outpost bonus objectives (Republic)
- Complete Makem Te Assault (Republic)
- Complete all the Makem Te Assault bonus objectives (Republic)
- Complete Archenar Interception (Republic)
- Complete all the Archenar Interception bonus objectives (Republic)
- Complete Llanic Station Strike (Republic)
- Complete all the Llanic Station Strike bonus objectives (Republic)
- Complete Syvris Evacuation (Republic)
- Complete all the Syvris Evacuation bonus objectives (Republic)
- Complete Kovor Ice Field (Republic)
- Complete all the Kovor Ice Field bonus objectives (Republic)
- Complete Pakuuni Defense (Republic)
- Complete all the Pakuuni Defense bonus objectives (Republic)
- Complete Drexel Sweep (Republic)
- Complete all the Drexel Sweep bonus objectives (Republic)
- Complete Hydian Way Blockade (Republic)
- Complete all the Hydian Way Blockade bonus objectives (Republic)
- Complete Zosha Advance (Republic)
- Complete all the Zosha Advance bonus objectives (Republic)
- Complete Kalee Fortification (Republic)
- Complete all the Kalee Fortification bonus objectives (Republic)
- Complete The Impossible Sector (Republic)
- Complete all the The Impossible Sector bonus objectives (Republic)
- Complete Jabiim Escort (Imperial)
- Complete all the Jabiim Escort bonus objectives (Imperial)
- Complete Saleucami Fleet Action (Imperial)
- Complete all the Saleucami Fleet Action bonus objectives (Imperial)
- Complete Cartel Listening Station (Imperial)
- Complete all the Cartel Listening Station bonus objectives (Imperial)
- Complete Sarapin Assault (Imperial)
- Complete all the Sarapin Assault bonus objectives (Imperial)
- Complete Nez Peron Sweep (Imperial)
- Complete all the Nez Peron Sweep bonus objectives (Imperial)
- Complete Ezran Outpost (Imperial)
- Complete all the Ezran Outpost bonus objectives (Imperial)
- Complete Taspan Ambush (Imperial)
- Complete all the Taspan Ambush bonus objectives (Imperial)
- Complete Mugaar Ice Field (Imperial)
- Complete all the Mugaar Ice Field bonus objectives (Imperial)
- Complete Skaross Fortification (Imperial)
- Complete all the Skaross Fortification bonus objectives (Imperial)
- Complete Sullust Interception (Imperial)
- Complete all the Sullust Interception bonus objectives (Imperial)
- Complete Polith Minefield (Imperial)
- Complete all the Polith Minefield bonus objectives (Imperial)
- Complete Clouds of Vondoru (Imperial)
- Complete all the Clouds of Vondoru bonus objectives (Imperial)
- Complete Aeten Defense (Imperial)
- Complete all the Aeten Defense bonus objectives (Imperial)
- Complete Ascendancy Barrier (Imperial)
- Complete all the Ascendancy Barrier bonus objectives (Imperial)
 Questions or comments? Feel free to send me a message on Twitter


 Discord
  Email swtorista@gmail.com
 Bluesky @swtorista.com
 Reddit /u/swtorista
 Twitch Swtorista
 Youtube
 Patreon
 Twitter @swtorista
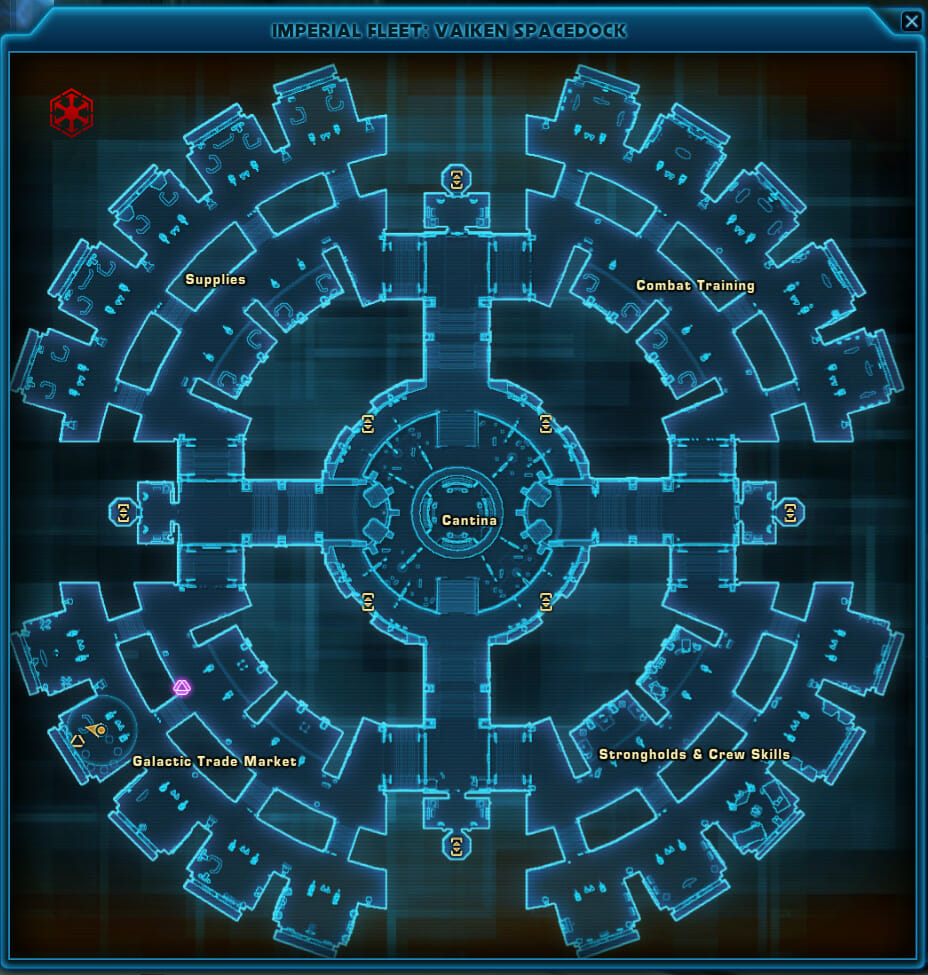