


Gunslinger Sharpshooter Basics Guide
Sharpshooter
Armed with the steely fortitude required to set up the perfect shot, the Sharpshooter is the Gunslinger at its most devious. Aiming from distant cover, the Sharpshooter goes for a devestating opening salvo, following up with vicious trick shots and penetrating rounds, putting a definitive end to the fight they started.
 Role: Damage
- Type: Burst Damage
- Weapon: Double Blaster Pistols
- Distance: Long Range
- Mirror: Sniper – Marksmanship
Sharpshooter for New Players
 Sharpshooter has you take cover and not move. Cover makes Sharpshooter a very difficult class for newer gamers to learn, as many fights require moving around – but you can ignore the cover mechanic while learning Sharpshooter if you want.
- Sharpshooter is long range – if you can handle the cover mechanic, you can hit targets very, very far away compared to most classes which makes it easier to find targets to hit than short-range classes.
- Sharpshooter is the simplest of the three Gunslinger disciplines – using a very basic move set, you can get away with using only 4 abilities if you aren’t worried about doing max damage.
- I was originally intimidated by the number of abilities Sharpshooter had, but found it very easy and intuitive to play once I read a guide and it felt there was less to memorize than many other disciplines.
 Sharpshooter has you take cover and not move. Cover makes Sharpshooter a very difficult class for newer gamers to learn, as many fights require moving around – but you can ignore the cover mechanic while learning Sharpshooter if you want.
 Sharpshooter is long range – if you can handle the cover mechanic, you can hit targets very, very far away compared to most classes which makes it easier to find targets to hit than short-range classes.
 Sharpshooter is the simplest of the three Gunslinger disciplines – using a very basic move set, you can get away with using only 4 abilities if you aren’t worried about doing max damage.
 I was originally intimidated by the number of abilities Sharpshooter had, but found it very easy and intuitive to play once I read a guide and it felt there was less to memorize than many other disciplines.
How to play a Sharpshooter Gunslinger
You can start playing Sharpshooter at level 1. To start playing Sharpshooter, you will need to first create a Gunslinger character, which can be played by Troopers, Bounty Hunters, Smugglers or Imperial Agents.
Once you are ingame, press K on your keyboard to open the Combat Style tab, and choose Sharpshooter from the three options. This choice is not permanent, you will be able to switch between all three options by finding a rest location like a cantina.
Updated for 7.2!
Below Level 80
If you are below level 80, there are no true guides available to tell you what specific abilities you should be using, because the ideal rotation would change every level.
Instead, you can use this guide to figure out which of your abilities are attacks, which are defensive, and which are just useful.
5 Ability Basic Rotation
Not quite ready to learn all your abilities yet? Use this quick 5-ability rotation for the Sharpshooter until you’re ready to read and learn from a true level 80 guide.
- Start your fight with Vital Shot. This damage-over-time ability weakens your enemy – you only need to apply it once every 18 seconds, do not use it over and over!
- Aimed Shot is going to be your main source of damage for most fights. Has bit of a cooldown and can be slow to cast, but you can speed it up by using Charged Burst twice before your next Aimed Shot!
- Penetrating Rounds is a channeled ability that does high damage and weakens your enemy’s defenses. Make sure this is done right after the opening Aimed Shot to deal way more weapon damage!
- Trickshot makes your Charged Burst more powerful, and is a very inexpensive filler which is important because energy management can be hard for Sharpshooters. Use whenever it’s available.
- Charged Burst is your standard spam-able filler for Sharpshooter. Always do two Bursts in a row to buff your next Trickshot and make Aimed Shot faster. If nothing else is glowing, or needs to be reapplied, or is off cooldown, or you’re just lost for a second, doing two Bursts is pretty safe.
More than 3 Enemies
- Sweeping Gunfire is a standard Area Attack that can deal great damage (especially if buffed by the tree choice Efficient Ammo at level 64) but is VERY expensive to cast, so be careful not to overdo it and run out of energy. You do need to be crouched to use it.
- If you still need more area damage, Bombing Run (a choice at level 68) can be taken for a huge amount of damage over a set area.
Extra Tips
- Crouch and stay in cover as much as you can! You can be very far from your enemy and still hit them.
- Burst Volley is a really great buff to your energy management, cast times, and also resets the cooldown of Penetrating Rounds, so typically you’ll want to activate this buff right after using Penetrating Rounds, and then use Penetrating Rounds again!
- Cool Head gives you energy if you run out.
 Feeling spicy? Use your gold Smuggler’s Luck buff to do automatic critical damage with your next two Aimed Shots.
- Quickdraw is an “execute” ability that you can add to your rotation once your target is under 30% health. Using Aimed Shot can make it glow, and it should only be used when glowing.
Before you start…
Compared to other classes: At the moment (update 7.0), Sharpshooter is considered one of the weakest classes in the game at level 80. You will be able to easily do more than enough damage for all basic group content including Story Mode Operations and all Flashpoints with the 5-key rotation, so don’t be afraid to try this discipline if it looks fun. If you choose to try harder content, you will need to work twice as hard at doing high damage compared to playing on many other classes, and some fights will still be out of reach even if you’re playing this class to its highest capabilities. We are hoping this class gets a boost in future updates so it can play at a similar level to other classes.
Making your Vital Shot debuff more visible on your enemy can make it easier to know when it is about to fall off.
![]()
- Press ESC on your keyboard, choose Interface Editor from the menu
- Select the “Target Frame” box where the portrait of your enemy would appear
- In the center box, scroll down and check 🔲 Highlight Debuff, then scroll down more and check 🔲 Personal Debuffs
- Save. This will show your own debuffs highlighted in gold so you don’t mix them up with your groups’!
If you have 3,000 Tech Fragments, go and buy the Agitating Energies tactical item.
![]()
![]()
With the tactical item, Vital Shots will stay on the enemy almost automatically after you use it at the beginning of the fight. You won’t need to reapply it later as long as you are doing the rest of your rotation!
| Discipline | Tactical | Legendary | Stats |
|---|---|---|---|
| Guardian Defense Juggernaut Immortal |  Grit Teeth Jaw Breaker, Hord’s Makashi Strike and Leviathan’s Hide are good alternatives Grit Teeth Jaw Breaker, Hord’s Makashi Strike and Leviathan’s Hide are good alternatives | Force Resistance + Retaliator | Shield: 5500-6000 Absorb: remaining tertiary stats |
| Guardian Vigilance Juggernaut Vengeance |  Hemophilic Slash (Single Target), Cut to Pieces (AoE) Hemophilic Slash (Single Target), Cut to Pieces (AoE) | Fearless Victor + Champion’s Precision | Accuracy: 2694 Alacrity: • 1.4 GCD = 2054 (7.14%) • 1.3 GCD = 5431 (15.38%) With Alacrity Guild Perk • 1.4 GCD = 560 • 1.3 GCD = 3209 |
| Guardian Focus Juggernaut Rage |  Cauterized Coronary Cauterized Coronary | Fearless Victor + Champion’s Precision | Accuracy: 2694 Alacrity: • 1.4 GCD = 2054 (7.14%) • 1.3 GCD = 5431 (15.38%) With Alacrity Guild Perk • 1.4 GCD = 560 • 1.3 GCD = 3209 |
| Sentinel Watchman Marauder Annihilation |  Spiteful Saber Spiteful Saber | Fearless Victor + Berserker’s Call and Dispatcher are all viable options | Accuracy: 2694 Alacrity: • 1.4 GCD = 2054 (7.14%) • 1.3 GCD = 5431 (15.38%) With Alacrity Guild Perk • 1.4 GCD = 560 • 1.3 GCD = 3209 |
| Sentinel Combat Marauder Carnage |  Shard of Mortis Shard of Mortis | Fearless Victor + Dispatcher | Accuracy: 2694 Alacrity: • 1.4 GCD = 1123 (4.14%) • 1.3 GCD = 4021 (12.38%) • 1.2 GCD = 9981 (22%) With Alacrity Guild Perk • 1.3 GCD = 2134 • 1.2 GCD = 6315 |
| Sentinel Concentration Marauder Fury | Cauterized Conary | Fearless Victor + Berserker’s Call | Accuracy: 2694 Alacrity: • 1.4 GCD = 2054 (7.14%) • 1.3 GCD = 5431 (15.38%) With Alacrity Guild Perk • 1.4 GCD = 560 • 1.3 GCD = 3209 |
| Sage Telekinetics Sorcerer Lightning |  Stormwatch Stormwatch | Gathering Storm + Unmatched Haste | Accuracy: 2694 Alacrity: • 1.4 GCD = 560 (2.14%) • 1.3 GCD = 3209 (10.38%) • 1.2 GCD = 8296 (20%) • 1.1 GCD under PS = 3596 (16.366) With Alacrity Guild Perk • 1.3 GCD = 1494 • 1.1 GCD under PS = 1801 |
| Sage Seer Sorcerer Corruption |  One for All One for All | Unmatched Haste + Revitalize or Dynamic Force are all considered viable as of now | Alacrity: • 1.4 GCD = 2054 (7.14%) • 1.3 GCD = 5431 (15.38%) • 1.2 GCD = 13531 (25%) With Alacrity Guild Perk • 1.4 GCD = 560 • 1.3 GCD = 3209 |
| Sage Balance Sorcerer Madness |  Tempest of Rho Tempest of Rho | Gathering Storm + Unmatched Haste | Accuracy: 2694 Alacrity: • 1.4 GCD = 2054 (7.14%) • 1.3 GCD = 5431 (15.38%) • 1.2 GCD = 13531 (25%) With Alacrity Guild Perk • 1.4 GCD = 560 • 1.3 GCD = 3209 |
| Shadow Kinetic Combat Assassin Darkness |  Two Cloaks, The Life Warden, Ancient Tome of Wrath and Shroud of a Shadow as potential alternatives Two Cloaks, The Life Warden, Ancient Tome of Wrath and Shroud of a Shadow as potential alternatives | Dynamic Force + Force Resistance or Ballast Point is fine if you prefer to use pieces with tanking stats | Shield: 5000-5500 Absorb: remaining tertiary stats |
| Shadow Infiltration Assassin Deception |  The Awakened Flame The Awakened Flame | Dynamic Force + Force Training | Accuracy: 2694 Alacrity: • 1.4 GCD = 2054 (7.14%) • 1.3 GCD = 5431 (15.38%) With Alacrity Guild Perk • 1.4 GCD = 560 • 1.3 GCD = 3209 |
| Shadow Serenity Assassin Hatred |  Two Time Trouble Two Time Trouble | Dynamic Force + Force Training | Accuracy: 2694 Alacrity: • 1.4 GCD = 2054 (7.14%) • 1.3 GCD = 5431 (15.38%) With Alacrity Guild Perk • 1.4 GCD = 560 • 1.3 GCD = 3209 |
| Commando Combat Medic Mercenary Bodyguard |  SC-4 Treatment Scanner SC-4 Treatment Scanner | Advanced Scanning + Concentrated Fire or Overcharged Cells seem to all be viable options | Alacrity: • 1.4 GCD = 2054 (7.14%) • 1.3 GCD = 5431 (15.38%) • 1.2 GCD = 13531 (25%) With Alacrity Guild Perk • 1.4 GCD = 560 • 1.3 GCD = 3209 |
| Commando Gunnery Mercenary Arsenal |  Primed Ignition (Single Target) Primed Ignition (Single Target) | Concentrated Fire + Overcharged Cells | Accuracy: 2694 Alacrity: • 1.4 GCD = 1123 (4.14%) • 1.3 GCD = 4021 (12.38%) • 1.2 GCD = 9981 (22%) With Alacrity Guild Perk • 1.3 GCD = 2134 • 1.2 GCD = 6315 |
| Commando Assault Specialist Mercenary Innovative Ordnance |  Energized Charges (Single Target) Energized Charges (Single Target) | Concentrated Fire + Overcharged Cells | Accuracy: 2694 Alacrity: • 1.4 GCD = 2054 (7.14%) • 1.3 GCD = 5431 (15.38%) • 1.2 GCD = 13531 (25%) With Alacrity Guild Perk • 1.4 GCD = 560 • 1.3 GCD = 3209 |
| Vanguard Shield Specialist Powertech Shield Tech |  Thermal Screen (Single Target), Oil Fire (AoE), The Life Warden Thermal Screen (Single Target), Oil Fire (AoE), The Life Warden | Supercommando + Squad Leader | Shield: 6000 - 6500 Absorb: remaining tertiary stats |
| Vanguard Plasmatech Powertech Pyrotech |  Superheated Fuel Superheated Fuel | Shock Trooper + Mandalorian Armaments | Accuracy: 2694 Alacrity: • 1.4 GCD = 2054 (7.14%) • 1.3 GCD = 5431 (15.38%) • 1.2 GCD = 13531 (25%) With Alacrity Guild Perk • 1.4 GCD = 560 • 1.3 GCD = 3209 |
| Vanguard Tactics Powertech Advanced Prototype |  Overwhelming Offense Overwhelming Offense | Shock Trooper + Mandalorian Armaments | Accuracy: 2694 Alacrity: • 1.4 GCD = 2054 (7.14%) • 1.3 GCD = 5431 (15.38%) • 1.2 GCD = 13531 (25%) With Alacrity Guild Perk • 1.4 GCD = 560 • 1.3 GCD = 3209 |
| Gunslinger Sharpshooter Sniper Marksmanship |  Agitating Energies Agitating Energies | Locked and Loaded + Improved Targeting use Energy Regulators if you experience energy issues | Accuracy: 2694 Alacrity: • 1.4 GCD = 2054 (7.14%) • 1.3 GCD = 5431 (15.38%) • 1.2 GCD = 13531 (25%) With Alacrity Guild Perk • 1.4 GCD = 560 • 1.3 GCD = 3209 |
| Gunslinger Saboteur Sniper Engineering |  Ruthless Interrogation Ruthless Interrogation | Locked and Loaded + Improved Targeting | Accuracy: 2694 Alacrity: • 1.4 GCD = 2054 (7.14%) • 1.3 GCD = 5431 (15.38%) • 1.2 GCD = 13531 (25%) With Alacrity Guild Perk • 1.4 GCD = 560 • 1.3 GCD = 3209 |
| Gunslinger Dirty Fighting Sniper Virulence |  Exploited Weakness (Single Target), Airborne Agents (AoE) Exploited Weakness (Single Target), Airborne Agents (AoE) | Locked and Loaded + Improved Targeting | Accuracy: 2694 Alacrity: 2700 - 2800 With Alacrity Guild Perk 1100 - 1300 |
| Scoundrel Sawbones Operative Medicine |  Critical Surgery and Diagnostics Probe are both viable alternatives Critical Surgery and Diagnostics Probe are both viable alternatives | Tactician + Aggressive Treatment or Field Medic | Alacrity: • 1.4 GCD = 2054 (7.14%) • 1.3 GCD = 5431 (15.38%) • 1.2 GCD = 13531 (25%) With Alacrity Guild Perk • 1.4 GCD = 560 • 1.3 GCD = 3209 |
| Scoundrel Scrapper Operative Concealment |  Acid Lash (Single Target), Explosive Cells (AoE) Acid Lash (Single Target), Explosive Cells (AoE) | Tactician + Locked and Loaded | Accuracy: 2694 Alacrity: • 1.4 GCD = 2054 (7.14%) • 1.3 GCD = 5431 (15.38%) • 1.2 GCD = 13531 (25%) With Alacrity Guild Perk • 1.4 GCD = 560 • 1.3 GCD = 3209 |
| Scoundrel Ruffian Operative Lethality |  Synox Shots (Single Target), Viral Elements (AoE) Synox Shots (Single Target), Viral Elements (AoE) | Tactician + Locked and Loaded | Accuracy: 2694 Alacrity: • 1.4 GCD = 2054 (7.14%) • 1.3 GCD = 5431 (15.38%) • 1.2 GCD = 13531 (25%) With Alacrity Guild Perk • 1.4 GCD = 560 • 1.3 GCD = 3209 |
Ready to learn more about your class, and how to play at a higher skill level? These guides by other players break down your class's abilities and your full rotation!
Guides
- Beginners Guide To Damage With The Marksman Sniper & Sharpshooter Gunslinger by Terssus on YouTube (7.4)
- Marksmanship / Sharpshooter 7.4 by admiralnick on admiralnicksswtorgu (7.4)
- Sharpshooter Gunslinger PvE Guide and Best Builds by Endonae on vulkk.com (7)
- Sharpshooter Gunslinger Guide by Biggs on YouTube (7.02)
Attacks
- Flurry of Bolts - Basic AttackLevel 1
- Charged Burst - AttackLevel 1
- Quickdraw - AttackLevel 1
- Thermal Grenade - Area AttackLevel 4
- Sweeping Gunfire - Area AttackLevel 7
- Vital Shot - AttackLevel 7
- Leg Shot - AttackLevel 10
- Aimed Shot - AttackLevel 15
- Penetrating Rounds - AttackLevel 35 REPLACES Speed Shot at Level 35+
- Speed Shot - AttackLevel 37
- Trickshot - AttackLevel 47
- Bombing Run - Optional Area Attack Level 68 Option 3/3Level 68
Multiple Enemy Attack Abilities
These Sharpshooter attacks are useful for attacking groups of enemies.
- Thermal Grenade - Area AttackLevel 4
- Sweeping Gunfire - Area AttackLevel 7
- Bombing Run - Optional Area Attack Level 68 Option 3/3Level 68
Buffs
You can combine your Sharpshooter buffs with your attacks to create powerful combinations.
- Lucky Shots - Passive Class BuffLevel 1
- Cool Head - BuffLevel 15
- Smuggler's Luck - BuffLevel 15
- Illegal Mods - Optional Buff Level 43 Option 3/3Level 43
- Burst Volley - BuffLevel 60
- Bag of Tricks - BuffLevel 67
Defensive & Healing Abilities
Use these abilities to help yourself stay alive. The Gunslinger has these defensive and healing abilities and you'll want to know where they are in a difficult fight.
- Diversion - DefensiveLevel 35
 Hunker Down - DefensiveLevel 35
- Defense Screen - DefensiveLevel 47
- Scrambling Field - Optional Defensive Level 68 Option 2/3Level 68
Useful Abilities
These abilities may not be directly for attacking, but they are used heavily by skilled Gunslingers in combat to turn the tide of a fight.
- Crouch - Cover - You must be in cover to take advantage of some of you abilities. Your Crouch will allow you to take cover where you are standing.Level 1
- Take Cover - Environment Cover - You must be in cover to take advantage of some of you abilities. You have two ways to enter Cover - your normal Cover in place ability, and your Environment Cover, which you can only use if there is terrain to take cover behind nearby, indicated by a holographic green figure crouching in front of a rock or barricade.Level 1
- Recuperate - Regeneration - Regain health out of battle.Level 1
- Escape - Stun Break - If you are stunned and can’t move, you can use this ability to unstun yourself.Level 10
- Distraction - Interrupt - Every class has an interrupt ability that allows them to interrupt an enemy while they are casting. Enemy castbars that fill up from left to right are called casts and can be interrupted and the ability will be stopped, but castbars that go from right to left deal damage the entire time they are channeling. Using your interrupt in combat is very useful as it can prevent the enemy from damaging you, or sometimes even prevent them from stunning you or knocking you back!Level 19
- Surrender - Detaunt - Your detaunt ability will cause enemies to lose interest in your character, at least for a short time. This is most useful if you're getting attacked during group fights when your tank is supposed to be taking the damage, or when your companion is set to tank.Level 23
- Below the Belt - Optional Stun Level 27 Option 2/3 - You can use your short stun on weaker enemies to stop them from running around, from casting abilities, to stop them from damaging you, or just to keep them out of the fight in general.Level 27
- Pulse Detonator - Knockback - Pushes enemies back.Level 31
- Hightail It - Movement - Roll forward 18 meters, purging movement-impairing effects and landing crouched behind cover. While rolling, your chance to dodge attacks is increased by 100%.Level 60
- Hideout - Optional Teleport Level 68 Option 1/3 - Activating the ability marks your current location for 10 minutes. When this ability is activated again, if you are within 60 meters of the marked location, you instantly return to the marked location. Hideout goes on cooldown for 120 seconds when used to return to the marked location.Level 68
Tree Choices
As you level up, you will be able to make choices about how you play your Sharpshooter Gunslinger with the Ability Tree, which can be opened with the K key on your keyboard. If you do not choose one, a default option will be chosen for you.
You will have eight choices to make as you level up, at levels 23, 27, 39, 43, 51, 64, 68 and 73. All of these Ability Tree choices are not permanent choices and can be changed later. If you are following a Level 80 guide on how to play your Sharpshooter Gunslinger, you will need to make sure to choose the same options as they have. You may not have the same choices chosen as a friend who is also playing a Sharpshooter Gunslinger.
Level 23 Choice: Aimed Shot Change
Choose from one of three ways that you want Aimed Shot to change at level 23. Your options are Hotshot, Shrap Shot, and Relentless Shots.
Fires a well-aimed shot that deals weapon damage. Aimed Shot ignores 20% of the targets armor. Requires dual blasters.
Increases the critical hit damage of Aimed Shot by 20%. Killing a target within 3 seconds after Aimed Shot critically hits the target resets the cooldown of Smuggler's Luck and Aimed Shot.
Increases the critical hit damage of Aimed Shot by 20%. Killing a target within 3 seconds after Aimed Shot critically hits the target resets the cooldown of Smuggler's Luck and Aimed Shot.
Aimed Shot deals splash damage to nearby targets and slows them by 30% for 6 seconds.
Aimed Shot deals splash damage to nearby targets and slows them by 30% for 6 seconds.
The energy cost of Aimed Shot is reduced by 5. Each use of Aimed Shot grants Relentless Shots lowering the cooldown of your next Aimed Shot by 1.5 seconds. Stacks up to 3 times.
The energy cost of Aimed Shot is reduced by 5. Each use of Aimed Shot grants Relentless Shots lowering the cooldown of your next Aimed Shot by 1.5 seconds. Stacks up to 3 times.
![]() Multi-Enemy Solo Suggestion: Shrap Shot - Excellent addition of cleave to your hard hitting abilities will make pulls of 3+ targets much better.
Multi-Enemy Solo Suggestion: Shrap Shot - Excellent addition of cleave to your hard hitting abilities will make pulls of 3+ targets much better.
![]() Solo Single-Strong-Enemy Suggestion: Relentless Shots - Sharpshooter Gunslingers probably have the most difficulty juggling their energy levels while doing damage; a choice to reduce costs is very helpful.
Solo Single-Strong-Enemy Suggestion: Relentless Shots - Sharpshooter Gunslingers probably have the most difficulty juggling their energy levels while doing damage; a choice to reduce costs is very helpful.
![]() Flashpoint Suggestion: Relentless Shots - Sharpshooter Gunslingers probably have the most difficulty juggling their energy levels while doing damage; a choice to reduce costs is very helpful.
Flashpoint Suggestion: Relentless Shots - Sharpshooter Gunslingers probably have the most difficulty juggling their energy levels while doing damage; a choice to reduce costs is very helpful.
![]() Operation Suggestion: Relentless Shots - Sharpshooter Gunslingers probably have the most difficulty juggling their energy levels while doing damage; a choice to reduce costs is very helpful.
Operation Suggestion: Relentless Shots - Sharpshooter Gunslingers probably have the most difficulty juggling their energy levels while doing damage; a choice to reduce costs is very helpful.
Level 27 Choice
Choose from one of three Gunslinger abilities at Level 27, you can only have one of these options at any given time. Your options as a Sharpshooter Gunslinger for the Level 27 choice are Flourish Burst, Below the Belt, and Dodge Stance.
The critical hit damage of Charged Burst is increased by 20%. Dealing damage to a target with Charged Burst inflicts trauma for 10 seconds, reducing all healing the target receives by 20%.
The critical hit damage of Charged Burst is increased by 20%. Dealing damage to a target with Charged Burst inflicts trauma for 10 seconds, reducing all healing the target receives by 20%.
Aim your sights low, dealing energy damage and stunning the target for 4 seconds and allowing your next Quickdraw to be used regardless of the target's remaining health and deal 15% additional damage. Requires dual blasters.
You can use your short stun on weaker enemies to stop them from running around, from casting abilities, to stop them from damaging you, or just to keep them out of the fight in general.
Surrender grants Dodge Stance, increasing your chance to dodge melee and ranged attacks by 200% and reducing the damage you take from Force and Tech attacks by 75% for 3 seconds. Additionally, activating Surrender resets the cooldown of Hightail It.
Surrender grants Dodge Stance, increasing your chance to dodge melee and ranged attacks by 200% and reducing the damage you take from Force and Tech attacks by 75% for 3 seconds. Additionally, activating Surrender resets the cooldown of Hightail It.
![]() General Suggestion: Flourish Burst - Unfortunately at level 27 a damage increase is competing against a better defensive passive and an optional stun, and as a DPS-only combat style, you should really be taking the DPS increase. If you really need a 4 second stun for something, Below the Belt is there, but ultimately, take Flourish Burst by default.
General Suggestion: Flourish Burst - Unfortunately at level 27 a damage increase is competing against a better defensive passive and an optional stun, and as a DPS-only combat style, you should really be taking the DPS increase. If you really need a 4 second stun for something, Below the Belt is there, but ultimately, take Flourish Burst by default.
Level 39 Choice: Penetrating Rounds Change
Choose from one of three ways that you want Penetrating Rounds to change at level 39. Your options are Piercing Rounds, Energy Barrels, and Lucky Draw.
Unleashes a number of rounds that deal weapon damage and sunder the target for 45 seconds. Sundered targets have their armor rating reduced by 20%. Consumes 20 energy over the duration of the channel. Requires both blasters. Replaces Speed Shot.
Increases the armor penetration of Penetrating Rounds by 20% and Penetrating Rounds now immobilizes targets for the duration of the channel.
Increases the armor penetration of Penetrating Rounds by 20% and Penetrating Rounds now immobilizes targets for the duration of the channel.
Increases the energy cost of Penetrating Rounds by 10 energy and increases its critical hit damage and critical hit chance by 20%.
Increases the energy cost of Penetrating Rounds by 10 energy and increases its critical hit damage and critical hit chance by 20%.
Whenever Penetrating Rounds deals damage, the cooldown of Smuggler's Luck is reduced by 2 seconds.
Whenever Penetrating Rounds deals damage, the cooldown of Smuggler's Luck is reduced by 2 seconds.
![]() General Suggestion: Energy Barrels - A good reason why sharpshooter's rotation has an emphasis on energy conservation; this choice that makes it harder also does great damage. This is by far the best damage increase on the level 39 tier, but if you find yourself unable to keep your energy levels up, Piercing Rounds is also free damage with no energy drawback.
General Suggestion: Energy Barrels - A good reason why sharpshooter's rotation has an emphasis on energy conservation; this choice that makes it harder also does great damage. This is by far the best damage increase on the level 39 tier, but if you find yourself unable to keep your energy levels up, Piercing Rounds is also free damage with no energy drawback.
Level 43 Choice
Choose from one of three Gunslinger abilities at Level 43, you can only have one of these options at any given time. Your options as a Sharpshooter Gunslinger for the Level 43 choice are Lucky Thoughts, Ballistic Redistribution, and Illegal Mods.
Dealing damage has a 50% chance to reduce Smuggler's Luck's cooldown by 2 seconds.
Dealing damage has a 50% chance to reduce Smuggler's Luck's cooldown by 2 seconds.
Critically hitting with a weapon attack restores 2 energy.
Critically hitting with a weapon attack restores 2 energy.
Increases ranged and tech accuracy by 30% and armor penetration by 15% for 10 seconds and immediately restores 15 energy. In addition, Illegal Mods generates one charge of Smuggler's Luck.
Increases ranged and tech accuracy by 30% and armor penetration by 15% for 10 seconds and immediately restores 15 energy. In addition, Illegal Mods generates one charge of Smuggler's Luck.
Surrender purges all movement-impairing effects when activated and grants Reset Engagement, increasing your movement speed by 75% for 6 seconds.
Surrender purges all movement-impairing effects when activated and grants Reset Engagement, increasing your movement speed by 75% for 6 seconds.
![]() General Suggestion: Lucky Thoughts - This choice will result in the biggest increase to your damage over longer fights where multiple uses of Smuggler's Luck are possible, but if you find yourself forgetting to use Smuggler's Luck or running out of energy too much, Ballistic Redistribution can help for less damage.
General Suggestion: Lucky Thoughts - This choice will result in the biggest increase to your damage over longer fights where multiple uses of Smuggler's Luck are possible, but if you find yourself forgetting to use Smuggler's Luck or running out of energy too much, Ballistic Redistribution can help for less damage.
Level 51 Choice
Choose from one of three Gunslinger abilities at Level 51, you can only have one of these options at any given time. Your options as a Sharpshooter Gunslinger for the Level 51 choice are Snap Shot, Ballistic Dampers, and Lay Low.
Entering cover makes the next Charged Burst or Dirty Blast activate instantly. This effect cannot occur more than once every 6 seconds.
Entering cover makes the next Charged Burst or Dirty Blast activate instantly. This effect cannot occur more than once every 6 seconds.
Entering cover grants 3 charges of Ballistic Dampers. Each charge absorbs 30% of the damage dealt by incoming attacks. This effect cannot occur more than once every 1.5 seconds. Ballistic Dampers can only be gained once every 6 seconds.
Entering cover grants 3 charges of Ballistic Dampers. Each charge absorbs 30% of the damage dealt by incoming attacks. This effect cannot occur more than once every 1.5 seconds. Ballistic Dampers can only be gained once every 6 seconds.
Reduces the cooldown of Hunker Down by 15 seconds. In addition, Pulse Detonator knocks targets back an additional 5 meters and the final shot of Speed Shot and Penetrating Rounds knocks targets back if they are within 10 meters.
Reduces the cooldown of Hunker Down by 15 seconds. In addition, Pulse Detonator knocks targets back an additional 5 meters and the final shot of Speed Shot and Penetrating Rounds knocks targets back if they are within 10 meters.
![]() General Suggestion: Ballistic Dampers - Ballistic Dampers is a great method of reducing damage done to your squishy gunslinger in any content! 30% less damage taken for the next few hits every time you enter cover will immediately show noticeable tankiness as soon as you reach this choice at 51. Always be taking cover!
General Suggestion: Ballistic Dampers - Ballistic Dampers is a great method of reducing damage done to your squishy gunslinger in any content! 30% less damage taken for the next few hits every time you enter cover will immediately show noticeable tankiness as soon as you reach this choice at 51. Always be taking cover!
Level 64 Choice
Choose from one of three Gunslinger abilities at Level 64, you can only have one of these options at any given time. Your options as a Sharpshooter Gunslinger for the Level 64 choice are Cool Under Pressure, Perfect Scheme, and Efficient Ammo.
While in cover, you heal for 3% of your total health every 2 seconds.
While in cover, you heal for 3% of your total health every 2 seconds.
Reduces the cooldown of Bag of Tricks by 45 seconds and increases your damage reduction by 15% for 15 seconds after activating Bag of Tricks.
Reduces the cooldown of Bag of Tricks by 45 seconds and increases your damage reduction by 15% for 15 seconds after activating Bag of Tricks.
Increases the damage dealt by Sweeping Gunfire by 25%.
Increases the damage dealt by Sweeping Gunfire by 25%.
![]() Solo Single-Strong-Enemy Suggestion: Perfect Scheme - A reduced cooldown on bag of tricks enables you to use surrender more often, which can also allow you to roll more often, which is pretty fun mobility!
Solo Single-Strong-Enemy Suggestion: Perfect Scheme - A reduced cooldown on bag of tricks enables you to use surrender more often, which can also allow you to roll more often, which is pretty fun mobility!
![]() Multi-Enemy Solo Suggestion: Perfect Scheme - A reduced cooldown on bag of tricks enables you to use surrender more often, which can also allow you to roll more often, which is pretty fun mobility!
Multi-Enemy Solo Suggestion: Perfect Scheme - A reduced cooldown on bag of tricks enables you to use surrender more often, which can also allow you to roll more often, which is pretty fun mobility!
![]() Flashpoint Suggestion: Perfect Scheme - Unlike the other two gunslingers, sharpshooters have fewer tools for dealing AoE damage: in any fight that has 3+ targets to hit, it's suggested to take this for a big boost.
Flashpoint Suggestion: Perfect Scheme - Unlike the other two gunslingers, sharpshooters have fewer tools for dealing AoE damage: in any fight that has 3+ targets to hit, it's suggested to take this for a big boost.
![]() Operation Suggestion: Perfect Scheme - Unlike the other two gunslingers, sharpshooters have fewer tools for dealing AoE damage: in any fight that has 3+ targets to hit, it's suggested to take this for a big boost.
Operation Suggestion: Perfect Scheme - Unlike the other two gunslingers, sharpshooters have fewer tools for dealing AoE damage: in any fight that has 3+ targets to hit, it's suggested to take this for a big boost.
Level 68 Choice
Choose from one of three Gunslinger abilities at Level 68, you can only have one of these options at any given time. Your options as a Sharpshooter Gunslinger for the Level 68 choice are Hideout, Scrambling Field, and Bombing Run.
Activating the ability marks your current location for 10 minutes. When this ability is activated again, if you are within 60 meters of the marked location, you instantly return to the marked location. Hideout goes on cooldown for 120 seconds when used to return to the marked location.
Activating the ability marks your current location for 10 minutes. When this ability is activated again, if you are within 60 meters of the marked location, you instantly return to the marked location. Hideout goes on cooldown for 120 seconds when used to return to the marked location.
Deploys an acquired scrambling field that disrupts the energy signatures of conventional weapons. The field spans 10 meters around you, reducing the damage taken by all allies that remain inside by 20%. Lasts 25 seconds.
Deploys an acquired scrambling field that disrupts the energy signatures of conventional weapons. The field spans 10 meters around you, reducing the damage taken by all allies that remain inside by 20%. Lasts 25 seconds.
Calls in support from your crew, dealing elemental damage over 9 seconds to up to 8 enemies within 8 meters of the targeted area. Additionally, standard and weak enemies are stunned by the flames.
Calls in support from your crew, dealing elemental damage over 9 seconds to up to 8 enemies within 8 meters of the targeted area. Additionally, standard and weak enemies are stunned by the flames.
![]() Operation Suggestion: Scrambling Field - Scrambling Field is a very strong group-wide defensive that should be taken whenever needed. If you find that you need a little more damage, you could take Bombing Run instead and have it do some extra damage over time at the beginning of a fight.
Operation Suggestion: Scrambling Field - Scrambling Field is a very strong group-wide defensive that should be taken whenever needed. If you find that you need a little more damage, you could take Bombing Run instead and have it do some extra damage over time at the beginning of a fight.
![]() Solo Single-Strong-Enemy Suggestion: Bombing Run - Bombing run is a great source of free damage even in single target scenarios if you drop it on the enemy right at the beginning of a fight. Open up with this if you take it! If you find you really dont need an extra Area Attack or maybe really need some group utility, Scrambling Field is a very strong group-wide defensive that should be taken whenever needed.
Solo Single-Strong-Enemy Suggestion: Bombing Run - Bombing run is a great source of free damage even in single target scenarios if you drop it on the enemy right at the beginning of a fight. Open up with this if you take it! If you find you really dont need an extra Area Attack or maybe really need some group utility, Scrambling Field is a very strong group-wide defensive that should be taken whenever needed.
![]() Multi-Enemy Solo Suggestion: Bombing Run - Bombing run is a great source of free damage even in single target scenarios if you drop it on the enemy right at the beginning of a fight. Open up with this if you take it! If you find you really dont need an extra Area Attack or maybe really need some group utility, Scrambling Field is a very strong group-wide defensive that should be taken whenever needed.
Multi-Enemy Solo Suggestion: Bombing Run - Bombing run is a great source of free damage even in single target scenarios if you drop it on the enemy right at the beginning of a fight. Open up with this if you take it! If you find you really dont need an extra Area Attack or maybe really need some group utility, Scrambling Field is a very strong group-wide defensive that should be taken whenever needed.
![]() Flashpoint Suggestion: Bombing Run - Bombing run is a great source of free damage even in single target scenarios if you drop it on the enemy right at the beginning of a fight. Open up with this if you take it! If you find you really dont need an extra Area Attack or maybe really need some group utility, Scrambling Field is a very strong group-wide defensive that should be taken whenever needed.
Flashpoint Suggestion: Bombing Run - Bombing run is a great source of free damage even in single target scenarios if you drop it on the enemy right at the beginning of a fight. Open up with this if you take it! If you find you really dont need an extra Area Attack or maybe really need some group utility, Scrambling Field is a very strong group-wide defensive that should be taken whenever needed.
Level 73 Choice
Choose from one of three Gunslinger abilities at Level 73, you can only have one of these options at any given time. Your options as a Sharpshooter Gunslinger for the Level 73 choice are Hotwired Defenses, Hot Pursuit, and Heads Up.
Increases the amount of damage absorbed by defense screen by 30%. In addition, when taking damage while Hunker Down is active the cooldown for Bag of Tricks is reduced by 2 seconds. This effect can only occur once every 3 seconds.
Increases the amount of damage absorbed by defense screen by 30%. In addition, when taking damage while Hunker Down is active the cooldown for Bag of Tricks is reduced by 2 seconds. This effect can only occur once every 3 seconds.
You gain 4 charges of Hot Pursuit upon exiting cover, which allow Charged Burst and Dirty Blast to be activated while moving. This effect lasts up to 15 seconds or until all 4 charges are consumed, but reentering cover removes the effect prematurely. Hot Pursuit cannot be gained more than once every 20 seconds.
You gain 4 charges of Hot Pursuit upon exiting cover, which allow Charged Burst and Dirty Blast to be activated while moving. This effect lasts up to 15 seconds or until all 4 charges are consumed, but reentering cover removes the effect prematurely. Hot Pursuit cannot be gained more than once every 20 seconds.
When Hunker Down ends or you leave cover while Hunker Down is active, you gain Heads Up, which increases your movement speed by 50% and grants immunity to movement impairing effects. Lasts 6 seconds.
When Hunker Down ends or you leave cover while Hunker Down is active, you gain Heads Up, which increases your movement speed by 50% and grants immunity to movement impairing effects. Lasts 6 seconds.
![]() Solo Single-Strong-Enemy Suggestion: Hotwired Defenses - Hotwired defenses takes the strongest defensive that gunslingers have and makes it better! This should be the default choice for any gunslinger taking damage.
Solo Single-Strong-Enemy Suggestion: Hotwired Defenses - Hotwired defenses takes the strongest defensive that gunslingers have and makes it better! This should be the default choice for any gunslinger taking damage.
![]() Multi-Enemy Solo Suggestion: Hotwired Defenses - Hotwired defenses takes the strongest defensive that gunslingers have and makes it better! This should be the default choice for any gunslinger taking damage.
Multi-Enemy Solo Suggestion: Hotwired Defenses - Hotwired defenses takes the strongest defensive that gunslingers have and makes it better! This should be the default choice for any gunslinger taking damage.
![]() Flashpoint Suggestion: Heads Up - If you aren't taking much damage and would rather some utility over Hotwired Defenses' increase to reduction, Heads up is a great addition of mobility for gunslingers that may need help dodging area attacks or standing in the right place for mechanics.
Flashpoint Suggestion: Heads Up - If you aren't taking much damage and would rather some utility over Hotwired Defenses' increase to reduction, Heads up is a great addition of mobility for gunslingers that may need help dodging area attacks or standing in the right place for mechanics.
![]() Operation Suggestion: Heads Up - If you aren't taking much damage and would rather some utility over Hotwired Defenses' increase to reduction, Heads up is a great addition of mobility for gunslingers that may need help dodging area attacks or standing in the right place for mechanics.
Operation Suggestion: Heads Up - If you aren't taking much damage and would rather some utility over Hotwired Defenses' increase to reduction, Heads up is a great addition of mobility for gunslingers that may need help dodging area attacks or standing in the right place for mechanics.
All Abilities
All your abilities for the Sharpshooter Gunslinger.
| Lvl | Icon | Ability |
|---|---|---|
| LvL1 | CrouchCover Crouches in place, taking cover if used behind an object that provides cover. Crouching enables the use of cover-only abilities, and so long as you remain down behind a cover object, most ranged attackers strike your cover instead. You must be in cover to take advantage of some of you abilities. Your Crouch will allow you to take cover where you are standing. | |
| LvL1 | Take CoverEnvironment Cover Roll into the selected cover point. If no cover point is available, you will crouch in place. Taking cover enables the use of cover-only abilities, and so long as you remain down behind a cover object, most ranged attackers strike your cover instead. You must be in cover to take advantage of some of you abilities. You have two ways to enter Cover - your normal Cover in place ability, and your Environment Cover, which you can only use if there is terrain to take cover behind nearby, indicated by a holographic green figure crouching in front of a rock or barricade. | |
| LvL1 | Flurry of BoltsBasic Attack 35m Fires a flurry of bolts from your blaster, dealing weapon damage. Fires a flurry of bolts from your blaster, dealing weapon damage. | |
| LvL1 | Charged BurstAttack 35m Fires a series of powerful blasts for weapon damage. Fires both blasters if dual wielding. Fires a series of powerful blasts for weapon damage. Fires both blasters if dual wielding. | |
| LvL1 | QuickdrawAttack 35m Fires off a round of lightning-quick shots that deals weapon damage. Only usable on targets at or below 30% max health. Requires dual blasters. Fires off a round of lightning-quick shots that deals weapon damage. Only usable on targets at or below 30% max health. Requires dual blasters. | |
| LvL1 | RecuperateRegeneration Allows you to catch your breath, recovering your health and energy over 15 seconds. This is only usable out of combat. Regain health out of battle. | |
| LvL1 | Lucky ShotsPassive Class Buff Increases critical hit chance by 5%. Increases critical hit chance by 5%. | |
| LvL1 | Accurized BlastersPassive Increases the critical chance of Sweeping Gunfire by 15% and increases its critical damage by 30%. Increases the critical chance of Sweeping Gunfire by 15% and increases its critical damage by 30%. | |
| LvL1 | Aim HighPassive Increases the critical chance of Quickdraw and Penetrating Rounds by 15% and reduces the energy cost of Quickdraw by 3. Increases the critical chance of Quickdraw and Penetrating Rounds by 15% and reduces the energy cost of Quickdraw by 3. | |
| LvL1 | DeadeyePassive Increases the critical damage dealt by Aimed Shot, Penetrating Rounds, Trickshot, Charged Burst, and Quickdraw by 10%. Increases the critical damage dealt by Aimed Shot, Penetrating Rounds, Trickshot, Charged Burst, and Quickdraw by 10%. | |
| LvL1 | Rapid FireHidden Passive Reduces the cooldown of Aimed Shot and Penetrating Rounds by 3 seconds. Reduces the cooldown of Aimed Shot and Penetrating Rounds by 3 seconds. | |
| LvL1 | Slick ShooterPassive Increases the critical hit chance of Charged Burst and Trickshot by 4%. Additionally increases armor penetration by 10%. Increases the critical hit chance of Charged Burst and Trickshot by 4%. Additionally increases armor penetration by 10%. | |
| LvL4 | Thermal GrenadeArea Attack 35m Deals kinetic damage to the primary target and kinetic damage to up to 7 standard or weak enemies within 5 meters of the primary target. If the primary target is a standard of weak enemy, it is knocked to the ground. Deals kinetic damage to the primary target and kinetic damage to up to 7 standard or weak enemies within 5 meters of the primary target. If the primary target is a standard of weak enemy, it is knocked to the ground. | |
| LvL4 | Hold PositionPassive While in cover, ranged defense is increased by 20%, you cannot be leapt to or pulled, and you are immune to interrupts and ability activation pushback. While in cover, ranged defense is increased by 20%, you cannot be leapt to or pulled, and you are immune to interrupts and ability activation pushback. | |
| LvL7 | Sweeping GunfireArea Attack 35m Sprays a wave of bolts over the target area, dealing weapon damage over the duration to up to 8 targets within 8 meters. Requires dual blasters. Can only be used from cover. Sprays a wave of bolts over the target area, dealing weapon damage over the duration to up to 8 targets within 8 meters. Requires dual blasters. Can only be used from cover. | |
| LvL7 | Vital ShotAttack 35m Fires a shot that causes the target to bleed, dealing internal damage over 18 seconds. Fires a shot that causes the target to bleed, dealing internal damage over 18 seconds. | |
| LvL10 | EscapeStun Break Purges incapacitating and movement-impairing effects. If you are stunned and can’t move, you can use this ability to unstun yourself. | |
| LvL10 | Leg ShotAttack 35m Fires a shot that deals weapon damage and immobilizes the target for 5 seconds. Direct damage dealt after 2 seconds ends the effect prematurely. Fires both blasters if dual wielding. Fires a shot that deals weapon damage and immobilizes the target for 5 seconds. Direct damage dealt after 2 seconds ends the effect prematurely. Fires both blasters if dual wielding. | |
| LvL15 | Cool HeadBuff Keeps a cool head, recovering 50 energy over 3 seconds. Keeps a cool head, recovering 50 energy over 3 seconds. | |
| LvL15 | Crack ShotPassive Increases the range of Quick Shot, Flash Grenade, and Distraction to 30 meters, and additionally increases the range of all blaster, grenade, and charge attacks by 5 meters. In addition, Vital Shot marks its target for 45 seconds. Marked targets take 5% more damage from ranged weapon attacks. Increases the range of Quick Shot, Flash Grenade, and Distraction to 30 meters, and additionally increases the range of all blaster, grenade, and charge attacks by 5 meters. In addition, Vital Shot marks its target for 45 seconds. Marked targets take 5% more damage from ranged weapon attacks. | |
| LvL15 | Smuggler's LuckBuff Increases the critical hit chance of your next Aimed Shot by 100%. This ability has two charges. Increases the critical hit chance of your next Aimed Shot by 100%. This ability has two charges. | |
| LvL15 | Aimed ShotAttack 35m Fires a well-aimed shot that deals weapon damage. Aimed Shot ignores 20% of the targets armor. Requires dual blasters. Fires a well-aimed shot that deals weapon damage. Aimed Shot ignores 20% of the targets armor. Requires dual blasters. | |
| LvL15 | FoxholePassive Increases the energy regeneration rate by 1 per second while in cover. Increases the energy regeneration rate by 1 per second while in cover. | |
| LvL15 | Smuggler's Luck (passive)Passive Smuggler's Luck gets two charges. Smuggler's Luck gets two charges. | |
| LvL19 | DistractionInterrupt 35m Interrupts the target's current action and prevents that ability from being used for 4 seconds. Every class has an interrupt ability that allows them to interrupt an enemy while they are casting. Enemy castbars that fill up from left to right are called casts and can be interrupted and the ability will be stopped, but castbars that go from right to left deal damage the entire time they are channeling. Using your interrupt in combat is very useful as it can prevent the enemy from damaging you, or sometimes even prevent them from stunning you or knocking you back! | |
| LvL23 | SurrenderDetaunt Puts up the front of surrender, instantly lowering your threat by a moderate amount. Your detaunt ability will cause enemies to lose interest in your character, at least for a short time. This is most useful if you're getting attacked during group fights when your tank is supposed to be taking the damage, or when your companion is set to tank. | |
| LvL23 | Ready for AnythingPassive Upon entering cover, your stealth detection level begins to increase gradually, reaching up to 30 additional levels of stealth detection over the following 30 seconds. This effect ends when you leave cover. Upon entering cover, your stealth detection level begins to increase gradually, reaching up to 30 additional levels of stealth detection over the following 30 seconds. This effect ends when you leave cover. | |
| LvL23 | Charged AimPassive Charged Burst gets your blasters charged up, reducing the activating time of your next Aimed Shot by 0.25 seconds. Stacks up to 2 times. Charged Burst gets your blasters charged up, reducing the activating time of your next Aimed Shot by 0.25 seconds. Stacks up to 2 times. | |
| LvL23 | Sharp AimHidden Passive Aimed Shot ignores 20% of the target's armor. Aimed Shot ignores 20% of the target's armor. | |
| LvL23 | HotshotOptional Passive Level 23 Option 1/3 Increases the critical hit damage of Aimed Shot by 20%. Killing a target within 3 seconds after Aimed Shot critically hits the target resets the cooldown of Smuggler's Luck and Aimed Shot. Increases the critical hit damage of Aimed Shot by 20%. Killing a target within 3 seconds after Aimed Shot critically hits the target resets the cooldown of Smuggler's Luck and Aimed Shot. | |
| LvL23 | Shrap ShotOptional Passive Level 23 Option 2/3 Aimed Shot deals splash damage to nearby targets and slows them by 30% for 6 seconds. Aimed Shot deals splash damage to nearby targets and slows them by 30% for 6 seconds. Solo Many-Enemy Suggestion: Excellent addition of cleave to your hard hitting abilities will make pulls of 3+ targets much better. | |
| LvL23 | Relentless ShotsOptional Passive Level 23 Option 3/3 The energy cost of Aimed Shot is reduced by 5. Each use of Aimed Shot grants Relentless Shots lowering the cooldown of your next Aimed Shot by 1.5 seconds. Stacks up to 3 times. The energy cost of Aimed Shot is reduced by 5. Each use of Aimed Shot grants Relentless Shots lowering the cooldown of your next Aimed Shot by 1.5 seconds. Stacks up to 3 times. General Suggestion: Sharpshooter Gunslingers probably have the most difficulty juggling their energy levels while doing damage; a choice to reduce costs is very helpful. | |
| LvL27 | BravadoPassive Increases maximum energy by 10. Increases maximum energy by 10. | |
| LvL27 | Flourish BurstOptional Passive Level 27 Option 1/3 The critical hit damage of Charged Burst is increased by 20%. Dealing damage to a target with Charged Burst inflicts trauma for 10 seconds, reducing all healing the target receives by 20%. The critical hit damage of Charged Burst is increased by 20%. Dealing damage to a target with Charged Burst inflicts trauma for 10 seconds, reducing all healing the target receives by 20%. General Suggestion: Unfortunately at level 27 a damage increase is competing against a better defensive passive and an optional stun, and as a DPS-only combat style, you should really be taking the DPS increase. If you really need a 4 second stun for something, Below the Belt is there, but ultimately, take Flourish Burst by default. | |
| LvL27 | Below the BeltOptional Stun 10m (short range) Level 27 Option 2/3 Aim your sights low, dealing energy damage and stunning the target for 4 seconds and allowing your next Quickdraw to be used regardless of the target's remaining health and deal 15% additional damage. Requires dual blasters. You can use your short stun on weaker enemies to stop them from running around, from casting abilities, to stop them from damaging you, or just to keep them out of the fight in general. | |
| LvL27 | Dodge StanceOptional Passive Level 27 Option 3/3 Surrender grants Dodge Stance, increasing your chance to dodge melee and ranged attacks by 200% and reducing the damage you take from Force and Tech attacks by 75% for 3 seconds. Additionally, activating Surrender resets the cooldown of Hightail It. Surrender grants Dodge Stance, increasing your chance to dodge melee and ranged attacks by 200% and reducing the damage you take from Force and Tech attacks by 75% for 3 seconds. Additionally, activating Surrender resets the cooldown of Hightail It. | |
| LvL31 | Pulse DetonatorKnockback Detonates an emergency charge that knocks all nearby targets back several meters and immobilizes them for 5 seconds. Damage dealt after 2 seconds ends the effect prematurely. Only usable in cover. Pushes enemies back. | |
| LvL35 | DiversionDefensive 35m Reduces the accuracy by 45% and exposes from cover of up to 8 enemies within 8 meters for 6 seconds. Cannot be used on Operation Bosses. Reduces the accuracy by 45% and exposes from cover of up to 8 enemies within 8 meters for 6 seconds. Cannot be used on Operation Bosses. | |
| LvL35 | Hunker DownDefensive Hunkers you down into cover, becoming immune to all controlling effects and reducing all area effect damage taken by 60%. Only grants protection while in cover. Lasts 20 seconds. Hunkers you down into cover, becoming immune to all controlling effects and reducing all area effect damage taken by 60%. Only grants protection while in cover. Lasts 20 seconds. | |
| LvL35 | Penetrating RoundsAttack 35m Unleashes a number of rounds that deal weapon damage and sunder the target for 45 seconds. Sundered targets have their armor rating reduced by 20%. Consumes 20 energy over the duration of the channel. Requires both blasters. Replaces Speed Shot. Unleashes a number of rounds that deal weapon damage and sunder the target for 45 seconds. Sundered targets have their armor rating reduced by 20%. Consumes 20 energy over the duration of the channel. Requires both blasters. Replaces Speed Shot. | |
| LvL35 | Percussive DiversionPassive Targets affected by your Diversion continue to be affected for 3 seconds after leaving the area of effect. Targets affected by your Diversion continue to be affected for 3 seconds after leaving the area of effect. | |
| LvL37 | Speed ShotAttack 35m Unloads both blasters at a high rate of fire, dealing weapon damage over the duration. Consumes 20 energy over the duration of the channel. Requires dual blasters. Unloads both blasters at a high rate of fire, dealing weapon damage over the duration. Consumes 20 energy over the duration of the channel. Requires dual blasters. | |
| LvL39 | Steady ShotsPassive Increases the damage dealt by Charged Burst, Dirty Blast, Speed Shot, and Penetrating Rounds by 5%. Increases the damage dealt by Charged Burst, Dirty Blast, Speed Shot, and Penetrating Rounds by 5%. | |
| LvL39 | Piercing RoundsOptional Passive Level 39 Option 1/3 Increases the armor penetration of Penetrating Rounds by 20% and Penetrating Rounds now immobilizes targets for the duration of the channel. Increases the armor penetration of Penetrating Rounds by 20% and Penetrating Rounds now immobilizes targets for the duration of the channel. | |
| LvL39 | Energy BarrelsOptional Passive Level 39 Option 2/3 Increases the energy cost of Penetrating Rounds by 10 energy and increases its critical hit damage and critical hit chance by 20%. Increases the energy cost of Penetrating Rounds by 10 energy and increases its critical hit damage and critical hit chance by 20%. General Suggestion: A good reason why sharpshooter's rotation has an emphasis on energy conservation; this choice that makes it harder also does great damage. This is by far the best damage increase on the level 39 tier, but if you find yourself unable to keep your energy levels up, Piercing Rounds is also free damage with no energy drawback. | |
| LvL39 | Lucky DrawOptional Passive Level 39 Option 3/3 Whenever Penetrating Rounds deals damage, the cooldown of Smuggler's Luck is reduced by 2 seconds. Whenever Penetrating Rounds deals damage, the cooldown of Smuggler's Luck is reduced by 2 seconds. | |
| LvL43 | Lucky ThoughtsOptional Passive Level 43 Option 1/3 Dealing damage has a 50% chance to reduce Smuggler's Luck's cooldown by 2 seconds. Dealing damage has a 50% chance to reduce Smuggler's Luck's cooldown by 2 seconds. General Suggestion: This choice will result in the biggest increase to your damage over longer fights where multiple uses of Smuggler's Luck are possible, but if you find yourself forgetting to use Smuggler's Luck or running out of energy too much, Ballistic Redistribution can help for less damage. | |
| LvL43 | Ballistic RedistributionOptional Passive Level 43 Option 2/3 Critically hitting with a weapon attack restores 2 energy. Critically hitting with a weapon attack restores 2 energy. | |
| LvL43 | Illegal ModsOptional Buff Level 43 Option 3/3 Increases ranged and tech accuracy by 30% and armor penetration by 15% for 10 seconds and immediately restores 15 energy. In addition, Illegal Mods generates one charge of Smuggler's Luck. Increases ranged and tech accuracy by 30% and armor penetration by 15% for 10 seconds and immediately restores 15 energy. In addition, Illegal Mods generates one charge of Smuggler's Luck. | |
| LvL43 | Honed ShotsPassive Charged Burst grants Honed Shots, increasing the critical hit chance and damage done by Charged Burst by 3% for 20 seconds. Stacks up to 3 times. Charged Burst grants Honed Shots, increasing the critical hit chance and damage done by Charged Burst by 3% for 20 seconds. Stacks up to 3 times. | |
| LvL43 | Reset EngagementHidden Passive Surrender purges all movement-impairing effects when activated and grants Reset Engagement, increasing your movement speed by 75% for 6 seconds. Surrender purges all movement-impairing effects when activated and grants Reset Engagement, increasing your movement speed by 75% for 6 seconds. | |
| LvL47 | Defense ScreenDefensive Projects a defense field around yourself for up to 10 seconds, which absorbs damage. Does not break stealth. Projects a defense field around yourself for up to 10 seconds, which absorbs damage. Does not break stealth. | |
| LvL47 | TrickshotAttack 35m Fires a wild follow-up shot at the target that deals weapon damage. Only usable within the 5 seconds immediately following a Charged Burst, Aimed Shot, Quickdraw, or a complete Penetrating Rounds. Requires both blasters. Fires a wild follow-up shot at the target that deals weapon damage. Only usable within the 5 seconds immediately following a Charged Burst, Aimed Shot, Quickdraw, or a complete Penetrating Rounds. Requires both blasters. | |
| LvL51 | Snap ShotOptional Passive Level 51 Option 1/3 Entering cover makes the next Charged Burst or Dirty Blast activate instantly. This effect cannot occur more than once every 6 seconds. Entering cover makes the next Charged Burst or Dirty Blast activate instantly. This effect cannot occur more than once every 6 seconds. | |
| LvL51 | Ballistic DampersOptional Passive Level 51 Option 2/3 Entering cover grants 3 charges of Ballistic Dampers. Each charge absorbs 30% of the damage dealt by incoming attacks. This effect cannot occur more than once every 1.5 seconds. Ballistic Dampers can only be gained once every 6 seconds. Entering cover grants 3 charges of Ballistic Dampers. Each charge absorbs 30% of the damage dealt by incoming attacks. This effect cannot occur more than once every 1.5 seconds. Ballistic Dampers can only be gained once every 6 seconds. General Suggestion: Ballistic Dampers is a great method of reducing damage done to your squishy gunslinger in any content! 30% less damage taken for the next few hits every time you enter cover will immediately show noticeable tankiness as soon as you reach this choice at 51. Always be taking cover! | |
| LvL51 | Lay LowOptional Passive Level 51 Option 3/3 Reduces the cooldown of Hunker Down by 15 seconds. In addition, Pulse Detonator knocks targets back an additional 5 meters and the final shot of Speed Shot and Penetrating Rounds knocks targets back if they are within 10 meters. Reduces the cooldown of Hunker Down by 15 seconds. In addition, Pulse Detonator knocks targets back an additional 5 meters and the final shot of Speed Shot and Penetrating Rounds knocks targets back if they are within 10 meters. | |
| LvL51 | Recoil ControlPassive Firing Charged Burst twice in a row, firing Quickdraw or Aimed Shot once, or completing a Penetrating Rounds now finishes the cooldown on Trickshot. Firing Charged Burst twice in a row, firing Quickdraw or Aimed Shot once, or completing a Penetrating Rounds now finishes the cooldown on Trickshot. | |
| LvL60 | Hightail ItMovement Roll forward 18 meters, purging movement-impairing effects and landing crouched behind cover. While rolling, your chance to dodge attacks is increased by 100%. Roll forward 18 meters, purging movement-impairing effects and landing crouched behind cover. While rolling, your chance to dodge attacks is increased by 100%. | |
| LvL60 | Burst VolleyBuff Immediately finishes the cooldown of Penetrating Rounds, increases base energy regeneration by 2 per second, and increases alacrity by 10%. Lasts 15 seconds. Immediately finishes the cooldown of Penetrating Rounds, increases base energy regeneration by 2 per second, and increases alacrity by 10%. Lasts 15 seconds. | |
| LvL60 | Smoking BarrelsPassive Trickshot reduces the energy cost of your next two Charged Bursts by 5. Trickshot reduces the energy cost of your next two Charged Bursts by 5. | |
| LvL64 | Cool Under PressureOptional Passive Level 64 Option 1/3 While in cover, you heal for 3% of your total health every 2 seconds. While in cover, you heal for 3% of your total health every 2 seconds. | |
| LvL64 | Perfect SchemeOptional Passive Level 64 Option 2/3 Reduces the cooldown of Bag of Tricks by 45 seconds and increases your damage reduction by 15% for 15 seconds after activating Bag of Tricks. Reduces the cooldown of Bag of Tricks by 45 seconds and increases your damage reduction by 15% for 15 seconds after activating Bag of Tricks. Solo Single-Enemy Suggestion: A reduced cooldown on bag of tricks enables you to use surrender more often, which can also allow you to roll more often, which is pretty fun mobility! Solo Many-Enemy Suggestion: A reduced cooldown on bag of tricks enables you to use surrender more often, which can also allow you to roll more often, which is pretty fun mobility! Flashpoint Suggestion: Unlike the other two gunslingers, sharpshooters have fewer tools for dealing AoE damage: in any fight that has 3+ targets to hit, it's suggested to take this for a big boost. Operation Suggestion: Unlike the other two gunslingers, sharpshooters have fewer tools for dealing AoE damage: in any fight that has 3+ targets to hit, it's suggested to take this for a big boost. | |
| LvL64 | Efficient AmmoOptional Passive Level 64 Option 3/3 Increases the damage dealt by Sweeping Gunfire by 25%. Increases the damage dealt by Sweeping Gunfire by 25%. | |
| LvL67 | Bag of TricksBuff Immediately finishes the active cooldowns on Surrender, Defense Screen, Pulse Detonator, and Hunker Down. Immediately finishes the active cooldowns on Surrender, Defense Screen, Pulse Detonator, and Hunker Down. | |
| LvL68 | HideoutOptional Teleport 60m Level 68 Option 1/3 Activating the ability marks your current location for 10 minutes. When this ability is activated again, if you are within 60 meters of the marked location, you instantly return to the marked location. Hideout goes on cooldown for 120 seconds when used to return to the marked location. Activating the ability marks your current location for 10 minutes. When this ability is activated again, if you are within 60 meters of the marked location, you instantly return to the marked location. Hideout goes on cooldown for 120 seconds when used to return to the marked location. | |
| LvL68 | Scrambling FieldOptional Defensive 10m (short range) Level 68 Option 2/3 Deploys an acquired scrambling field that disrupts the energy signatures of conventional weapons. The field spans 10 meters around you, reducing the damage taken by all allies that remain inside by 20%. Lasts 25 seconds. Deploys an acquired scrambling field that disrupts the energy signatures of conventional weapons. The field spans 10 meters around you, reducing the damage taken by all allies that remain inside by 20%. Lasts 25 seconds. Operation Suggestion: Scrambling Field is a very strong group-wide defensive that should be taken whenever needed. If you find that you need a little more damage, you could take Bombing Run instead and have it do some extra damage over time at the beginning of a fight. | |
| LvL68 | Bombing RunOptional Area Attack 35m Level 68 Option 3/3 Calls in support from your crew, dealing elemental damage over 9 seconds to up to 8 enemies within 8 meters of the targeted area. Additionally, standard and weak enemies are stunned by the flames. Calls in support from your crew, dealing elemental damage over 9 seconds to up to 8 enemies within 8 meters of the targeted area. Additionally, standard and weak enemies are stunned by the flames. Solo Single-Enemy Suggestion: Bombing run is a great source of free damage even in single target scenarios if you drop it on the enemy right at the beginning of a fight. Open up with this if you take it! If you find you really dont need an extra Area Attack or maybe really need some group utility, Scrambling Field is a very strong group-wide defensive that should be taken whenever needed. Solo Many-Enemy Suggestion: Bombing run is a great source of free damage even in single target scenarios if you drop it on the enemy right at the beginning of a fight. Open up with this if you take it! If you find you really dont need an extra Area Attack or maybe really need some group utility, Scrambling Field is a very strong group-wide defensive that should be taken whenever needed. Flashpoint Suggestion: Bombing run is a great source of free damage even in single target scenarios if you drop it on the enemy right at the beginning of a fight. Open up with this if you take it! If you find you really dont need an extra Area Attack or maybe really need some group utility, Scrambling Field is a very strong group-wide defensive that should be taken whenever needed. | |
| LvL68 | Stay LowPassive Increases the duration of Hunker Down by 3 seconds. In addition, when you enter cover after using Hightail It, you gain Hunker Down for the first 3 seconds. Increases the duration of Hunker Down by 3 seconds. In addition, when you enter cover after using Hightail It, you gain Hunker Down for the first 3 seconds. | |
| LvL73 | Hotwired DefensesOptional Passive Level 73 Option 1/3 Increases the amount of damage absorbed by defense screen by 30%. In addition, when taking damage while Hunker Down is active the cooldown for Bag of Tricks is reduced by 2 seconds. This effect can only occur once every 3 seconds. Increases the amount of damage absorbed by defense screen by 30%. In addition, when taking damage while Hunker Down is active the cooldown for Bag of Tricks is reduced by 2 seconds. This effect can only occur once every 3 seconds. Solo Single-Enemy Suggestion: Hotwired defenses takes the strongest defensive that gunslingers have and makes it better! This should be the default choice for any gunslinger taking damage. Solo Many-Enemy Suggestion: Hotwired defenses takes the strongest defensive that gunslingers have and makes it better! This should be the default choice for any gunslinger taking damage. | |
| LvL73 | Hot PursuitOptional Passive Level 73 Option 2/3 You gain 4 charges of Hot Pursuit upon exiting cover, which allow Charged Burst and Dirty Blast to be activated while moving. This effect lasts up to 15 seconds or until all 4 charges are consumed, but reentering cover removes the effect prematurely. Hot Pursuit cannot be gained more than once every 20 seconds. You gain 4 charges of Hot Pursuit upon exiting cover, which allow Charged Burst and Dirty Blast to be activated while moving. This effect lasts up to 15 seconds or until all 4 charges are consumed, but reentering cover removes the effect prematurely. Hot Pursuit cannot be gained more than once every 20 seconds. | |
| LvL73 | Heads UpOptional Passive Level 73 Option 3/3 When Hunker Down ends or you leave cover while Hunker Down is active, you gain Heads Up, which increases your movement speed by 50% and grants immunity to movement impairing effects. Lasts 6 seconds. When Hunker Down ends or you leave cover while Hunker Down is active, you gain Heads Up, which increases your movement speed by 50% and grants immunity to movement impairing effects. Lasts 6 seconds. Flashpoint Suggestion: If you aren't taking much damage and would rather some utility over Hotwired Defenses' increase to reduction, Heads up is a great addition of mobility for gunslingers that may need help dodging area attacks or standing in the right place for mechanics. Operation Suggestion: If you aren't taking much damage and would rather some utility over Hotwired Defenses' increase to reduction, Heads up is a great addition of mobility for gunslingers that may need help dodging area attacks or standing in the right place for mechanics. | |
| LvL73 | Sharpshooter's TouchPassive Charged Burst grants Sharpshooter's Touch, increasing the armor penetration and damage dealt by your next Trickshot by 10%. Stacks up to 2 times. Charged Burst grants Sharpshooter's Touch, increasing the armor penetration and damage dealt by your next Trickshot by 10%. Stacks up to 2 times. | |
| LvL78 | Stay DownPassive Dealing damage with Aimed Shot to a target with less than 30% health grants Stay Down, increasing the damage of your next Quickdraw by 20%. Dealing damage with Aimed Shot to a target with less than 30% health grants Stay Down, increasing the damage of your next Quickdraw by 20%. |
Milestones
- At Level 15 you will get your first exclusive ability only the Sharpshooter Gunslinger has, it will be called Aimed Shot.
- At Level 23 you will get to choose a way to change how Aimed Shot works from three different options. This is your first Ability Tree choice, and you can make it by pressing K on your keyboard and selecting an option from the Sharpshooter Ability Tree on the right.
- At Level 27 you will get your second choice between three options in your Ability Tree. These options may be useable abilities you can click, or they can be passive abilities which give you a boost to your existing abilities.
- At Level 47 you will get your second exclusive ability only the Sharpshooter Gunslinger gets, it will be called Penetrating Rounds.
- At Level 39 you will get to choose a way to change how Penetrating Rounds works from three different options in your Ability Tree.
- At Level 47 and 60 you will get your last two exclusive abilities only the Sharpshooter Gunslinger has, Trickshot and Burst Volley.
- At Level 73, you will get to make an important choice between three major abilities. This is a big choice all players need to make for their character.
- At Level 43, 51, 64, 68 you will get to make additional choices for your Gunslinger.
- All of these Ability Tree choices are not permanent. You can change them any time you are not in combat and are not in a queue for Flashpoints, Operations or PvP.
 And finally thank you to Zahk who helped type up all the 1,000+ abilities in the game for each class so we could make the summaries and the basic class guides for each discipline, and helped with testing and formatting for this page!


 Easiest Classes to Play
 Basic Class Guides
 Focus Guardian Basics Guide
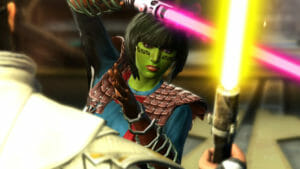 Vigilance Guardian Basics Guide
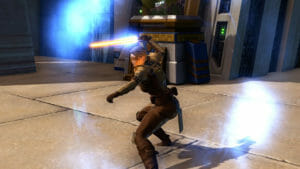 Defense Guardian Basics Guide
 Concentration Sentinel Basics Guide
 Combat Sentinel Basics Guide

 Twitter @swtorista
 Reddit /u/swtorista
 Discord Swtorista#0153
 Email swtorista@gmail.com
 Youtube Swtorista
 Twitch Swtorista
 Patreon