


The Feast of Prosperity event, sometimes known as the “Hutt Event”, “Feast Event”, “Fall Event”, or “Thanksgiving Event”, is a limited-time event in Star Wars: The Old Republic. This event only takes place once a year in the late fall. The event focuses on a gourmet feast being held by the Hutts as a charity event for the less wealthy of Nar Shaddaa. During the event you can earn some unique rewards including a a set of orange robes, some fun emotes and toys, a chef’s hat, and a lot of decorations. You can participate in the event as early as level 20, and the event is available to both free-to-play and subscribed players. This event lets you cook gourmet dishes and deliver food to patrons as a droid in two minigames, as well as gather exotic ingredients in the open world and from World Bosses.
LIMITED TIME EVENT: We do not know the 2024 dates yet. Likely sometime in mid-October.
There are the rewards that were added last year.
(Left) Young Wetlands Mudhorn – 1,875 Tokens
(Right) Curious Rodir Cub – 1,875 Tokens

All of the above personnel – civilian decorations (Feast Chef, Trader, and Attendee, all in male and female variants) are new to 2023 feast, and all cost the same 18,75 tokens!
Some other small nice updates include being able to talk to the NPC while in a group, and being able to have shared tagging for the World Bosses including on opposite factions should now be working.
These are the newer rewards from the previous times it ran if you haven’t collected them yet:
- Feast Trader’s Armor Set
- Roast Scyk Belly and Feast of Prosperity Poster decorations
- Gourmand’s Favorite Weapons
- Holo-Feasts
- Skiff Mounts
Guide video:

Rewards video:

Last year’s additions video:

Contents
How to Start the Feast of Prosperity Event
To start the Feast of Prosperity Event, look for the Festival Crier character on the Fleet. They will be locate near the northern elevator on the Republic fleet, and near the southern elevator on the Imperial Fleet.

After you watch introductory cutscene, you can fly to Nar Shaddaa with your ship


If you have the Nar Shaddaa stronghold, travelling to it and exiting will get you there very fast. Go up the single ramp not the double ramps to get there quicker.

If you do not have the stronghold, and still want to be efficient, you can open the Activity window by clicking the button of three little people near your minimap, then go to the solo tab and pick up the Nar Shaddaa heroics which will teleport you to Nar Shaddaa. You can then take a taxi, or quick travel, to the Upper Promenade. (See map below.)

The event is located in the northern part of the Upper Promenade and there should be a quest marker there if you talked to the crier first. Once you arrive, speak to both hutts for more information about the event, and then you’ll be rewarded with a fun item called a Single Use Food Launcher that you can right click when you have another player targetted and it will chuck some food at them for fun.
Quests
There are four types of quests for the event and weeklies that go with them. There’s the serving quests, cooking quests, the gathering quests, and world boss quests. The easiest way to get all the quests, is simply to pick up all the quests in the Feast of Prosperity event area – they’re all grouped together across multiple terminals. The World Boss mission does not show up until you pick up the prep work quest first, and you can only have one Cantina Rush quest at a time and one Cooking quest at a time, though you can pick the other one of each up after you drop or complete the first one you picked up.

When do the quests reset?
We’ll have to wait and see for 2022!
Quest List
| Quest | Tokens | Tactical | Description |
|---|---|---|---|
| Week 1 Quest - Sharing Our Bounty | 1,000 | - | One-time story quest, introduced the first week |
| Week 2 Quest - A Dash of Kindness | 1,000 | - | One-time story quest, introduced the second week |
| Week 3 Quest - Fate of the Feast | 1,000 | - | One-time story quest, introduced the third and final week |
| [Daily] Prep Work | 100 | - | Find specified ingredients in open world planets |
| [Daily] [World Boss] Special Request | 200 | - | Fight specified world boss |
| [Daily] Cantina Rush: Lunch Service (Easy) | 75 | 85 | One round, deliver 25 dishes, maximum of 5 failures |
| Perfect Rush (Easy) | 10 | 15 | Deliver food to every patron in the easy version of the cantina rush |
| [Daily] Cantina Rush: Dinner Service (Hard) | 125 | 145 | Five rounds, deliver 35 dishes each round, maximum of 5 failures |
| Perfect Rush (Hard) | 20 | 25 | Deliver food to every patron in the hard version of the cantina rush |
| [Daily] Cooking: Exotic Medley Delight | 75 | ?? | Untimed cooking minigame |
| [Daily] Challenge Dish: Ultimate Galactic Sampler | 100 | ?? | Timed cooking minigame |
| [WEEKLY] Cantina Rush | 750 | - | 0/3 Cantina Rush Dailies |
| [WEEKLY] Kitchen Duty | 750 | - | 0/3 Cookies Dailies |
| [WEEKLY] Ingredient Acquisition | 750 | - | 0/3 Ingredient Dailies |
| [WEEKLY] World Boss Ingredients | 750 | - | 0/3 World Boss Ingredient Dailies |
| [WEEKLY] The Feast of Prosperity | 2500 | - | 0/3 Weekly Missions |
Cantina Rush Missons

Cantina Rush is a fun minigame where you can deliver dishes to guests of the feast as a serving droid. You must pick up the correct dishes and deliver them to the correct patrons. There are two modes you can pick up from the quest terminal, and you can do each mode once per day per character. The easier mode has you deliver 25 dishes and only has a single round, while the more difficult mode has five rounds and each round seems to get progressively faster, but still has 25 dishes to deliver per round. To start the Cantina Rush pick up your desired Cantina Rush mode quest from the Work Request Board terminal, and then go up to the glowing blue door that is between the two hutts. As the minigame starts, you will start seeing the tables have symbols appear above their heads. These symbols represent the dish that they would like to eat. You can pick up dishes at the front of the room and when you take a dish another one of the same kind will appear in its place a few seconds later.
There are five different dishes, and they can be differentiated by the color of the shape behind the food, the picture of the food, and the the shape itself behind the food. Do not be confused by the color of the very large blinking circle around the guests’ food order, as that signifies how long you have left to deliver their dish before they get angry – it will cycle from blue to green to yellow to orange to red and then the timer will run out. You can also see how much time you have left with a guest by the quarters in the large blinking circle which disappear as the time counts down. To actually deliver a dish, roll your droid up to the food counter at the front, stand in front of the dish you want to pick up, and right click the glowing blue dish. You can pick up to four dishes up at a time, but you get slower the more dishes you pick up. If you are doing the easier mode, you can deliver one dish at a time, but the harder mode requires you to be more strategic. The sweet spot seems to be two dishes at once, and pick up a third dish if there is three tables waiting for orders near each other. Once you get to a table, you can press the 1, 2, 3, 4, and 5 keys on your keyboard to deliver the food to the table once you are close enough. You can see which key corresponds to each food on your quickbar, where you can also click the food delivery if you prefer that to using your number keys on your keyboard. If you bring the wrong order to the wrong table, nothing will happen when you press that food’s key. If nothing happens, double check you are pressing the correct key and are at the right table. If you accidentally picked up the wrong dish, and want to dump out so it doesn’t slow you down, go up to the trash can near the front serving area, and use your number keys to throw out the dish you don’t want to keep.
In the easier mode, the quest will auto complete the event once you deliver 25 dishes. It will track your failures of up to 5 dishes, but won’t actually fail you, and you can keep going until you succeed. In the harder mode, there are five rounds, and each round gets faster and more difficult, and the quest will autocomplete after you finish the final round.
There is a hidden achievement for doing a cantina rush perfectly without failing any tables, which will give you an extra 10 tokens on story mode and an extra 20 tokens on hard mode.

- 1 Key – Honey Glazed K’lor’slug – Red – Square
- 2 Key – Vegetarian Combo – Yellow – Rounded Square
- 3 Key – Full Huttese Breakfast Platter – Green – Triangle
- 4 Key – Swamp Lentil Soup – Blue – Circle
- 5 Key – Roast Bog Snarler – Purple – Pentagon

Cooking Missions

The second minigame during the event allows you to cook a dish by following the instructions of a chef. There are also two modes just like the Cantina Rush you can pick up from the quest terminal, and you can do each cooking mode once per day per character. The easier mode lets you cook without a timer, while the harder mode is a challenge of some sort. To start the cooking minigame, pick up your desired mode from the Work Request Board terminal, and then go to the glowing blue door that is a bit of a ways down the promenade, just follow the quest marker. Once you get inside, the chef will start giving you instructions. You will need to do things like turn on the stove by right clicking the glowing blue nob, or pick up ingredients which will also glow blue. If you need to add an ingredient to the pot or grill, you can use the temporary ability to chuck it in there once you’ve picked it up.

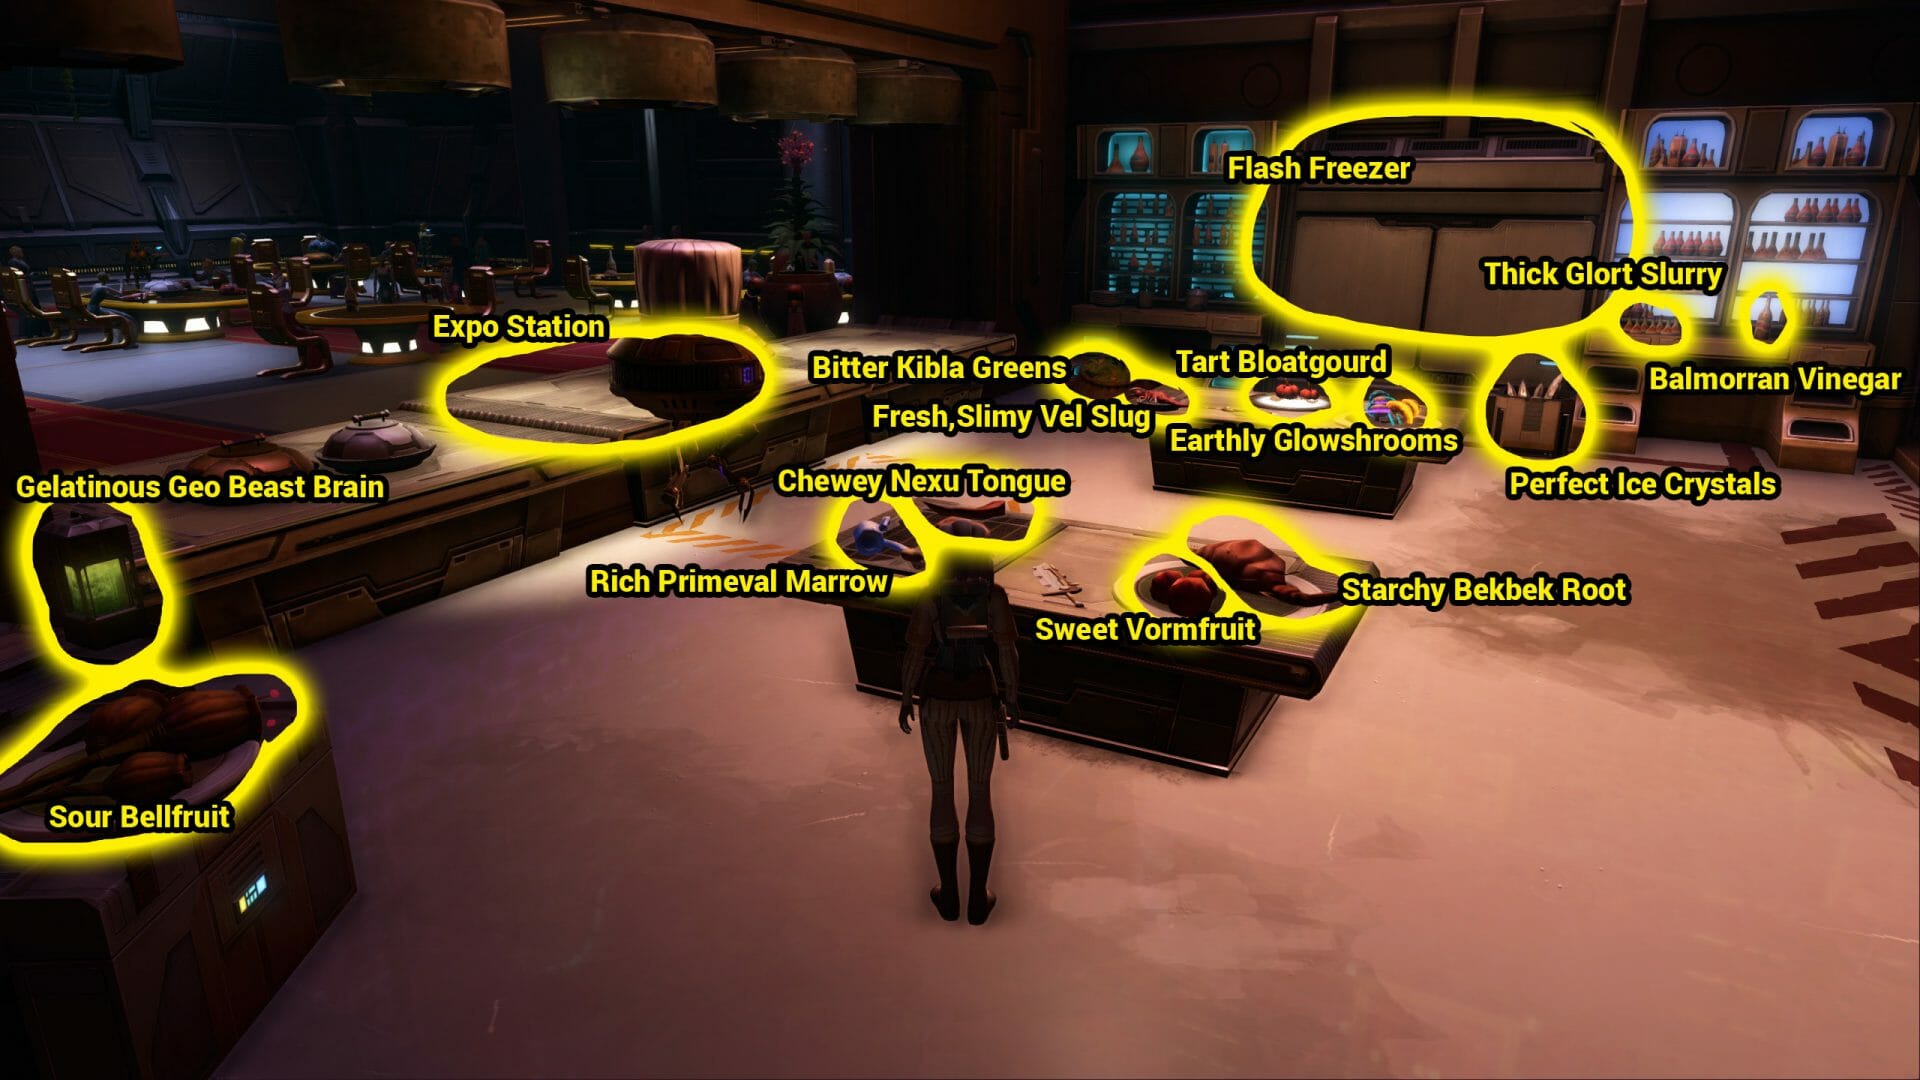
Ultimate Galactic Sampler: In the harder mode, there are two different dishes and challenges. The first and most common is the Ultimate Galactic Sampler, which has very short timed rounds between cooking and the ingredients are not highlighted so you will need to hunt for them by rolling over them to see their names or memorize where they are. There’s about sixteen ingredients scattered around the room, and if you’re having trouble finding any of them, I’ve made some labelled maps below.
Spicy Nexu Supreme: The second hard mode challenge is not timed, but requires you to think a little more. Here are the steps:
- Fire Up the Grill (right-click blue button)
- Tenderize Nexu Tounge (glows blue on the chopping board, right-click)
- Add Nexu Tounge: THERE IS SOMETHING WRONG WITH THIS ONE. Throwing it into the grill doesn’t work a lot of the time. Instead it SHOULD work if you throw it on the floor on front of the grill, where the striped lines on the floor are. Why… I don’t know. But it works.
The recipe then changes each time you run it. There is still no timer. Nothing bad happens if you click the wrong ingredient you just need to keep looking.
- Find something Sweet and Fruity: Vormfruit (apples)
- Find something Rich and Creamy: Rich Primeval Marrow (bones)
- Find something Tart: Tart Blotguard (pumpkins)
- Find something Jelly-like: Gelatinous Geo Beast Brain
- Find something Chewy: Chewy Nexu Tongue
- Find something Thickening: Thick Glort Slurry
- Find something Fatty: Fatty Scyk Belly
- Find something Acidic: Balmorrean Vinegar
- Find something Slimy: Fresh, Slimy Vel Slug
- Find something Salty: Salinated Soz Juice
- Find something Starchy: Starchy Bekbek Root
- Find something Cooling: Perfect Ice Crystals
That’s not all but should be most of them!
Oh my god ok there is a bug with the new #SWTOR Supreme Nexu Tongue recipe.
You need to throw the Nexu Tongue in the grill. It doesn't work most of the time. ❌
Throwing it on the FLOOR in front of the grill seems to work every time! ✔️
GET COOKING MY FRIENDS! 🤣🤣🤣 pic.twitter.com/msyjRMTiRZ
— Swtorista (@swtorista) October 18, 2021
Prep Work Gathering Missions
The Prep Work quests change daily, and send you out in to the open world to go gather exotic ingredients either from weak enemies or from glowing blue objects on the ground. These items are usually located near the world bosses of the planets. You can pick up the prep work missons from the Feast of Prosperity Ingredients Request board. Note that the board will be lit up even after you pick up the quest, to remind you to come back tomorrow. You can only pick up the gathering quest on the day it is available – so there will only ever be one gathering mission on the board at a time, and that will be the one assigned to today.
How to pick up multiple days of world bosses: If you pick up the Ingredient Gathering quest from the terminal, then pick up the World Boss quest, but don’t complete either today, tomorrow you can drop the ingredient quest but keep yesterday’s world boss quest, then pick up the new ingredient quest, and you’ll be able to pick up today’s world boss quest while keeping yesterday’s. I don’t think this works if yesterday’s and today’s are the same though.
Multiple quests multiple days strangeness: I had strange results when picking up the prep work quests and not completing them right away. On my main character, I picked up the first quest the first day, completed it, the second day picked up the second quest, and completed it, no problems. On my other characters, I picked up the first day quests, but did not complete them. On the second day, many of them could not pick up the second day quests until they completed the first day, after which they could do both in one day. On another character, I had picked up prep work the first day but forgot the world boss quest, and the second day I went to pick up the world boss quest and I got the world boss quest from the first day instead of the second current day. On another character I had not picked up any quests on the first day, went to the event the second day, and got the second day’s prep work and world boss quest. I’m unsure if this is normal or related to the maintenance patch that happened.
Belsavis: Sour Bellfruit

Retrieve Sour Bellfruit 0/5
Sour Bellfruit is located on Belsavis in the most Northern map in the same area as the world boss, and you can get it by looking for the blue flowers near the quest marker. Note that this area is for around level 45, you can go there earlier you just might die a bit as you gather flowers, you can still right click them even as enemies are chasing or attacking you.
Corellia: Nexu Tongues

Retrieve Nexu Tongues
Nexu Tongues can be found near the zoo on Corellia near the world boss, by killing Nexu in the area. Invite others nearby from your faction to a group to save time.
Nar Shaddaa: Lost Recipe Data

Retrieve Lost Recipe Data 0/5
Perfect Ice Crystals are located on Hoth, in the same area as the Snowblind world boss, and you can find them scattered around the crystal forest. They are blue glowing crystal stalagmites growing from the snow.
Hoth: Larval Geo Beast Brains

Retrieve Larval Geo Beast Brains 0/5
Larval Geo Beast Brains are located on Hoth, just south of the Snowblind world boss, you get them from defeating larva. There is not very many larva in the area so please group up with anyone nearby so you can all pick up the items from the same enemies. They respawn quite slowly too.
UPDATE EVEN BETTER player @Rui_ALF_Chaves says when you are doing the #SWTOR Larval Geo Beast Brains ingredients prep work quest on Hoth, TELL YOUR OPS GROUP TO STAY IN A GROUP after Snowblind, as it counts for your whole group!!! pic.twitter.com/Uc5pl3uHJR
— Swtorista (@swtorista) October 29, 2020
Hoth: Perfect Ice Crystals

Retrieve Perfect Ice Crystals 0/5
Perfect Ice Crystals are located on Hoth, in the same area as the Snowblind world boss, and you can find them scattered around the crystal forest. They are blue glowing crystal stalagmites growing from the snow.
Belsavis: Primeval Marrow

Retrieve Primeval Marrow 0/5
Primeval Marrow is located on Belsavis in the most Northern map in the same area as the world boss, and you can get it by defeating the smaller enemies in the area.
Nar Shaddaa?
Tatooine?
World Boss Missions
The final type of event missions will instruct you to fight a world boss. Much like the prep work quest, you can only pick up the world boss quest on the day it is available – so there will only ever be one world boss mission on the board at a time, and that will be the one assigned to today.
The easiest way to find a group is simply to travel to the planet using the heroic missions shuttle and watch general chat.

Hoth: Snowblind

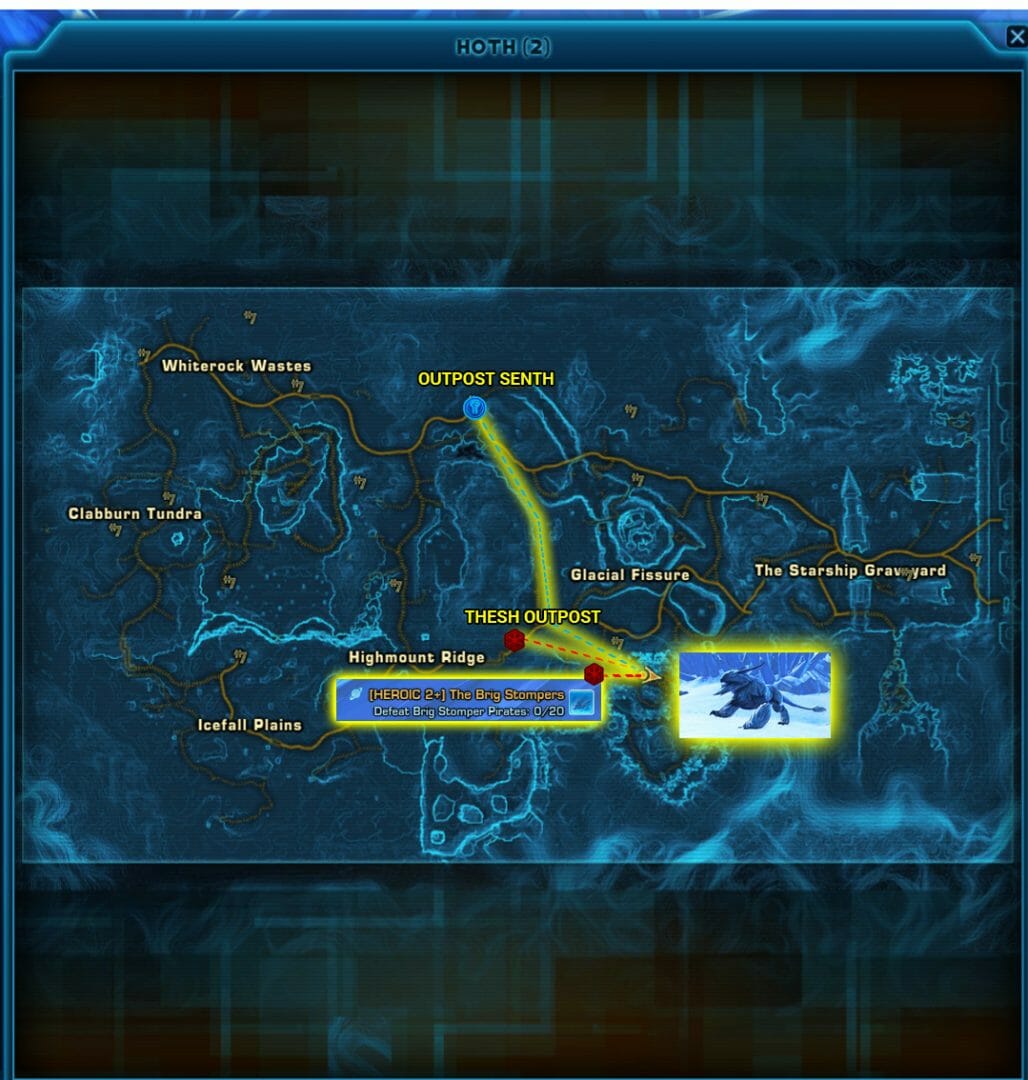
Directions: The worldboss Snowblind drops the Ice Cat Whisker ingredient for the Feast event and is recommended for characters level 41 and up. The easiest way to get to Snowblind is to pick up the Hoth heroics from the activities panel, by clicking the symbol of “three little people” near your minimap, then clicking the solo tab, choosing “Heroics Misssions: Hoth” then clicking travel, which will let you skip past the orbital station. While you’re there, if you’re an Imperial player, pick up the “Brig Stompers” Heroic and use the shuttle, as it will place you just south of Snowblind in the crystal forest. On Republic side, quick travel to Outpost Senth or take the taxi there, then run way South, while not taking any paths that lead downwards into the crevasses. Imperial side, if you can’t use the heroic, quicktravel to Thesh Outpost or take the speeder, and Snowblind will be fairly nearby, just head west in to the crystal forest.
Mechanics: Snowblind has an interesting mechanic your group will want to pay attention to. Throughout the fight, the boss will create a snowstorm. When this happens, players will need to huddle up for warmth, otherwise they will get a stacking debuff that will likely kill them if they go off on their own, so make sure all group members know to stack up when the snowstorm happens. Other than that mechanic, Snowblind is not difficult, but may take a long time to kill. I believe you can fight this boss with a group of four, though I recommend more, as it seemed like it would take us a very long time with two undergeared damage characters, a tank and a healer.

- Ingredient: Ice Cat Whisker
- Recommended level: 41+
 Closest Heroic Shuttle Republic: None
- Closest Quicktravel Republic: Outpost Senth (middle top of map)
- Closest Taxi Republic: Outpost Senth Speeder (middle top of map)
- Closest Heroic Shuttle Imperial: [Heroic 2+] Brig Stompers
- Closest Quicktravel Imperial: Thesh Outpost (near center of map)
- Closest Taxi Imperial: Thesh Outpost Speeder (near center of map)
 Closest Heroic Shuttle Republic: None
 Closest Heroic Shuttle Imperial: [Heroic 2+] Brig Stompers
Belsavis: The Primal Destroyer

Directions: The Primal Destroyer worldboss drops the Parasitic Clingmoss ingredient for the Feast event and is recommended for characters level 45 and up. Much like the Hoth worldboss, the easiest way to get to the Primal Destroyer is to pick up the Belsavis heroics from the activities panel, by clicking the symbol of “three little people” near your minimap, then clicking the solo tab, choosing “Heroics Misssions: Beslavis” then clicking travel, which will let you skip past the orbital station. If you are on an Imperial character, you can pick up the “Freeing the Fallen” heroic and then run north to save time. On Republic side, quick travel to Outpost Senth or take the taxi there, then run way South, while not taking any paths that lead downwards into the crevasses. Imperial side, quicktravel to Imperial Frontline Camp, or take the speeder there, and once there, get off the taxi and run in to the nearby cave, use the Rakata Transporter to taxi to Lower Prison Magma Transport, exit the purple cave to the west, then hop on your speeder and drive north along the path for a long time. Note that in the past you may have needed to unlock the Rakata transporters through the story, now anyone may use them.
Mechanics: The Primal Destroyer has an important mechanic your group will need to know about. Shortly into the fight, the boss will summon three beasts to help him in the fight. If any of these beasts die, the boss will become much stronger, so it’s important to keep them alive and defeat the boss first. Let your team know not to use area attacks, and not to attack the smaller enemies. The Primal Destroyer is not difficult to fight, and we did it quite easily with a group of four including two undergeared damage characters, a tank and a healer. Make sure the tank does their best to keep the aggro of all four enemies, or if you have a second tank that tank can pull the smaller enemies away from the boss.
MAJOR BUG: If you fight the boss and leave his three little enemies alive and don’t kill them, this breaks the boss permanently until the server or instance is reset. This boss breaks individually per instance – so it may be working on Instance 1 but not on say Instance 5. You can do it on an instance that works, OR if you are just working on your daily/weekly, you can find someone who has a previous boss as a quest and have them share prep work to you and world boss quest to you and go do that one instead!

- Ingredient: Parasitic Clingmoss
- Recommended level: 45+
- Closest Heroic Shuttle Republic: None
- Closest Quicktravel Republic: Oasis Republic Post (top of map)
- Closest Taxi Republic: Taxi to Republic Frontline Speeder, once there, get off the taxi and run in to the nearby cave, use the Rakata Transporter to taxi to Oasis Republic Post, then hop on your speeder and drive north.
- Closest Heroic Shuttle Imperial: [Heroic 2+] Freeing the Fallen
- Closest Quicktravel Imperial: Quicktravel to Imperial Frontline Speeder, once there, get off the taxi and run in to the nearby cave, use the Rakata Transporter to taxi to Lower Prison Magma Transport, exit the purple cave, then hop on your speeder and drive north along the path for a long time.
- Closest Taxi Imperial: Taxi to Imperial Frontline Speeder, once there, get off the taxi and run in to the nearby cave, use the Rakata Transporter to taxi to Lower Prison Magma Transport, exit the purple cave, then hop on your speeder and drive north along the path for a long time.
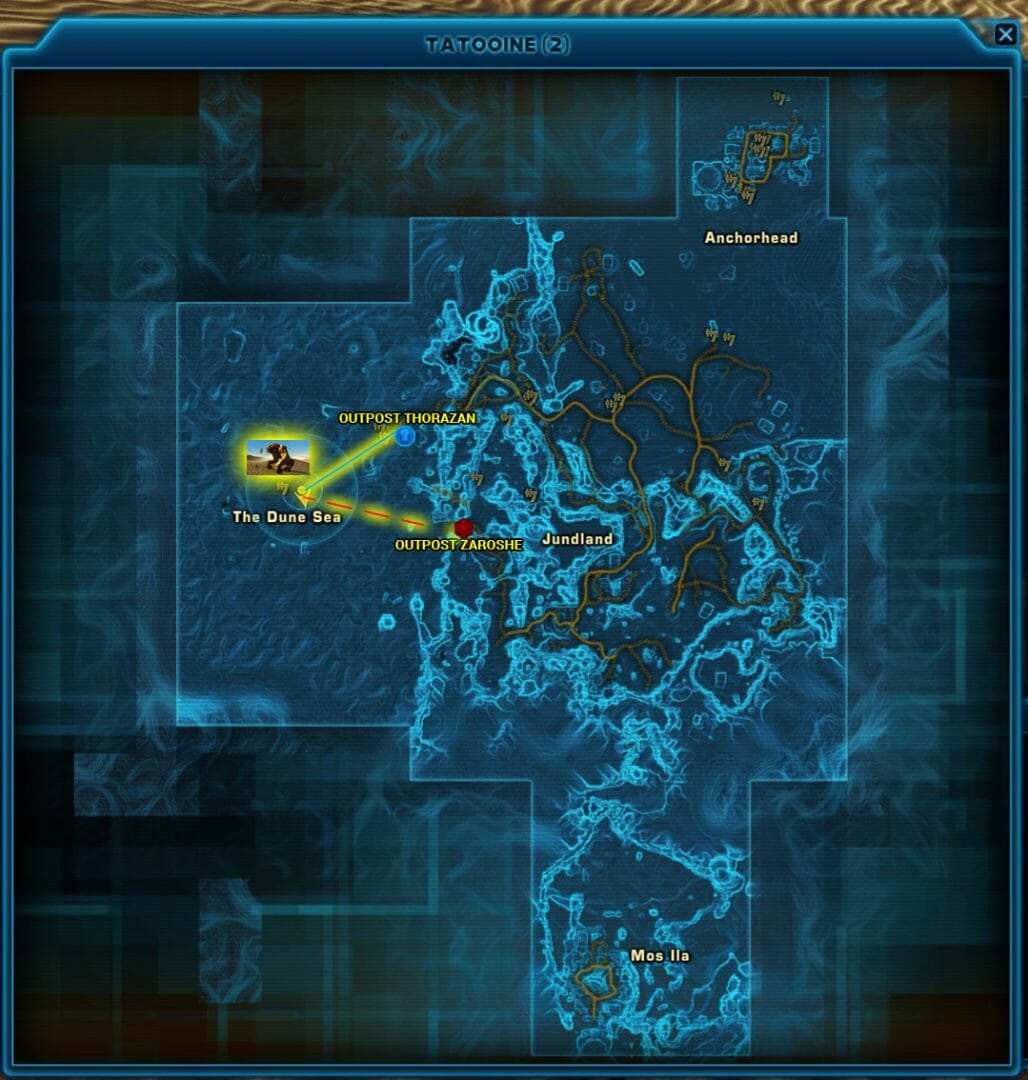
Tatooine: Trapjaw


Directions: The worldboss Trapjaw drops the Wraid Ampulla Jelly ingredient for the Feast event and is recommended for characters level 29 and up. Just like the other worldbosses, the easiest way to get to Trapjaw is to pick up the Tatooine heroics from the activities panel, by clicking the symbol of “three little people” near your minimap, then clicking the solo tab, choosing “Heroics Misssions: Tatooine” then clicking travel, which will let you skip past the spaceport. If you are Imperial side, you can also get to the boss quickly by picking up the “Prison Labor” Tatooine Heroic which will give you a transport just south of the boss. On Republic side, quick travel to Outpost Thorazan or take the taxi there, and Trapjaw is in the desert to the South West. Imperial side, if you can’t use the heroic transport, quicktravel to Outpost Zaroshe on the far left of the map, or take the speeder, and Trapjaw is located deep in to the desert to the west. To make Trapjaw appear, click the small blue skull in the sand surrounded by dead Jawas.
Mechanics: Trapjaw has some fun stuns and area attacks, but nothing you really need to watch out for. Trapjaw is a pretty easy fight, and we did it quite easily with a group of four including two undergeared damage characters, a tank and a healer at level 75.
- Ingredient:Wraid Ampulla Jelly
- Recommended level: 29+
- Closest Heroic Shuttle Republic: None
- Closest Quicktravel Republic: Outpost Thorazan (far left on map)
- Closest Taxi Republic: Outpost Thorazan Speeder (far left on map)
- Closest Heroic Shuttle Imperial: [Heroic 2+] Prison Labor
- Closest Quicktravel Imperial: Outpost Zaroshe (far left on map)
- Closest Taxi Imperial: Outpost Zaroshe Speeder (far left on map)
Corellia: Lucky the Rancor

Directions: The worldboss Lucky drops the Rancor-Beast Rancor ingredient for the Feast event and is recommended for characters level 50 and up. Also like the other worldbosses, the easiest way to get to Lucky is to pick up the Corellia heroics from the activities panel, by clicking the symbol of “three little people” near your minimap, then clicking the solo tab, choosing “Heroics Misssions: Corellia” then clicking travel, which will let you skip past the spaceport. On Republic side, at the heroic terminal, you can pick up the “Concierge” Heroic which will put you just west of the world boss. If you can’t use the heroic Republic side, quick travel to Axial Park North or take the taxi there, it’s on the top middle of the map. Imperial side, quicktravel to Axial Park South on the top middle of the map, or take the speeder. Note that in the past, you may have had to unlock the speeders through the story, but now anyone may use the trams. Lucky is located in the very center of the park, in a walled in area that has a crack in it you can enter through.
Mechanics: Lucky does not have any special mechanics. However, he has two casted attacks that your team should try and interrupt as often as possible to reduce incoming damage. Lucky has a LOT of health compared to the other worldbosses. We were able to do it with a team of four including two undergeared damage characters, a tank and a healer, but it took us 27 minutes to kill him, so I highly recommend bringing a larger group.
- Ingredient: Rancor-Beast Rancor
- Recommended level: 50+
- Closest Heroic Shuttle Republic: [Heroic 2+] Concierge
- Closest Quicktravel Republic: Axial Park North (middle top of map)
- Closest Taxi Republic: Axial Park North Tram (middle top of map)
- Closest Heroic Shuttle Imperial: None
- Closest Quicktravel Imperial: Axial Park South (middle top of map)
- Closest Taxi Imperial: Axial Park South Tram (middle top of map)
Nar Shaddaa: Battledroid R4-GL

Directions: The Nar Shaddaa worldboss Battledroid R4-GL drops the Poola Blossom Threads ingredient for the Feast event and is recommended for characters level 25 and up. Just like the other worldbosses, the easiest way to get to the Battledroid worldboss is to pick up the Nar Shaddaa heroics from the activities panel, by clicking the symbol of “three little people” near your minimap, then clicking the solo tab, choosing “Heroics Misssions: Nar Shaddaaa” then clicking travel, which will let you skip past the spaceport. If you’re Republic side, you can save some time by picking up the Heroic “The Morgukai”, which has a shuttle that will save you some time. Otherwise the closest Republic quick travel is High Security Lockdown, and on that map you need to head to the west and find the exit called Network Access, which is just north of the Morgukai heroic shuttle. From there, head to the north east on the Network Security District map. Imperial side, it’s a lot easier, and you can quicktravle or take a taxi to Network Access, then just walk South and then east to get to the boss.
Mechanics: The Nar Shaddaa worldboss is quite easy, and I think you could do it with as few as three high level characters. The battledroid has an ability called Repeater Cannon you can interrupt to reduce damage in the first half of the fight, then later it becomes uninteruptable. It sounds like a high pitched shooting sound.

There’s also a missile that goes out that does damage over time called Trauma and Burning and can be cleansed.

- Ingredient: Poola Blossom Threads
- Recommended level: 25+
- Closest Heroic Shuttle Republic: [Heroic 2+] The Morgukai
- Closest Quicktravel Republic: High Security Lockdown (bottom right on map)
- Closest Taxi Republic: High Security Lockdown Speeder (bottom right on map)
- Closest Heroic Shuttle Imperial: None
- Closest Quicktravel Imperial: Network Access (bottom right on map)
- Closest Taxi Imperial: Network Access Speeder (bottom right on map)
Reputation
This event does NOT have a reputation track, unlike all other events in the game.
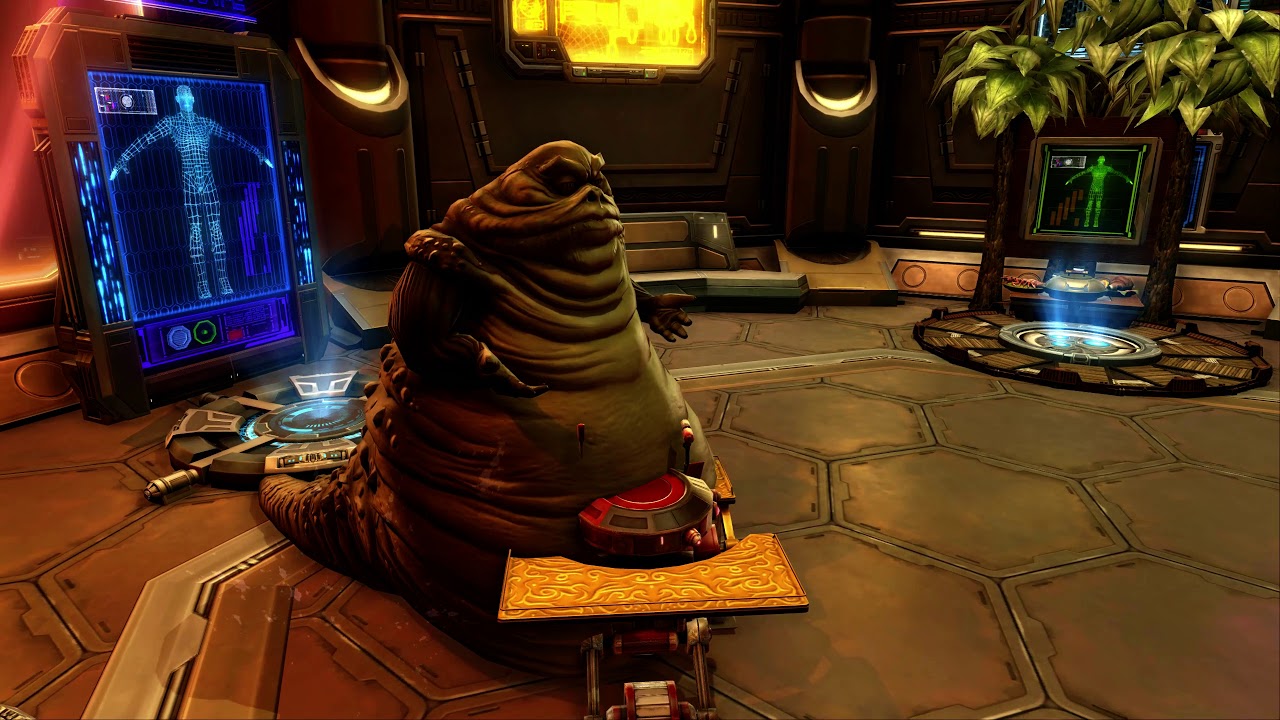
Story
Instead, you earn event currency tokens by doing the quests, and more story quests are automatically unlocked each week that the event is out. Don’t worry, even if you start the event late, you’ll be able to complete all the story quests, as long as you do them while the event is still running. The first part of the story starts on the Fleet with the introductory quest, then speak to the two hutts on Nar Shaddaa
Week 1 – Sharing Our Bounty – Rishi

The first story quest was introduced on October 20, 2020, and can be picked up from Garbooga after you speak to the two hutts. The quest icon may be slow to load in due to the amount of players in the area, The first quest will send you to Rishi where you will need to complete three tasks.
Speed Run
For players who have already done this quest on a character and just want to speed run it, here is the speed run list:
- Fleet Travel, speak to NPC
- Nar Shaddaa Heroic Travel
- Quicktravel to promenade
- Speak to Gaborga, Duuba, then Gaboorga
- Pick up weeklies so you don’t forget them later
- Pick up prep work and world boss quest if you want
- Ship travel to Rishi, run to NPC
- First NPC, Weequay, bribe: 3,2,3,2,3,1 on the first guy
- Second NPC, green Rodian, threaten: 1,4 on the second
- Third NPC, otter, give Gaboorga nothing: 2,2,1,2,2 for the last guy
Part 1

Part 1 has three options:
- Steal wine
- Bribe
- Defeat Nova Blades
You get a funny letter if you steal the wine (spoilers)
Part 2

Part 2 has two options:
- Disable Water Mains (pipes)
- Threaten
There is a bad design issue with the Sharing Our Bounty quest causing players to need to wait to complete the quest if they choose the Water Mains pipes option, so choose the threaten option for the green rodian to save yourself hassle!!!!
People queueing to do the Feast of Prosperity water mains on Rishii… there are 3
byu/ducks_underneath inswtor
If you do choose to do the water mains pipes quest, invite your other players into a group! I know a 4 person groups works for sure, and I have heard an operation group works too and gives credit to everyone. So ask and invite players nearby to save time for all players.

Part 3

Part 3 has three options:
- Kill Orobird
- Kill Lizard instead and lie
- Give Hutts nothing
Week 2 – A Dash of Kindness – Mek-Sha
Introduced at 11 AM PDT on October 27, 2020

To start the second part of the story quest, speak to Duuba the Hutt who will send you to the planet of Mek-Sha (level 75 area) to deliver packages. There are no real choices / differences in this quest.
Week 3 – Fate of the Feast
Introduced at 10 AM PST on November 3, 2020

To start the third and final part of the quest speak to Duuba or Gaboorga – you will be able to speak to both if you choose.
You will need to choose between supporting Duuba and Gaboorga by choosing the support option at the end of their dialogues. If you want to talk or choose the other Hutt, select the option about needing time to think.
Helping Duuba will grant you the Magnanimous title, and helping Gaboorga will get you the Abundant title. Once you have earned the title on one character, you can retrieve it on other characters by using the plaques that will appear in front of the Hutts after the quest is turned in. This means you can get both titles on one or all of you characters.
Support Duuba
If you want to play a light side option, choose to support Duuba. You will be sent to find three hidden secret cooking datacrons on Onderon, Dantooine and Voss. The general location will be marked on your map when you arrive.
Voss Cooking Datacron
The Voss cooking datacron is hidden in the Voss cantina. There is a quicktravel there.
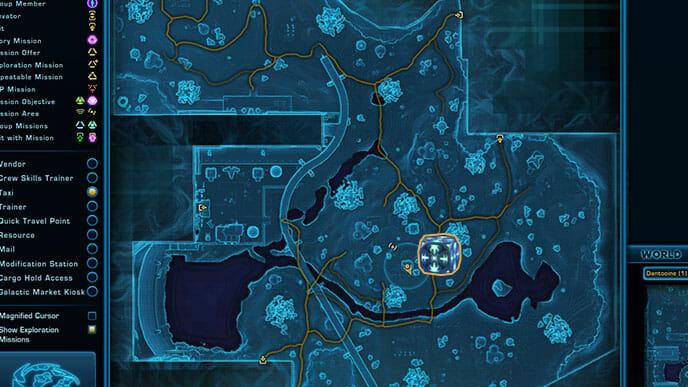
Dantooine Cooking Datacron
The Dantooine cooking datacron is hidden in a building in the middle of the map on a table.
Onderon Cooking Datacron
The Onderon Cooking Datacron is hidden on the floor of the northern area marked on the map between some ship debris.
Mouse Droid
In the final part of the quest you play as a mouse droid to help save the kitchen. Select droids and use the 1 key to reprogram them, and then right click the blue glowing objects in the kitchen. The 2 key makes cute noises. Returning to Duuba after will complete the event quest!

Support Gaboorga
If you want to play a dark side option, choose to support Gaboorga. You wil lbe sent to find three rare ingredients on Onderon, Dantooine and Voss.
Crysfang Chromatophore Plates on Voss
Fight Crysofangs on Voss to get the Crysfang Chromatophore Plates ingredient.
Imperial Quicktravel: Chen’s Overlook on the top right, then run very far south, the Crysofangs are spread out across the map even before you reacheed the area marked on the map and still count
Orlax Hearts on Onderon
Fight Orlaxs on Onderon to get the Orlax Hearts ingredient.
Imperial quicktravel: Forward Operating Base, top right, then run west through the crashed ship, the Orlaxs are in the water
Rare-Strain Kibla Greens on Dantooine
The Kibla Greens are hidden in the center of the Dantooine map near the collapsed well and are a glowing blue object.
Mouse Droid
In the final part of the quest you play as a mouse droid to help sabotage the kitchen. Select droids and use the 1 key to disable them, and then right click the blue glowing objects in the kitchen. The 2 key makes cute noises. Returning to Gaboorga after will complete the event quest!

Achievements
In addition to the minigames and quests, there’s also achievements for the Feast of Prosperity Event
Story Achievements
First off, there’s an achievement for supporting Gaboorga the hutt in the story, which will give you a title “The Abundant” and a separate achievement for supporting Duuba the hutt which will give you the title “The Magnanimous”.
Achievement: Master of the Feast
If you’re really enjoying the Feast of Prosperity event, you can complete all the achievements to get the Galactic Chef title.
Achievement: Food Fight
There is a hidden achievements for starting a food fight during the cooking minigame. I’ll leave it up to you to figure how to do that!

Achievement:
We finally know how to get this achievement! It gives you the legacy title “Spicy”!

To get the “What Did You Put in This?!” achievement and Spicy legacy title, you must do these three things:
- Add 75 Pepper Spices during the Easy Cooking mission (if you add 25 every easy mission you would need to run it 9 times) – Difficult mode does not seem to count
- Run the Hard Mode Cantina Rush serving minigame 25 times (or at least enter it and let the timer run out and fail 25 times)
- Run the Hard Mode cooking mission 25 times
And if you want to see your progress…
Ok! So if you are working on the #SWTOR spicy title, you can see your hidden progress by:
1) find a player ingame who has the achievement
2) inspect their achievement
3) SHIFT+CLICK their achievement into chat
4) click the green text in chatcool! ty Vigoria! pic.twitter.com/e7Bb0Ciy4d
— Swtorista (@swtorista) October 25, 2020
Testing Screenshots
- What I started with
- Ran a hard version, added no pepper , increaased my Cooking mission score
- Ran a story version, used three pepper, increased my pepper score but did not increase my cooking score
- Ran a hard version last, tried to add extra pepper before the real ingredients, increased my cooking missions but not my pepper score
Achievement: I Don’t Have to Put Up with This
To get the “I Don’t Have to Put Up with This” achievement, you need to leave the kitchen before completing the dish for each of the five cooking missions. There’s three in the easier mode and two in the harder mode, so you’ll need to log in each day and see which cooking misisons are on the board until you get and leave the ones you need for the achievement.
Here are the five cooking dishes you’ll need to enter then leave:
- Braised Scyk Belly
- Exotic Medley Delight
- Jellied Glowshroom Stew
- Challenge Dish: Ultimate Galactic Sampler
- Challenge Dish: Spicy Nexu Surpreme
Rewards
The Feast of Prosperity rewards are all purchased with the Prosperity token currency, which is earned from doing any of the daily or weekly quests related to the event. There are five weekly quests that reward many tokens, and as a solo player, you can do four out of five of them including the large weekly that rewards 2,500 tokens per character per week – you don’t need to do the world boss weekly to complete the large weekly. To complete all the weeklies, you’ll need to do the event at least three days a week, as the weeklies require you to do three daily quests and you can only do one daily quest per character per day, but a new one will pop up the next day. On a single character, if you did every daily quest once per day, every day of the week, which would also complete all the weeklies, you could earn a little under 10,000 Prosperity tokens per week per character.
Don’t forget that you can do the event on as many characters as you want if you want to continue earning rewards after you’ve completed all the dailies or weeklies on your first character. This may be even more efficient for you if you have many characters, as you can just do enough quests on each character to complete the large-reward weeklies and then jump to the next character and start working on dailies there. If you decide to do this, by doing the easy cooking, easy serving, and gathering mission three days a week, thereby completing the weeklies, you’d get about 5,500 tokens per character.
![]()
You can see how many Prosperity Tokens you have by clicking the currency tab of your inventory, and the tokens are legacy-bound and can be spent and earned on any character. To spend your prosperity tokens, there is a vendor on the promenade near the event that sells the Feast of Prosperity Rewards. You can get all kinds of fun and silly rewards, including a new outfit, chef’s hat, a new mount with a cooking pot on the front, two new pets, some toys and emotes, some titles, and decorations related to the event including two disguise terminals.
Here’s something I made to help me track my characters you are welcome to use!
I finally made a spreadsheet so I could see which of my characters have done what for the new #SWTOR Feast of Prosperity event lol. If you want to use mine, go here, https://t.co/AvHGnFmbey and go File -> Make a Copy, delete my characters and fill in your own. pic.twitter.com/H7UyZIra1D
— Swtorista (@swtorista) October 24, 2020
Tokens Tactical
There is also some tactical you can buy with tokens that give you more prosperity tokens when you do the two event minigames. IT IS NOT WORTH BUYING, as it only gives an extra ten tokens for the story cantina rush, and an extra 20 for the hard cantina rush. This means, with the tactical costing 2,250, you would need to run the cantina rush mission on story and hardmode together 75 times to break even. If you got the perfect rush bonuses every time you would have to run them together 57 times to break even.
Enhanced Seasoning for New Cooks
Costs 2250 Prosperity Tokens – Tactical – DO NOT BUY NOT WORTH IT
Improved Axel Grease
Costs 2250 Prosperity Tokens – Tactical – DO NOT BUY NOT WORTH IT
Example of the rewards…
| [Daily] Cantina Rush: Lunch Service (Easy) | 75 | 85 | One round, deliver 25 dishes, maximum of 5 failures |
| Perfect Rush (Easy) | 10 | 15 | Deliver food to every patron in the easy version of the cantina rush |
| [Daily] Cantina Rush: Dinner Service (Hard) | 125 | 145 | Five rounds, deliver 35 dishes each round, maximum of 5 failures |
| Perfect Rush (Hard) | 20 | 25 | Deliver food to every patron in the easy version of the cantina rush |
Official image:

Titles
- The Finest Ingredient: Costs 1500 Prosperity Tokens
- Well Seasoned: Costs 1500 Prosperity Tokens
- The Abundant: supporting Gaboorga in the story
- The Magnanimous: supporting Duuba in the story
- Galactic Chef: completing all the achievements
- Spicy: What Did You Put in This?! achievement
Armor
Feast Trader
Costs 1500-3750 Prosperity Tokens per piece, total of 14,250 tokens for the whole set but you can only hold 10,000 tokens at a time – Armor – not legacy bound – binds when you put it on so be careful, you can’t return it after trying it on


Feast Attire
Costs 1500-3750 Prosperity Tokens per piece, total of 16,500 tokens for the whole set but you can only hold 10,000 tokens at a time – Armor – not legacy bound


Feast Preparation Hat
Costs 1500 Prosperity Tokens per piece – Armor – not legacy bound


Weapons
Gourmand’s Favorite Assault Cannon
Costs 3750 Prosperity Tokens – Weapon – Added 2022

Gourmand’s Favorite Blaster Pistol
Costs 3750 Prosperity Tokens – Weapon – Added 2022

Gourmand’s Favorite Blaster Rifle
Costs 3750 Prosperity Tokens – Weapon – Added 2022

Gourmand’s Favorite Dualsaber
Costs 3750 Prosperity Tokens – Weapon – Added 2022


Gourmand’s Favorite Lightsaber
Costs 3750 Prosperity Tokens – Weapon – Added 2022


Gourmand’s Favorite Sniper Rifle
Costs 3750 Prosperity Tokens – Weapon – Added 2022

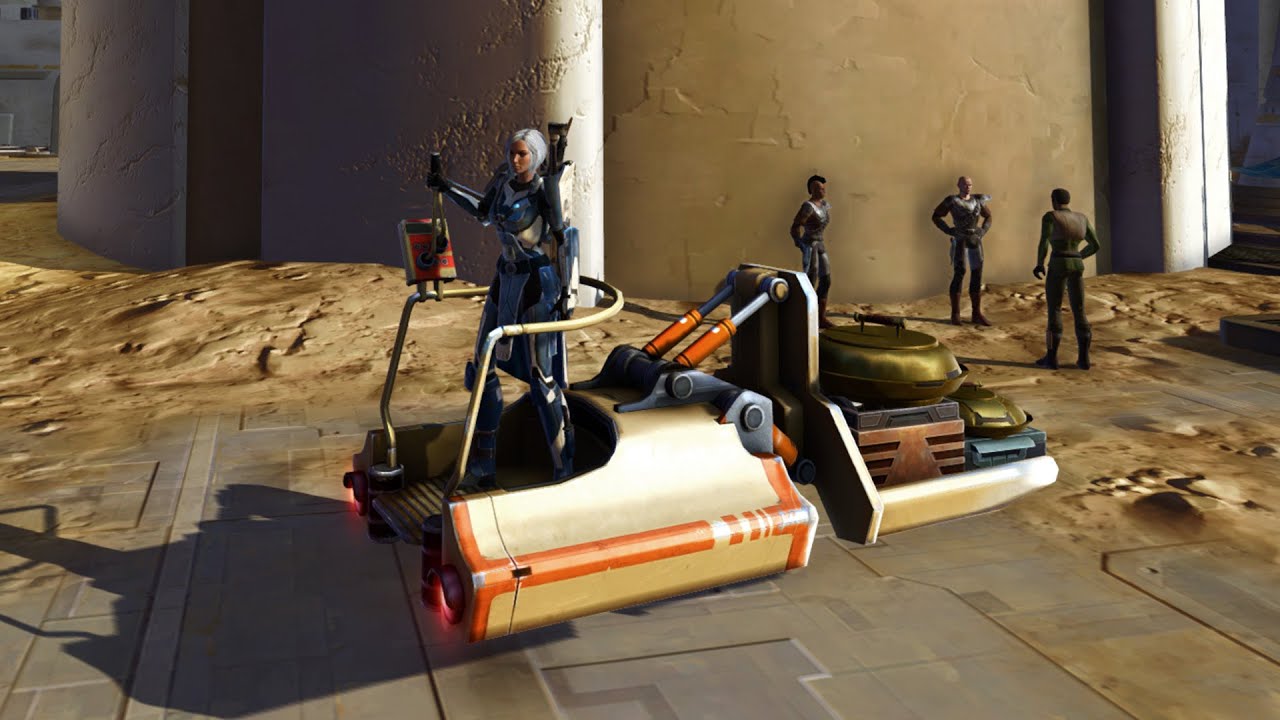
Mounts
Duuba’s Transport Skiff
Costs 4250 Prosperity Tokens – Mount – Added 2022

Gaboorga’s Transport Skiff
Costs 4250 Prosperity Tokens – Mount – Added 2022

Feast Ingredient Transport
Costs 3750 Prosperity Tokens – Mount
![]()
Pets

Earthen Thurrb
Costs 1875 Prosperity Tokens – Pet

Hairless Mudhorn
Costs 1875 Prosperity Tokens – Pet

Curious Rodir Cub
Costs 1875 Prosperity Tokens – Pet

Young Wetlands Mudhorn
Costs 1875 Prosperity Tokens – Pet

Toys & Emotes
Feast of Prosperity Holo-Feast
Costs 2250 Prosperity Tokens – Toy – Makes a small holographic feast item appear on the ground in a location of your choice – Added 2022

Feast of Prosperity Food Launcher
Costs 7500 Prosperity Tokens – Toy


Single Use Food Launcher
Costs 150 Prosperity Tokens – Toy

Meditative Satiation
Costs 2250 Prosperity Tokens – Toy

Overstuffed Food Sack
Costs 3750 Prosperity Tokens – Toy
Right click the item in your inventory and it gives you a funny backpack you can run around with that drops food everywhere.


Emote: Overeat
3750 Tokens of Prosperity – Decoration

Emote: Feel the Groove
Costs 3750 Prosperity Tokens – Emote
A silly dance.
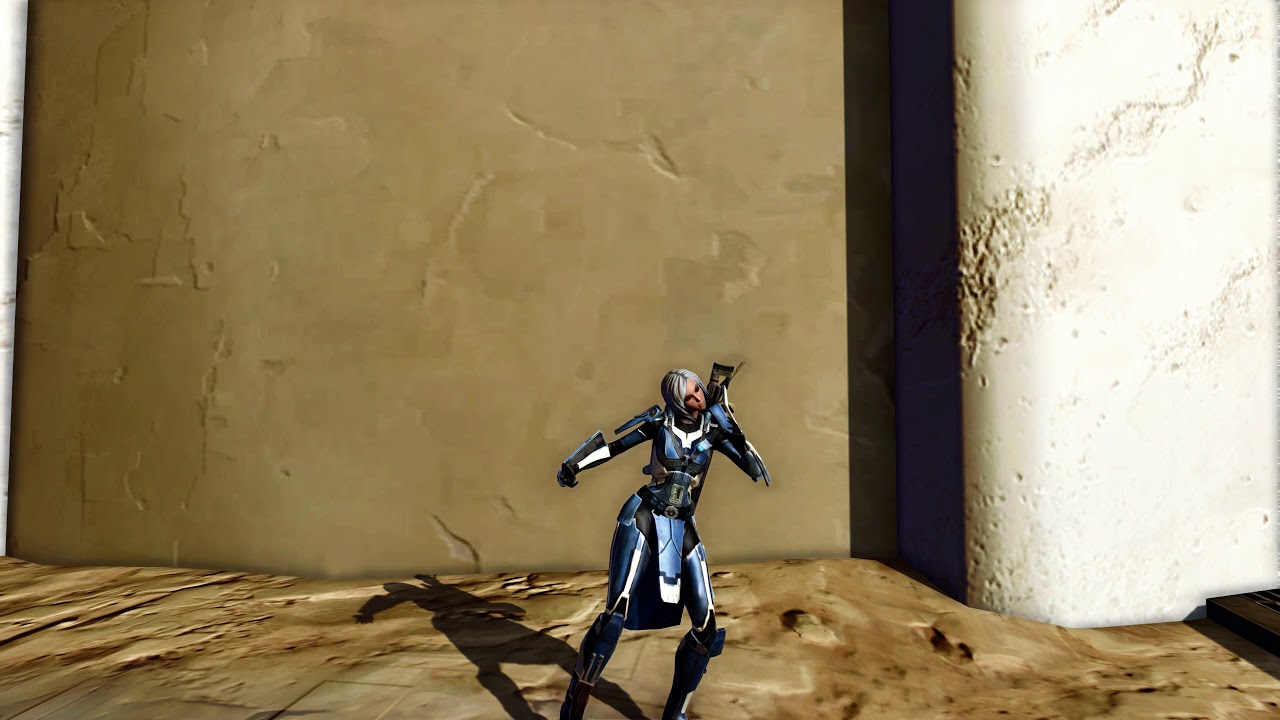
Emote: Toast of Prosperity
Costs 3750 Prosperity Tokens – Emote
Raise a glass and take a drink.

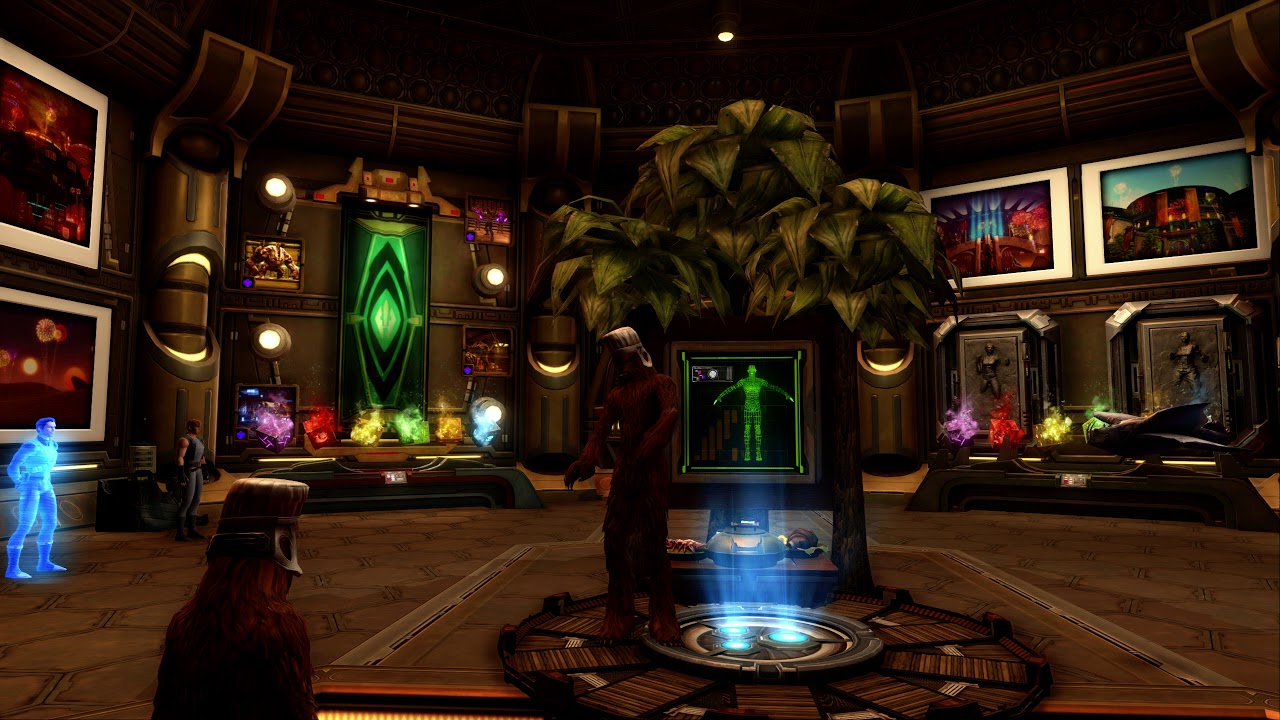
Decorations
Disguise Terminal: Cantina Dasher
Costs 2250 Prosperity Tokens – Decoration

Turns you in to a droid!

You get abilities to play with.
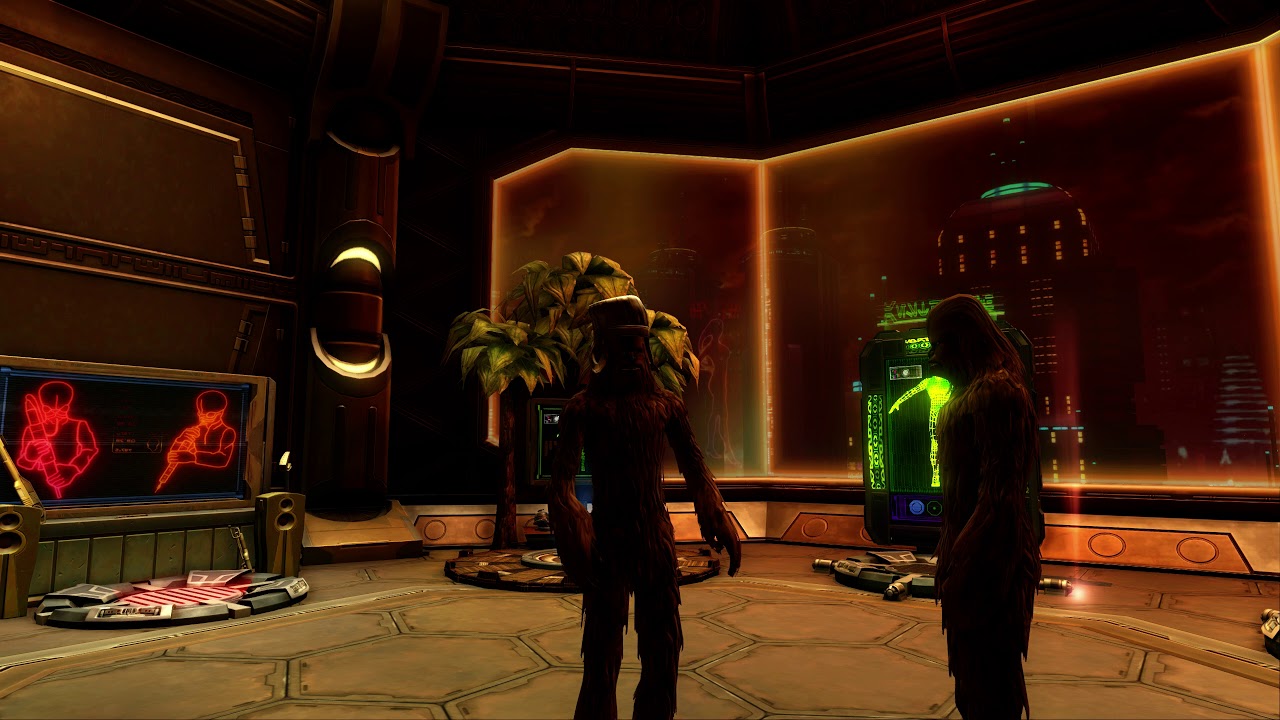
Disguise Terminal: Ultimate Chef
Costs 2250 Prosperity Tokens – Decoration

Turns you in to a wookiee chef! you get abilities to play with.

Daichyura Feast Celebrator
1875 Tokens of Prosperity – Decoration

Duuba’s Guard
1875 Tokens of Prosperity – Decoration

Duuba’s Protector
1875 Tokens of Prosperity – Decoration

Feast Attendee (Female)
1875 Tokens of Prosperity – Decoration

Feast Attendee (Male)
1875 Tokens of Prosperity – Decoration

Feast Chef (Female)
1875 Tokens of Prosperity – Decoration

Feast Chef (Male)
1875 Tokens of Prosperity – Decoration

Feast Trader (Female)
1875 Tokens of Prosperity – Decoration

Feast Trader (Male)
1875 Tokens of Prosperity – Decoration

Refreshments Probe
1875 Tokens of Prosperity – Decoration

Ugnaught Feast Celebrator
1875 Tokens of Prosperity – Decoration

Arrangement: Roast Scyk Belly
850 Tokens of Prosperity – Decoration

Arrangement: Braised Vel Slug
850 Tokens of Prosperity – Decoration

Arrangement: Exotic Medley Delight
850 Tokens of Prosperity – Decoration

Arrangement: Galactic Sampler
850 Tokens of Prosperity – Decoration

Arrangement: Glowshroom Stew
850 Tokens of Prosperity – Decoration


The Feast of Prosperity arrangement pedestals don’t work very well if you try and push them together to make a big table…

Arrangement: Feast Spread
Costs 1875 Prosperity Tokens – Decoration

Arrangement: Meal for Three
Costs 1500 Prosperity Tokens – Decoration

Basket of Fruit
Costs 750 Prosperity Tokens – Decoration

Basket of Root Vegetables
Costs 1125 Prosperity Tokens – Decoration

Basket of Vegetables
Costs 750 Prosperity Tokens – Decoration

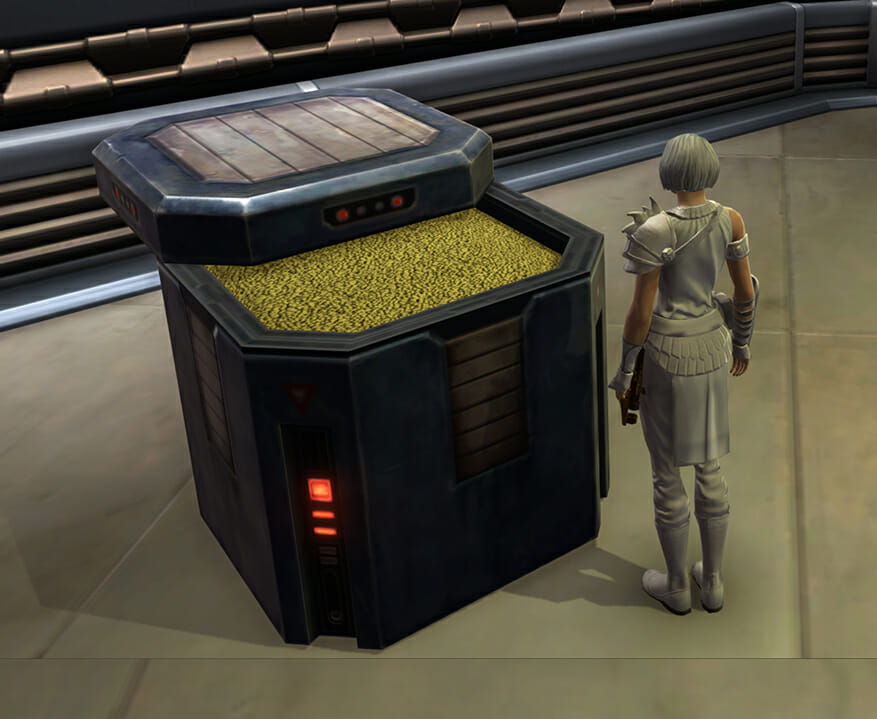
Crate of Grain
Costs 750 Prosperity Tokens – Decoration
Feast of Prosperity Poster I (Large)
Costs 800 Prosperity Tokens – Decoration – Big yellow one
Feast of Prosperity Poster II (Large)
Costs 800 Prosperity Tokens – Decoration – Big purple one
Feast of Prosperity Poster I
Costs 750 Prosperity Tokens – Decoration – Small yellow one
Feast of Prosperity Poster II
Costs 750 Prosperity Tokens – Decoration – Small purple one

Other
Title: The Finest Ingredient
Costs 1500 Prosperity Tokens – Title
Title: Well Seasoned
Costs 1500 Prosperity Tokens – Title
Reward Vendor List
| Item | Cost | Type | Year |
|---|---|---|---|
| Feast Ingredient Transport | 3750 | Mount | 2020 |
| Earthen Thurrb | 1875 | Pet | 2020 |
| Hairless Mudhorn | 1875 | Pet | 2020 |
| Emote: Feel the Groove | 3750 | Emote | 2020 |
| Emote: Toast of Prosperity | 3750 | Emote | 2020 |
| Emote: Overeat | 3750 | Emote | 2020 |
| Meditative Satiation | 2250 | Toy | 2020 |
| Overstuffed Food Sack | 3750 | Toy | 2020 |
| Single Use Food Launcher | 150 | Toy | 2020 |
| Feast of Prosperity Food Launcher | 7500 | Toy | 2020 |
| Feast Preparation Hat | 1500 | Armor | 2020 |
| Feast Attire Belt | 1500 | Armor | 2020 |
| Feast Attire Boots | 2250 | Armor | 2020 |
| Feast Attire Chestplate | 3750 | Armor | 2020 |
| Feast Attire Gauntlets | 2250 | Armor | 2020 |
| Feast Attire Helmet | 3000 | Armor | 2020 |
| Feast Attire Robes | 3750 | Armor | 2020 |
| Feast Trader's Chestplate | 3750 | Armor | 2021 |
| Feast Trader's Robes | 3750 | Armor | 2021 |
| Feast Trader's Boots | 2250 | Armor | 2021 |
| Feast Trader's Helmet | 3000 | Armor | 2021 |
| Feast Trader's Belt | 1500 | Armor | 2021 |
| Arrangement: Feast Spread | 1875 | Decoration | 2020 |
| Arrangement: Meal for Three | 1500 | Decoration | 2020 |
| Arrangement: Exotic Medley Delight | 850 | Decorations | 2020 |
| Arrangement: Braised Vel Slug | 850 | Decorations | 2020 |
| Arrangement: Galactic Sampler | 850 | Decorations | 2020 |
| Arrangement: Glowshroom Stew | 850 | Decorations | 2020 |
| Arrangement: Roast Scyk Belly | 850 | Decorations | 2021 |
| Basket of Fruit | 750 | Decoration | 2020 |
| Basket of Root Vegetables | 1125 | Decoration | 2020 |
| Basket of Vegetables | 750 | Decoration | 2020 |
| Crate of Grain | 750 | Decoration | 2020 |
| Disguise Terminal: Cantina Dasher | 2250 | Decoration | 2020 |
| Disguise Terminal: Ultimate Chef | 2250 | Decoration | 2020 |
| Daichyura Feast Celebrator | 1875 | Decorations | 2020 |
| Duuba's Guard | 1875 | Decorations | 2020 |
| Duuba's Protector | 1875 | Decorations | 2020 |
| Refreshments Probe | 1875 | Decorations | 2020 |
| Ugnaught Feast Celebrator | 1875 | Decorations | 2020 |
| Feast of Prosperity Poster I | 750 | Decoration | 2020 |
| Feast of Prosperity Poster II | 750 | Decoration | 2020 |
| Feast of Prosperity Poster I (Large) | 850 | Decoration | 2021 |
| Feast of Prosperity Poster II (Large) | 850 | Decoration | 2021 |
| Improved Axel Grease | 2250 | Tactical | 2020 |
| Enhanced Seasoning for New Cooks | 2250 | Tactical | 2020 |
| Title: The Finest Ingredient | 1500 | Title | 2020 |
| Title: Well Seasoned | 1500 | Title | 2020 |
| Duuba's Transport Skiff | 4250 | Mount | 2022 |
| Gaboorga's Transport Skiff | 4250 | Mount | 2022 |
| Gourmand's Favorite Assault Cannon | 3750 | Weapon | 2022 |
| Gourmand's Favorite Blaster Pistol | 3750 | Weapon | 2022 |
| Gourmand's Favorite Blaster Rifle | 3750 | Weapon | 2022 |
| Gourmand's Favorite Dualsaber | 3750 | Weapon | 2022 |
| Gourmand's Favorite Lightsaber | 3750 | Weapon | 2022 |
| Gourmand's Favorite Sniper Rifle | 3750 | Weapon | 2022 |
| Feast of Prosperity Holo-Feast | 2250 | Toy | 2022 |
Past Event Dates
- See Previous List of Gathering, Cooking and World Bosses for Feast of Prosperity tables
- October 20 – November 10, 2020, as part of update 6.1.4.
- October 12 – November 2, 2021
- January 11, 2022 – February 1, 2022 (special re-run)
- November 1 – 29, 2022
- October 10 – November 7, 2023 – Added: Young Wetlands Mudhorn – 1,875 Tokens, Curious Rodir Cub – 1,875 Tokens, Chef Decos, Trader Decos, Attendee Decos
 Questions or comments? Feel free to send me a message on Twitter
  Dantooine Spring Abundance Festival Event Guide
 Nar Shaddaa Nightlife Event Guide
 Anniversary Event Guide & Free Rewards
 Rakghoul Event Guide
 Swoop Event Guide
 Gree Event PvP Achievements Guide
 Gree Event Guide


 Twitter @swtorista
 Reddit /u/swtorista
 Discord Swtorista#0153
 Email swtorista@gmail.com
 Youtube Swtorista
 Twitch Swtorista
 Patreon