


 How to Craft
 Choose a Crew Skill
 Armormech
 Armstech
 Artifice
 Biochem
 Cybertech
 Synthweaving

 Gathering Guide
 Rare Materials Guide
 White Materials Guide
 Jawa Junk
 Augments
 Medpacs, Stims and Adrenals
 Synthweaving Crafting Tree


 Crafted Decorations
 Crafted Mounts
 Crafted Dyes
 Crafted Crystals
 Events Calendar
 Galactic Seasons
 PvP Seasons
 Bounty Event
 Double XP Event
 Feast of Prosperity
 Gree Event
 Life Day
 Nightlife Event
 Pirate Incursion Event
 Rakghoul Event
 Spring Abundance Festival
 Swoop Event

 Jedi Knight
 Jedi Consular
 Trooper
 Smuggler
 Sith Warrior
 Sith Inquisitor
 Bounty Hunter
 Imperial Agent
 Bounty Hunter
 Imperial Agent
 Jedi Consular
 Jedi Knight
 Sith Inquisitor
 Sith Warrior
 Smuggler
 Trooper
 Legacy Gear
 Lightsabers
 Double-Bladed Lightsabers
 Vibroswords
 Double-Bladed Vibroswords
 Blaster Pistols
 Blaster Rifles
 Sniper Rifles
 Blaster Cannons

The Onderon dailies are a set of missions you can repeat to earn Reputation and Rewards. Ossus is the first daily area of Onslaught, the first expansion after the Jedi Under Siege update. It takes place after Ossus and before Mek-Sha.
 Thank you player Zahk for all your help on this guide to make it easier for other players to find the quest objectives!

How to Start
Chronological Start: Onderon’s dailies naturally fall into the main story missions directly after the ending of Jedi Under Siege. Story Order Guide
Early on Other Characters: You CANNOT run Onderon if you are not caught up on the story, your legacy must have completed Onslaught in order to accept the daily missions. After at least one character in the legacy has finished Onslaught, any at least level 70 can go do them. The planet’s level-down-sync is 75.
How to Get There: You can head to Onderon via either travelling directly in your ship, or by Accepting the Daily Area: Onderon weekly mission from the Solo Tab of the activities finder (icon of ‘three little people’ near your minimap). This is also a quick way to know if you’re eligible for the dailies on that character at a glance: if it’s not in the solo tab, you either have the weekly already, or have story to do still.

Reputation
Reputation is a way of gaining favor with different groups by completing missions for them. As you level up your reputation rank, more rewards for that reputation track become available. Reputation is shared by all your characters on your server, so it’s legacy-wide.
By using multiple characters, you won’t be limited to how many Onderon missions you run, but you will still be gated by how many reputation points you can earn – you can only earn a hard limit of 17,500 reputation points per week.
There is one Reputation track for Onderon named differently for Republic (Onderon Royal Guard) and Empire (Onderon Infiltration Force). Progress gained on Republic Side won’t need to be redone on Imperial side.
You also gain some Onderon reputation just by running the expansion itself – so if you are looking to earn Reputation on Onderon, feel free to also simply run the expansion on other characters in your legacy!
Ranks
As you run Onderon Dailies, you’ll rank up your reputation, and each rank unlocks new rewards from the Onderon Reputation vendor in your home base (Iziz for Republic and the Hunting Lodge for Empire).
- None – 0 Reputation
- Outsider – 0/2,500 Reputation (2,500 total points needed)
- Newcomer – 0/5,000 Reputation (7,500 total points needed)
- Friend – 0/7,500 Reputation (15,000 total points needed)
- Hero – 0/10,000 Reputation (25,000 total points needed)
- Champion – 0/15,000 Reputation (40,000 total points needed)
- Legend – 0/30,000 Reputation (70,000 total points needed)
Tokens
Each type of token from Onderon gives you a different amount of Reputation, and it also changes based on what various boosts you have and whether you are subscribed or not:
 Onderonian Ecological Sample: 75 Reputation (113 as a subscriber)
 Lost Relic: 180 Reputation (270 as a subscriber)
 Ancient Animal Fossil: 925 Reputation (1388 as a subscriber)
 Datapad of a Dark Lord: 1850 Reputation (2775 as a subscriber)
Other Rewards
Depending on your level when completing a Onderon mission, there are also some additional rewards tied to some; exactly what per mission is on a table down below!
 Conquest Commendations (at max-level, [DAILY] missions give 3 each, [WEEKLY] gives 50): Conquest Commendations will be awarded for most Planetary Repeatables. It’s used to upgrade virtually every track of gear upgrade, in varying amounts.
 Tech Fragments (at max-level, [DAILY] missions give 30 each, [WEEKLY] gives 100): Tech Fragments are an endgame currency used to buy Legendary Implants, Tacticals, materials for the best Augments in the game, and some older/cosmetic armors.
 Conquest Gear Piece: at max-level, the Weekly mission will award a Conquest Gear Box in addition. These have a minimum item level of 324, and are green quality.
 FP-1 Stabilizer: at max-level, you may choose to take 25 of these instead of the Conquest Gear Piece. They are the Flashpoint gear-currency.
Earning Reputation
- The Weekly “Daily Area” mission asks you to complete 6 dailies and gives you the extra large purple reputation token.
- Each daily awards a blue reputation token.
- The Daily patrol of doing 6 missions will award a blue reputation token.
Missions – Republic
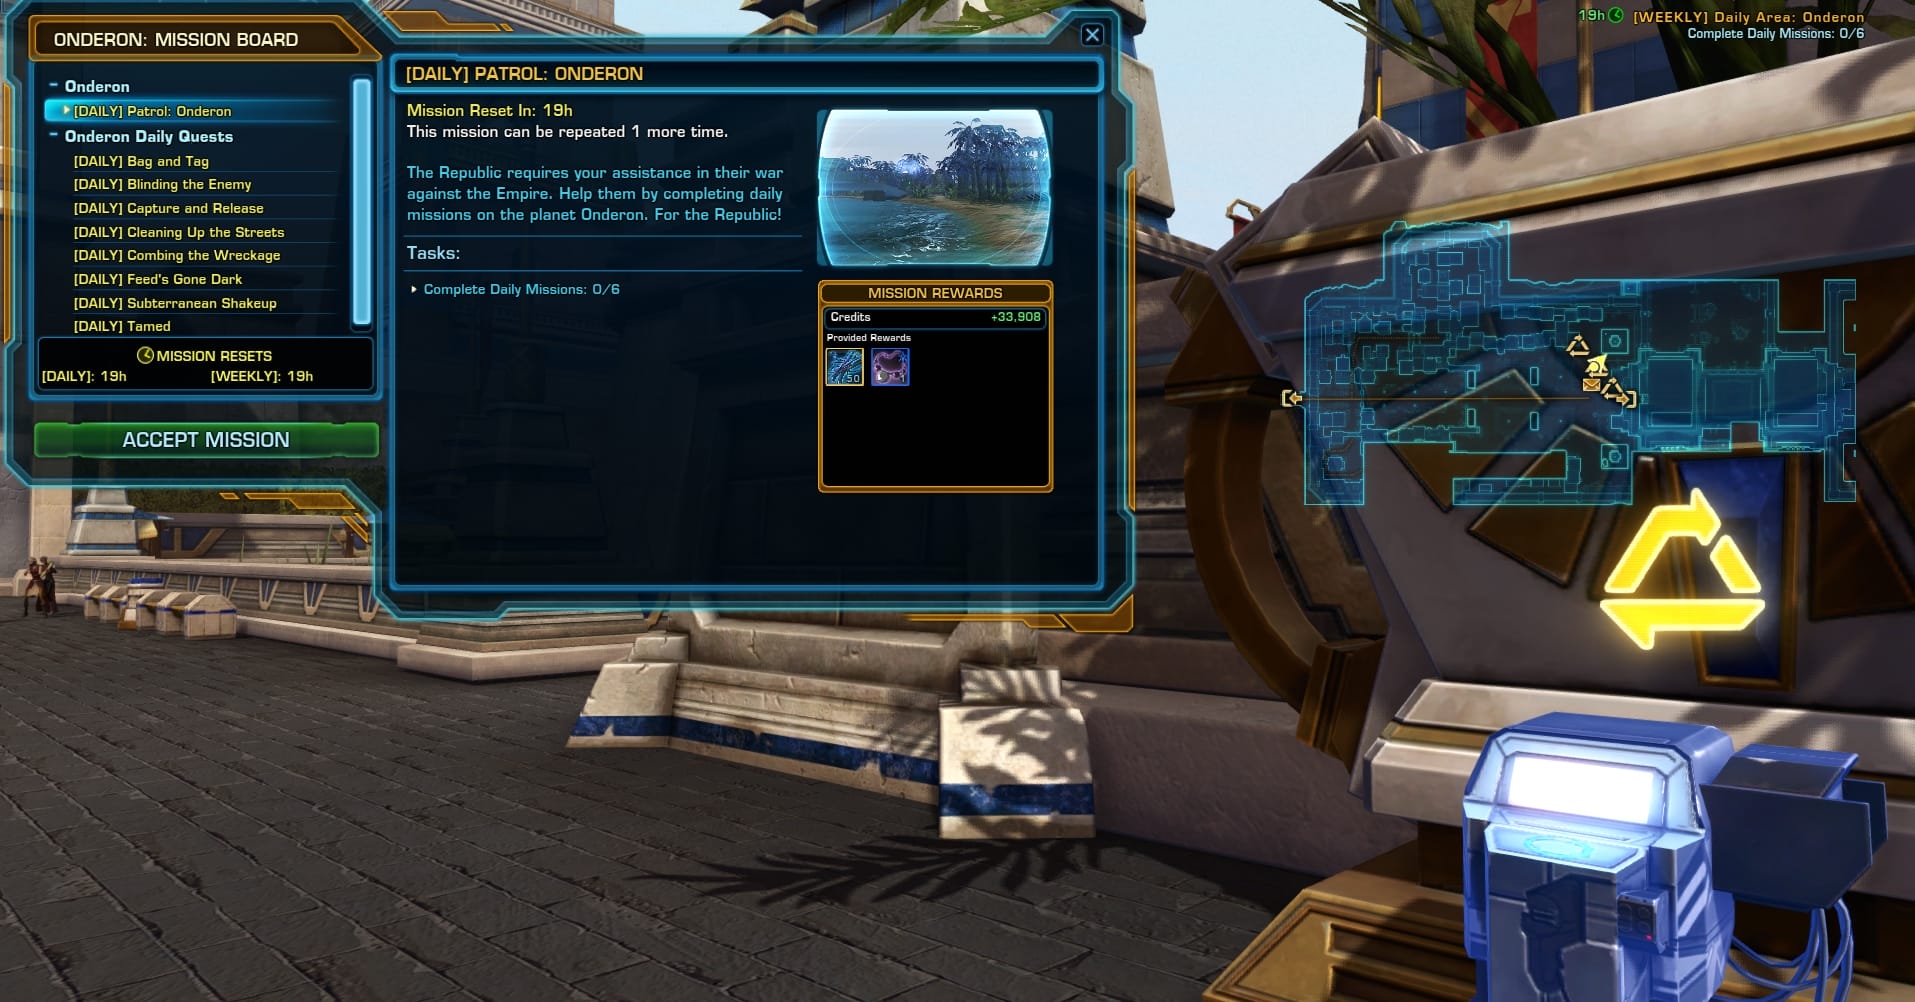
Aside from the daily missions available at this terminal, there is also one at the Onderon Royal Guard just up the stairs to the palace (Proving Your Worth), and another from Shae Vizsla at a console just across the plaza from the terminal (Scorn for the Dishonored).
[WEEKLY] Daily Area: Onderon
Complete 6 of 10 daily quests on Onderon:
- [DAILY] Bag and Tag
- [DAILY] Blinding the Enemy
- [DAILY] Capture and Release
- [DAILY] Cleaning Up the Streets
- [DAILY] Combing the Wreckage
- [DAILY] Feed’s Gone Dark
- [DAILY] Subterranean Shakeup
- [DAILY] Tamed
- [DAILY] Proving Your Worth
- [DAILY] Scorn for the Dishonored
[DAILY] Bag and Tag

Tips:
- This mission starts right at the end of the bridge leading out of Iziz, and consists of many very small search radius areas.
- Look very closely at your mission objective for these steps and see just how small the search radius is. The clickable tracks you’re finding will be hard to spot – they look like these little green discs in the image above. When your mouse goes over them, you should get a tooltip called “Strange Tracks” pop up. It can be helpful to look at your search area and move your mouse across it quickly trying to get the tooltip to appear to search if the foliage is in the way.
- You’ll repeat this search in 4 different locations, and at the fourth, confirm the track with a 5th interaction. Once done, a Ferocious “something” will appear (It could be an Arkonok, Pritarr, any Onderon animal.) They’re all gold level and basically just melee you quickly.
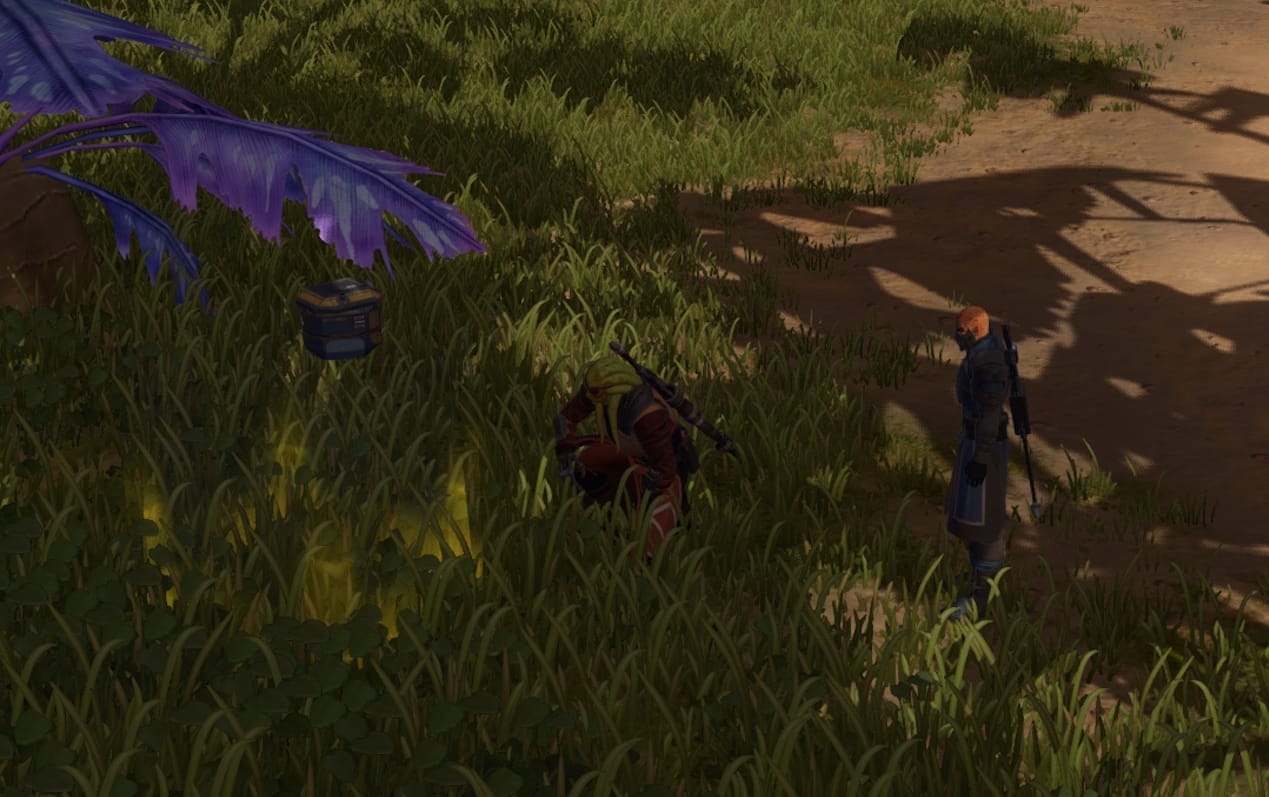
[DAILY] Blinding the Enemy

Tips:
- This mission takes place along the riverbank north of Iziz’s bridge. Jump through the foliage and take out any covert imperial enemies you see as the devices in the image above are usually all around them.
- While killing covert imperials, you may get an item that starts another bonus daily when looting them. This is “Cutting off the Head” and isn’t required to finish Blinding the Enemy, though it counts as an extra daily if you’re doing this for Galactic Seasons. It is also separate, so you can finish blinding the enemy first.
- To do the bonus, simply head into the cave now marked on your map across from the listening device field, and defeat the Surveillance Commander after starting a conversation with them. They’re a gold level enemy that has a few interruptable moves.
[DAILY] Capture and Release
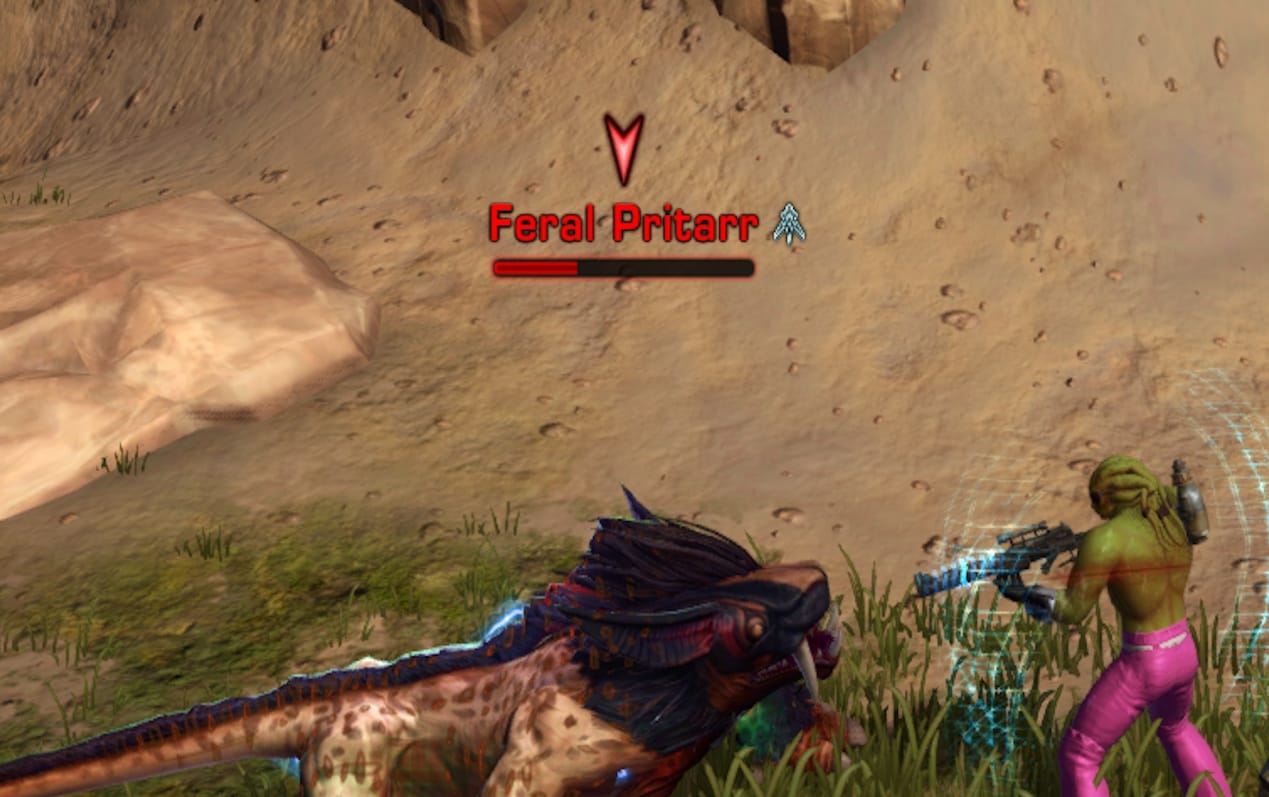
Tips:
- Capture and release takes place way up on the north end of Onderon. Take the Forest Encampment or Lake Overlook quicktravels if you have them already.
- For this objective you will notice it says pacify and cage FERAL pritarrs. There are lots of different ones around here – vicious and collared ones do not count.
- Once you’ve found some ferals, damage them to half HP and that should enable your mission item, sedating it and making it a friendly follower after a second. Take it to an open cage (you’ll probably need to find some mandalorians, 8 of them gets you the bonus) and hop into the cage. It should follow you and turn green, giving you credit.
- Once a cage is used it stayed permenantly occupied, so you’ll have to take new pritarrs to a new cage. You also can’t sedate more than one at a time – it overwrites the first follower for the new one.
[DAILY] Cleaning Up the Streets
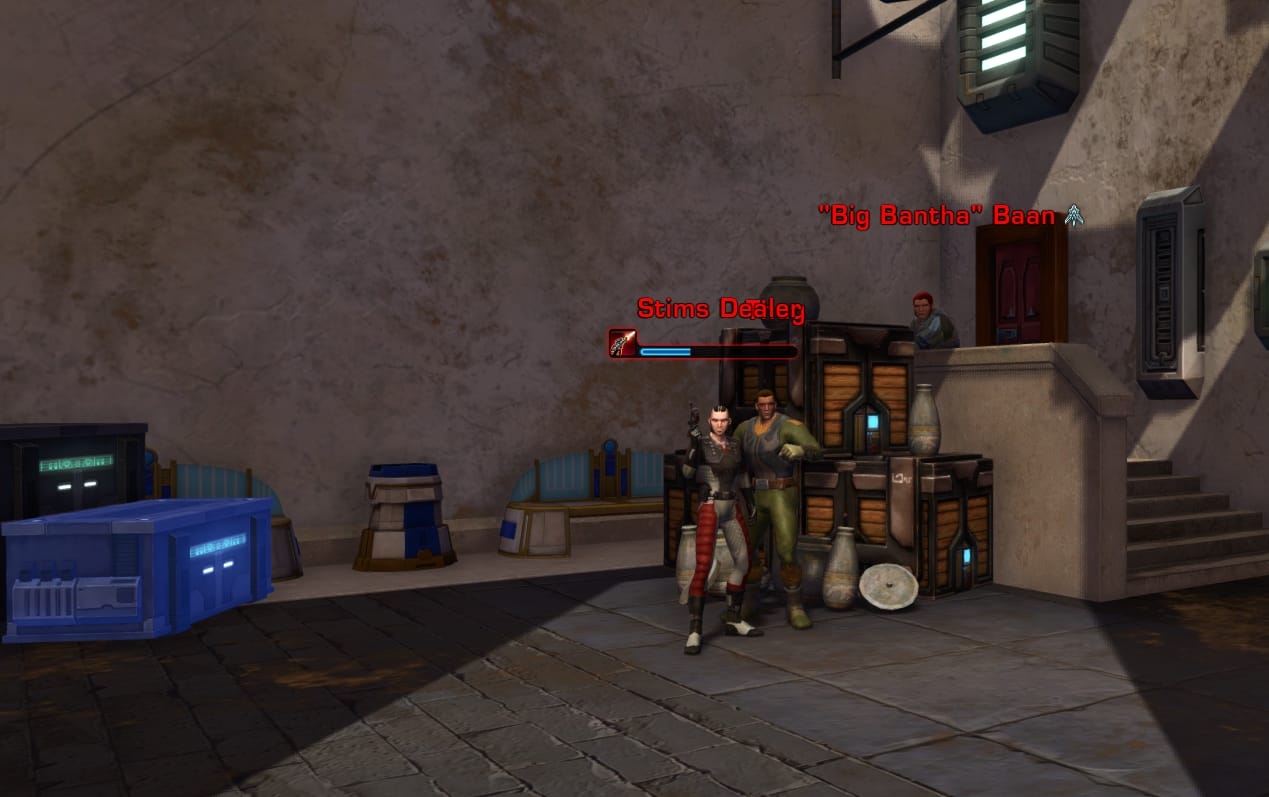
Tips:
- Cleaning up the streets takes place directly inside of Iziz, so head down the main road towards the exit but look to your right for an open archway. Through here you’ll find another archway ahead of you that has an instance barrier on it.
- Inside you’ll immediately see enemies on your left and right in the alleys. The image above has all you need to know – thugs are generic enemies, stim dealers will cast heals so interrupt them or kill them first, and the ends of the alleys will have the named enemies to take out for the mission.
- You’ll also see those glowing blue crates. They are illicit contraband and destroying 6 will complete a bonus mission quick and easy.
- After getting the first two thugs you may notice “Chuckles” is nowhere to be found and for those doing the bonus, you’re only 4/6 so far. Exit the instance and head to the right. There will be a SECOND instance through yet another archway.
[DAILY] Combing the Wreckage
Tips:
- This mission takes place way up at the crash site, so either quicktravel/taxi up to the forest encampment, or do missions like bag and tag / blinding the enemy on your way up north.
- Once you make it inside the crashed ship, you’ll find your first ship log next to a box with some glowsticks on it.
- The next steps in this mission always comprise of finding more ship logs, though the locations of these next ones are always a little more vague and they aren’t the same from day-to-day.
- To help find them, take care to check closely near wreckage with glowsticks/lights within your objective radius. If you’re doing this in a group, stand where you found your last log and communicate it to others, as the locations are usually the same for each players if you all grabbed the mission at the same time. Glowsticks are your friend!
- Once you’ve found the final ship log, your objective will update to “locate the black box recording”. This one has a clear objective marker on the map so no in-depth search is required.
[DAILY] Feed’s Gone Dark
Tips:
- This mission takes place right on the edge of Untamed Territory so either quicktravel to the cave camp or do missions like bag and tag / blinding the enemy on your way up the path.
- This mission can require some good eyes – the search objective is a pretty huge radius and they don’t really tell you what you’re looking for. Use the image above to see your objective: a glowing yellow square.
- These squares can be found usually pretty close to the dirt path that runs through the objective radius, so don’t search too far off-road.
- Activating them also tends to spawn 2-3 untamed enemies to attack you, but they aren’t very strong. Once you’ve activated 3 squares and are out of combat, you’ll be done. Super fast if you know what you’re looking for!
[DAILY] Subterranean Shakeup
Tips:
- This mission takes place in each of the cave tunnels on Onderon, so it’s a good mission to do during a full sweep as you can use the tunnels to get between areas. If you’re just looking to do a handful, it may be an inefficient amount of walking compared to grouping up some other missions.
- The southern and central caves both have entrances easily reached by simply following the west road out of Iziz. The north cave is quite close to the hunting lodge, away from quick travels. For the fastest path, do the south cave first, back out of it into the central cave, then exit it from the west exit to be right near the northern caves southern mouth. South > Central > North.
- The objectives in the caves themselves are pretty much identical to the Empires “Simple Discourse” mission. Go in, touch the comms device pictured in the image above, fight off the two enemies that appear.
- Note that while the two enemies are just silver-level and not too tough, in the event you DO die and don’t defeat them first, you’ll need to reset the mission as the summoning comm protocol will be gone.
[DAILY] Tamed
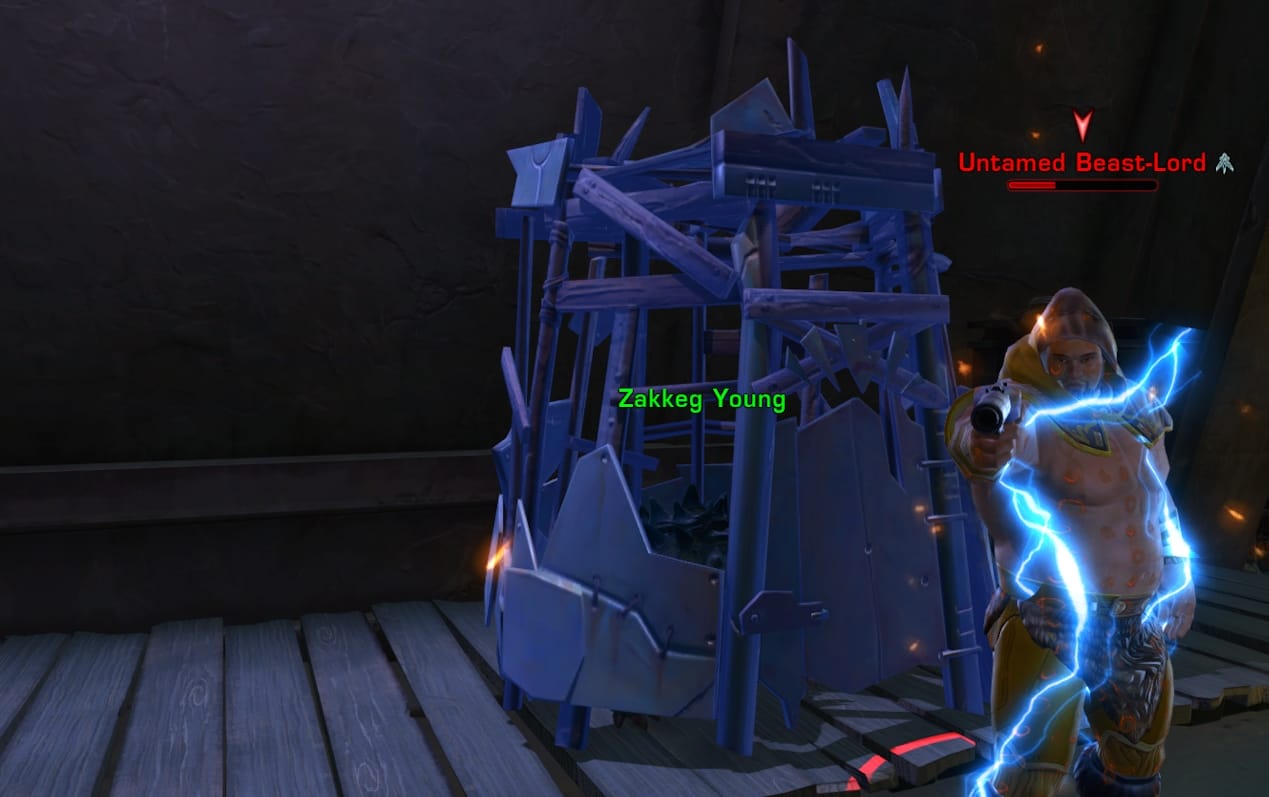
Tips:
- This mission takes place entirely within it’s own instance of the Untamed Lair in the center of Onderon. It’s identical to the opposing faction’s daily of the same name.
- Once inside your instance, follow the narrow tunnels to the beastmaster. Along the way you’ll see interactable blue cages like in the image above – this is the bonus objective and there will be 6 to find.
- Once you’ve looted the key from the beast-lord, you can backtrack up to the other hallway where you’ll find more untamed enemies and the last of the bonus objective zakkeg cages before the final door.
- With the door open, you’ll find three larger Zakkeg creatures, a silver difficulty bull and two regular difficulty matriarchs. Defeat them to complete the mission.
[DAILY] Proving Your Worth
Tips:
- Remember that this mission isn’t picked up from the terminal, but the Royal Guard Commander at the top of the steps to Iziz’s palace.
- This mission starts in the bottom of the untamed territory – if you have the caves camp quicktravel it’s almost right on top of the first brazier to light.
- Once you interact with the brazier, you’ll get a torch attached to you. This is also represented by a 2-minute buff timer – you must drive north into the untamed den and get into a phase on the east side of the temple (seen in the map above) to light the torch in time. You can get on a vehicle and won’t lose the torch.
- A gold-level champion will fight you the moment you light the torch. Defeat it and the daily will complete.
[DAILY] Scorn for the Dishonored
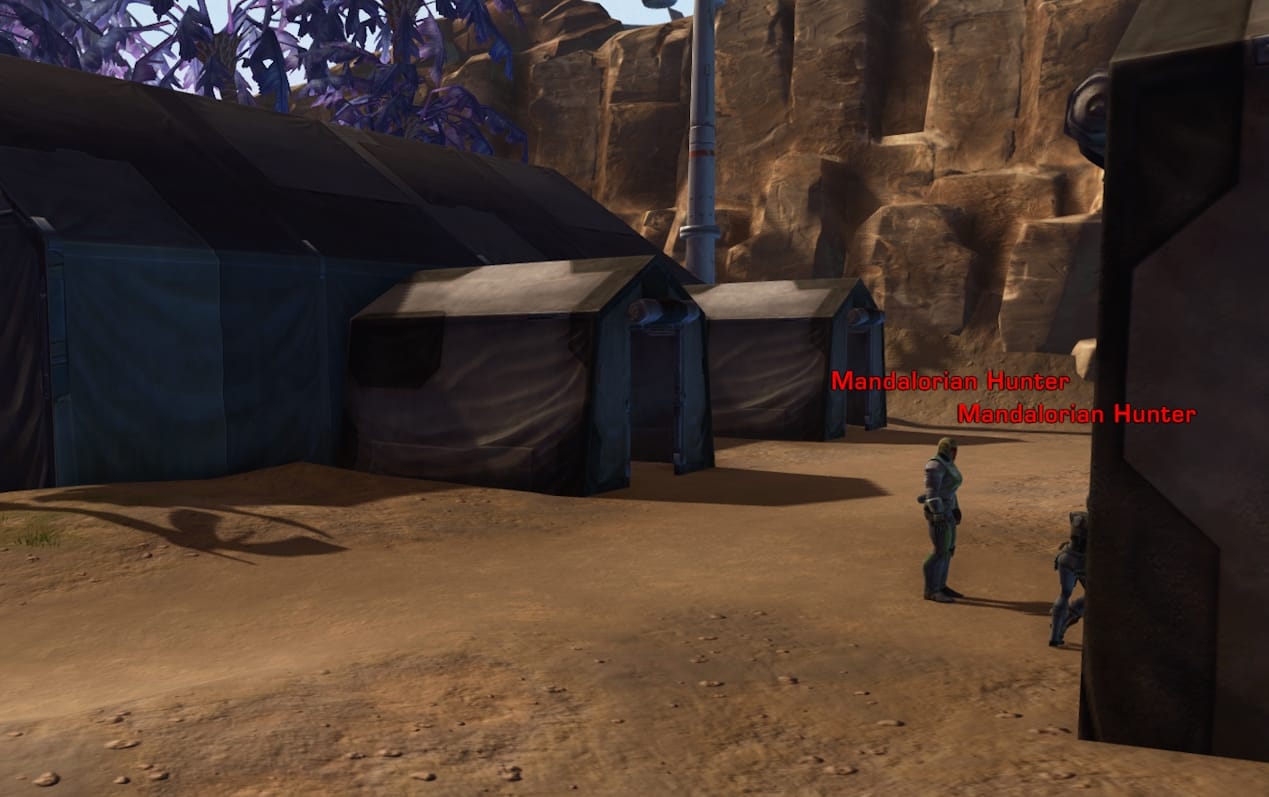
Tips:
- Remember that this mission is not picked up from the main terminal, but a console directly across from it.
- Once started, taxi to the Lake Observation/Quicktravel to Lake Overlook. Your objective is mostly concentrated in the cluster of tents on the north shore of the lake.
- Every mandalorian enemy (like the ones pictured) will have a chance to drop armor. If you’re looking for a bonus, “eliminate the supplies” requires you to interact with and destroy 6 boxes laying around the complex. They’re mostly indoors or right up against the tents.
Missions – Empire
In addition to the missions listed at this terminal, there is also a mission from Archeologist Maheyya to the right of the terminal (Forgotten Treasures) and another to the left of the console from Ambassador Dhur-Ell (To Catch a Killer).
[WEEKLY] Daily Area: Onderon
Complete 6 of 10 daily quests on Onderon:
- [DAILY] A Simple Discourse
- [DAILY] Advancing Science
- [DAILY] Good Hunting
- [DAILY] Recording History
- [DAILY] Rooftop Rumble
- [DAILY] Royal Reconnaissance
- [DAILY] Tamed
- [DAILY] Two Birds with One Stone
- [DAILY] Forgotten Treasures
- [DAILY] To Catch a Killer
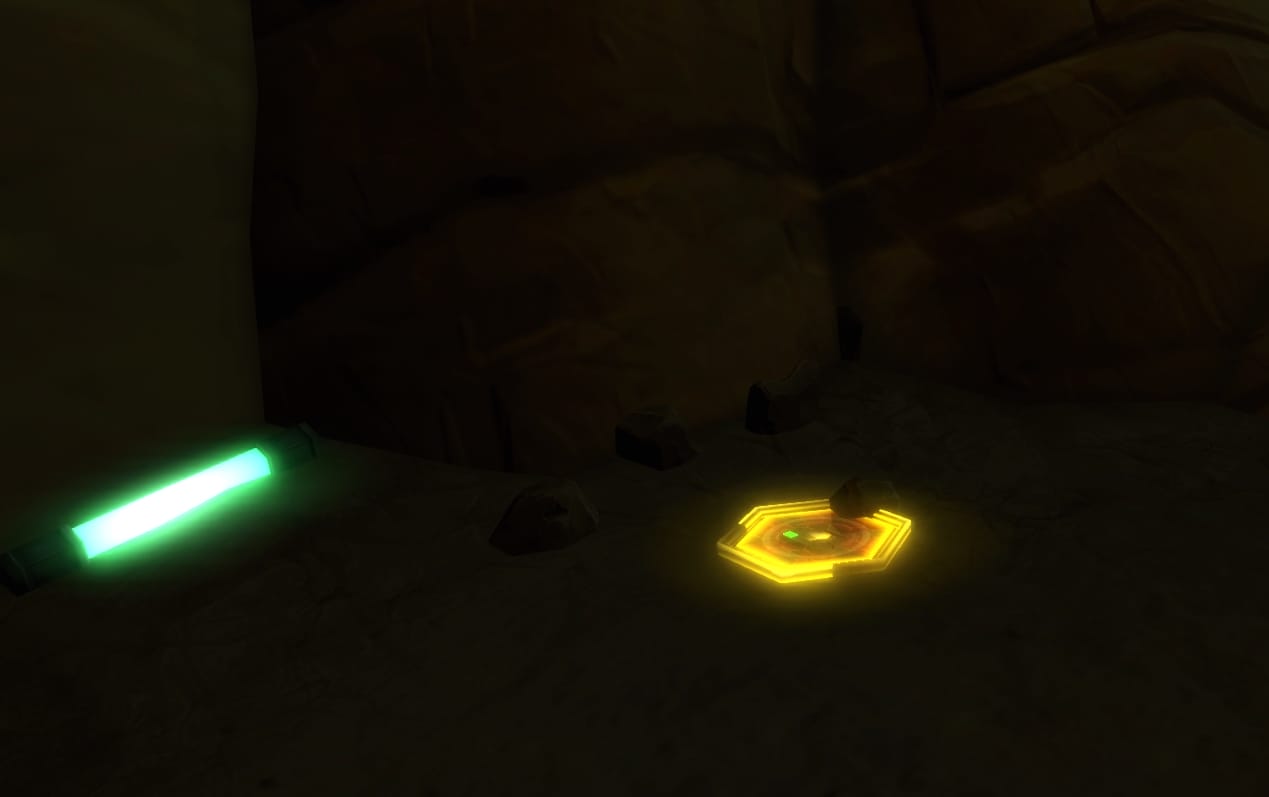
[DAILY] A Simple Discourse

Tips:
- This mission takes place in the southern cave network just across the path from the “Imperial Cave Camp” quicktravel. Alternatively, head east into the same cave from the Imperial Canyon Overlook.
- Once inside, follow the bioluminescent path to the back of the cave and discover a listening device highlighted by a gold hexagon like in the image above. This is pretty much exactly like the republic mission “Subterranean Shakeup”.
- Although the defeatable Jedi and Untamed conspirator objective is marked just north of this device, they won’t actually be there until the item is used.
- This objective will then repeat twice more in different caves throughout Onderon. NOTE: if you happen to die after summoning any of the jedi/untamed duos, they will dissapear. Since you’ve already activated and used the listening device, this gets you stuck. You need to select the mission in your log and hit the “RESET” button to try it again.
[DAILY] Advancing Science
Tips:
- This mission is a generic kill-and-loot one: though you can only hunt each animal one at a time. For your first prey, you need Orlaxes, so physically leave the hunting lodge and then immediately go south. There are many at the base of the oasis and the silver-level Snappers seem to drop more organs.
- Next is pterathki. The neutral (yellow name) displaced ones near the entrance of the lodge don’t seem to help with the objective at all, so follow your map marker to an area directly in untamed territory, accessed by a cave across from the hunting lodge. The ones found on the eastern exit of the cave are hostile, and drop the pheromones.
- The final ingredient is from Grefnas. Once again, random grefnas around the planet don’t drop the material, so head through the southern cave and follow the road east to get to the hunting grounds south of Iziz. The hostile Grefnas here will count.
- Finally, pop back to the hunting lodge and dump the specimens in a drop box that’s glowing blue next to Archaeologist Maheyya.
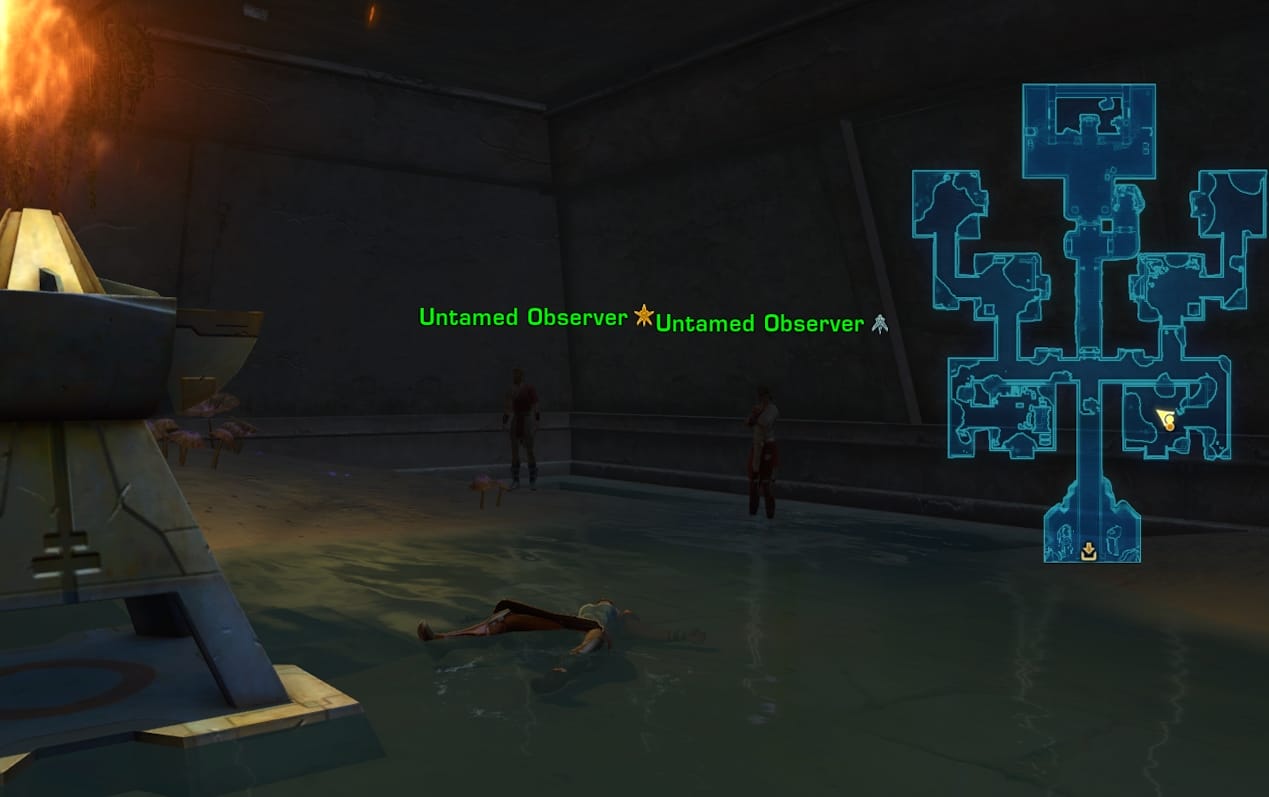
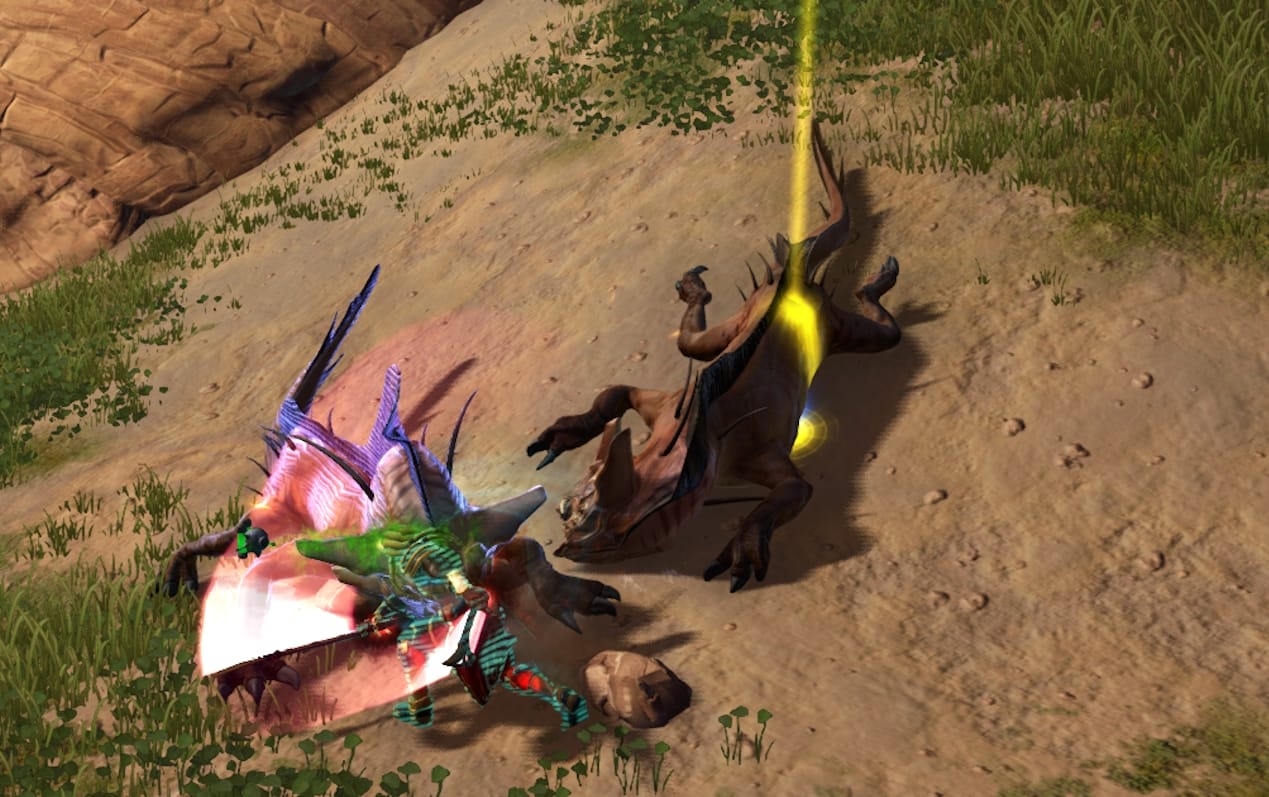
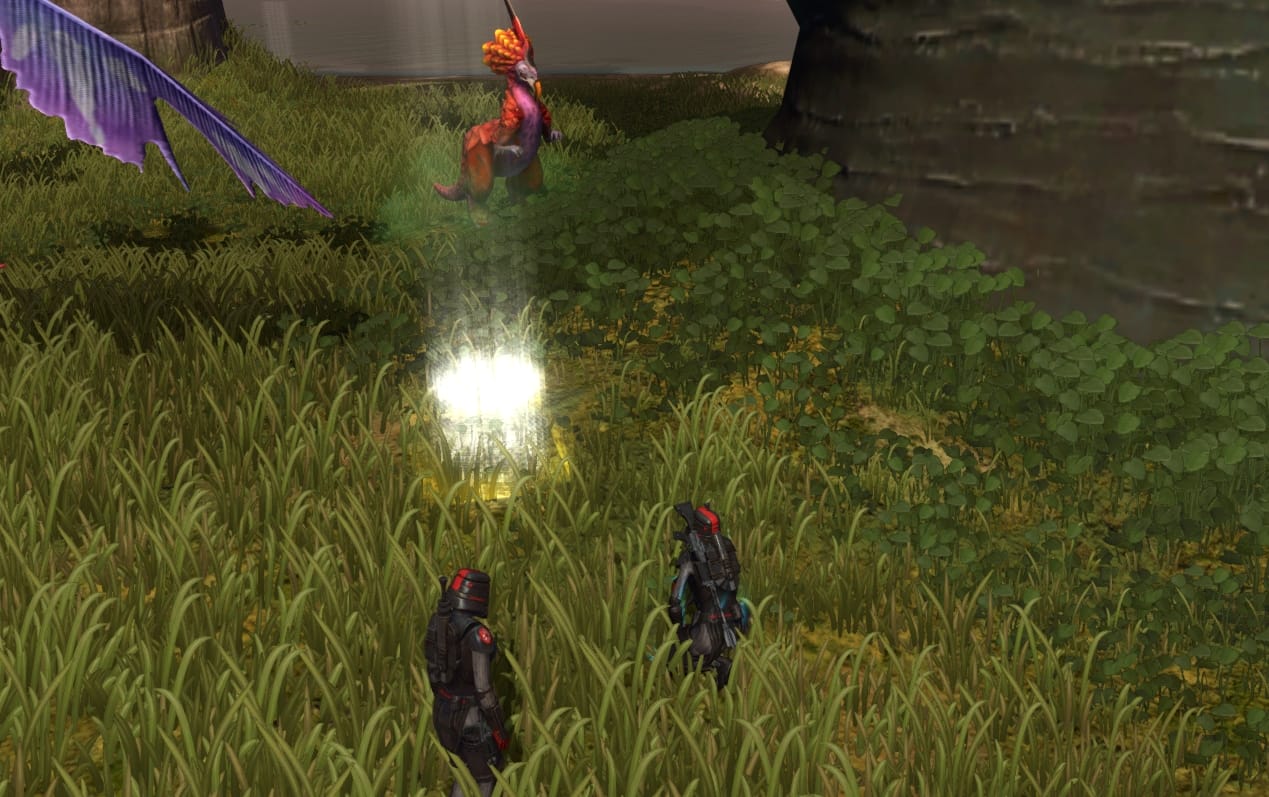
[DAILY] Good Hunting
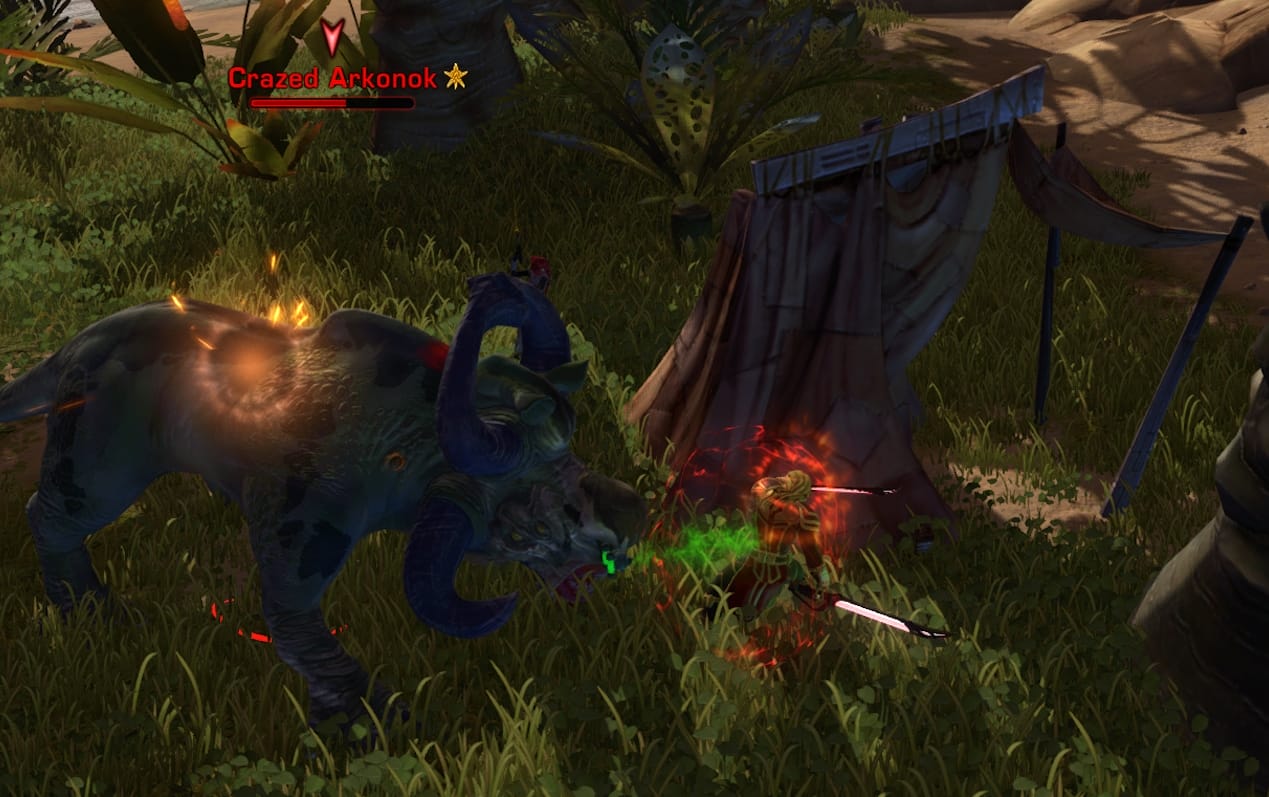
Tips:
- This mission takes place in the oasis just south of the hunting lodge, so it pairs well with the first step of advancing science where you collect the orlax organs here.
- Stand directly in the middle of the little island in the center of the oasis and use the mission item – a carcass lure to get an elite to attack you. A monsterous gold-level pritarr should jump out and attack.
- After it falls, you can either head south into a cave entrance and follow the winding path through the canyon out or simply quicktravel to the Imperial Canyon Camp. From here, head south into the Republic Forward Operating Base and plant a carcass on the nearest objective marker. It’s next to an old abandoned tent just off the path, visible in the image above. A gold level Arkonok will immediately attack.
[DAILY] Recording History
Tips:
- This mission isn’t ideal as a quick and easy one due to needing to go around the whole planet to do – but if you’re taking and doing all of the daily missions, it’s pretty convenient to scan each objective as you do other missions.
- As with all macrobinocular-style missions, you’ll be given an item in your mission-inventory that lets you look around. Always drive down to the wifi-signal looking symbol on the maps, stand directly on them, and make sure to face the same direction as them before using the item.
- Starting with the Republic Forward Operating Base objective, you’ll find the “proving grounds” are some ruined arches directly ahead of you.
- Once at the Ancient Sith Crypt spot, take care not to stand with the large tree blocking your view east. Just past it is a large spiked statue of Freedon Nadd.
- For the Iziz palace objective, quicktravel to the cave camp and head east along the road. There’s a large pile of rubble just in front of a ton of republic troops guarding the bridge to the palace. Jumping up on top of this rubble is fine and you won’t aggro any enemies from this distance. You can safely scan the palace from here.
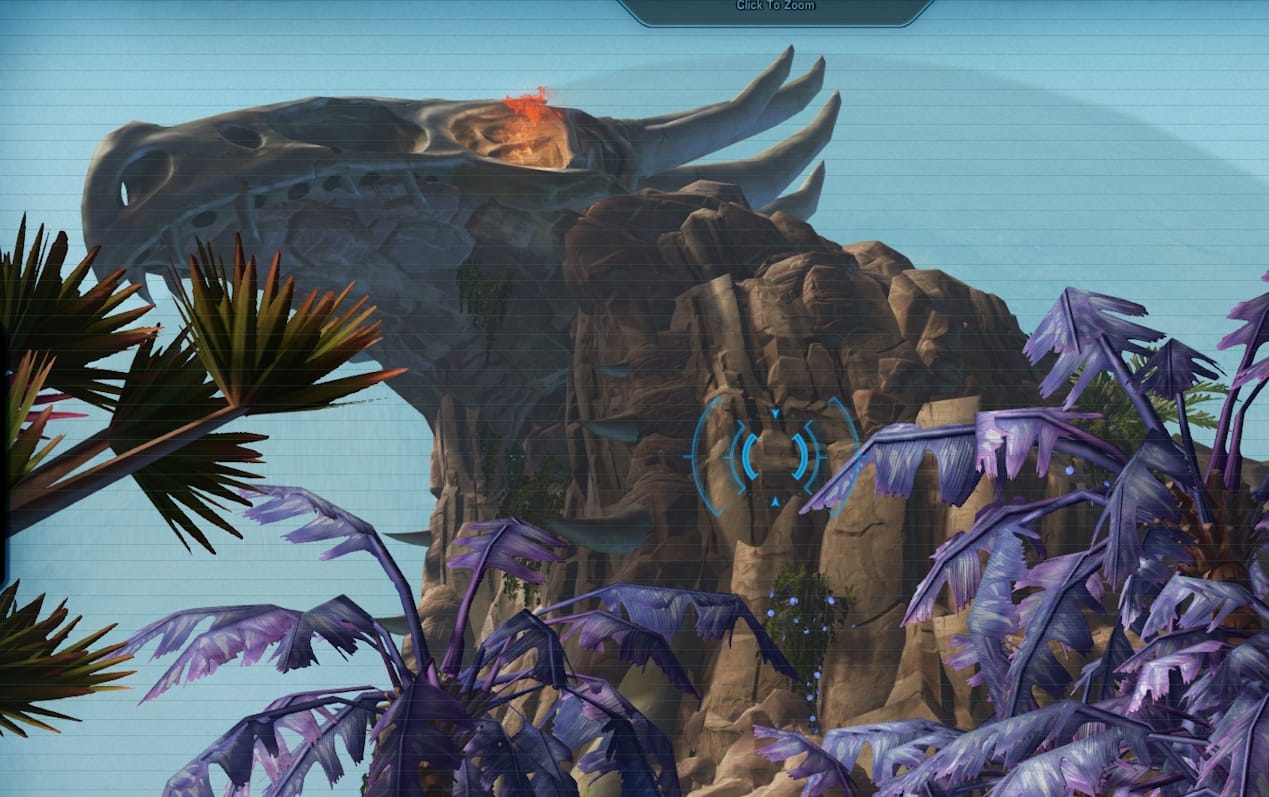
- After scanning the palace, follow the curved dirt path going north. It splits eventually – take the left fork to the very end where you’ll scan your last objective. At a glance, nothing may look glowy at the entrance to the untamed base. Look up – the whole decorated mountaintop is the scannable object.
[DAILY] Rooftop Rumble
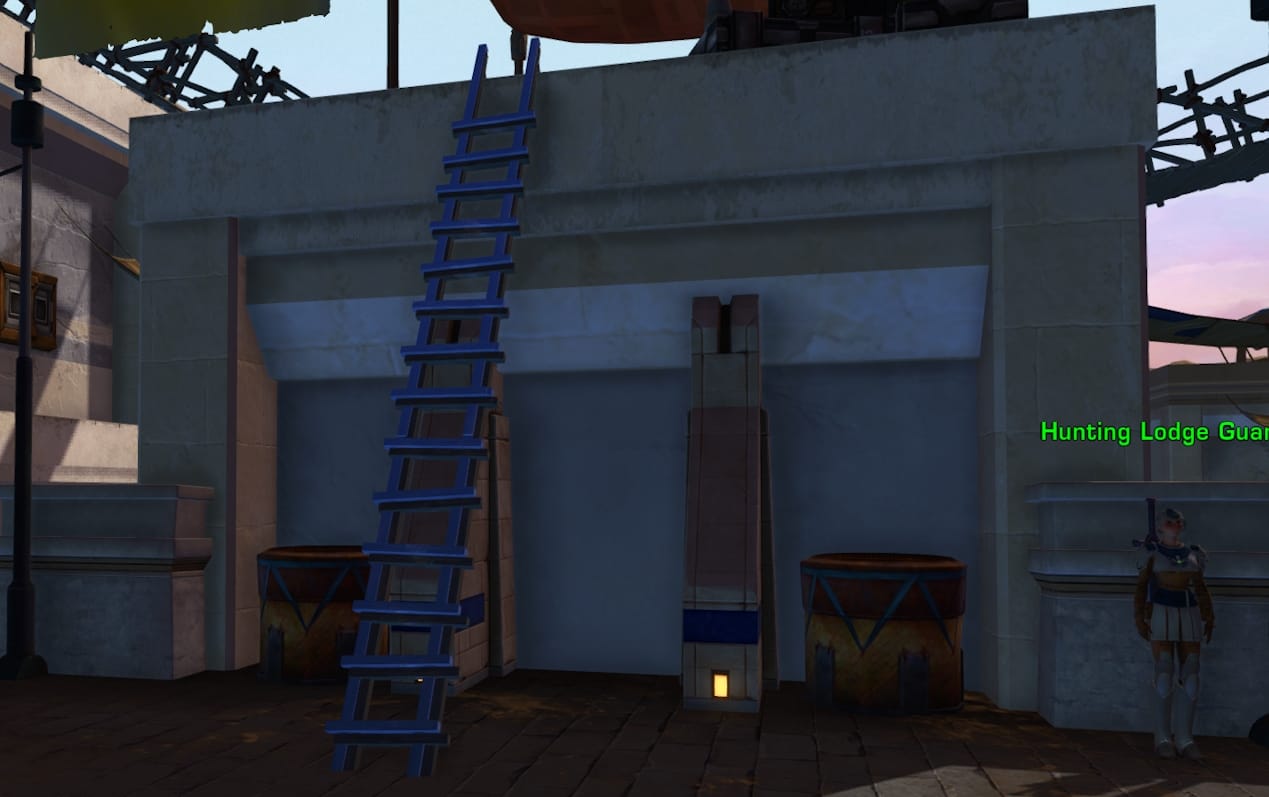
Tips:
- This mission takes place entirely within the hunting lodge and so it’s a pretty quick one.
- Head down the winding road from the reputation vendors and eventually you’ll come to this 3-way intersection with a ladder in it, like in the image above. By interacting with the ladder you’ll climb it and get to the roofs.
- The roof just west of you once up has the shattered comms protocol in a planter box. Using it will spawn a silver level enemy that you’ll need to defeat and loot.
- NOTE: though it’s temping to force push everyone off the roofs, it can glitch this daily out sometimes, so try to refrain and kill everything normally.
- Head back to your starting roof and pass it, going east this time to the glowing comms relay. Your first attempt at slicing will be interrupted by 3 regular-difficulty grenadiers. AoE them down and slice again. This time, it should generate loot you can pick up. Take this back up to the hunting lodge to complete the daily.
[DAILY] Royal Reconnaissance
Tips:
- This mission takes place along the waterline south of Iziz, so take the quicktravel to the Ancient Sith Crypt’s Archeological Site if you have it and head north.
- Once you’re about to hit the shoreline you’ll start to see pretty bright columns of light rising from the foliage. All along this coast in between the nearest trees are places to interact with and drop your 6 surveillance devices.
- Almost every time you do so, you’ll be accosted by a group of three Iziz guards. Sometimes they are accompanied by Iziz medics, so destroy those first to go faster. Stealth characters can also skip a group of enemies by cloaking out after planting, but if you have a companion out, they’ll still find you both.
[DAILY] Tamed
Tips:
- This mission takes place entirely within it’s own instance of the Untamed Lair in the center of Onderon. It’s identical to the opposing faction’s daily of the same name.
- Once inside your instance, follow the narrow tunnels to the beastmaster. Along the way you’ll see interactable blue cages like in the image above – this is the bonus objective and there will be 6 to find.
- Once you’ve looted the key from the beast-lord, you can backtrack up to the other hallway where you’ll find more untamed enemies and the last of the bonus objective zakkeg cages before the final door.
- With the door open, you’ll find three larger Zakkeg creatures, a silver difficulty bull and two regular difficulty matriarchs. Defeat them to complete the mission.
[DAILY] Two Birds with One Stone
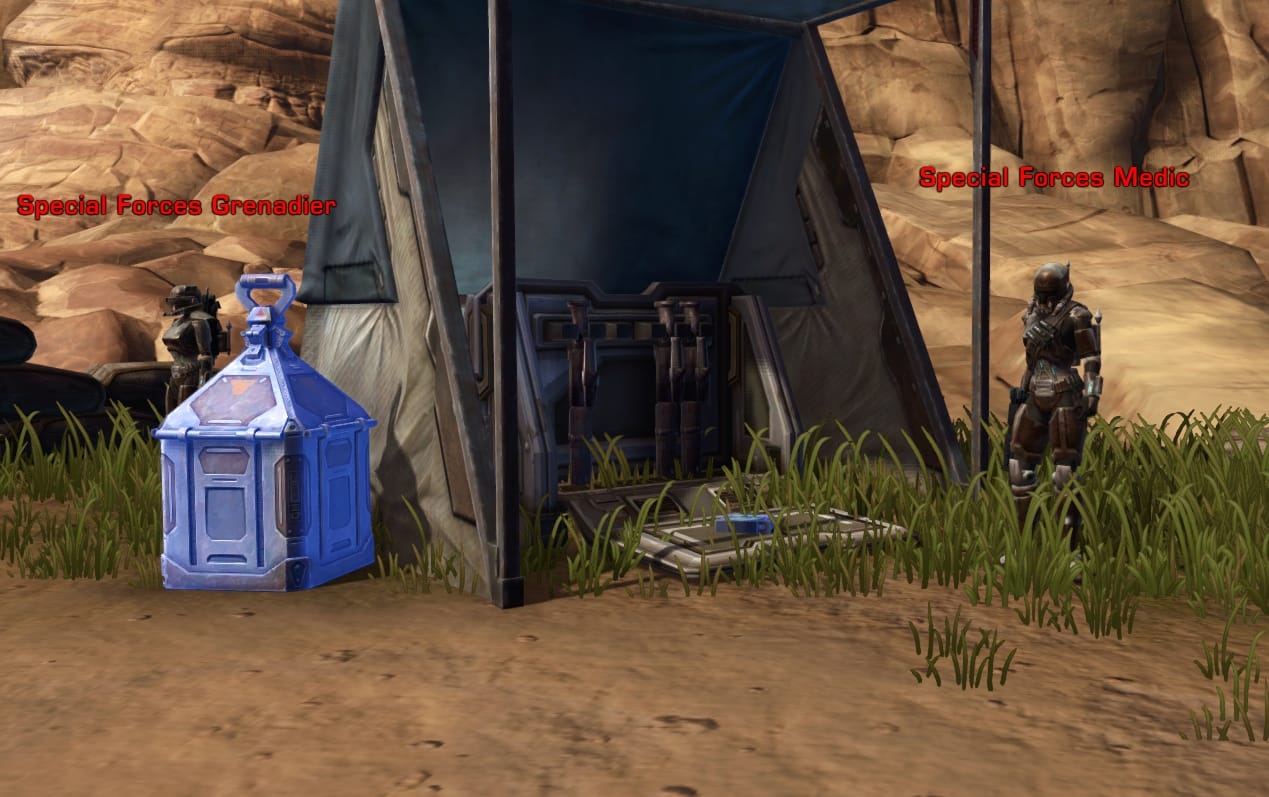
Tips:
- This mission takes place down at the Republic Forward Operating Base, so fly to the Canyon Overlook or Quicktravel to Canyon Camp and head south.
- For this mission, you’ll see a lot of large glowing boxes. These are simply for the bonus, “Cutting the Supply Line”, which requires 6 of them broken.
- Your real objective is also in the image above, albiet harder to see than the boxes. A datapad sits on the ground, which is one of the Evidence items you’ll need to collect.
- The Armor and Weapon do not drop from the special forces mobs guarding the items, but are instead just like the datapad – sitting around the little camps of supplies they guard, and need to be found and clicked on. The datapad was just north of the watering hole here, armor in the camp just across from it, and then in the northwest is a cliff-side wooden deck with the weapon sitting in a corner. Don’t go immediately west as you’ll probably aggro the Posted Guards of the republic taxi area, and die.
- After you have all your evidence, head north to the untamed territory. If you’ve discovered the Cave Camp quicktravel, that can speed things up – otherwise follow the road north.
- Directly at the search radius marker on your map you’ll find a shrine with a red and green interactable button on them. Interact with both to damage the shrine and plant the evidence, then move on to the next, repeating the objective. After three, you’ll have finished.
[DAILY] Forgotten Treasures
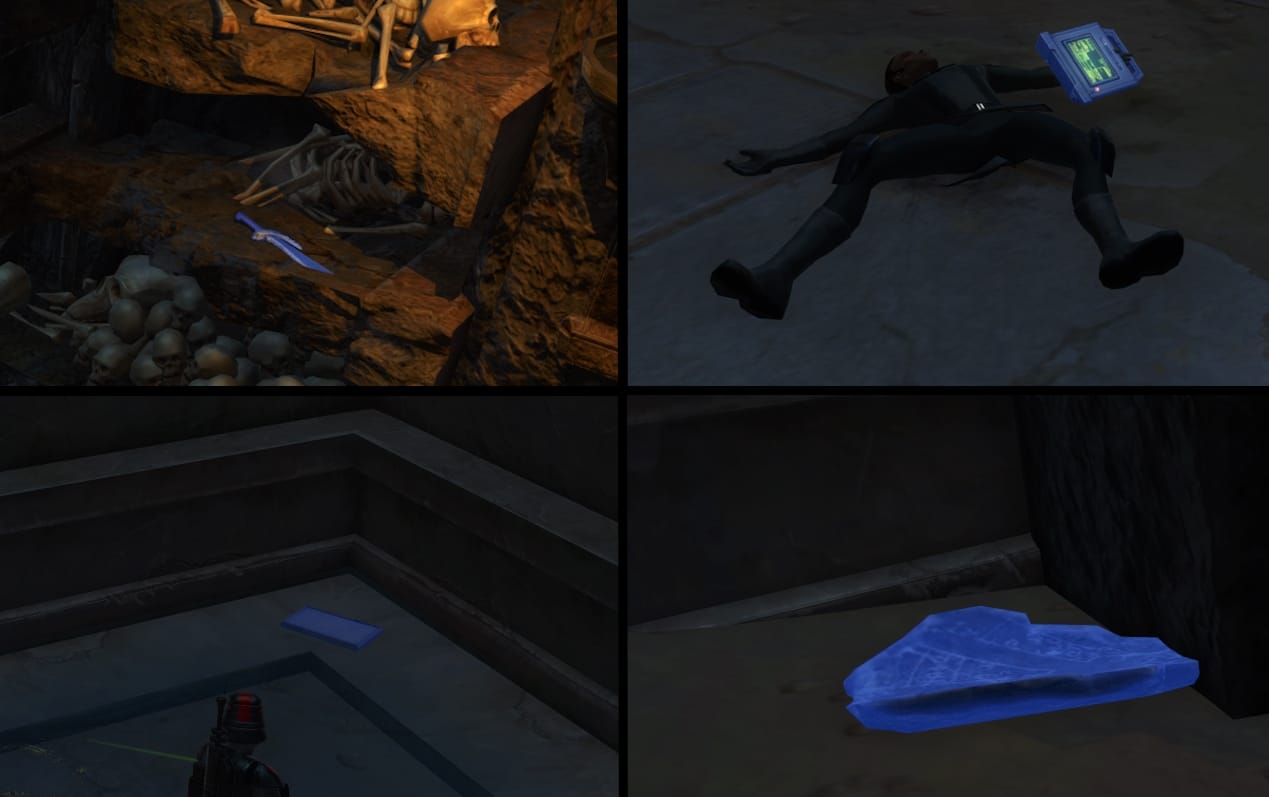
Tips:
- Reminder that this mission is NOT on the main terminal – you pick it up from Archeologoist Maheyya just across from it. It takes place in the Ancient Sith Crypt way on the southeastern corner of Onderon, so QT/Taxi on down to the Archeological site to start.
- From the camp’s gonk droid, head straight north and you’ll find the crypt entrance.
- Inside, there are a LOT of highlightable objects, and most of them are completely unnecessary.
- In the image above, an example useful object is the sword in the top left. The datapad on the corpses, like the top right, are just for the bonus. You’d need four.
- The bottom two lootables, are both “ancient tablet” items. The bottom left version starts and one-and-done sidequest (Force Legacy of Onderon), while the curled ceramic one in the bottom right is a repeatable bonus.
- Each wider room on your map can have the four objects you need, with the hallway loot mostly just being bonus stuff.
- After getting all four unique items, you’ll get a direct objective on your map to a previously locked instance – grab the holocron, fight a silver-level sith spawn, and touch the holocron again to complete.
[DAILY] To Catch a Killer
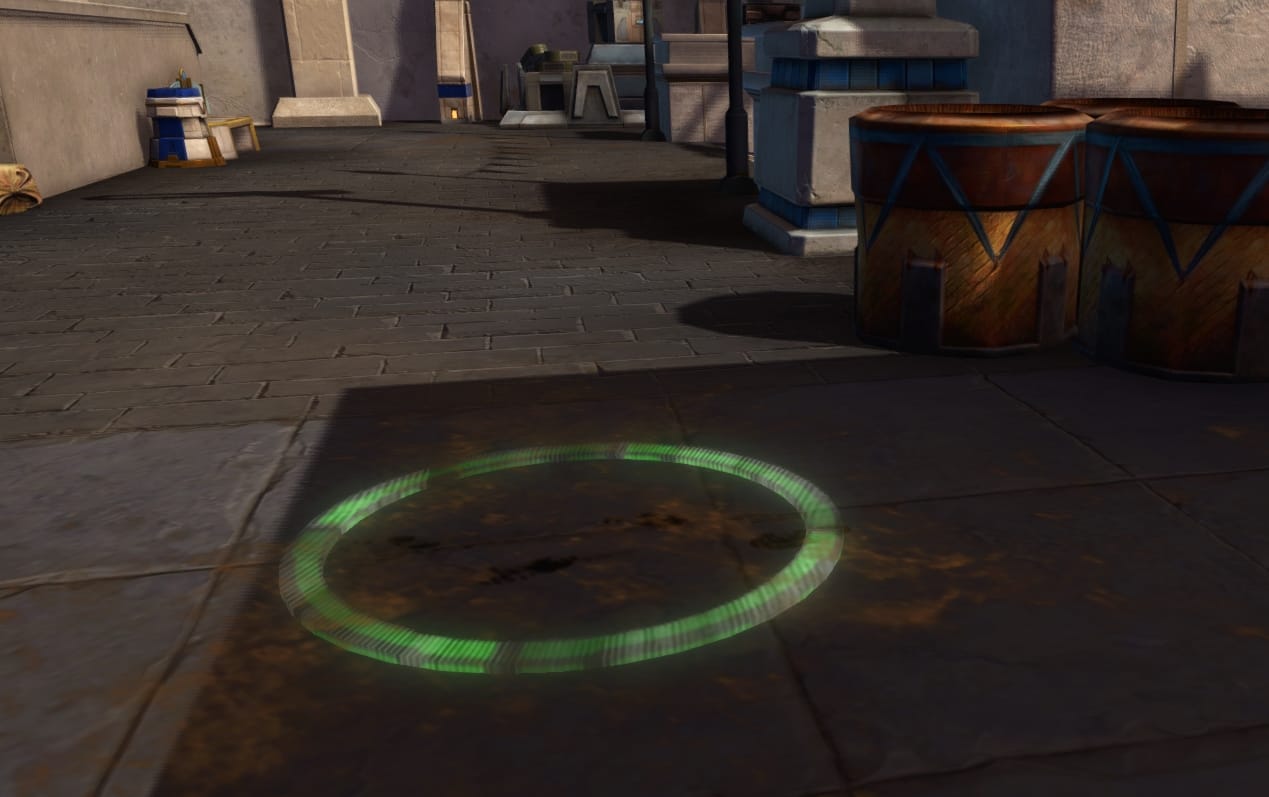
Tips:
- Reminder that this mission is NOT on the main terminal – you pick it up from Ambassador Dhur-Ell just across from it. It takes place right at home in the Hunting Lodge so take care of it alongside Rooftop Rumble before leaving for other missions, if you’re doing a bunch.
- You’ll find “Evidence” along the road, signified by a spiraling green circle. Follow the linear path through the city and you’ll find more evidence – like a trashed astromech droid, followed by even more green circles.
- Eventually, it will update at an instance now enterable at the bottom of the lodge. The assassin is a gold-level melee enemy who will try to stun you with electro-dart. It’s a four second cast, so it’s pretty easy to interrupt.
Rewards
All the Onderon rewards require Onderon reputation and credits, so you can easily earn them by running daily and weekly quests on Onderon. The vendors for Republic are in an open air market in the northwest corner of Iziz. They’re named Zox Veetrull and Mo Narki. Imperial side, the vendors are down the stairs in the streets just below the Hunting Lodge. They’re named Private Jilain and Corporal Wisco.


Weapons
Royal Autocannon
Requires Onderon Friend rank, costs 125000 credits
Royal Blaster
Requires Onderon Friend rank, costs 125000 credits

Royal Blaster Rifle
Requires Onderon Friend rank, costs 125000 credits

Royal Lightsaber
Requires Onderon Friend rank, costs 125000 credits

Royal Saberstaff
Requires Onderon Friend rank, costs 125000 credits

Royal Sniper Rifle
Requires Onderon Friend rank, costs 125000 credits

Armor
Onderonian Guard Tunic
Requires Onderon Hero rank, costs 125000 credits
Onderonian Guard Pants
Requires Onderon Hero rank, costs 125000 credits
Onderonian Guard Headgear
Requires Onderon Hero rank, costs 125000 credits
Onderonian Guard Gloves
Requires Onderon Friend rank, costs 100000 credits
Onderonian Guard Girdle
Requires Onderon Newcomer rank, costs 72500 credits
Onderonian Guard Bracers
Requires Onderon Newcomer rank, costs 72500 credits
Onderonian Guard Boots
Requires Onderon Friend rank, costs 100000 credits

Headgear of Dying Precision Info
Headgear of Dying Precision
Requires Onderon Champion rank, costs 1200000 credits
Greaves of Dying Precision
Requires Onderon Champion rank, costs 1200000 credits
Gauntlets of Dying Precision
Requires Onderon Champion rank, costs 1500000 credits
Chestguard of Dying Precision
Requires Onderon Champion rank, costs 1200000 credits
Boots of Dying Precision
Requires Onderon Champion rank, costs 700000 credits
Belt of Dying Precision
Requires Onderon Champion rank, costs 700000 credits
Armguards of Dying Precision
Requires Onderon Champion rank, costs 700000 credits
Mounts
Adorned Grefna
Requires Onderon Legend rank, costs 1000000 credits

Heavy Arkonok
Requires Onderon Champion rank, costs 1000000 credits

Decorations
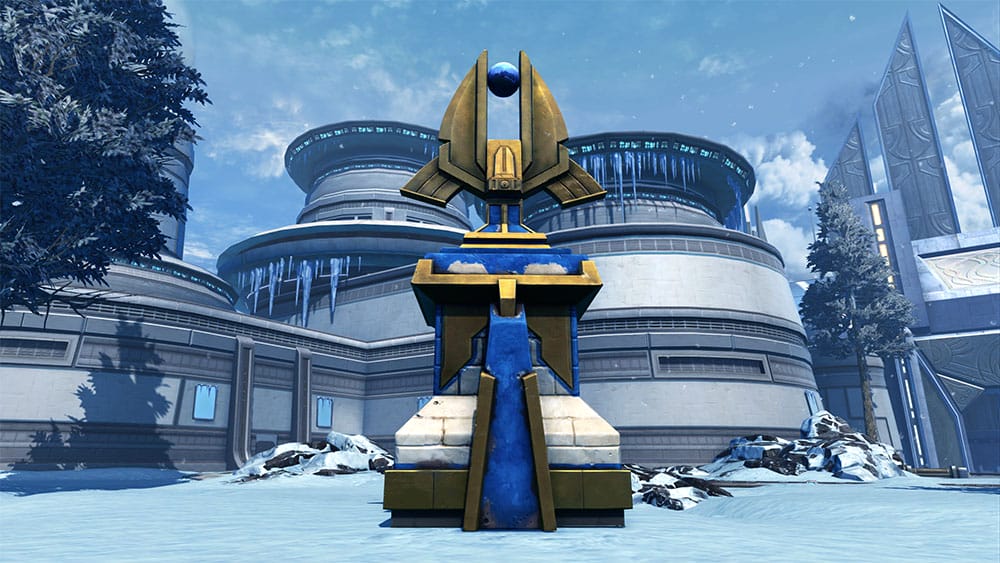
Capital City Monument
Requires Onderon Newcomer rank, costs 75000 credits
Dark Jungle Budding Tree
Requires Onderon Newcomer rank, costs 75000 credits

Dark Jungle Tree
Requires Onderon Newcomer rank, costs 75000 credits

Hunter’s Shrine
Requires Onderon Newcomer rank, costs 75000 credits

Hunters Lodge Rug (Red)
Requires Onderon Newcomer rank, costs 75000 credits

Iziz City Bench
Requires Onderon Newcomer rank, costs 75000 credits

Onderon Blooming Tree
Requires Onderon Newcomer rank, costs 75000 credits

Onderon Merchant Stall: General Goods
Requires Onderon Newcomer rank, costs 75000 credits

Onderon Merchant Stall: General Goods Info
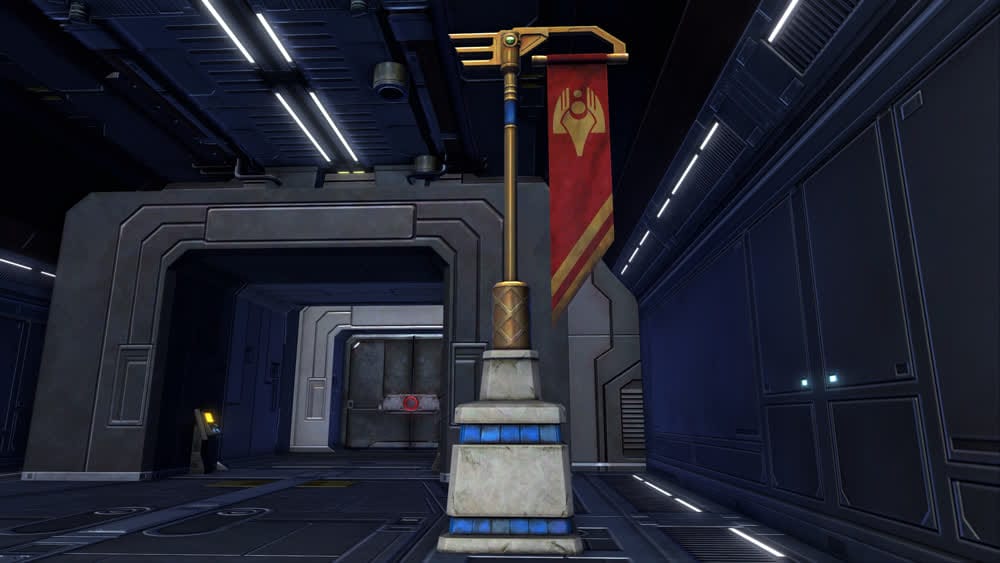
Onderon Street Banner
Requires Onderon Newcomer rank, costs 75000 credits
Onderon Temple Relief (Moons)
Requires Onderon Newcomer rank, costs 75000 credits
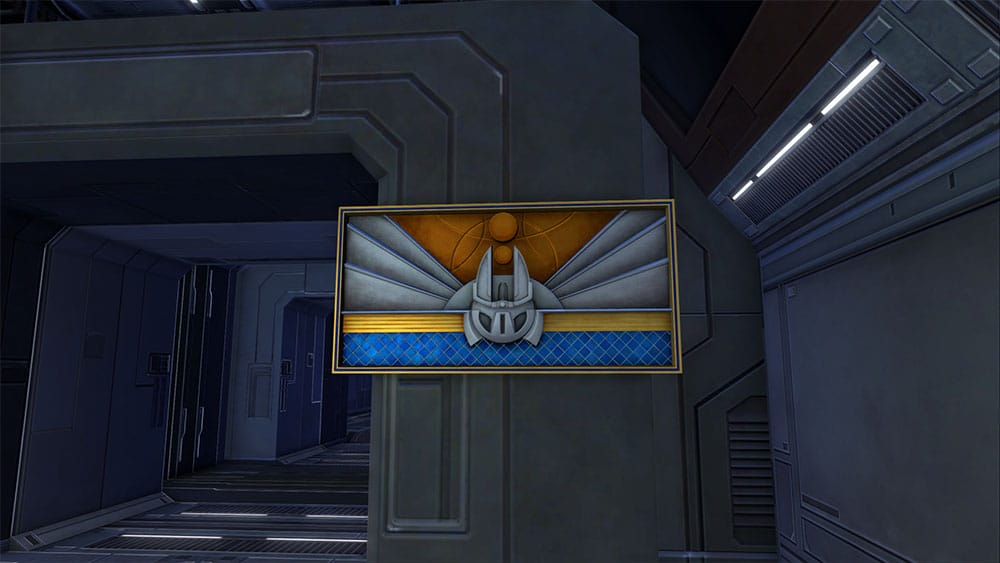
Onderon Temple Relief (Moons) Info
Taxidermy: Acklay
Requires Onderon Champion rank, costs 750000 credits

Taxidermy: Acklay Head (Silver Plaque)
Requires Onderon Friend rank, costs 100000 credits

Taxidermy: Acklay Head (Silver Plaque) Info
Taxidermy: Asharl Panther
Requires Onderon Hero rank, costs 450000 credits

Taxidermy: Asharl Panther Info
Taxidermy: Asharl Panther Head (Silver Plaque)
Requires Onderon Friend rank, costs 100000 credits

Taxidermy: Asharl Panther Head (Silver Plaque) Info
Taxidermy: Gundark
Requires Onderon Hero rank, costs 450000 credits

Taxidermy: Gundark Head (Silver Plaque)
Requires Onderon Friend rank, costs 100000 credits

Taxidermy: Gundark Head (Silver Plaque) Info
Taxidermy: Horranth
Requires Onderon Hero rank, costs 450000 credits

Taxidermy: Horranth Head (Silver Plaque)
Requires Onderon Friend rank, costs 100000 credits

Taxidermy: Horranth Head (Silver Plaque) Info
Taxidermy: Pritarr
Requires Onderon Hero rank, costs 450000 credits

Taxidermy: Pritarr Head (Silver Plaque)
Requires Onderon Friend rank, costs 100000 credits

Taxidermy: Pritarr Head (Silver Plaque) Info
Taxidermy: Voreclaw
Requires Onderon Hero rank, costs 450000 credits

Taxidermy: Voreclaw Head (Silver Plaque)
Requires Onderon Friend rank, costs 100000 credits

Taxidermy: Voreclaw Head (Silver Plaque) Info
Taxidermy: Wampa
Requires Onderon Hero rank, costs 450000 credits

Taxidermy: Wampa Head (Silver Plaque)
Requires Onderon Friend rank, costs 100000 credits

Taxidermy: Wampa Head (Silver Plaque) Info
Tacticals
A Breath of Fresh Air
Requires Onderon Legend rank, costs 1500000 credits

Every third activation of your basic attack restores 10% of your Class Resource.
Biorhythm
Requires Onderon Legend rank, costs 700000 credits

Dealing Damage increases all healing done. Healing increases all damage done. Stacks up to 5 times, only one effect can be active at a time.
Datacrons
There are two Datacrons hidden on Onderon! The Yellow Presence Datacron and Purple/Red Mastery Datacron.
Achievements
There are many hidden achievements on Onderon to earn – Onderon’s a really great planet to explore for secrets, hidden items, and codex entries.
General
 Loremaster of Onderon: Unlocked all Onderon codex entries.
- Onderon
- King Petryph
- Senator Nebet
- The Untamed
- Ancient Proving Grounds
- Royal Hunting Lodge
- The Ash’ad
- Flirron
- Orlax
- Arkonok
- Pritarr
- Grefna
 Beast-Lord of Onderon: Demonstrated mastery over the beasts of Onderon.
- Arkonok Master Completed
- Lord of the Arkonok Completed
- Grefna Master Completed
- Lord of the Grefna Completed
- Orlax Master Completed
- Lord of the Orlax Completed
- Pritarr Master Completed
- Lord of the Pritarr Completed
 Master of Onderon: Accomplished a great deal on Onderon.
- Beast-Lord of Onderon
- Onderonian Botanist
- Onderon Datacron Master
- Explorer of Onderon
- Loremaster of Onderon
- Crypt Conqueror
Exploration
- Explorer of Onderon: Uncovered all map areas of the planet Onderon.
 Flirron-Friend: Fed the tiny, hungry flirron enough to gain its trust. Reward: Flirron Hidden Achievement
 Onderon Datacron Master: Found all of the datacrons on Onderon.
 Onderon Crypt Explorer: Defeated 50 possessed enemies in the ancient crypt on Onderon.
- Further Into the Crypts: Defeated 100 possessed enemies in the crypt on Onderon.
- Onderonian Botanist: Discovered strange subspecies of plants on Onderon.
Beasts
Each beast achievement has intermediate milestones of 10, 50, and 75 kills of a specific species for “Tracker/Hunter/Master” Respectively.
 Arkonok Tracker: Defeated 10 Arkonok on Onderon.
 Arkonok Hunter: Defeated 50 Arkonok on Onderon.
 Arkonok Master: Defeated 75 Arkonok on Onderon.
 Lord of the Arkonok: Defeated the Arkonok Ragehorn on Onderon.
- Grefna Tracker: Defeated 10 Grefna on Onderon.
- Grefna Hunter: Defeated 50 Grefna on Onderon.
- Grefna Master: Defeated 75 Grefna on Onderon.
- Lord of the Grefna: Defeated the Grefna Gorecrest on Onderon.
- Orlax Tracker: Defeated 10 Orlax on Onderon.
- Orlax Hunter: Defeated 50 Orlax on Onderon.
- Orlax Master: Defeated 75 Orlax on Onderon.
- Lord of the Orlax: Defeated the Orlax Swarmlord on Onderon.
- Pritarr Tracker: Defeated 10 Pritarr on Onderon.
- Pritarr Hunter: Defeated 50 Pritarr on Onderon.
- Pritarr Master: Defeated 75 Pritarr on Onderon.
- Lord of the Pritarr: Defeated the Pritarr Packmaster on Onderon.
Dailies
 Onderon: Doing Your Part: Completed 25 Daily Missions on Onderon.
- Onderon: Reliable Aid: Completed 50 Daily Missions on Onderon.
- Onderon: Above and Beyond: Completed 100 Daily Missions on Onderon.
- Onderon: Preliminary Expedition: Completed a Weekly Mission on Onderon.
- Onderon: Experienced Guide: Completed the Weekly Mission 5 times on Onderon.
- Onderon: Veteran Pathfinder: Completed the Weekly Mission 10 times on Onderon.
Story Missions
 In Our Own Backyard: Completed all Republic story missions for Onslaught on Onderon.
- Where They Least Expect It: Completed all Imperial story missions for Onslaught on Onderon.
Player Vs.Player
 Onderon: Waylayer: Defeated 50 players on Onderon.
- Onderon: Assailant: Defeated 100 players on Onderon.
- Onderon: Ambusher: Defeated 150 players on Onderon.
- Onderon: Marauder: Defeated 250 players on Onderon.
 Questions or comments? Feel free to send me a message on Twitter


 Discord
  Email swtorista@gmail.com
 Bluesky @swtorista.com
 Reddit /u/swtorista
 Twitch Swtorista
 Youtube
 Patreon
 Twitter @swtorista