


 How to Craft
 Choose a Crew Skill
 Armormech
 Armstech
 Artifice
 Biochem
 Cybertech
 Synthweaving

 Gathering Guide
 Rare Materials Guide
 White Materials Guide
 Jawa Junk
 Augments
 Medpacs, Stims and Adrenals
 Synthweaving Crafting Tree


 Crafted Decorations
 Crafted Mounts
 Crafted Dyes
 Crafted Crystals
 Events Calendar
 Galactic Seasons
 PvP Seasons
 Bounty Event
 Double XP Event
 Feast of Prosperity
 Gree Event
 Life Day
 Nightlife Event
 Pirate Incursion Event
 Rakghoul Event
 Spring Abundance Festival
 Swoop Event

 Jedi Knight
 Jedi Consular
 Trooper
 Smuggler
 Sith Warrior
 Sith Inquisitor
 Bounty Hunter
 Imperial Agent
 Bounty Hunter
 Imperial Agent
 Jedi Consular
 Jedi Knight
 Sith Inquisitor
 Sith Warrior
 Smuggler
 Trooper
 Legacy Gear
 Lightsabers
 Double-Bladed Lightsabers
 Vibroswords
 Double-Bladed Vibroswords
 Blaster Pistols
 Blaster Rifles
 Sniper Rifles
 Blaster Cannons
The The Nathema Conspiracy is a Flashpoint in Star Wars: The Old Republic that you can run alone, with friends, or with other random players through the groupfinder.
Contents
The Nathema Conspiracy

The Order of Zildrog is revealed. On the tomb world of Nathema, they have discovered an ancient weapon that can lay waste to the Alliance. From their abandoned listening post, you’ve gathered coordinates related to the Order of Zildrog.
How to Start
The Nathema Conspiracy is a Flashpoint meant to be played later in the story, quite a while after your class story is completed. You can encounter it in the story near the end of the Traitor Arc, replay it alone in Story mode, or play it outside of the story with a group in Story, Veteran or Master mode.

Use the tabs above for instructions for how to enter the flashpoint in the story line, and how to enter it in Solo (Story) mode, Veteran mode, and Master mode. The instructions are exactly the same Republic and Imperial side.
- Story: Lvl 70+
- Solo: Lvl 70+
- Veteran: Lvl 15-80
- Veteran Groupfinder: Lvl 70-80
- Master Mode: Lvl 70-80 †
- Master Mode Groupfinder: Lvl 80

Story Instructions
![]()
![]()


Requirements: To play The Nathema Conspiracy Flashpoint in the story, and receive all the special cutscenes related to the Flashpoint in the story, you will need to be level 70+ and be on the correct quest in the Traitor Arc quest chain. If you are below this level, you can not play the story quest or associated quest line for this Flashpoint.
![]()
Timeline: In the story, this Flashpoint takes place late in the Traitor story arc, on the planet Odessen. It does not make much sense plot-wise to play outside of the story.

Bring a Friend?: You can NOT bring a friend of The Nathema Conspiracy Flashpoint that is part of the Traitor Arc storyline UNLESS that friend is on the exact same step quest The Nathema Conspiracy as part of the Traitor Arc on the step Complete The Nathema Conspiracy Solo Flashpoint and then run the The Nathema Conspiracy quest.
If they have not done the Traitor Arc storyline, they can join you in a group and you can follow the exact same steps together and do the Traitor Arc as long as they are level 70+ and meet the other quest requirements to start. Then you can walk into The Nathema Conspiracy together.
If they have already run the storyline or are ineligible to start the Traitor Arc, they will NOT be able to walk into the Flashpoint behind you to help you.
Why can’t I get a friend to help? This is because this quest is a special one-time version of The Nathema Conspiracy Flashpoint – it is not the same as the [STORY], [VETERAN] or [MASTER] version you would pick up from the terminal. It is a unique fourth mode designed to be run alone and has special one-time cutscenes related to the Traitor Arc.
![]()
Directions to the Story Quest for The Nathema Conspiracy: The Nathema Conspiracy’s one-time story quest is built in to the Traitor Arc / War on Iokath storyline.

If you have not yet run through the Traitor Arc / War on Iokath storyline, you can start it from the glowing blue terminal on your ship. To start this questline, you need to have completed the fourth and fifth expansion (KOTFE and KOTET) and be at least level 70. Then you can start The Forgotten World (sometimes known as Iokath, and labelled the War on Iokath in the Eras tab) which will lead you through a series of quests on Iokath and eventually to The Nathema Conspiracy quest, where you will speak to Theron on Odessen then run the Flashpoint.
→ The Knights of the Fallen Empire Expansion (KOTFE)
→ The Knights of the Eternal Throne Expansion (KOTET)
→ The Forgotten World (aka Iokath)
→ Shots Fired
→ The Lost Arsenal
→ Showdown on Iokath
→ Crisis on Umbara
→ A Traitor Among the Chiss
→ The Nathema Conspiracy
If you are on this step, you can use the Launch Mission button to get to Odessen quickly.

The steps for the Nathema Conspiracy storyline quest are:
- Meet with Lana in the Alliance Staging Area
- Press “Launch” to Begin the Mission
- Restore Power
- Investigate the Active Terminals
- Investigate the Main Terminal
- Escape the Listening Post
- Complete the Nathema Flashpoint in Solo-Story Mode
- Return to Lana in the Alliance Staging Area
Once on Odessen, you can follow the purple markers to the elevator outside the base, and go to the Alliance Staging Room to meet with Lana.

The first step of the one-time The Nathema Conspiracy story quest will lead you to the Staging Room – just walk in the door, and ignore the other quest boxes nearby.

Once you get to the quest literally called The Nathema Conspiracy, after you speak to Theron, you’ll automatically be on the quest [SOLO-STORY] The Nathema Conspiracy, where you can travel to the Flashpoint entrance and walk in – no need to use the quest terminal, as you should already be on the quest.
IMPORTANT! This is a special one-time version of The Nathema Conspiracy Flashpoint called [SOLO-STORY] mode – it is not the same as the [STORY], [VETERAN] or [MASTER] version you would pick up from the terminal. It is designed to be run alone and has special one-time cutscenes related to the Traitor Arc.
![]()
Story Progress: [STORY] The Nathema Conspiracy alone will not progress your storyline – it is simply the repeatable solo version. To work on the overarching story, you also need to be on the quest The Nathema Conspiracy as part of the Traitor Arc on the step Complete the Nathema Flashpoint in Solo-Story Mode and then run the The Nathema Conspiracy quest.

Lost the quest? If you lost the The Nathema Conspiracy / Traitor Arc quest, head back to the terminal on your ship you started at to re-pick up the quest, but keep in mind this story-based introductory quest related to the Traitor Arc is one-time-per-character. If you lost the ability to walk into the Flashpoint door, or lost the quest with the word Flashpoint in it, you can pick up the [STORY] Flashpoint: The Nathema Conspiracy quest from the The Nathema Conspiracy outside the flashpoint’s entrance.

Solo (Story) Instructions
![]()

You can also run this repeatable Flashpoint solo outside of the one-time story quest, at level 70+.

Activity Finder: The FASTEST and EASIEST way to get into The Nathema Conspiracy Flashpoint soo mode is with the Activity Finder. If you are level 70 or higher, click the icon of “three little people” on the bottom right of your screen which will open the Activity Finder Window.

Then choose the Solo tab in the Activity Finder.

On the solo tab, scroll down and find the listing for The Nathema Conspiracy on the list under Flashpoints, select it, then click the green Travel button. This will take you right into the Flashpoint!

Bring a Friend: You are allowed to bring friends along for this Flashpoint, you do not have to do it alone even though it is considered soloable. Your friends must also be level 70+, be in a group with you, and then you can all use the Solo Tab of the Activity Finder to get into the Flashpoint, and it will put you together no matter where in the galaxy you started from.
![]()
There’s really no need to walk into the Flashpoint manually, but here are the instructions.
Manual Entry: To enter this Flashpoint manually, you must go to The Nathema Conspiracy’s Flashpoint entrance, which is located on the planet of Odessen, which you can fly to on your ship. The Flashpoint can be picked up from The Nathema Conspiracy terminal on Odessen, which you can get to by using the elevator to in the eastern area of the Odessan outside platform (not inside the base) and taking it to the Alliance Staging Room level on the lower floor. If you don’t see the Solo version it means you are not yet eligible due to being below level 70. The solo, single-player repeatable mode will be called [STORY] mode from the terminal. You can then walk in the nearby door and play the Flashpoint.
Step 1 – Get to Odessen, by flying there with your ship.

Step 2 – Take the elevator outside the base to the Alliance Staging Room level on the lower floor. Look for The Nathema Conspiracy quest terminal, and choose [STORY] mode to start the Flashpoint.

![]()
Story: [STORY] Flashpoint: The Nathema Conspiracy alone will not progress your storyline – it is simply the repeatable solo version, and while it has some cutscenes, the spoilers of the story have been concealed. To work on the overarching story, you also need to be on the quest The Nathema Conspiracy on the step Complete the Nathema Flashpoint in Solo-Story Mode as part of the Traitor Arc. See the Story tab for more info.
Veteran Instructions
![]()
![]()
The Nathema Conspiracy also has a repeatable 4-player Veteran version. It is meant to be completed by a group with any type of Republic characters in it, you do not necessarily need a tank or healer to complete it. You will likely also have good luck with 2 players and 2 companions, or 3 players and 1 companion.
Group Finder: If you want to queue up and enter The Nathema Conspiracy in veteran mode through the group finder, you will need to be level 70-80 and not currently on any The Nathema Conspiracy Flashpoint quests or it won’t show up as an option in the group finder. If you are level 70-80, click the icon of “three little people” on the bottom right of your screen which will open the Activity Finder Window. Then choose the Group tab in the Activity Finder.
Filter: If you want to specifically run The Nathema Conspiracy and not a random Flashpoint, make sure to choose Veteran Flashpoints, then click the Filter button the right and narrow your choices down to just The Nathema Conspiracy before pressing Join Queue. Joining the queue will put you in line to be matched with random players to play The Nathema Conspiracy with.
Groupfinder flashpoints do NOT show the cutscenes. To see the cutscenes related to this Flashpoint, you must enter it manually by walking in the door.
Bring a Friend in the Groupfinder: You can queue up with a group of 2, 3, or 4 players in the group finder. If you have a full group of 4, it will bring you straight to the Flashpoint with your full group. If you have 2 or 3 players in your group, the group finder will match you with other random players until you have a full group – but you’ll always be paired with your friends who started off in your group, and will not be split up.
![]()
Story Progress: [VETERAN] The Nathema Conspiracy will not progress your storyline – it is simply the repeatable group version. If you are a low level, this is the only version that will show up on the actual Flashpoint terminal in front of the entrance door – so don’t be confused and accidentally enter the group version if you are a low level, as it is not meant to be completed alone.
![]()
Veteran Manual Entry (Republic): To enter this Flashpoint manually, you must go to The Nathema Conspiracy’s Flashpoint entrance, which is located on the planet of Odessen, which you can fly to on your ship, then pick up the quest from The Nathema Conspiracy terminal. If you don’t see the Solo version it means you are not yet eligible due to being below level 70. The solo, single-player repeatable mode will be called [STORY] mode from the terminal. You can then walk in the nearby door and play the Flashpoint.
Bring a Friend Manually: Veteran Mode Flashpoints are not meant to be completed alone, though highly-skilled, highly-geared, high-level players might be able to. To bring friends along for this Veteran Flashpoint, they’ll need to pick up the Veteran Mode quest from the terminal – or you can pick up the quest and share it with them, but they’ll still need to walk in the door manually. Characters walking in the door need to be level 15+.
Step 1 – Get to Odessen, by flying there with your ship.
Step 2 – Take the elevator outside the base to the Alliance Staging Room level on the lower floor. Look for The Nathema Conspiracy quest terminal, and choose [VETERAN] mode to start the Flashpoint.
Master Instructions
![]()
![]()
Master Mode is the hardest version of The Nathema Conspiracy. It is meant to be completed by a high-level high-skilled group at level 80. Most teams will want a Tank, Healer and two Damage characters.
Group Finder: If you want to queue up and enter The Nathema Conspiracy in Master Mode through the group finder, you will need to be level 80 and not currently on any The Nathema Conspiracy Flashpoint quests or it won’t show up as an option in the group finder. If you are level 80, click the icon of “three little people” on the bottom right of your screen which will open the Activity Finder Window. Then choose the Group tab in the Activity Finder.
Filter: If you want to specifically run The Nathema Conspiracy and not a random Flashpoint, make sure to choose Master Flashpoints, then click the Filter button the right and narrow your choices down to just The Nathema Conspiracy before pressing Join Queue. Joining the queue will put you in line to be matched with random players to play The Nathema Conspiracy with.
Groupfinder flashpoints do NOT show the cutscenes. To see the cutscenes related to this Flashpoint, you must enter it manually by walking in the door.
Bring a Friend in the Groupfinder: You can queue up with a group of 2, 3, or 4 players in the group finder. If you have a full group of 4, it will bring you straight to the Flashpoint with your full group. If you have 2 or 3 players in your group, the group finder will match you with other random players until you have a full group – but you’ll always be paired with your friends who started off in your group, and will not be split up. Your friends all need to be level 80 too.
![]()
Story: [MASTER] The Nathema Conspiracy will not progress your storyline – it is simply the repeatable difficult group version.
![]()
Master Manual Entry: To enter this Flashpoint manually, you must go to The Nathema Conspiracy’s Flashpoint entrance, which is located on the planet of Odessen, which you can fly to on your ship. If you don’t see the Solo version it means you are not yet eligible due to being below level 70. The solo, single-player repeatable mode will be called [MASTER] mode from the terminal. You can then walk in the nearby door and play the Flashpoint.
Bring a Friend Manually: Master Mode Flashpoints are not meant to be completed alone, and are designed for level 80 players who are comfortable with their role and class. To bring friends along for this Master Flashpoint, they’ll need to pick up the Master Mode quest from the questgiver – or you can pick up the quest and share it with them, but they’ll still need to walk in the door manually while you’re in a group. Level 70-80 characters can technically enter Master Mode flashpoints, but all the enemies are level 80, and they will die very quickly.
Step 1 – Get to Odessen, by flying there with your ship.
Step 2 – Take the elevator outside the base to the Alliance Staging Room level on the lower floor. Look for The Nathema Conspiracy quest terminal, and choose [MASTER] mode to start the Flashpoint.
Bosses
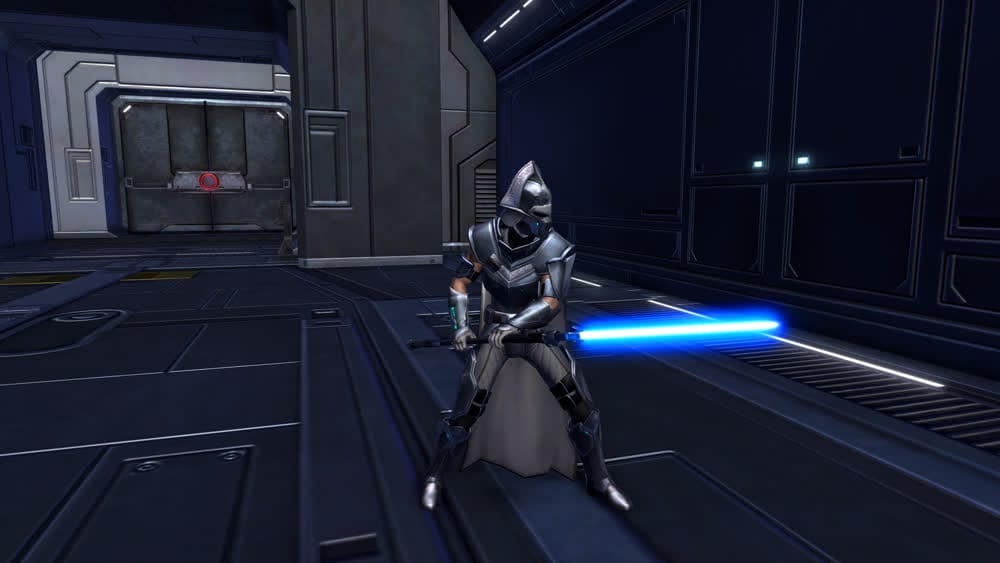
This Flashpoint has three boss fights – the Voreclaw, the Ancient Guardian Droid, the final boss Gemini 16 and Vinn Atrius, and the bonuss boss Herald of Zildrog and Hand of Zildrog.
In Story Mode and Veteran Mode, you can use the medpacs scattered around the bosses. Walk over these to heal yourself – don’t step on them if you do not need them. They also respawn fairly quickly if you need to use them again in this Flashpoint.

Boss 1 – Voreclaw

You can bring the boss to the green circles, and then right-click the glowing blue terminals to give him a nice little zap and stun him. The little enemies hit hard, so once he is in position, that’s a good time to fight the smaller enemies before focusing on the boss.


When he makes a big red circle and goes underground, stay out of the red circle if it is killing you. Another tactic you can use it waiting to use the glowing blue terminal once he is underground, as it will force him to come out from under the earth, but I found this took a long time in both Solo and Veteran mode.

Bonus Boss – Herald of Zildrog and Hand of Zildrog

These bonus bosses do not require any quests to unlock, but they are not on the main quest path. They are after the first boss, but before the second.

They hit really hard, even in story mode. You’ll need to make full use of your defensive cooldowns, the healing packs available, and stay out of as many red circles as possible. The fight is fast and furious and is a lot harder than most “story” mode Flashpoint bosses.

Boss 2 – Ancient Guardian Droid

This boss can be very easy solo if you know the mechanics. However this boss can be very hard if you are in a group who do not know the mechanics!
There are Hunter Probes around the room. DO NOT KILL THEM! You need them alive to help you.

The goal is to bring the boss over to one, and then kill it to half health only – not all the way dead.

This will cause the boss to be shocked, making him vulnerable. If you do not do this, he takes much longer to die.

When the boss jumps to the center, and starts spinning and shooting lasers, you can also hide behind the Hunter Probes as a shield.
In Veteran mode, this spinning laser attack really hurts! Its damage is tuned very high for a Veteran mode, like much of this Flashpoint – so be ready to get behind a shield.

When you are playing with other players, you might run into two different issues:

1 – The other players don’t know the mechanic, and accidentally just kill the Hunter Probes and…
2 – The players are very good at their damage, and know the mechanics and accidentally kill the Hunter Probes trying to get them down to 50%
Ideally, you can watch your team – don’t attack the Hunter Probes unless none of them do. Otherwise you might accidentally kill them by helping.
If your whole team dies, you can still win the fight solo if you do the mechanics properly.
Boss 3 – Part 1 – Gemini 16

This is a VERY DIFFICULT FIGHT in Solo mode. It is tuned way too difficult for the average player. In Veteran Mode it can still be quite difficult if your group isn’t ready for it!!
In STORY mode, when Gemini does her blue beam, STEP OUT of it.

In VETERAN mode, when Gemini does her blue beam, it follows you – you can’t step out of it! If it is blasting you, use a defensive cooldown, or if you are a ranged player, you can try hiding behind the large pillars around the room.

Skytrooper enemies show up throughout the fight. However, when you kill all four, they boss will summon more to the fight.

There is a funny little trick where you kill 3 of the 4 and leave the last one alone, and the boss won’t summon more. You may need to tell your companion to attack the boss instead of the final Skytrooper by clicking Gemini and then the attack button on the companion bar. In STORY mode, if you don’t kill the Skytroopers, they will kill your companion, so take special care to kill at least three of them. This 3 of 4 tactic works in Veteran and Master mode too, but only if your team is all aware not to kill all the Skytroopers, as they die faster in Veteran with four people.

When four Geminis show up, you MUST do the mechanic or you or your team will die. You need to attack the tanks along the sides of the arena. These are called Crypts of Essence, but they do not have a nameplate, and don’t look attackable. Each shielded Gemini 16 clone is attached to one Crypt by a yellow beam – kill the crypt, and then kill the now-unshielded Gemini that was attached to it. When all four Gemini clones are up, they do a lot of damage, so do them one by one!

Master Mode: At the end Gemini’s fight, she’ll start Obliteration Protocol and you’ll have to kill her as quickly as possible.

Boss 3 – Part 2 – Vinn Atrius

Vinn Atrius’s fight is a bit easier. He has lots of knock-backs, so try not to be near the edge of the platform.

Step out of the blue circles.

When the Annex shows up, kill it first. It is a glowing triangular floating golden object.

THIS IS THE HARDEST MECHANIC: Vinn has a special mechanic called Lifeforce Shackles. He will chain together two players or you and your companion. If you are far apart he will heal himself. If the shackle glowing line is red, you are too far away – run towards eachother.

If the shackle is green, you’re good to go, stay close until the shackle line disappears. If you do not do this, Vinn can literally heal up to full, which can cause a lot of frustration in randomized groups!

Master Mode: There’s a lot more yellow and red circles to avoid on the ground.

When Vinn is dead, you can attack the computer directly – the ability to target the computer is a bit finicky and you may have to crunch yourself into a corner to hit it.

Master Mode

Master Mode Nathema is almost exactly the same as Veteran Mode Nathema, except for these small differences:
- The trash enemies have a lot more circles and lines to stay out of.
- The enemies and bosses are stronger and have more health.
- The boss mechanics are pretty much the same, but it’s more important to do them.
- The bonus boss and bonus quest are in all modes, and are no different in Master Mode.
Bonus Quests

The Bonus Quest Seeker of Fortune in Nathema Conspiracy is not required for the bonus boss, and instead gives a choice of two decorations as a reward when you find the 7 hidden Treasure Chests that are glowing blue on the map. They are often in strange little corners or hidden behind crates off the main path. The Bonus Quest is available in all modes, Story, Veteran and Master.

- #1 – Hidden under an overhang beside an Acklay (first map)
- #2 – In a camp with the Nathema Zealots (first map)
- #3 – Hidden in the crates in a little maze between the shipping containers (second map)
- #4 – Up a set of stairs leading nowhere and hidden in a crevice on the right (third map Verdant Valley)
- #5 – Near the bonus boss in a waterfall (third map Verdant Valley)
- #6 – Right before the second boss behind a single crate (third map Verdant Valley)
- #7 – Down a skinny tightrope walk pipe (final map)

When you find your 7th Treasure Chest, you get to pick one of two decorations rewards. You can always come repeat this quest another time to get the other one or get more copies of the decoration.

Valkorion Holo:
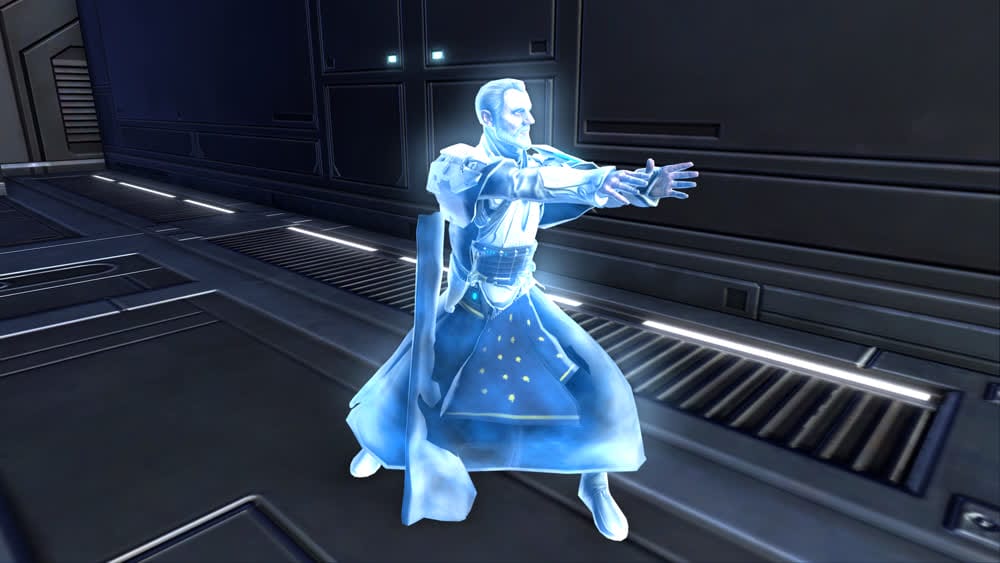
Dramath Holo:

Skips (with a Stealther)
Nathema doesn’t have many ways to skip enemies unles you have a stealther in the group… but if you are a stealther, or your group has at least one stealther, you can skip a huge amount of the smaller enemies! Not all stealthers know how to skip ahead, so if you want someone to stealth forward, ask and explain in chat rather than expecting them to just do it. Some groups may also not want to skip all the flashpoint and may want to actually play it, and not use the skep method.
Solo Stealth: If you are playing The Nathema Conspiracy alone and are on a Stealth character, you can skip many of the enemies – this Flashpoint is extremely friendly towards stealthers. You should fight almost nothing except the bosses while stealthing.
Group with 1 Stealther: If you are in a group, and have at least one stealther, one tactic players often do is have the stealther sneak all the way to the first boss, and get close enough to see the objective change to fighting it. This usually triggers combat, so you can either start and await the team to reinforce you soon, or die with /stuck. Everyone left at the beginning then jumps off the side of the cliff to die. When everyone revives, they will revive at the next boss, skipping all the smaller enemies along the way. This will be described instead of regular stealthless skips because with just one stealther you can easily teach even a pick-up group of strangers the method.
Skip #1 – One Stealther in the Group Method

Here’s a map detailing the skip to the first boss. You’ll see a notification at the False Checkpoint but keep going to the boss and true checkpoint.
Skip #1 – Non-stealth Waiting Cliff

This is just the view from the ship starting point, looking at the cliff your non-stealth buddies will be waiting for the signal to jump off of. Note the dead voreclaw and swiss-cheese patterned stone. Nice view!
Skip #1 – False Checkpoint

A common misfire in this plan is players that are waiting seeing the objective flip to “Make your Way to the Zildrog Encampment” and jump off right away. This is not the correct objective to update your respawn point – it updates the respawn to about halfway to the first boss. If this happens, you’re luckily right next to ANOTHER cliff to wait at and jump off of, so it’s no sweat.
Skip #1 – True Checkpoint

This area exists right around the corner from the first boss fight and it kicks off pretty much immediately as you come around it, stealthed or not. Personally, /stucking to die and start with the rest of the team isn’t super needed (if it’s on master mode you may not have a choice), just pop a defensive and your team should arrive shortly. If it’s a pick-up group, you may want to say a quick “jump” in chat to let them know this was the right objective switch. (For the record, the objective switch is as you pass the two little purple mushrooms in the foreground. Backing up from there won’t prevent combat.)
Skip #2 – One Stealther in the Group Method

After the first boss falls the skips continue! Head into the back and take the service lift down to the next level. Here you’ll see the first map on the right. You’ll wait in the area just around the elevator landing in the skyway. The stealther can move up, through the entire skyway, and make it to the next elevator down to the verdant valley.
Skip #2 – Skyway Jump-off

Here’s the point of view of where you’ll jump. You’ll aggro some of the skyway guards once you see “Reach the Temple” and start running. They may even stun you – no problem, you’re just trying to die as fast as possible. As soon as you can, jump over the railing.
Skip #2 – “Reach the Temple” Objective

Once you revive, this is the checkpoint you’ll be at. Unfortunately, there doesn’t appear to be a way to respawn right at the 2nd boss. What this means is you’ll have to run up to the “Ambush” spot in the map and deal with that group together.
Skip #2 – Bonus Boss

The good news is you’ll be prepped to head left and grab the bonus boss for a free deco on the way! Even if you don’t want the bonus boss, the left path has less enemies. You really only have to fight the ambush and then it’s on to the big dog boss.
Skip #3 – One Stealther Method

Here at the temple beyond the big dog, things are pretty simple. Wait in the little area with the front-end loader and cargo boxes while your stealther heads to the end of the flashpoint.
Skip #3 – Final Jump

Here’s your jump! You can wait here and stare-down these enemies until you see your objective flip between “Locate the Order of Zildrog Leaders” to “Defeat Gemini 16”. Once that happens, run past these guys, get to the catwalk, and leap off the edge.
Skip #3 – Final Checkpoint

Here’s the point-of-view your stealther will have as they make it to the checkpoint. Note that this bridge will break and crumble away as you start the last fights, so make sure everyone who jumped and revived at the top of the stairs behind this image actually get to the arena before you start pulling!
Rewards
In addition to the usual rewards of XP, credits, gear and end-game currency, The Nathema Conspiracy has the following rewards available.
Valkorion Holo
Valkorion Holo, bonus quest reward Seeker of Fortune
Dramath Holo
Dramath Holo, bonus quest Seeker of Fortune
Arena Torch
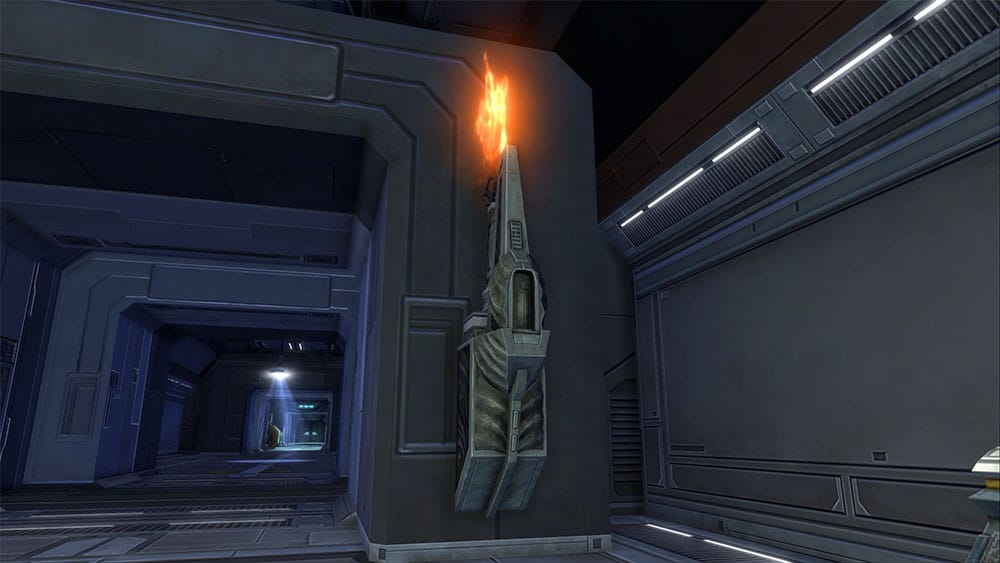
Arena Torch, drops from bosses Hands of Zildrog & Zildrog x2 from any mode, including Story
Crypt of Lifeforce
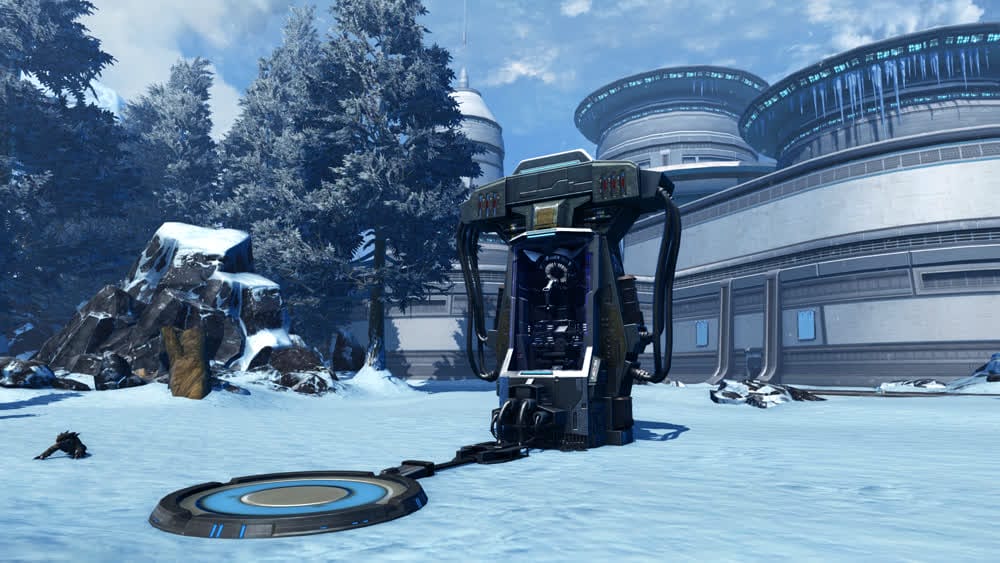
Crypt of Lifeforce, drops from Vinn Atrius & Zildrog from any mode, including Story
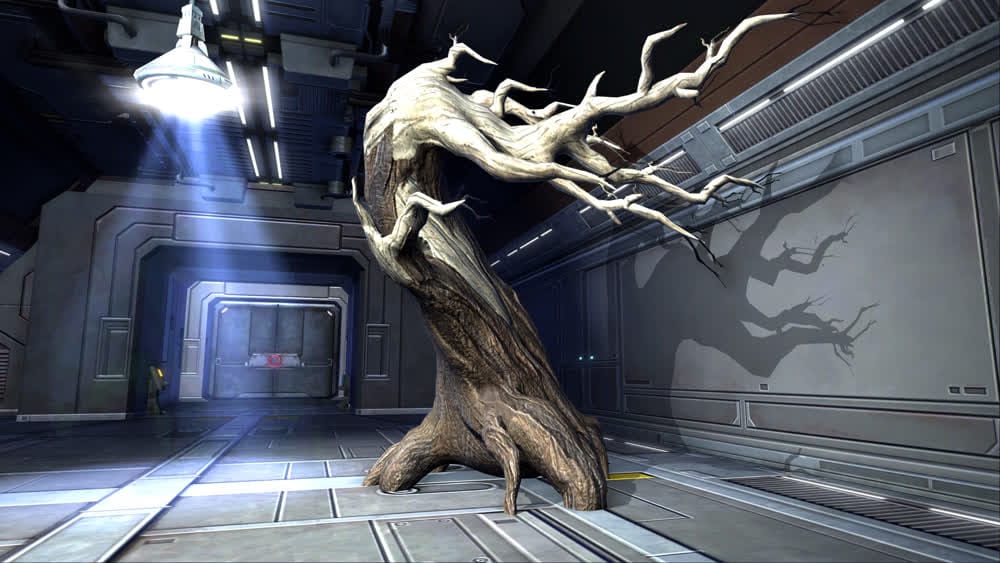
Dead Tree

Dead Tree, drops from Voreclaw boss in any mode, including Story
Gemini 16
Gemini 16, drops from Vinn Atrius & Zildrog, Gemini 16 in any mode, including Story
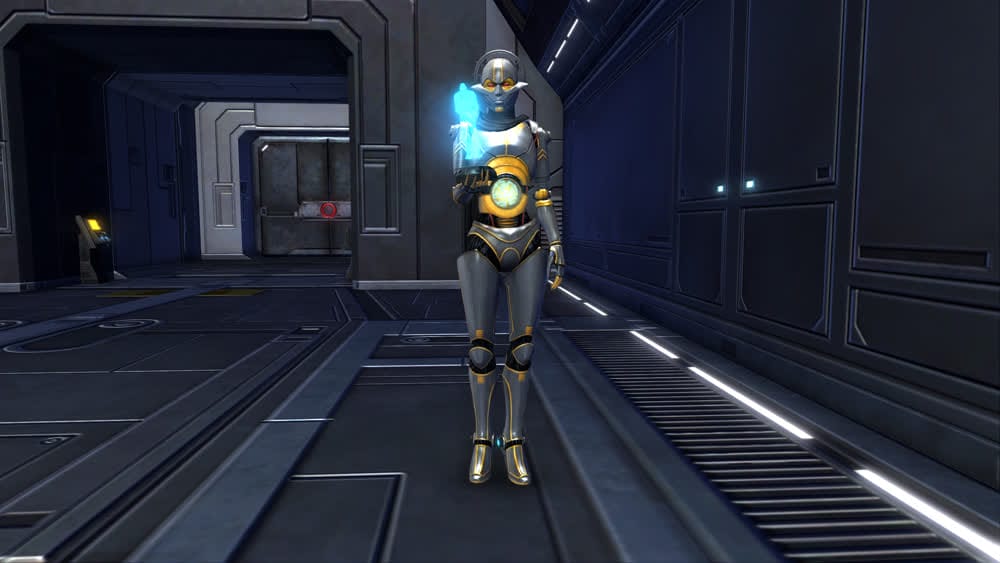
Guardian Droid

Guardian Droid, drops from Ancient Guardian Droid in any mode, including Story
Hanging Tree

Hanging Tree, drops from Ancient Guardian Droid in any mode, including Story
Nathema Flower
Nathema Flower, drops from Voreclaw in any mode, including Story
Nathema Hanging Vines
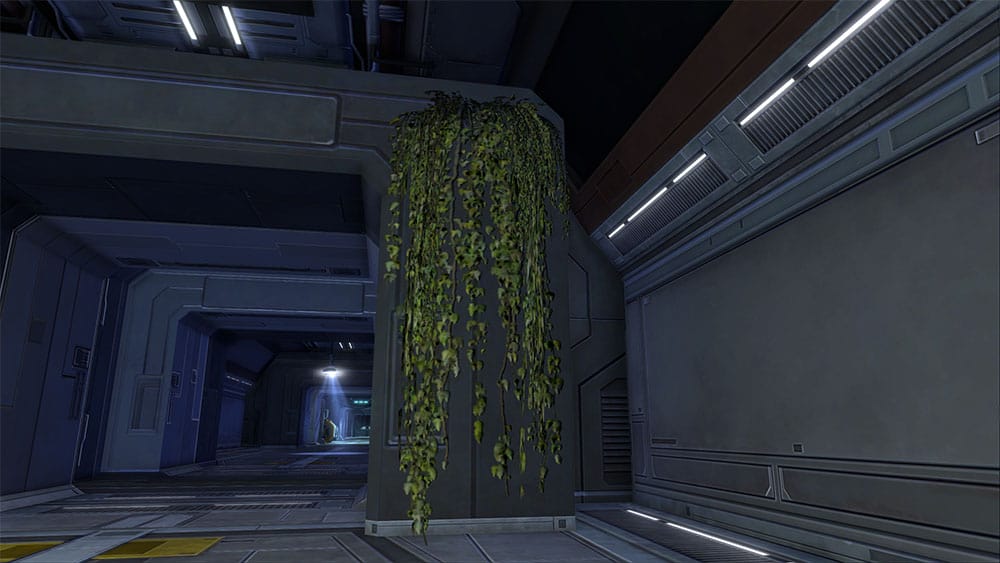
Nathema Hanging Vines, drops from Ancient Guardian Droid
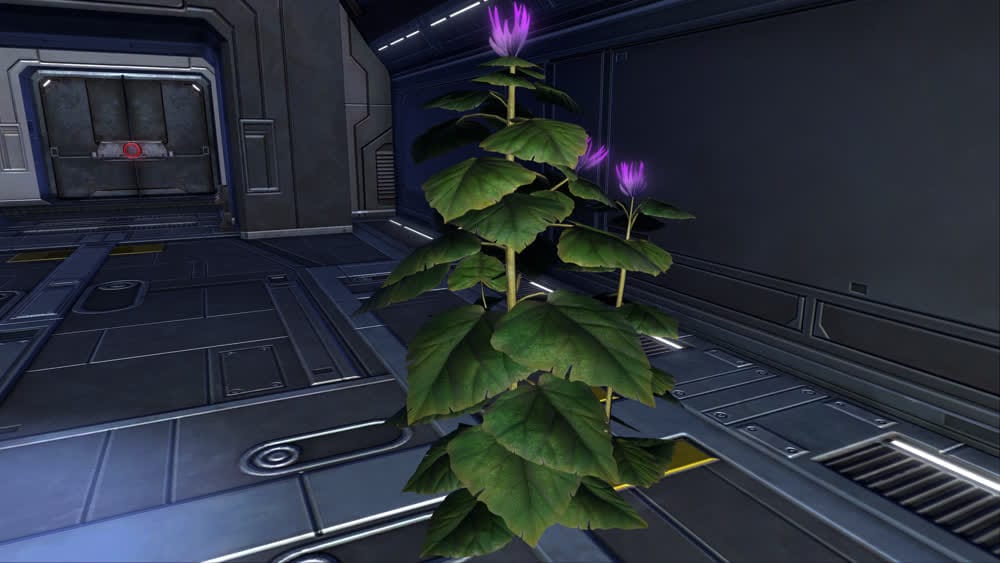
Nathema Plant

Nathema Plant, drops from Voreclaw
Nathema Statue

Nathema Statue, drops from Hands of Zildrog, Gemini 16 in any mode, including Story
Nathema Statue Large

Nathema Statue Large, drops from Gemini 16 in any mode, including Story
Small Dead Tree
Small Dead Tree, drops from Voreclaw boss in any mode, including Story
Temple Arches

Temple Arches, drops from Vinn Atrius & Zildrog in any mode, including Story
Temple Torch

Temple Torch, drops from Gemini 16 in any mode, including Story
Vinn Atrius
Vinn Atrius, drops from Vinn Atrius & Zildrog in any mode, including Story
Wall Statue

Wall Statue, drops from Gemini 16 in any mode, including Story
Waterfall
Waterfall, drops from Ancient Guardian Droid or Hands of Zildrog in any mode, including Story
Zildrog
Zildrog, drops from Vinn Atrius & Zildrog in any mode, including Story
Objectives
- Make Your Way to the Zildrog Encampment
- Defeat the Voreclaw
- Get to the Verdant Valley
- Reach the Temple
- Open the Door to the Temple
- Defeat the Ancient Guardian Droid
- Locate the Order of Zildrog Leaders
- Defeat GEMINI 16
- Shut Down the Zildrog Console
- Defeat Vinn Atrius and Zildrog
Get to the Verdant Valley: the is an elevator button a while after the first boss you can right-click

 Questions or comments? Feel free to send me a message on Twitter


 Discord
  Email swtorista@gmail.com
 Bluesky @swtorista.com
 Reddit /u/swtorista
 Twitch Swtorista
 Youtube
 Patreon
 Twitter @swtorista