


 How to Craft
 Choose a Crew Skill
 Armormech
 Armstech
 Artifice
 Biochem
 Cybertech
 Synthweaving

 Gathering Guide
 Rare Materials Guide
 White Materials Guide
 Jawa Junk
 Augments
 Medpacs, Stims and Adrenals
 Synthweaving Crafting Tree


 Crafted Decorations
 Crafted Mounts
 Crafted Dyes
 Crafted Crystals
 Events Calendar
 Galactic Seasons
 PvP Seasons
 Bounty Event
 Double XP Event
 Feast of Prosperity
 Gree Event
 Life Day
 Nightlife Event
 Pirate Incursion Event
 Rakghoul Event
 Spring Abundance Festival
 Swoop Event

 Jedi Knight
 Jedi Consular
 Trooper
 Smuggler
 Sith Warrior
 Sith Inquisitor
 Bounty Hunter
 Imperial Agent
 Bounty Hunter
 Imperial Agent
 Jedi Consular
 Jedi Knight
 Sith Inquisitor
 Sith Warrior
 Smuggler
 Trooper
 Legacy Gear
 Lightsabers
 Double-Bladed Lightsabers
 Vibroswords
 Double-Bladed Vibroswords
 Blaster Pistols
 Blaster Rifles
 Sniper Rifles
 Blaster Cannons

The Ossus dailies are a set of missions you can repeat to earn Reputation and Rewards. Ossus is the first daily area post-KOTFE/KOTET and was part of the Jedi Under Siege update. It takes place after Iokath and before Dantooine.
 Thank you player Zahk for all your help on this guide to make it easier for other players to find the quest objectives!
Contents
- How to Start
- Reputation
- Missions – Republic
- [WEEKLY] Daily Area: Ossus
- [WEEKLY] Heroic Missions: Ossus
- [HEROIC 2+] Expel the Darkness
- [HEROIC 2+] Into the Hive
- [HEROIC 4] Hold the Line
- [DAILY] Collected History
- [DAILY] Crossed Wires
- [DAILY] Explosive Intervention
- [DAILY] Firestorm
- [DAILY] Leave No Jedi Behind
- [DAILY] Perimeter Protection
- [DAILY] The Sacred Artifacts
- [DAILY] Wasteland Terrors
- [DAILY] The Science of Darkness
- [DAILY] Opening A Channel
- [DAILY] Remembering the Past
- [DAILY] Sensor Sweep
- Missions – Empire
- [WEEKLY] Daily Area: Ossus
- [WEEKLY] Heroic Missions: Ossus
- [HEROIC 2+] Information Appropriation
- [HEROIC 2+] Consume the Light
- [HEROIC 4] Supply Heist
- [DAILY] Blazing Fury
- [DAILY] Enkindled Knowledge
- [DAILY] Front Line Support
- [DAILY] Silencing the Guns
- [DAILY] Supply Drop
- [DAILY] Missing Pieces
- [DAILY] Scrapyard
- [DAILY] Communication Blackout
- [DAILY] Know Your Enemy
- Rewards
- Decoration Drops
- Datacron
- World Bosses
- Tech Frag Decorations
- Achievements

How to Start
Chronological Start: Ossus’s dailies naturally fall into the main story missions directly after the ending of Knights of the Eternal Throne. Story Order Guide
Early on Other Characters: You can run Ossus even if you are not caught up on the story, as long as you have it unlocked and are level 70. The planet’s level-down-sync is also 70.
How to Get There: You can head to Ossus via either travelling directly in your ship, or by Accepting the Daily Area: Ossus weekly mission from the Solo Tab of the activities finder (icon of ‘three little people’ near your minimap).

Reputation
Reputation is a way of gaining favor with different groups by completing missions for them. As you level up your reputation rank, more rewards for that reputation track become available. Reputation is shared by all your characters on your server, so it’s legacy-wide.
By using multiple characters, you won’t be limited to how many Ossus missions you run, but you will still be gated by how many reputation points you can earn – you can only earn a hard limit of 12,000 reputation points per week.
There is one Reputation track for Ossus named differently for Republic (Ossus Colonization Initiative) and Empire (Ossus Assault Battalion). Progress gained on Republic Side won’t need to be redone on Imperial side.
You also get a TON of Ossus reputation just by running the expansion itself – so if you are looking to earn Reputation on Ossus, feel free to also simply run the expansion on other characters in your legacy!
Ranks
As you run Ossus Dailies, you’ll rank up your reputation, and each rank unlocks new rewards from the Ossus Reputation vendor in Raider’s Cove.
- None – 0 Reputation
- Outsider – 0/2,500 Reputation (2,500 total points needed)
- Newcomer – 0/5,000 Reputation (7,500 total points needed)
- Friend – 0/7,500 Reputation (15,000 total points needed)
- Hero – 0/10,000 Reputation (25,000 total points needed)
- Champion – 0/15,000 Reputation (40,000 total points needed)
- Legend – 0/30,000 Reputation (70,000 total points needed)
Tokens
Each type of token from Ossus gives you a different amount of Reputation, and it also changes based on what various boosts you have and whether you are subscribed or not:
 Recollection of a Jedi Knight: 180 Reputation (270 as a subscriber)
- Geonosian Power Cell: 420 Reputation (630 as a subscriber)
- Encrypted Data Disk: 960 Reputation (1440 as a subscriber)
 Recollection of a Jedi Knight: 180 Reputation (270 as a subscriber)
 Geonosian Power Cell: 420 Reputation (630 as a subscriber)
 Encrypted Data Disk: 960 Reputation (1440 as a subscriber)
Other Rewards
Depending on your level when completing a Ossus mission, there are also some additional rewards tied to some; exactly what per mission is on a table down below!
- Conquest Commendations (at max-level, [DAILY] missions give 3 each, [WEEKLY] gives 50): Conquest Commendations will be awarded for most Planetary Repeatables. It’s used to upgrade virtually every track of gear upgrade, in varying amounts.
- Tech Fragments (at max-level, [DAILY] missions give 30 each): Tech Fragments are an endgame currency used to buy Legendary Implants, Tacticals, materials for the best Augments in the game, and some older/cosmetic armors.
- Conquest Gear Piece: at max-level, the Weekly mission will award a Conquest Gear Box in addition. These have a minimum item level of 324, and are green quality.
- Relics of Ossus (at max-level, [DAILY] missions give 7 each, [WEEKLY] gives 30): This is a planet-unique currency used to purchase a lot of the reputation rewards from the vendors.
 Conquest Commendations (at max-level, [DAILY] missions give 3 each, [WEEKLY] gives 50):
  Tech Fragments (at max-level, [DAILY] missions give 30 each):
  Conquest Gear Piece: at max-level, the Weekly mission will award a Conquest Gear Box in addition. These have a minimum item level of 324, and are green quality.
 Relics of Ossus (at max-level, [DAILY] missions give 7 each, [WEEKLY] gives 30): This is a planet-unique currency used to purchase a lot of the reputation rewards from the vendors.
Earning Reputation
- The Weekly “Daily Area” mission asks you to complete 6 dailies and gives you the purple reputation token. There is another weekly for three heroic missions, that gives a seperate purple token as well.
- Each daily awards a green reputation token.
- The Daily patrol of doing 5 missions will award a blue reputation token
Missions – Republic

[WEEKLY] Daily Area: Ossus
Complete 6 of 12 daily quests on Ossus:
- [DAILY] Collected History
- [DAILY] Crossed Wires
- [DAILY] Explosive Intervention
- [DAILY] Firestorm
- [DAILY] Leave No Jedi Behind
- [DAILY] Perimeter Protection
- [DAILY] The Sacred Artifacts
- [DAILY] Wasteland Terrors
- [DAILY] The Science of Darkness
- [DAILY] Opening A Channel
- [DAILY] Remembering the Past
- [DAILY] Sensor Sweep
[WEEKLY] Heroic Missions: Ossus
Complete the 3 heroic missions on Ossus:
- [HEROIC 2+] Expel the Darkness
- [HEROIC 2+] Into the Hive
- [HEROIC 4] Hold the Line
[HEROIC 2+] Expel the Darkness

Tips:
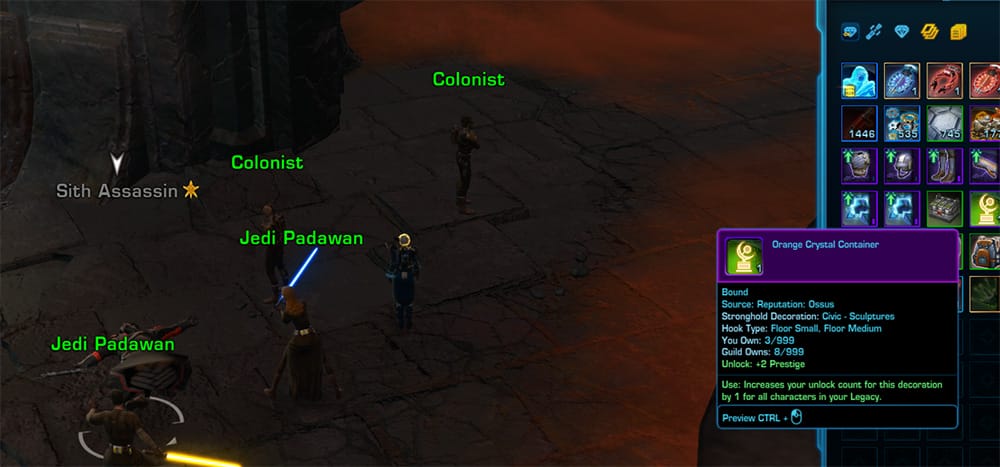
- Expel the Darkness is NOT collected from the daily mission board and will have to be picked up from the Jedi Library speeder point, so start by taking a ride up there – you can also grab Collected History and The Sacred Artifacts from the board if you’re looking to do multiple or all dailies.
- While both dailies take place in the northern wing of the library, this Heroic will be by itself in the phased southwestern wing. You can use the shuttle given by the tracked mission to appear at this phase immediately.
- Once inside, your objective is to defeat three Sith Lords. These are the Gold-level enemies in the phase specifically. Starting in the entrance room, head to the south end and fight the Sith Conquerer. He has a channeled ravage that can be interrupted, as well as a Death Field area attack you can simply run out of.
- Continue west into a room with pyramidal databanks. In the northwest corner is your gold-level Sith Juggernaut to fight. Aside from a defensive, he didn’t seem to have much of any unique abilities.
- Head further down the linear path of libraries until you get to the large hall containing the last Sith Ravager. No attacks to make note of aside from the fact that she deals the most default damage out of any gold-level enemy thus far, so maybe use a stun or knockback for breathing room. Interrupting the Imperial Commander’s heal may help as well.
- The objective at this point updates to retrieving a force relic at the back of the final room – but upon approaching you will find Darth Kinsho, a champion-level sith. The objective switches to defeating them. Kinsho has a few moves – Debris Storm, Turbulence, and Revivification, as well as untelegraphed knockbacks and teleports. He may also elect to whirlwind the person or companion with the most threat. Companion healing is usually enough for his damage moves, so it’s more recommended to save your interrupts and stuns for Revivification, as healing himself can drag this out.
- Note that as a stealther, you can pop in, kill the gold-level targets and cloak back out, making this heroic quite fast.
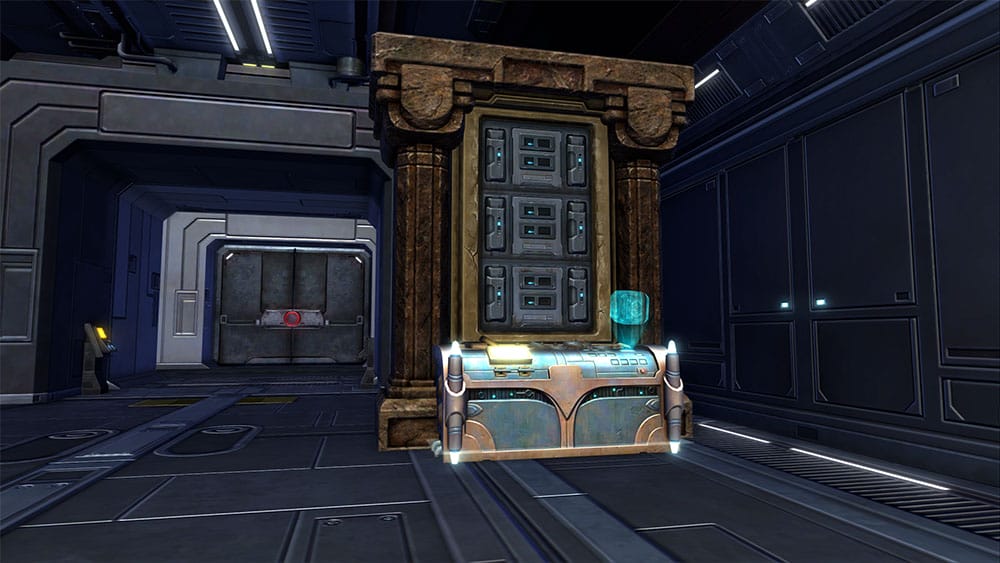
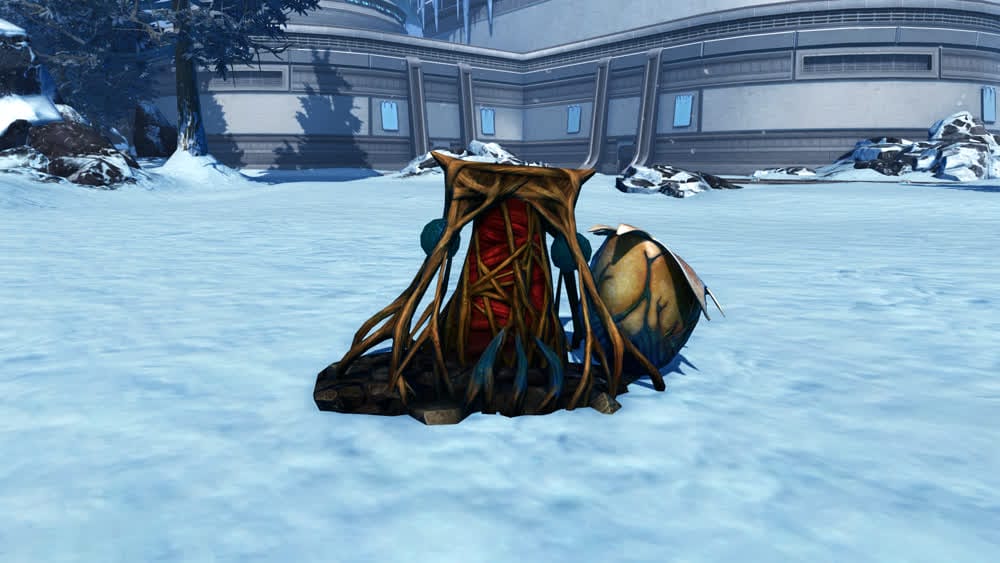
[HEROIC 2+] Into the Hive

Tips:
- Into the Hive is NOT collected from the daily mission board and will have to be picked up from the Ancient Ruins Outpost speeder point (along with a Opening A Channel), so start by taking a ride up there – you can also grab Crossed Wires from the board if you’re looking to do multiple or all dailies.
- You’ll be given a heroic transport for this heroic that drops you right outside the phase door. If for whatever reason it’s unusable, head up the path you’d normally take for Crossed Wires and turn left (north) instead of right (south) on the road once you pass the first big robot. Inside the ruins you’ll get to the phase.
- Inside is a group of 5 very weak geonosians followed by a silver-level with two weak ones. Past these two groups (who you can stealth past) there isn’t much danger until the very back, when your objective updates to defeat the gold-level swarm lord.
- The swarm lord is bit of a unique fight but not really threatening to any player with a companion out. He has two channeled abilities, “summon the swarm” and “command the swarm”. If you see one start, interrupting it may be counter productive as the effects seem to be instantaneous regardless of how fast you try to interrupt it. Better to leave him casting the full 3 seconds instead of letting him start hitting you early.
- Summon the Swarm will spawn a group of small, weak geonosians to assist him. He gets a stacking defensive buff for each additional enemy up, so clear the little ones before returning to him. Command the Swarm simply buffs the existing reinforcements. No change to strategy – if the swarm is up, kill it, then move back to the lord when he’s alone again.
- Once defeated, your objective will switch to “set explosives”. These are the yellow holographic displays you’ve likely seen on the way down the cave, and in the image above. There are two down in the room the swarm lord was in, and you’ll have to get the rest on the way back up and out. There are six or seven points to choose from, but after the fifth the mission will complete.
[HEROIC 4] Hold the Line

Tips:
- Hold the Line is NOT collected from the daily mission board and will have to be picked up from the landing point of Ossus Farms after travelling there. It is located in a phase in the southern farmlands – though also comes with a free shuttle item to get you there instantly.
- Once inside, you need to head to the group of 4 colonists standing just between the farm plots and the building. This should update your objective to hold off imperials. They should start coming through the phase door that you came in through in about a minute, so you can head over there early.
- After fighting ten or so regular mobs, a gold-level commander will come in. Defeating him is nothing special as far as Heroic 4’s tend to go. The ground will then begin to shake. This is your warning to get closer to the farm plots because the geonosians are coming.
- The Geonosian fight is why this heroic is recommended 4, though two with companions should do fine too – there’s like 20 Geonosians on the field, a dozen regular ones, 4 to 6 silver ones with constant crowd control moves, and two Gold-level Geonosians, Broken Wing and The Roach.
- Unfortunately, reavers will call in more little Geonosians as soon as you kill a group of three of them, and likewise killing any reavers will just be instantly replaced by the gold-level commanders. Don’t get bogged down killing weaker bugs, there’s just too much incoming damage to waste time like that. Go straight for the gold-level mobs and keep the aoe channeled attack that they do interrupted.
- For those that are worried about soloing this Heroic, the “Survive the Geonosian Attack” objective isn’t picky about how many deaths you have. Just remember to kill gold > silver > regular and after a few attempts you should at least be able to kill a gold enemy before dying and coming back and getting the next, etc. I find that as a stealth character, setting a companion to Tank and letting them run in first buys me more time than relying on their heals.
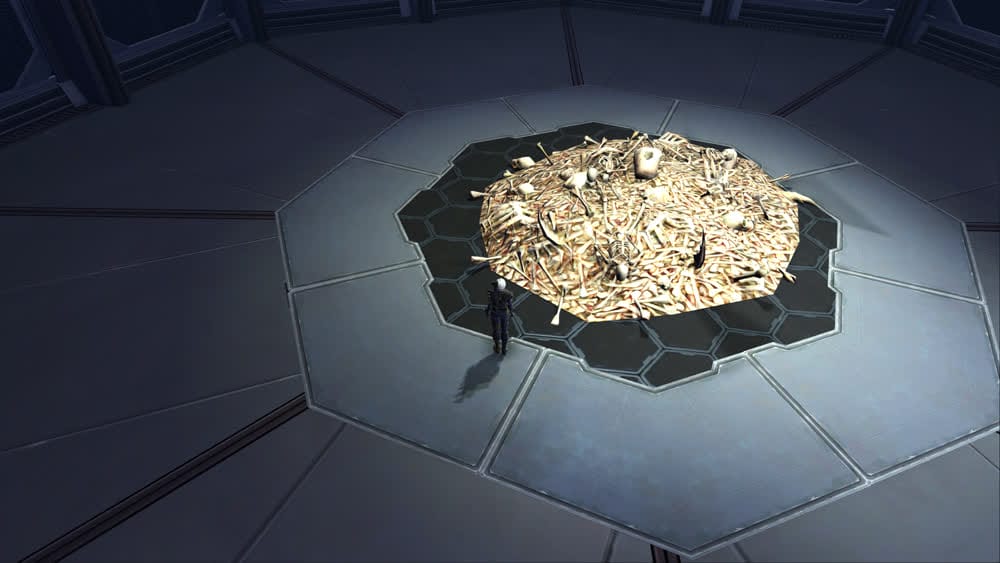
- Once Broken Wing and The Roach are down, you can move on to killing the Silver Reaver and Grenadiers. You’ll notice they keep respawning a bit, but after a few this will prove finite. You’ll be able to kill bigger and bigger chunks at a time until all are down, completing the mission and leaving you with a mountain of bugs.
[DAILY] Collected History

Tips:
- Collected History is collected from the daily mission board, and takes place inside the Jedi Library, so start by taking a ride up there. This also pairs perfectly with The Sacred Artifacts if you’re looking to do two missions for Bessie or making your daily patrol more efficient.
- Head north up the cliff stairs to the library and head on in. Go past the huge statue in the front and take a right at the upcoming three way intersection.
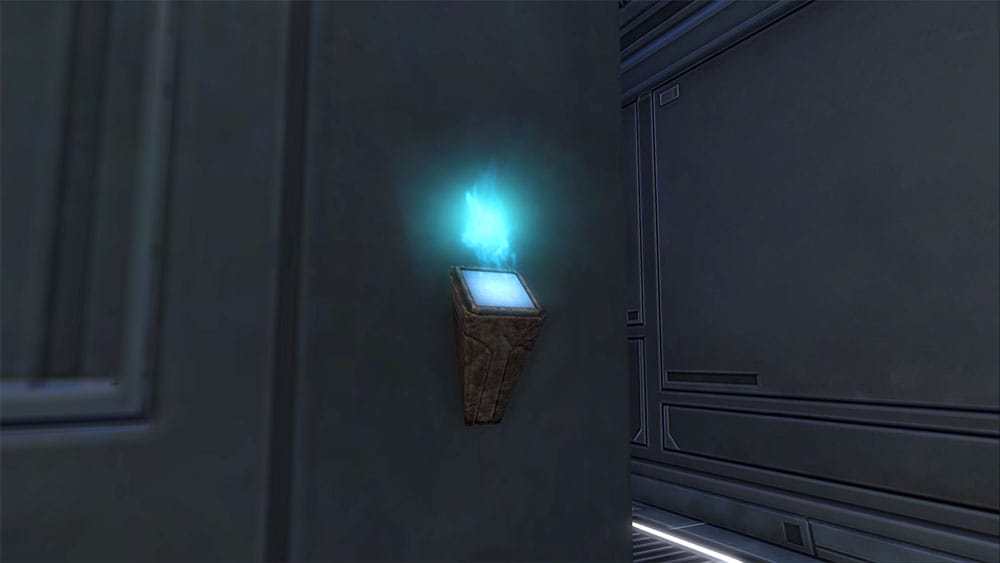
- Stay inside these thinner hallways by sticking right and you’ll find plenty of these glowing blue dirt piles along the way like in the image above. Interact to start a few second channel of shoveling, then wait a few seconds. The dirt should disappear right away but it usually takes a second or two for a relic to show up on the ground in it’s place. Loot a few of these and it’s mission complete – as a stealther there’s never a reason to fight anything for this one.
[DAILY] Crossed Wires

Tips:
- Crossed Wires is collected from the daily mission board and is the only mission board daily that goes to the Ancient Ruins Outpost speeder point (more dailies are available when you land there), so start by taking a ride up there.
- Pick up Into the Hive and Opening a Channel from the duros and droid respectively if you’re planning to get them done as they are nearby – then head out to the east. The map is unambiguous for your objective and the two green markers are the exact locations of the two champion droids you’ll have to beat for this daily.
- Head north past some fighting droid NPCs, past a speeder parking spot, and around the mountains – with fancy driving even non-stealth characters won’t have to defeat anything extra on this daily.
- Engage R8-X4F whenever you’re sure you’ll enter combat with nothing else at the same time. As a champion level enemy there are a few unique moves – a concussion shot is the most annoying, you’ll be stunned and knocked down for a bit if it goes off. Interrupt as many of these as you can, as the missile barrage channeled attack can be easily healed through with a companion.
- After X4F falls, head east down the hill and follow the road to the eastern edge of the ancient ruins map. X4L will be patrolling back and forth on this plateau, and the fight is identical to the first.
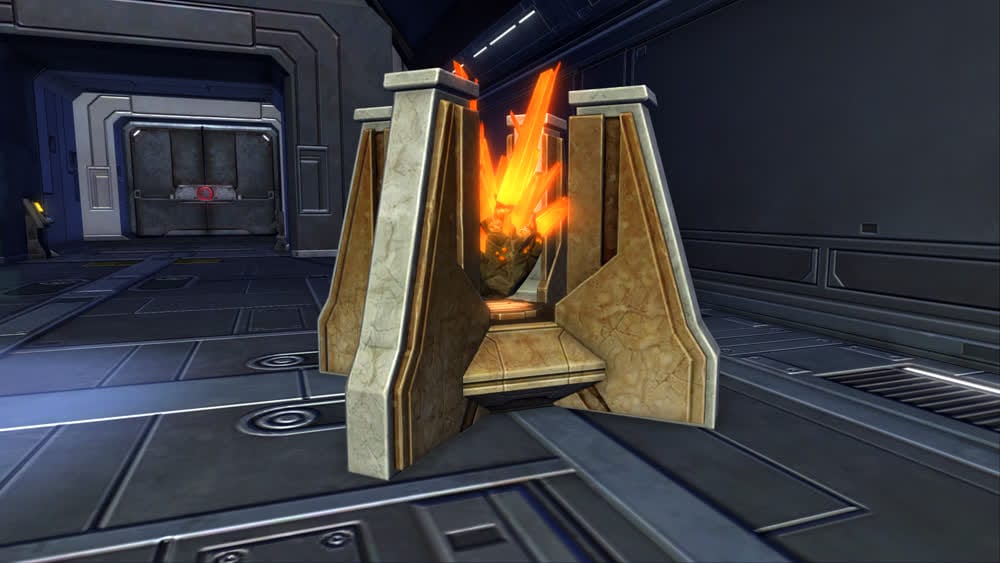
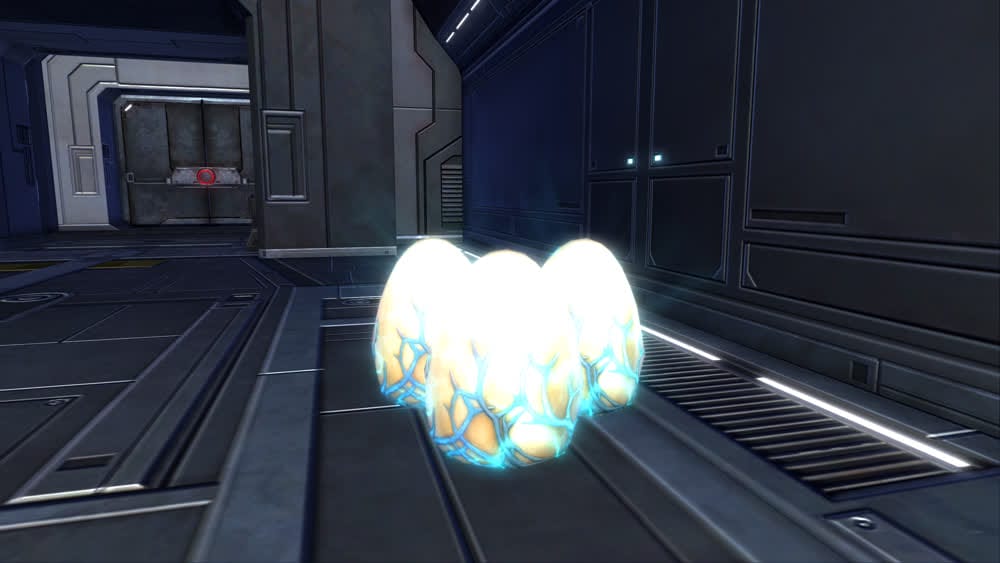
[DAILY] Explosive Intervention

Tips:
- Explosive Intervention is collected from the daily mission board, and goes well with Wasteland Terrors and Sensor Sweep if you’re looking to do multiple or all dailies. Sensor Sweep is from the Ancient Catacombs Outpost speeder point, so start by taking a ride up there after grabbing stuff from the board.
- The previously mentioned dailies and this one all conveniently take place in the search radius – the western side of the catacombs map up the waterfall. So drop down from the outpost, hug the wall to your right and head up the steps.
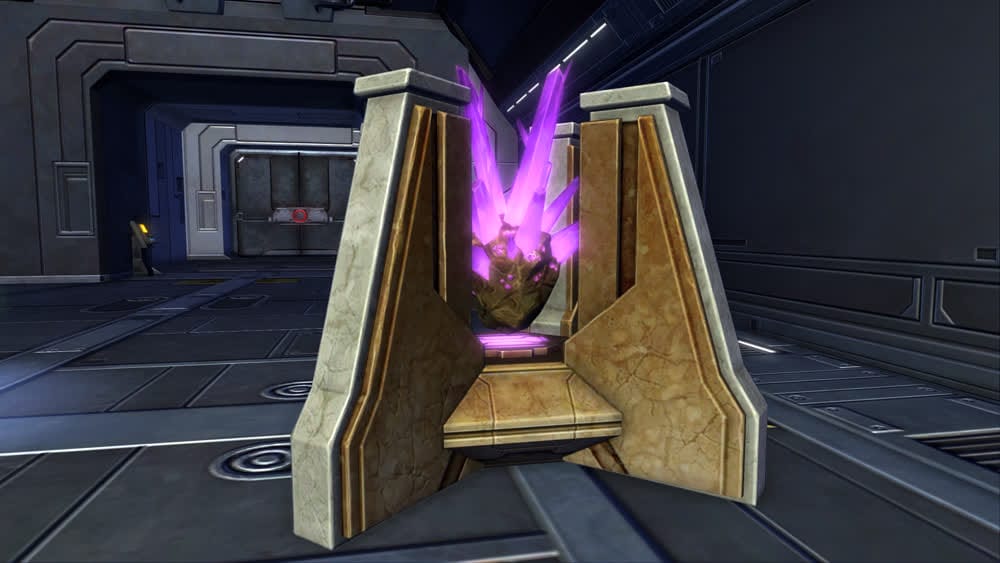
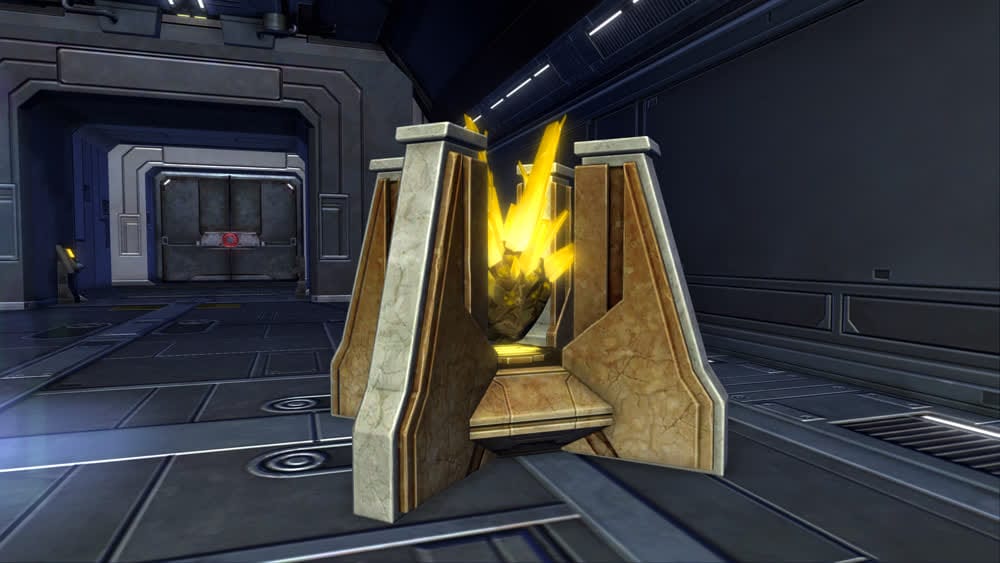
- At the top of the waterfall, head up the steps on the right and in this canyon you should see your first tunnel, pictured in the image above. By running up and interacting with the yellow holographic, you’ll do a 2 second demolition channel and collapse the tunnel. More tunnels are found both along the canyon further Northwest or back down along the river near the Wasteland Terrors.
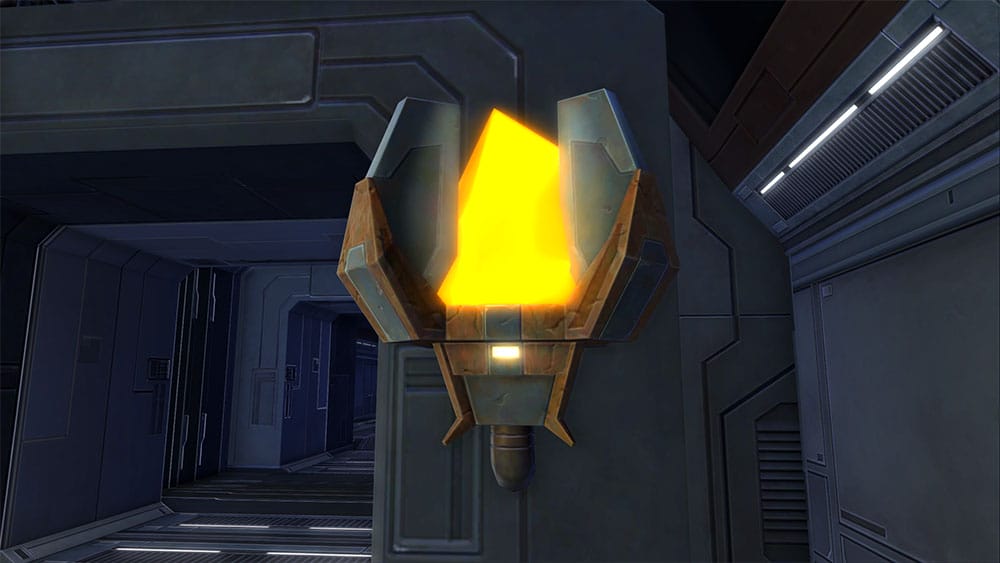
[DAILY] Firestorm

Tips:
- Firestorm is collected from the daily mission board and takes places along with Perimeter Protection at the Ossus Farms quicktravel area. Once landing there, you can also pick up The Science of Darkness or the Heroic 4, Hold the Line if you’re looking to do everything.
- For firestorm, head down the southbound road from the speeder landing point on the farms map. Across a bridge (or just across the water if you’re looking to skip a fight with some geonosians) will be the small farm plot covered in fire.
- If you’re looking for a mission item or extinguisher, look no further than your own hands! The fires are apparently interactable objects you can simply run up and click on to extinguish.
- As is the case with a bunch of interactable objects for Ossus dailies, the fires spring back up pretty quickly so if you’re looking to avoid fighting, clear geonosians off two fires and walk back and forth between em for a minute.
[DAILY] Leave No Jedi Behind

Tips:
- Leave No Jedi Behind is collected from the daily mission board, and takes place north of the Ancient Catacombs Outpost speeder point, so start by taking a ride up there. Once arrived, jump down from the outpost and head north up the valley to the northern half of the map.
- You’ll know you’re in the right place when you come up a hill to see a scene like the image above. Littered throughout this northern half are yellow-glowing cages with interactable panels guarded by extremely weak imperials.
- As a stealther, you may be tempted to tranquilize the nearest guard to the panel and grab your four cages this way. In practice, the yellow shields on the cage act as a real wall for enemy aggro purposes, so they won’t see you on the opposite side until you open it. Once open, they’ll immediately spot you. Either cloak out and continue stealthing or simply kill em the normal way – they’re all very squishy.
- If there’s a bit of competition for objectives in the area just stay put – these cages and the guards respawn almost every minute or so. Very fast.
[DAILY] Perimeter Protection

Tips:
- Perimeter Protection is collected from the daily mission board and takes places along with Firestorm at the Ossus Farms quicktravel area. Once landing there, you can also pick up The Science of Darkness or the Heroic 4, Hold the Line if you’re looking to do everything.
- To get to the turrets, head north out of the landing area and east to the farm plots. You’ll start seeing blue interactable metal like in the image above around the area.
- Checking the literal perimeter for turret placements won’t find much aside from geonosians (and they wonder why they’re constantly under attack…), but these turret setups are plentiful in front of the buildings and littered along the path of the irrigated water streams.
- Like most “interact with this many objects” dailies on Ossus, the turrets will reset and be re-activateable after a pretty short amount of time, so if you run out of places to set them up, just head back to the first ones you did and wait a minute.
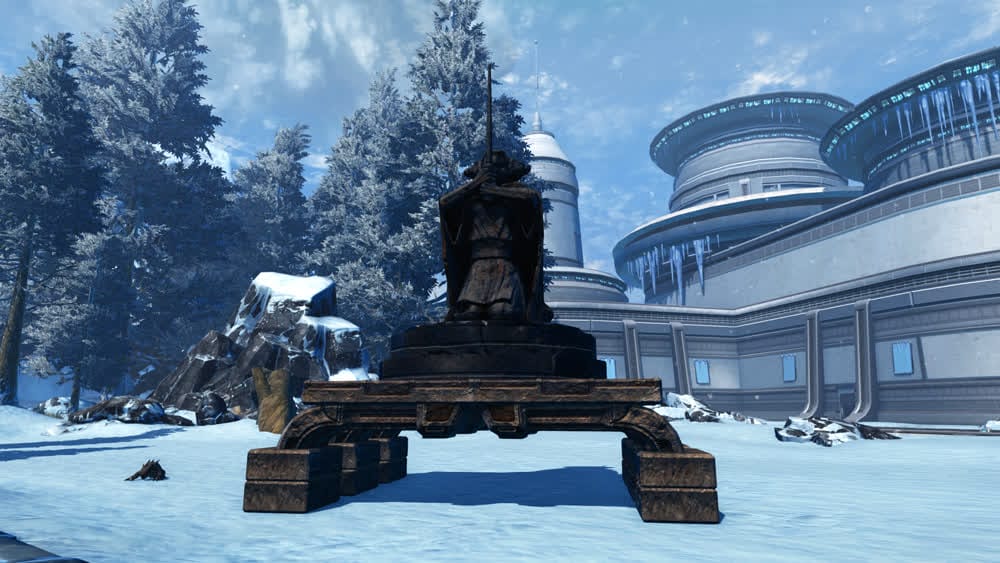
[DAILY] The Sacred Artifacts

Tips:
- The Sacred Artifacts is collected from the daily mission board, and takes place inside the Jedi Library, so start by taking a ride up there. This also pairs perfectly with Collected History if you’re looking to do two missions for Bessie or making your daily patrol more efficient.
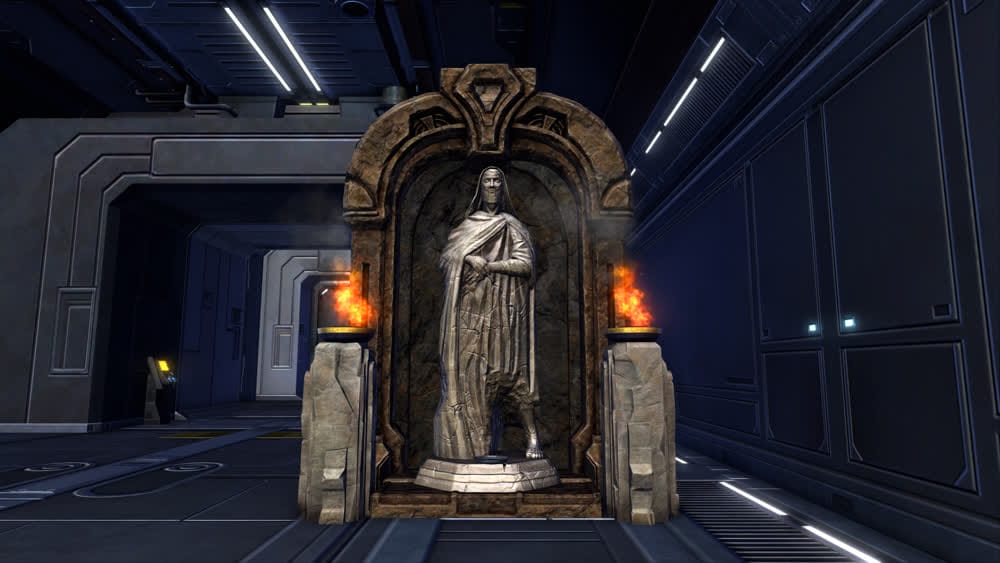
- Head north up the cliff stairs to the library and head on in. Go past the huge statue in the front and take a right at the upcoming three way intersection.
- Check your map and head for the huge circular room up ahead. The search radius when you mouse over the objective deceptively says your lightsabers will be found in the immediate viscinity of the central statue, but this isn’t true. Head up the steps around the room and check around the edges for little altars like the image above. Grab four lightsabers (you’ll sometimes be attacked by some cheap battle droids) and your objective should update. Head north out of the room.
- Past a few sith assassins is a Jedi Holocron on the altar in the middle of the room. Swipe it and get interrupted by a gold-level Sith Executioner. He has a channeled AoE called Forcequake that can be interrupted, otherwise not too special. Beat him and you’ll be done!
[DAILY] Wasteland Terrors

Tips:
- Wasteland Terrors is collected from the daily mission board at the Jedi Colony and takes place in the Ancient Catacombs area of Ossus along with Leave No Jedi Behind and Explosive Intervention, so grab those too if you’re doing multiple. As you land at the speeder point, Remembering the Past and Sensor Sweep are also found here.
- After dropping down the cliff from the outpost, hug the right-hand wall and climb up the steps that get past the waterfalls in this area. Continue along the river and you’ll find Razorclaw just where the map said he’d be smack dab in the center of the river. Aside from a channeled AoE attack these gold-level targets are quite easy and do nothing special.
- Further down the river, Scarjaw is hiding to the right of the next waterfall, in a small resevoir. He has an interruptable missile attack, a short knockdown, and can put fire on the floor, so make sure to step out of any red circles. Otherwise he’s just as easy as Razorclaw.
[DAILY] The Science of Darkness

Tips:
- The Science of Darkness is not available at the initial mission board, but can be found as soon as you land at the Ossus Farms area by talking to the nearby Ithorian Doctor NPC. It can pair with the nearby objectives for Perimeter Protection and Firestorm.
- Once you’ve decided which of the missions you’ll pair it with (north road to the farms for Perimeter Protection, south road to the farms for Firestorm) you’ll see a bunch of geonosian enemies nearby your objectives.
- These will be what you target and use your serum mission item on. Sometimes you’ll make the geonosian large and spooky looking – this is only a cosmetic debuff made by the serum. It does not change how well they do in combat.
- I’ve personally found that targetting the non-silver weak mobs with the serum sometimes makes the whole pack of them despawn and immediately respawn, giving me time to back away and re-use the serum when it’s off cooldown – effectively making this a quick combat-free mission to do.
[DAILY] Opening A Channel

Tips:
- Opening a Channel is NOT collected from the daily mission board and will have to be picked up from the Ancient Ruins Outpost speeder point (along with a heroic 2), so start by taking a ride up there – you can also grab Crossed Wires from the board if you’re looking to do multiple or all dailies.
- Leaving the outpost and heading up the northern path to the top of the hill where a huge R8 Droid likes to sit, you’ll see a huge fork-like antenna structure just south of you like in the image above. This is your landmark to follow for the four signal jammers you need – the blue interactable node just underneath it.
- Getting around to these landmarks should be no problem as a stealther but if you’ve gotta fight your way through droids, it shouldn’t be too bad either. Remember an easy priority for fighting these droids: least legs to most legs. That is, kill the floating repair droids first (no legs), then the scrambled security droids as they die fastest (two legs) and finally the silver-level enemies can be safely finished off (three legs).
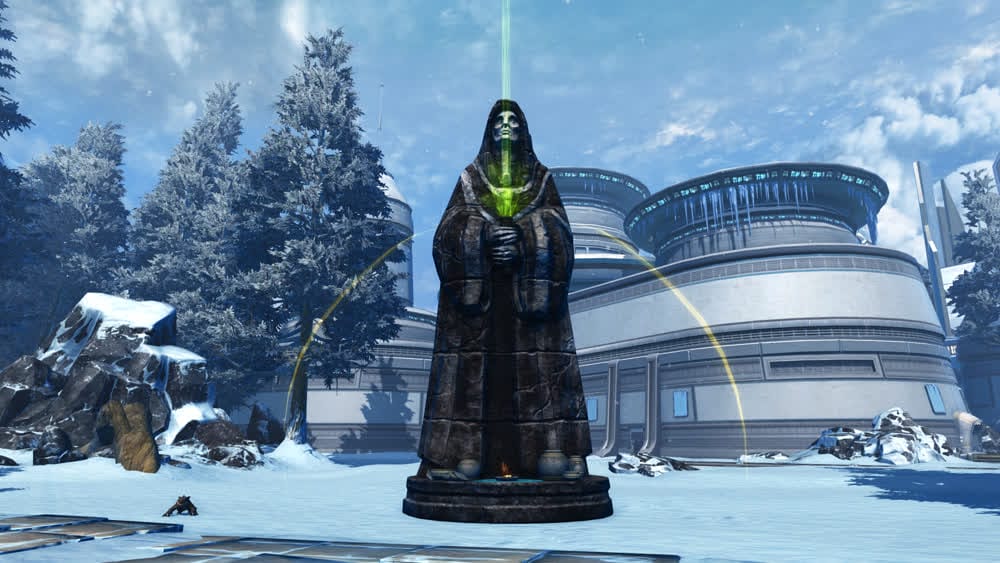
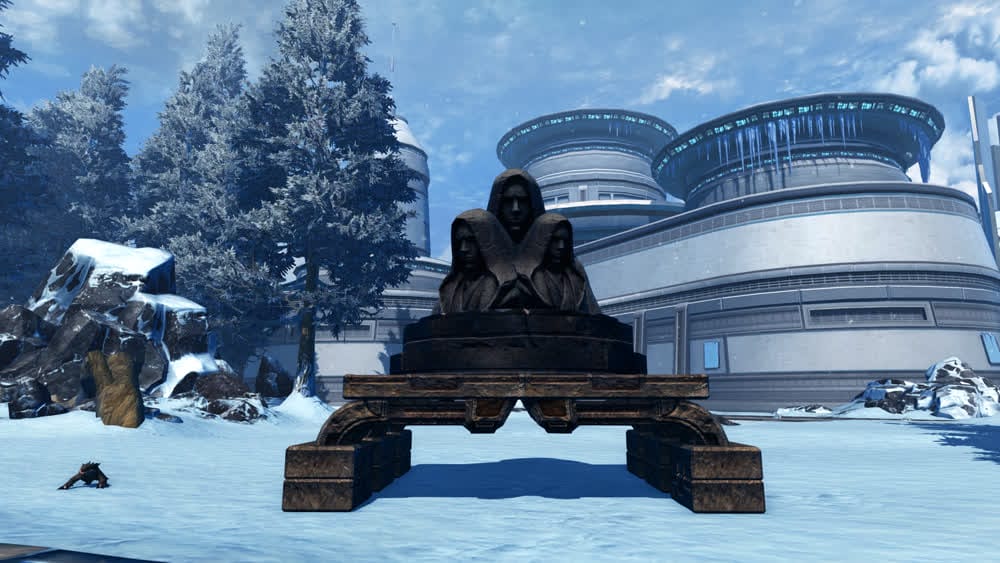
[DAILY] Remembering the Past

Tips:
- Remember the Past is NOT collected from the daily mission board and will have to be picked up from the Ancient Catacombs Outpost speeder point, so start by taking a ride up there – you can also grab Wasteland Terrors and Explosive Intervention from the board if you’re looking to do multiple or all dailies.
- Unlike Sensor Sweep, this mission only shares one of it’s objectives in the western side of the catacombs map up the waterfall. Still, drop down from the outpost, hug the wall to your right and head up the steps.
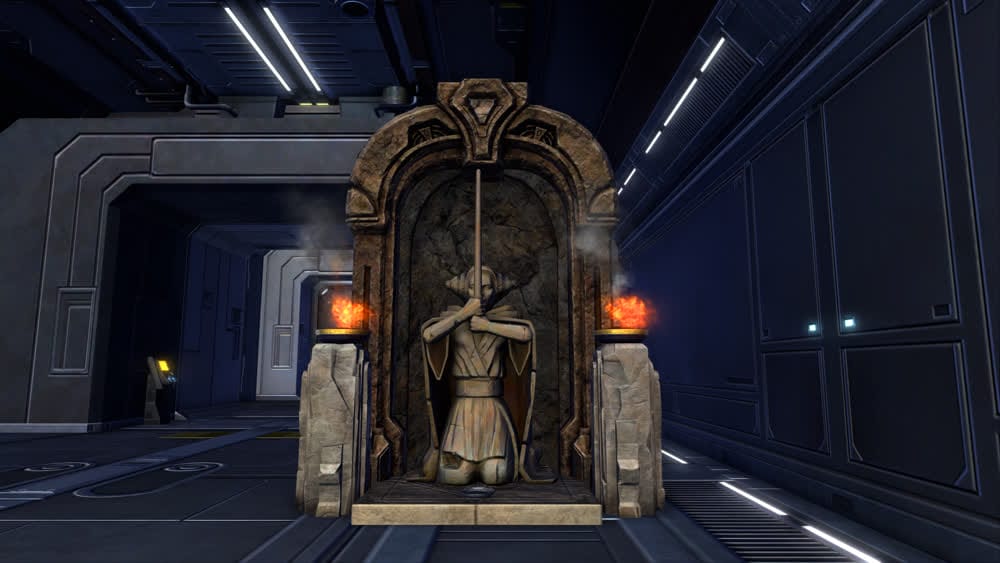
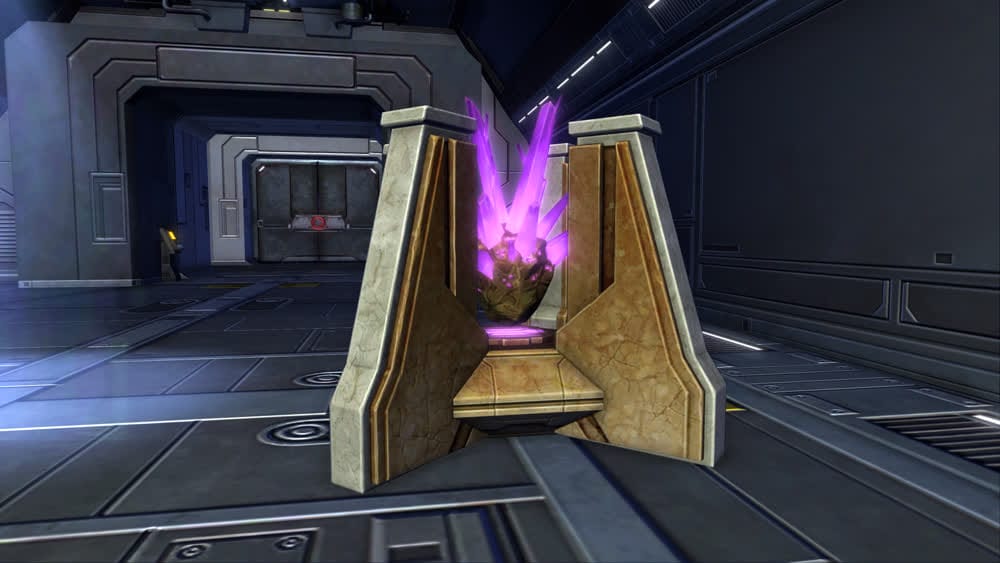
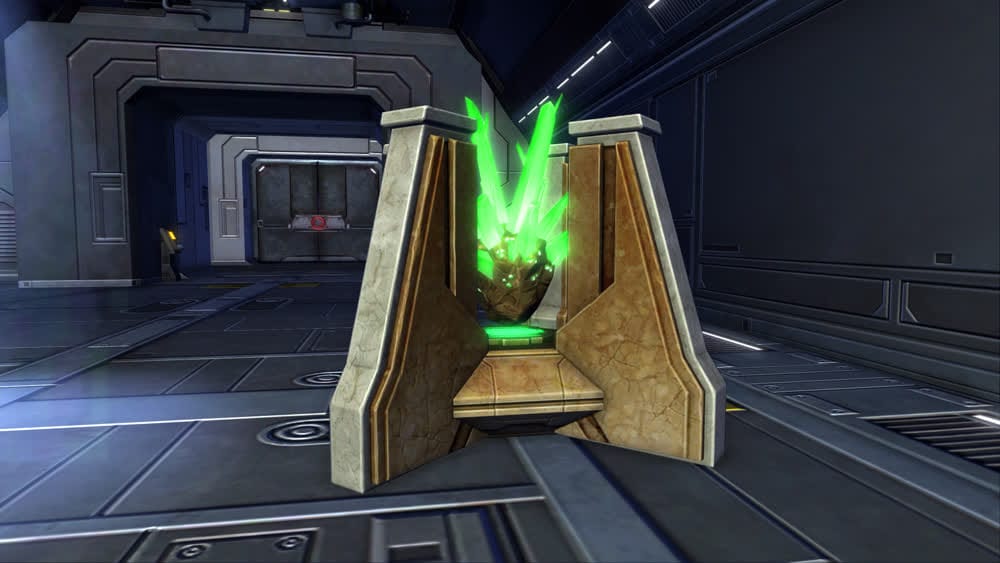
- From here at the top of the waterfall, pull out the macrobinoculars provided in the tracked mission and scan the three statues above the ruins below.
- Unfortunately that’s the only nearby objective to the other dailies, so from here you’ll have to head back down from the waterfall and head north past the outpost. Once you get near groups of geonosians near the scan position on your map, you’ll have already seen the jedi master monument to scan for awhile, it’s huge and dominates the immediate area. Scan away.
- Once you have these first two the rest of the mission no longer takes place in the ancient catacombs so hop back to the outpost and take the taxi to the Jedi Library.
- The moment you land, jump off the taxi pad to the dirt east of it and you’ll be able to scan the front of the library north of you from all the way over here.
- The final monument takes slightly more legwork. Head north up to the library and climb the stairs to it’s grounds. Without going all the way inside, you can stand at the outdoor railing here and aim your binoculars through the front door to scan the monument inside.
[DAILY] Sensor Sweep

Tips:
- Sensor Sweep is NOT collected from the daily mission board and will have to be picked up from the Ancient Catacombs Outpost speeder point, so start by taking a ride up there – you can also grab Wasteland Terrors and Explosive Intervention from the board if you’re looking to do multiple or all dailies.
- The previously mentioned dailies and this one all conveniently take place in the search radius – the western side of the catacombs map up the waterfall. So drop down from the outpost, hug the wall to your right and head up the steps.
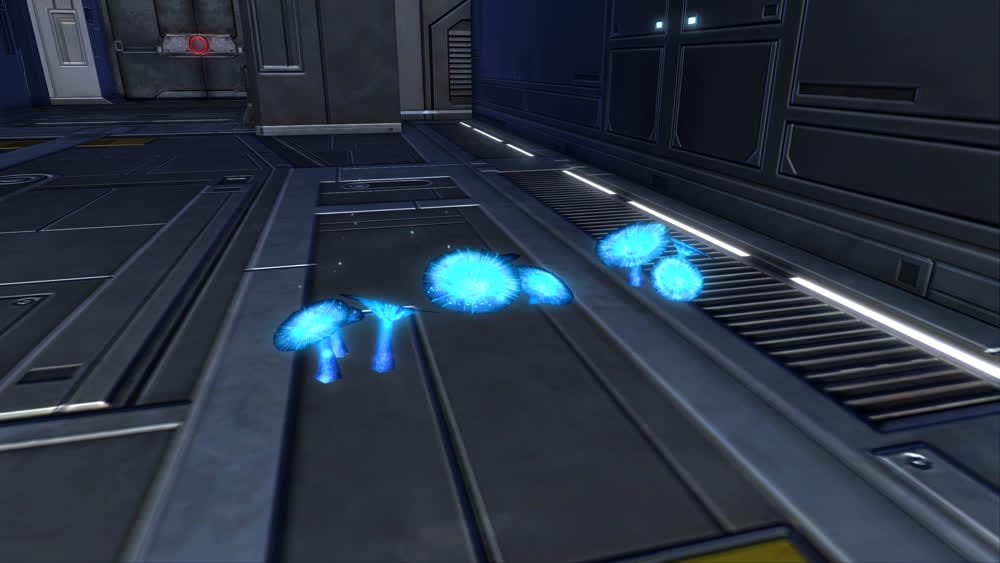
- The sensor placement indicators are pretty easy to spot – they’re giant yellow beams of light similar but thinner than loot beams. In the image above you should be able to see two, one coming from the intitial top of the waterfall, and another in the mountains. You can head up the steps fighting geonosians to the 2nd, and from there head further west.
- For the extra combat-allergic, the sensors you place despawn after about a minute. You can re-use the same 2 spots over and over again.
Missions – Empire

[WEEKLY] Daily Area: Ossus
Complete 6 of 9 daily quests on Ossus:
- [DAILY] Blazing Fury
- [DAILY] Enkindled Knowledge
- [DAILY] Front Line Support
- [DAILY] Silencing the Guns
- [DAILY] Supply Drop
- [DAILY] Missing Pieces
- [DAILY] Scrapyard
- [DAILY] Communication Blackout
- [DAILY] Know Your Enemy
NOTE: Likely due to a bug or to make up for a previously bugged mission in the past, for whatever reason, Imperials are able to pick up the Republic “Collected History” daily on Ossus. The description even still says you’re gathering the relics for safekeeping before the Imperials find them. Sure. Similarly, find Wasteland Terrors and Crossed Wires in the Republic section if you need any tips for them.
[WEEKLY] Heroic Missions: Ossus
Complete the 3 Heroic Missions on Ossus:
- [HEROIC 2+] Information Appropriation
- [HEROIC 2+] Consume the Light
- [HEROIC 4] Supply Heist
[HEROIC 2+] Information Appropriation

Tips:
- Information Appropriation is not available from the daily mission board – you will have to fly down to the Ossus Canyons taxi area to pick it up from a droid at the outpost.
- The mission comes with it’s own shuttle to take you straight there, but if for whatever reason it is not usable, head north from the outpost through the tunnel of scrambled droids and follow the Eastern path on the other side to a metal bunker along the Northern walls.
- Inside the bunker, there will be multiple packs of enemies you’ll either have to defeat or stealth past. Primary targets are the gold-level sages and the Repair Droids to ensure nothing heals up as you fight. With a leveled companion, these should all be manageable in a pull or two.
- Down in the basement to the north you’ll pass by a floor filled with green Hypergolic Fuel Cells. Pass them to the computer in the back to steal intel. This will summon the R8-X6 gold-level boss for the heroic.
- Defeating this will complete your mission but doing so can be tricky – there are a couple of moves to take note of.
- Electronet Volley is a channeled move that you can’t interrupt. About halfway through the cast you’ll start seeing blue circle underneath you – run away and keep running to dodge the series of blue circles as they will trap you and lock you into more red circles that will explode shortly. The red circles can detonate Hypergolic Fuel Cells, so if you ran near one, keep running far away as the chain reaction explosions can kill very fast.
- There is another major channeled move – a flamethrower conal that can also ignite the Fuel Cells. By default, take care not to stand near any in case this comes your way. If the flames are on your companion, this is interruptable to save them. If the flames are directly at you, they stay in place, so it may be more worth it to simply run out of the cone and attack from the side for the duration, this way to can save your interrupts for keeping your companion alive throughout the fight.
[HEROIC 2+] Consume the Light

Tips:
- Consume the Light is not available from the daily mission board – you will have to fly down to the Ossus Jedi Temple taxi area to pick it up from a hostage Jedi at the outpost. If you’re doing more than heroics, note that both Collected History (curiously a republic mission) and Enkindled Knowledge CAN be grabbed from the mission board and takes place nearby.
- The mission comes with a shuttle that takes you straight to the instance, but for whatever reason its on cooldown or you’re nearby doing other missions already, the phase is located on your first left after passing through the temple entrance and around the giant statue.
- Once inside, your objective is to defeat three Jedi Masters. These are the Gold-level enemies in the phase specifically labelled masters. Starting in the entrance room, you can head to the south end and run around the first pack of Jedi to fight the Master Sentinel. No attacks to make note of.
- Continue west into a room with pyramidal databanks. In the northwest corner is your gold-level Master Duelist to fight. She comes with a gold-level sage that you may want to defeat first. No attacks to make note of aside from the fact that she deals a lot of damage for simple auto attacks, so maybe use a stun or knockback for breathing room.
- Head further down the linear path of libraries until you get to the large hall containing the last Master Guardian. Again, accompanied by a healing sage, so stun or take care of it first. The guardian pops a defensive and that’s about it – I noticed sleep darting the sage and defeating the Guardian despawned the rest of the enemies as well, saving time.
- The objective at this point updates to retrieving a force relic at the back of the final room – but upon approaching you will find Master Sashana, a champion-level Jedi. The objective switches to defeating them. Sashana shows her supreme mastery of the Force by spamming telekinetic throw – I don’t honestly recommend you interrupt this as I found her saber autoattacks to do even more damage. Let her waste her time casting it.
- Note that as a stealther, you can pop in, kill the gold-level targets and cloak back out, making this heroic quite fast.
[HEROIC 4] Supply Heist

Tips:
- Supply Heist is not available from the daily mission board – you will have to fly down to the Ossus Farms taxi area to pick it up from a hostage colonist in the outpost. If you’re doing more than heroics, note that Blazing Fury CAN be grabbed from the mission board and takes place nearby, as well as Know Your Enemy, also picked up at the outpost acros from this heroic.
- The mission comes with a shuttle that takes you straight to the instance, but for whatever reason its on cooldown or you’re nearby doing Blazing Fury, the door is the northernmost exit of the farm map.
- Head through the tunnel and interact with the glowing blue tarp over the Jedi Supplies to initiate wave-by-wave Jedi Colony Security droid combat. This includes tons of regular droids, some silver-difficulty Heavy Troopers, and Gold-difficulty R8-X4 droids.
- After defeating some of these droids, you’ll notice they are immediately replaced. The reinforcements are finite so simply continue killing them until they run out. The gold level droids will cast a concussion pulse that can be interrupted otherwise you’ll be knocked back and stunned a bit, while the silver-level heavy troopers will drop red area attacks under your feet so as long as you keep moving, you can ignore them for quite awhile.
- Soloing is possible but time consuming due to the sheer amount of damage intake being hard for a healing companion to keep up with, so I’d recommend using a tank companion to buy you more time to kill a gold level enemy and work your way down. It will take multiple deaths but eventually you could do it. 1 extra friend with a companion makes it much more worth it. Returning to med center will repawn you all the way back at the base, so it’s likely more worth it to wait out the med droid timer.
[DAILY] Blazing Fury

Tips:
- Blazing Fury can be picked up from the daily mission board, and takes you to the Ossus Farms quicktravel and taxi point. Once arrived, this can pair well with picking up Know Your Enemy and the Heroic 4, Supply Heist if you’re looking to do everything.
- Head out of your hidden canyon you start in and head north from the first pack of Geonosians you see. You’ll be heading straight toward the northern farm plots.
- Once at any of the green crop circles, your objective is dead simple – right click on any 3 of the center pillars on the irrigation equipment like in the image above, and plant a bomb.
- With stealth, or with some tricky vehicle driving, you can sneak by most packs of enemies and plant 3 bombs without fighting a single thing. It should also be noted that it only takes a minute or so for a farm to recover from your sabotage, allowing you to bomb the same one multiple times if need be.
[DAILY] Enkindled Knowledge

Tips:
- Enklindled Knowledge SHOULD be the only non-heroic in the Jedi Temple area for Ossus, though you can also pick up the Republic mission Collected History from the board as well, and they do pair nicely. As for heroics, the one nearby would be Consume the Light.
- Once in the Jedi temple, head right at the first intersection past the giant statue. Along the ground will be dirt piles if you picked up Collected History – you can check the Republic section of the guide for an image.
- Enkindled Knowledge takes place in the medium-sized square shaped rooms on your map – the search radius says just the northernmost one, but the room east of the large circle also has the item you need – the little books on pedestals like in the image above.
- Simply right click to literally torch the books. Like most interactables in Ossus it only takes about 60 seconds for the books to suddenly recover from your flames, allowing you to burn a book, burn a second book, then return to the first book and burn it again, if you’re looking to avoid fighting through tons of Jedi.
- Your objective should update to the Master Book, which in fact is only located in the northernmost room. This book is on a pedestal located on the back of a holocron shrine in the middle of the room – and burning it will spawn a Jedi Master for you to defeat. He channels an ability called Project Storm but it does laughable damage for a gold-level enemy. You can interrupt it for fun.
[DAILY] Front Line Support

Tips:
- Front Line Support can be picked up from the daily mission board, and takes you to the Ossus Canyons quicktravel and taxi point. If doing more than one mission, Supply drop also occurs in the Canyon area and is also on the board. Once arrived, this can pair well with Communication Blackout, Scrapyard, and the Heroic Information Appropriation, if you’re looking to do everything.
- The search radius is only half-accurate, but it’s a good place to start, so from the outpost head southwest to the mission objective. Around here, you’ll see some imperial patrols engaged in combat with Geonosians, and the silver-level, specifically named “Captains” are the only Geonosians that will count for the mission. Up here in the canyon, Captains will only be found amongst the groups that spawn immedaitely in combat with Imperials.
- There’s only really two available in that search radius, though, so unless you’d like to wait for a respawn, follow the path south into the river, and you’ll see a few Captains as you follow the river, supported by a couple regular Geonosians.
- After three are down, you’ll be directed off the south bank of the river to a phased cave. The objective will start off asking you to rescue a patrol – they’ll be besieged by a half dozen regular Geonosians that can be effortlessly defeated with area attacks.
- Immediately following will be two Geonosian Reavers, the standard Silver level enemies. They channel an area attack you can interrupt, and once dead, the mission completes.
[DAILY] Silencing the Guns

Tips:
- Silencing the Guns can be picked up from the daily mission board, and takes you to the Ossus Farms quicktravel and taxi point. Once arrived, this can pair well with picking up Know Your Enemy and the Heroic 4, Supply Heist if you’re looking to do everything.
- Head out of your hidden canyon you start in and head north from the first pack of Geonosians you see. You’ll be heading straight toward the northern farm plots.
- Once at the Farms, your objective is dead simple – any of the Farm Turrets you find here will contribute to your mission total. They can mostly be found along the little irrigation rivers and in front of buildings.
- If you’ve picked up Blazing Fury at the mission board as well, this is a good time to run around bombing the farms – just avoid geonosians.
[DAILY] Supply Drop

Tips:
- Supply Drop can be picked up from the daily mission board, and takes you to the Ossus Canyons quicktravel and taxi point. If doing more than one mission, Front Line Support also occurs in the Canyon area and is also on the board. Once arrived, this can pair well with Communication Blackout, Scrapyard, and the Heroic Information Appropriation, if you’re looking to do everything.
- Starting from the Canyon Outpost Speeder landing, you can look to the south and see these glowing yellow Jedi prisons in the distance, guarded by Imperials. Upon getting close to any you’ll see your objective come into view; a yellow beam near the cage like in the image above.
- These cages are littered on this north half of the mountain nearby – they’re pretty easy to find with some elevation so climb a hill and if you see one already delivered to just hang tight, they respawn to be interacted with in about 60 seconds. This only takes place up here in the mountains, so if you hit the river you’ve gone too far.
[DAILY] Missing Pieces

Tips:
- Missing Pieces is NOT picked up from the daily mission board and players looking to complete it will need to take the taxi to the Ancient Catacombs quicktravel point and grab it from the Y-G3 floating droid at the outpost. Due to imperials normally using a different outpost for canyon map dailies, this one is a little stand-alone.
- Drop down north of the outpost and head up the ramp nearby to the top of the waterfall up ahead. Cross the river and take the narrow stone steps up the cliff to reach the ruins containing a Shuttle Datapad. Imperial NPCs are usually fighting the geonosians nearby so no combat may be required.
- The next datapad is directly south, so if you can slide down the cliff without alerting Scarjaw in the river, that’s the most expedient way. Climb out of the river using the broken bridge-turned-ramp and head west to the small lean-to tents outside a phase. The datapad is on a box here. You’ll be ambushed by a silver-level geonosian with two buddies – they aren’t required to further your objective but they don’t take long to defeat, either.
- North from this spot along the river will lead to another set of lean-to tents on the left bank. Grab the final datapad from the box nearest you.
[DAILY] Scrapyard

Tips:
- Scrapyard can NOT be picked up from the daily mission board, and is only from a droid at the Ossus Canyons quicktravel and taxi point. If doing more than one mission, Communication Blackout is also in the Canyon area goes through the same tunnel. The Heroic Information Appropriation also takes place beyond the needed tunnel.
- Once your missions are picked up, head out of the outpost and north to the area exit located in a big cave. Scrambled droid enemies should be everywhere in here. Initially it should just be security and repair droids, but at the 90 degree bend in the cave you should see your first Excavator, like in the image above.
- Once found and targetted, you can click your tracked mission item that comes with Scrapyard and it will reprogram the droid (even mid-combat) and turn it friendly.
- After this droid, you could very well exit the cave and head to the western side of this new map to find more, but keep in mind – like most things on ossus the respawn time is usually only about a minute, and you already fought or stealthed your way to this spawn point. I find it’s faster to sit tight and keep reprogramming the same one.
[DAILY] Communication Blackout

Tips:
- Communication Blackout can NOT be picked up from the daily mission board, and is only from a droid at the Ossus Canyons quicktravel and taxi point. If doing more than one mission, Scrapyard is also in the Canyon area and goes through the same tunnel. The Heroic Information Appropriation also takes place beyond the needed tunnel.
- Once ready, leave the Canyon Outpost heading north, through a huge mining tunnel filled with scrambled droid enemies. On the other side you’ll be in the Ancient Ruins map of Ossus.
- What should be immediately apparent once out of the tunnel is the presence of these large fork-like towers in the image above. The thin yellow beam that appears as you approach is your interactable object for the daily – just get to a fork, right click the base of the beam, and boom, signal jammer.
- As with many interactables on Ossus it respawns in about a minute – so you can re-use the same fork multiple times to get this done.
[DAILY] Know Your Enemy

Tips:
- Know Your Enemy can NOT be picked up from the daily mission board, though it takes place at the Ossus Farms quicktravel and taxi point so you could grab Blazing Fury to pair with it before you go. Once arrived, this can pair well with the Heroic 4, Supply Heist if you’re looking to do everything. Know Your Enemy comes from a droid near the farm taxi.
- Head out of your hidden canyon you start in and head north from the first pack of Geonosians you see. Before heading down the earthen ramp to the farms, you can stand at the top of the cliffside here near the Geonosians and use your tracked mission-item macrobinoculars to scan two of the four items you’ll need – the big egg-shaped storage tanks as well as the actual crops being sprayed under the irrigation arms. At a glance it may look like only the storage tanks glow under the binoculars, but mousing over the crops should reveal they’re just relatively thin and hard to see – it’ll work.
- With just the Power Generator and Sensor Array left, head north past the farm plots and through the exit in the northeast corner of the map.
- Unfortunately despite all the fun tech looking forks in view, you’ll have to stealth or fight past a few robots and head to the map marker pictured above to scan the next two objects, as they’re along the northern edge of the map and you’ll need some high-ground to see both so well.
- Take care not to try avoiding droids by sticking left on this map, you’ll run into the republic outpost and get one-shot by a turret. Through the ruins and droids is the safest way.
Rewards
All the Ossus rewards require Ossus reputation and credits, so you can easily earn them by running daily and weekly quests on Ossus. The vendors for Republic are in a hut north of the main, largest building in the Jedi Colony. They’re named D3-C0, Harod Trien, and Biera Dani. Imperial side, the vendors are down an elevator from the daily missions board – across the deck, up a ramp and inside the building on the east end. Their names are Captain Mayfari and Major Cassare.


Armor
Ossus Explorer
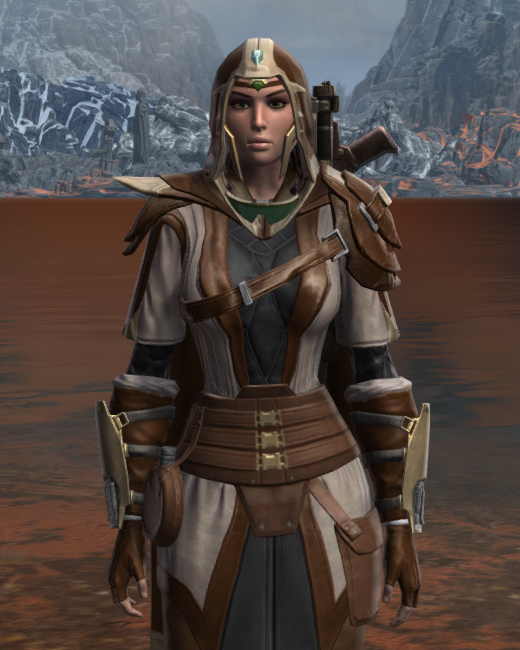
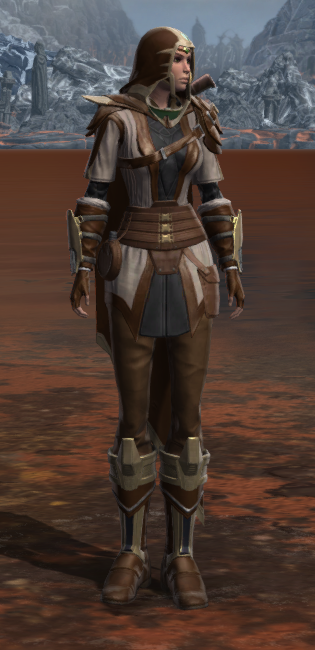
Ossus Explorer Boots – Requires Champion Rank – Costs 105,000 Credits, 20 Relics of Ossus
Ossus Explorer Bracers – Requires Champion Rank – Costs 60,000 Credits, 15 Relics of Ossus
Ossus Explorer Girdle – Requires Champion Rank – Costs 60,000 Credits, 15 Relics of Ossus
Ossus Explorer Gloves – Requires Champion Rank – Costs 105,000 Credits, 20 Relics of Ossus
Ossus Explorer Headgear – Requires Champion Rank – Costs 150,000 Credits, 35 Relics of Ossus
Ossus Explorer Pants – Requires Champion Rank – Costs 150,000 Credits, 35 Relics of Ossus
Ossus Explorer Tunic – Requires Champion Rank – Costs 150,000 Credits, 35 Relics of Ossus
Nadia Grell Classic Customization
Requires Reputation: Outsider – 40,000 Credits, 10 Relics of Ossus

versus her newer one for Ossus

Ancient Tome

Level 70 top-tier crafting materials, can be bought from a vendor on Ossus for 100,000 Credits and 65 Relics of Ossus. All items crafted with these, with the exception of level 70 modifications, can also be bought directly from the Masterwork Vendor on Ossus, costing 27,500 credits and Champion status with Ossus Reputation.
Experimental Ossan Gear
These armors do not require any reputation rank, and were meant to be a set of starter level 75 gear if you needed it in a previous expansion. They just cost credits.


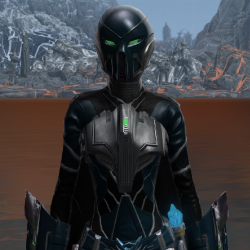 Experimental Ossan Combat Medic’s
 Planet Vendors
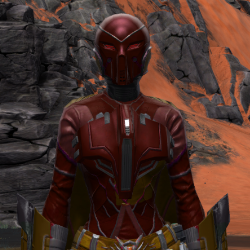 Experimental Ossan Combat Medic’s
 Planet Vendors
 Experimental Ossan Enforcer’s
 Experimental Ossan Enforcer’s
 Experimental Ossan Force-Master’s
 Experimental Ossan Force-Master’s
 Experimental Ossan Vindicator’s
Masterwork Experimental Ossan Gear
These armors do not require Champion rank, and were meant to be a set of upgraded level 75 gear if you needed it in a previous expansion. They just cost credits plus you ‘turn in’ the matching piece of Experimental gear (which can be bought from the previous vendor).


 Masterwork Ancient Combat Medic
 Masterwork Ancient Combat Medic
 Masterwork Ancient Enforcer
 Masterwork Ancient Enforcer
 Masterwork Ancient Force-MasterOssus Reputation (Champion Rank)
 Masterwork Ancient Stalker
 Masterwork Ancient Weaponmaster
 Masterwork Ancient Weaponmaster
Decorations


Reputation Rank: Champion, Cost: 45,000 Credits and 18 Relics of Ossus
Reputation Rank: Champion, Cost: 45,000 credits and 18 Relics of Ossus

Reputation Rank: Champion, Cost: 45,000 Credits & 18 Relics of Ossus
Reputation Rank: Newcomer, Cost: 15,000 credits and 5 Relics of Ossus

Reputation Rank: Newcomer, Cost: 15,000 Credits & 5 Relics of Ossus
Reputation Rank: Legend, Cost: 90,000 credits & 20 Relics of Ossus (only buyable Imperial side)

Disguise Terminal: Imperial
Trooper
Reputation Rank: Legend, Cost: 100,000 credits and 100 Relics of Ossus

Disguise Terminal: Republic
Trooper
Reputation Rank: Legend, Cost: 100,000 credits and 100 Relics of Ossus

Reputation Rank: Champion, Cost: 45,000 Credits & 18 Relics of Ossus

Reputation Rank: Newcomer, Cost: 15,000 Credits & 5 Relics of Ossus

Reputation Rank: Champion, Cost: 45,000 & 18 Relics of Ossus

Reputation Rank: Champion, Cost: 45,000 Credits & 18 Relics of Ossus

Reputation Rank: Champion, Cost: 45,000 Credits & 18 Relics of Ossus

Reputation Rank: Legend, Cost: 65,000 Credits & 25 Relics of Ossus

Reputation Rank: Legend, Cost: 65,000 Credits & 25 Relics of Ossus
Reputation Rank: Legend, Cost: 65,000 Credits & 25 Relics of Ossus

Reputation Rank: Newcomer, Cost: 15,000 Credits & 5 Relics of Ossus

Reputation Rank: Hero, Cost: 30,000 Credits & 10 Relics of Ossus
Reputation Rank: Legend, Cost: 90,000 credits and 20 Relics of Ossus (only buyable Republic side)

Reputation Rank: Hero, Cost: 30,000 Credits & 10 Relics of Ossus
Reputation Rank: Hero, Cost: 30,000 Credits & 10 Relics of Ossus

Reputation Rank: Hero, Cost: 30,000 Credits & 10 Relics of Ossus

Reputation Rank: Hero, Cost: 30,000 Credits & 10 Relics of Ossus

Reputation Rank: Champion, Cost: 45,000 Credits & 18 Relics of Ossus
Reputation Rank: Champion, Cost: 45,000 Credits & 18 Relics of Ossus
Reputation Rank: Champion, Cost: 45,000 Credits & 18 Relics of Ossus
Reputation Rank: Champion, Cost: 45,000 Credits & 18 Relics of Ossus
Reputation Rank: Champion, Cost: 45,000 Credits & 18 Relics of Ossus
Reputation Rank: Champion, Cost: 45,000 Credits & 18 Relics of Ossus
Decoration Drops
Some decorations on Ossus can only be gotten by random drop while playing on the planet. They are all “Binds on Pickup”, which means they can not be bought/sold on the GTN to traded to a friend. They are very random, you generally get them while playing the dailies and defeating enemies on the main open world of Ossus.
These are the decorations you can find while exploring Ossus and defeating enemies:


Datacron
xxx
World Bosses
x for Swtorista section
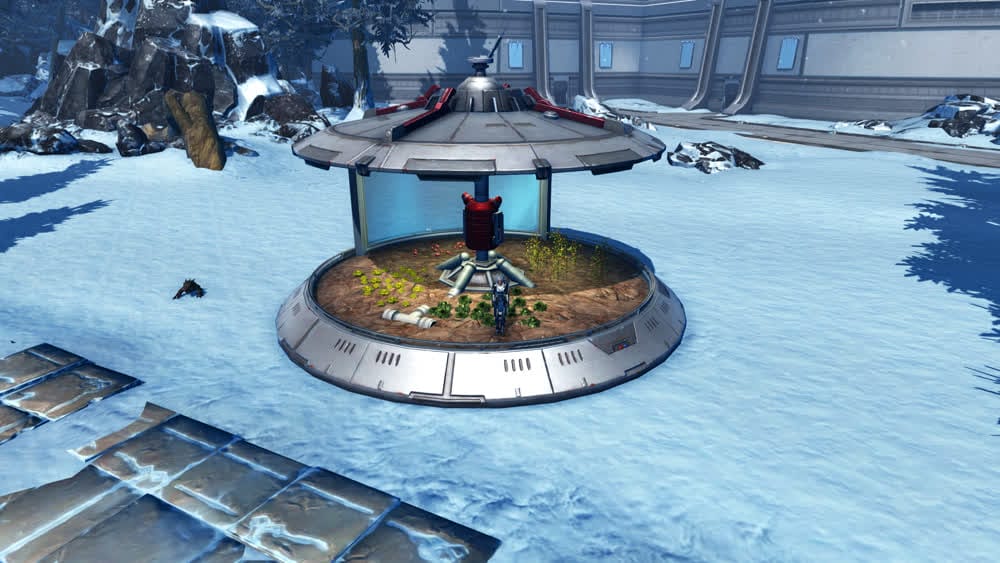
Irrigated Garden

Withered Tree

Tech Frag Decorations
These decorations are not technically tied to the Ossus reputation, but are only sold on the planet of Ossus. They cost Tech Frags.


Cost: 50 Tech Fragments
Cost: 150 Tech Fragments
Cost: 150 Tech Fragments
Cost: 250 Tech Fragments

Cost: 150 Tech Fragments

Cost: 250 Tech Fragments

Cost: 150 Tech Fragments

Cost: 350 Tech Fragments
Cost: 250 Tech Fragments

Cost: 150 Tech Fragments

Cost: 350 Tech Fragments
Cost: 50 Tech Fragments
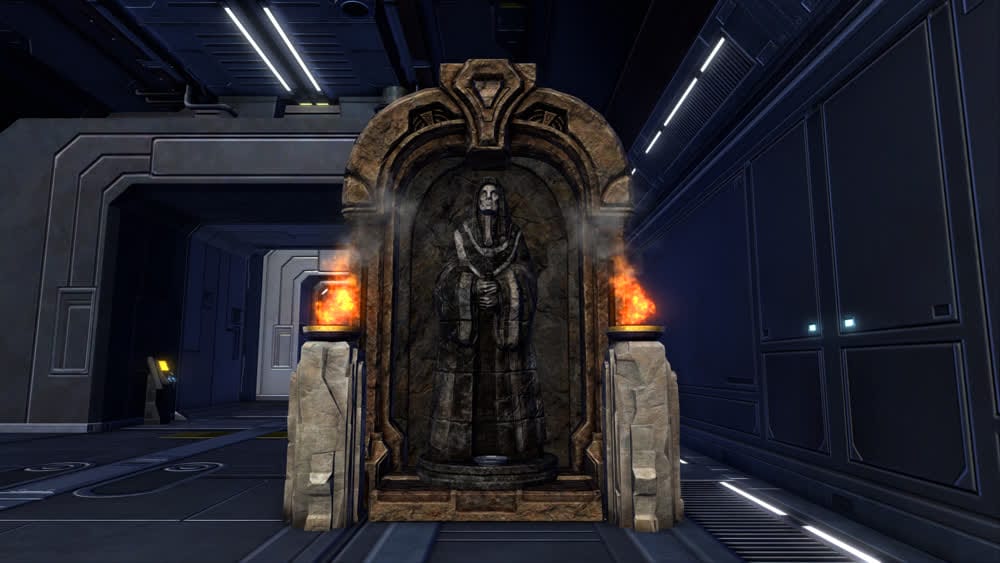
Statue of the Forgotten Heroine
Cost: 350 Tech Fragments
Cost: 150 Tech Fragments

Achievements
There are many hidden achievements on Ossus to earn.
General
 Doing My Part / In The Thick of It / Staking A Claim : Defeated 80 / 230 / 480 non-player opponents while on Ossus.
- The Mechanic / Advanced: The Mechanic / Expert: The Mechanic / Master: The Mechanic : Defeated 150 / 300 / 600 / 1200 Scrambled Droids while on Ossus.
- The Exterminator / Advanced: The Exterminator / Expert: The Exterminator / Master: The Exterminator : Defeated 150 / 300 / 600 / 1200 Mutated Geonosians while on Ossus.
- Ruin Raider: Completed all combat achievements on Ossus.
Exploration
- The Epic of the Exiled Knight: Found all of the journals of the Exiled Knight.
- Dawn of the Exiled Knight: Located Don, the Exiled Knight Reward: The Exiled Knight (decoration)
- The Ossus Cipher: This strange cipher may be related to some sort of code used by underworld traders, though for what specific purpose, you can’t say. (Hidden Achievement)
- Read the Secrets of Ossus, Vol 01
- Read the Secrets of Ossus, Vol 02
- Read the Secrets of Ossus, Vol 03
- Read the Secrets of Ossus, Vol 04
- Read the Secrets of Ossus, Vol 05

The Exiled Knight (decoration)
Heroic Missions
 Heroic Rise/Heroic Moment/Heroic Legend: Completed 15/30/60 Heroic missions on Ossus. Reward: Orgus Din Memorial

Resolution of Ossus: Complete Daily Area: Ossus x10, Complete Patrol: Ossus x90. Reward: Orrery Table & Ossus Beast Skeleton


Player Vs. Player
- Ossus Subduer / Ossus Vanquisher / Ossus Subjugator / Ossus Victor : Defeated 50 / 100 / 200 / 400 players on Ossus.
- Ossus: Fury of the Empire / Ossus: Wrath of the Empire / Ossus: Might of the Empire : Defeated 100 / 250 / 400 Republic Forces on Ossus.
- Ossus: Resolution of the Republic / Ossus: Courage of the Republic / Ossus: Valor of the Republic : Defeated 100 / 250 / 400 Imperial Forces on Ossus.
World Bosses
- A Date with R8-X8: Defeated R8-X8 on Ossus.
- Sick Kill: Defeated Kil’Cik the Swarm Lord.
- Blood and Oil/Advanced: Blood and Oil/Elite: Blood and Oil: Defeated both World bosses on Ossus 1/10/25 times. Reward: 20 Cartel Coins
 Questions or comments? Feel free to send me a message on Twitter


 Discord
  Email swtorista@gmail.com
 Bluesky @swtorista.com
 Reddit /u/swtorista
 Twitch Swtorista
 Youtube
 Patreon
 Twitter @swtorista