


 How to Craft
 Choose a Crew Skill
 Armormech
 Armstech
 Artifice
 Biochem
 Cybertech
 Synthweaving

 Gathering Guide
 Rare Materials Guide
 White Materials Guide
 Jawa Junk
 Augments
 Medpacs, Stims and Adrenals
 Synthweaving Crafting Tree


 Crafted Decorations
 Crafted Mounts
 Crafted Dyes
 Crafted Crystals
 Events Calendar
 Galactic Seasons
 PvP Seasons
 Bounty Event
 Double XP Event
 Feast of Prosperity
 Gree Event
 Life Day
 Nightlife Event
 Pirate Incursion Event
 Rakghoul Event
 Spring Abundance Festival
 Swoop Event

 Jedi Knight
 Jedi Consular
 Trooper
 Smuggler
 Sith Warrior
 Sith Inquisitor
 Bounty Hunter
 Imperial Agent
 Bounty Hunter
 Imperial Agent
 Jedi Consular
 Jedi Knight
 Sith Inquisitor
 Sith Warrior
 Smuggler
 Trooper
 Legacy Gear
 Lightsabers
 Double-Bladed Lightsabers
 Vibroswords
 Double-Bladed Vibroswords
 Blaster Pistols
 Blaster Rifles
 Sniper Rifles
 Blaster Cannons

Wreckage on Dantooine is the main quest line for the Dantooine Crash Site and Dantooine Biome Dynamic Encounters area, which teaches you about the unique hazards of the crash site, and gives you a tour of the area. You will need to be level 80 for this quest.
Contents
- What are the Dantooine Biomes?
- Step 1 – Fly to Dantooine Crash Site
- Step 2 – Answer Your Personal Comlink
- Step 3 – Travel to the Glacial Trespass Camp
- Step 4 – Travel to the Geothermal Disruption Camp
- Step 5 – Travel to the Sporefall Disruption Camp
- Step 6 – Complete a Transition Encounter
- Step 8 – Explore the Base Camp
- Step 9 – Complete [MASTER 4] Orbital Core
- Rewards
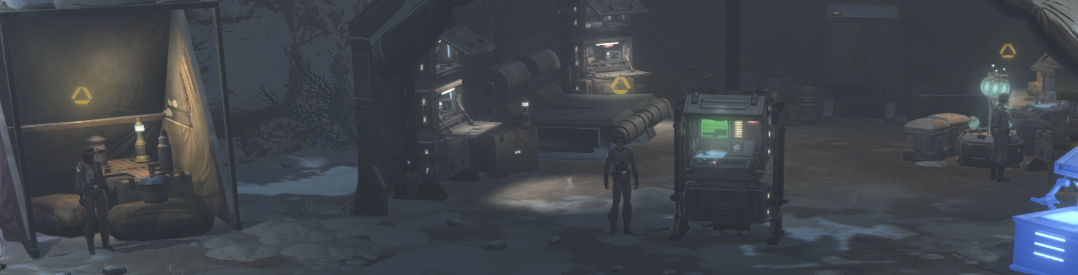
What are the Dantooine Biomes?
Dantooine Biomes are a set of Dynamic Encounters quests in the Crashed Ship Zone area of Dantooine. This area is designed for level 80 characters, and is a set of explorational quests exploring the three unique biomes each with their own hazardous and repeatable encounters. This area also has its own Reputation track and set of rewards and achievements, and the Wreckage on Dantooine quest teaches you how the area works. You can learn more about the rewards and Reputation track on the Dantooine Biome Dynamic Encounters Guide.
Step 1 – Fly to Dantooine Crash Site
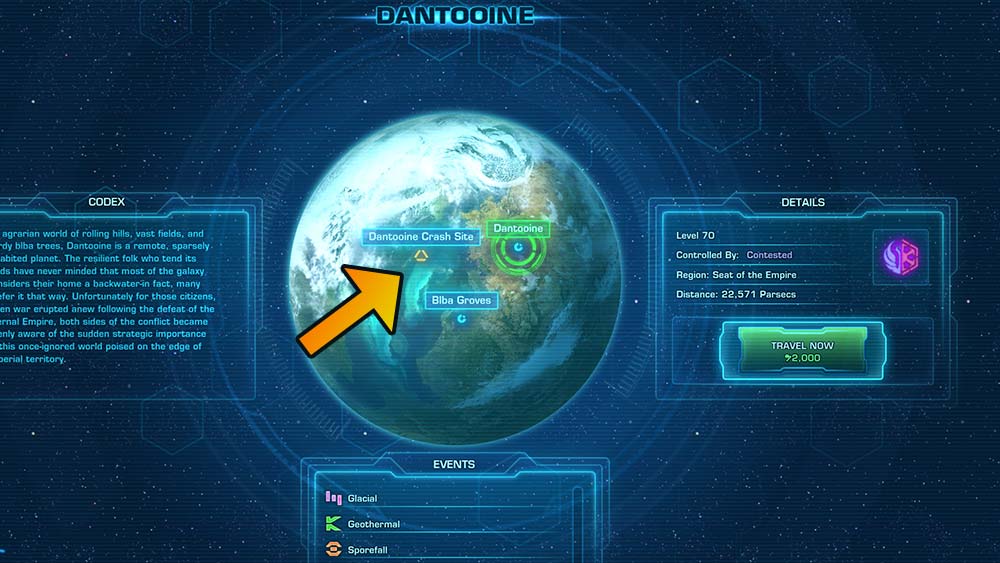
To start the Dantooine Biome quests, you do not need to speak to any questgiver – you just need to fly to the Dantooine Crash Site landing point of Dantooine. Don’t land on the normal part of Dantooine, or you won’t be able to find the biome quests and there’s no shuttle to the biomes from there. Once you land, walk forwards into the camp, and you’ll automatically get the quest Wreckage on Dantooine, which is the main quest line for the area. This is a long quest that leads you around the area and teaches you about how it works, and if you want to enter the final boss area, you’ll need to have progressed past all three biomes in this quest.
Step 2 – Answer Your Personal Comlink
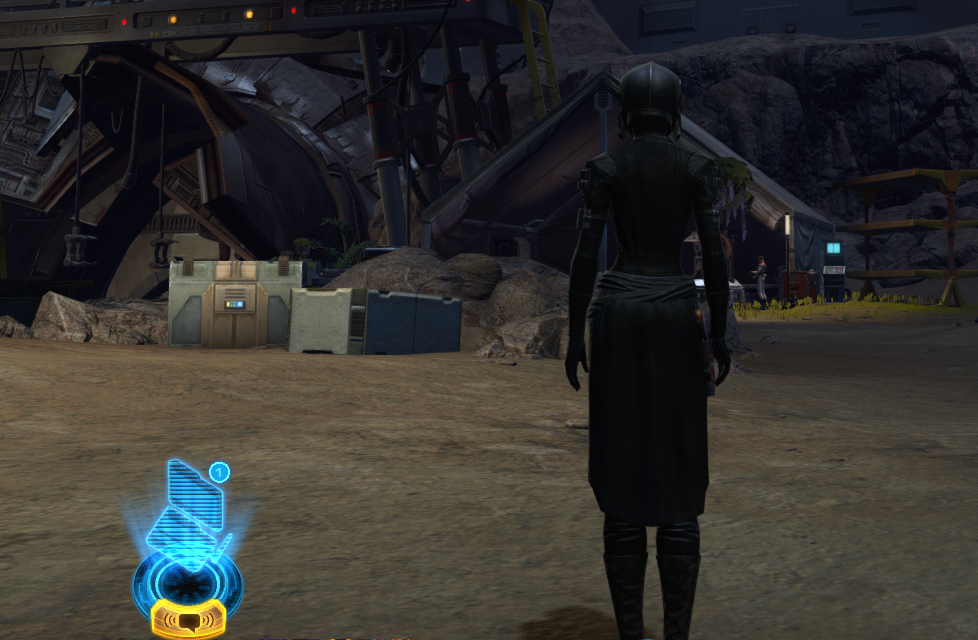
Most of these quests don’t have a questgiver you talk to – instead you just walk nearby, and the questgivers audio will start playing, or you can read it in your chat log. Walk over to the nearby Doctor Pordav, who will ask you to go help the forward camps, starting with travelling to the Glacial Trespass Camp.
Step 3 – Travel to the Glacial Trespass Camp
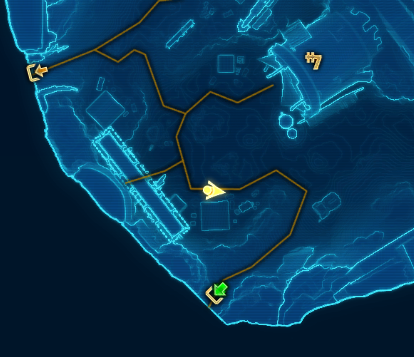
The map in this area can be a bit chaotic due to it being big with lots of tunnels, and having lots of Dynamic Encounters on the map also makes it confusing. Just do your best to follow the “green arrows” between the maps to find your next quest objective! When running between camps, save yourself some grief and don’t worry about completing any Dynamic Encounters until you reach the camp and picked up the quests there!
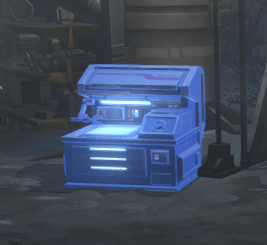
You will see these glowing blue workshop tables around the area called Hazard Mitigation Modules – if you are just starting, you can’t use any of their functionality yet, so don’t worry about them. They will become available later in the questline or when you rank up in reputation.
At each camp, once you walk near to it and the lead scientist is done speaking, you’ll see three questgivers pop up. Once will give you a quest to scan things, one will give you a quest to use a pair of macrobinoculars, and one will ask you to do three Dynamic Encounters in the area.
BUG: If you are trying to pick up the third quest in the Glacial camp on the new Dantooine Biomes area, but it is stuck ,and right-clicking the questgiver doesnt do anything – it is a bug, and slightly broken, but there is a fix!

If you are having this bug: Try switching instances and then speaking to the questgiver.
To switch instance, open your big map, and use the drop-down on the bottom left to swap from say Crashed Ship Zone (7) to a different one, ideally not a pvp one.

Glacial Encounters
This quest simply asks you to do any 3 Glacial Dynamic Encounters. You can complete these while making your way towards the other objectives.
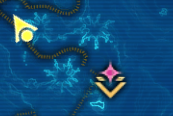
Glacial Dynamic Encounters are marked with a pink diamond on the map.
Dynamic Encounters on this planet are shared between everyone who participates, so just walk in to the area and the objectives will pop up and allow you to participate, even if you are not in a group. When one Dynamic Encounter on this planet is finished, another pops up somewhere else on the map.
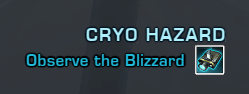
Cryo Hazard
This quest will teach you about the dangerous hazard in this area.
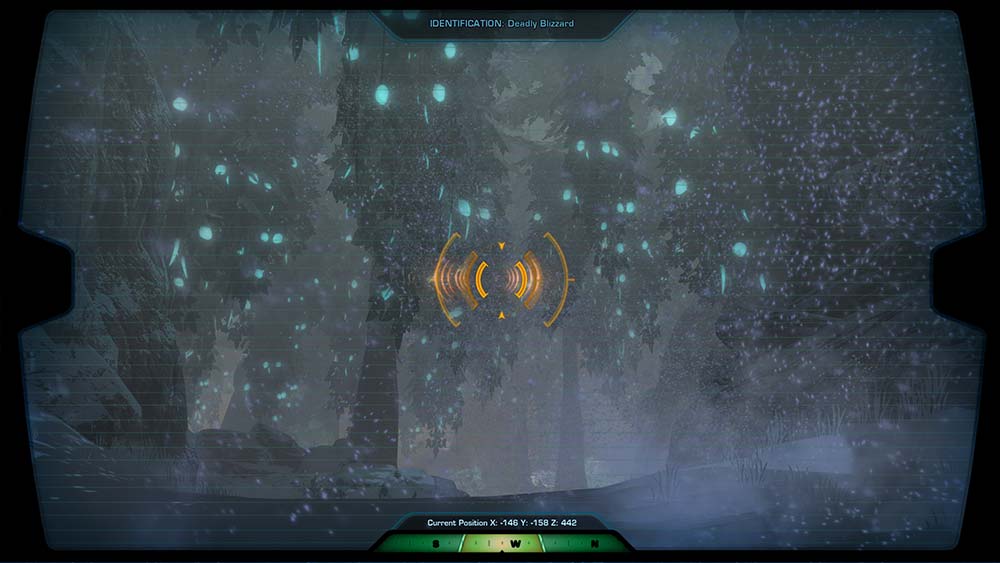
To scan things, walk over to the icon on the map of a scanning signal, and face the same direction as the signal is facing.
To use the scanner, left-click the scanner icon next your quest in the quest log, or right-click the scanners from the Mission Items tab of your inventory if you can’t see it in your quests.
Once the scanner is open, drag your mouse around until the center turns orange. Then left-click to zoom in and scan. Press ESC to exit.
Next it will ask you to Enter the Blizzard and Take a Reading.
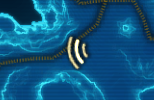
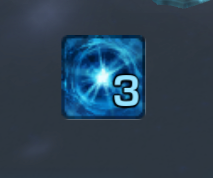
As soon as you walk forward towards the blizzard, you will start freezing! If you stop at any point, and aren’t moving, you will get stacks of freezing, and if you reach 10, you will die! Stay warm by moving around while questing in areas where you get these blue stacks in your debuff bar.
To take a reading, once you are inside the blizzard, you should receive a temporary ability on your temporary ability bar. Left-click it to take a reading.
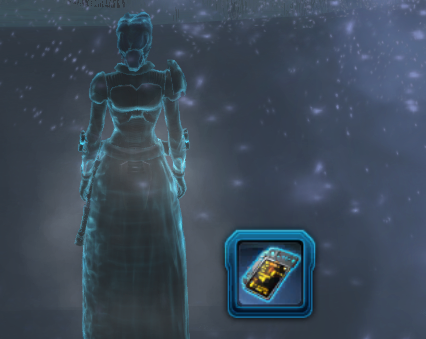
Not showing up? Temporary abilities tend to be a bit finicky – if it doesn’t show up, walk in and out of the area where it is supposed to appear.
Cold, Hard Data
This quest will give you a small tour of the area.
To scan locations, walk over to the yellow triangles on your map filled in with green, and if there is none on the map, follow the green doorway arrows to the next map.

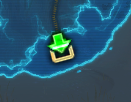
To scan, walk onto the location marked on the map, you should receive a temporary ability on your temporary ability bar. Left-click it to take a reading.
Not showing up? Temporary abilities tend to be a bit finicky – if it doesn’t show up, walk in and out of the area where it is supposed to appear.
- Scan Location Aurek
- Scan Location Besh
- Scan Location Cresh
Upload Biome Data
Follow the green arrows to head back to the camp and right-click the TALL glowing blue terminal to turn in the information you’ve learned after completing all three quests!

Step 4 – Travel to the Geothermal Disruption Camp
Follow the green arrows to the Geothermal camp. Once you walk near to it and the lead scientist is done speaking, you’ll see three questgivers pop up again.

Geothermal Encounters
This quest simply asks you to do any 3 Geothermal Dynamic Encounters. You can complete these while making your way towards the other objectives.

Geothermal Dynamic Encounters are marked with a green diamond on the map.

Toxic Runoff
This quest will teach you about the dangerous hazard in this area.
To scan things, walk over to the icon on the map of a scanning signal, and face the same direction as the signal is facing.
To use the scanner, left-click the scanner icon next your quest in the quest log, or right-click the scanners from the Mission Items tab of your inventory if you can’t see it in your quests.

Once the scanner is open, drag your mouse around until the center turns orange. Then left-click to zoom in and scan. Press ESC to exit.

Next it will ask you to Enter the Runoff and Take a Reading.
When you walk into areas with green water, or any blue tained water, you’ll start taking stacking damage – you can see the stacks building up on your debuff bar.

To take a reading, once you are inside the toxic sludge, you should receive a temporary ability on your temporary ability bar. Left-click it to take a reading. Head back to safe land when you are done!

Not showing up? Temporary abilities tend to be a bit finicky – if it doesn’t show up, walk in and out of the area where it is supposed to appear.
Stability Monitoring
To scan locations, walk over to the yellow triangles on your map filled in with green, and if there is none on the map, follow the green doorway arrows to the next map.
To scan, walk onto the location marked on the map, you should receive a temporary ability on your temporary ability bar. Left-click it to take a reading.

Not showing up? Temporary abilities tend to be a bit finicky – if it doesn’t show up, walk in and out of the area where it is supposed to appear.
- Scan Location Cherek
- Scan Location Dorn
- Scan Location Esk
Upload Biome Data
Follow the green arrows to head back to the camp and right-click the TALL glowing blue terminal to turn in the information you’ve learned after completing all three quests!
Step 5 – Travel to the Sporefall Disruption Camp
Follow the green arrows to the Sporefall camp. Once you walk near to it and the lead scientist is done speaking, you’ll see three questgivers pop up again.
Sporefall Encounters
This quest simply asks you to do any 3 Sporefall Dynamic Encounters. You can complete these while making your way towards the other objectives.

Sporefall Dynamic Encounters are marked with a orange diamond on the map.

Spore Exposure
This quest will teach you about the dangerous hazard in this area.
To scan things, walk over to the icon on the map of a scanning signal, and face the same direction as the signal is facing.
To use the scanner, left-click the scanner icon next your quest in the quest log, or right-click the scanners from the Mission Items tab of your inventory if you can’t see it in your quests.
![]()
Once the scanner is open, drag your mouse around until the center turns orange. Then left-click to zoom in and scan. Press ESC to exit.

Next it will ask you to Enter the Runoff and Take a Reading.
When you walk into areas with sporefall, you’ll start getting Sporefall stacks- you can see the stacks building up on your debuff bar, and they build up very slowly. When you get ten stacks, you get infected – but all it does is make you move very slowly.

To take a reading, once you are inside an area with light sporefall, you should receive a temporary ability on your temporary ability bar. Left-click it to take a reading.

Not showing up? Temporary abilities tend to be a bit finicky – if it doesn’t show up, walk in and out of the area where it is supposed to appear.
A Few Observations
To scan locations, walk over to the yellow triangles on your map filled in with green, and if there is none on the map, follow the green doorway arrows to the next map.
To scan, walk onto the location marked on the map, you should receive a temporary ability on your temporary ability bar. Left-click it to take a reading.
Not showing up? Temporary abilities tend to be a bit finicky – if it doesn’t show up, walk in and out of the area where it is supposed to appear.
- Scan Location Enth
- Scan Location Onith
- Scan Location Forn
Upload Biome Data
Follow the green arrows to head back to the camp and right-click the TALL glowing blue terminal to turn in the information you’ve learned after completing all three quests!
After uploading your third set of Biome data, you’ll Answer Your Personal Comlink again.

Step 6 – Complete a Transition Encounter

After you complete all three biomes, you’ll be asked to Complete a Level Transition Encounter.

A Transition Encounters happens when a biome is going to flip from level 1 to 2, or 2 to 3. Between the stages, all other encounters disappear, and the Transition encounter pops up on the map. Transition Encounter can be very fast and disappear until the next time the biome transitions – so if you need to do one, you will need to pay attention to when the biomes are getting close to 100% in the bar near your quest log on the top right, and be ready in the area to run towards a Transition Encounter when it pops up.
These are the transitions that you can complete, so look for them on the map when a biome flips! Their icon will be a bit of a bigger icon than the normal encounters, and they almost always take place in the ship – so if you can get in the ship from any entrance, you’ll eventually get to them. The quicktravel point in the center may or may not get you to them quicker, use it if it is closer.

- The Cryonest Matron (
 Glacial, Transition Stage 1 → 2)
 - Cryocore Override ( Glacial, Transition Stage 2 → 3)
- Core Overload (
 Geothermal, Transition Stage 1 → 2)
 - Caretaker Unit K-6 ( Geothermal, Transition Stage 2 → 3)
- They Call Me Doctor Spores (
 Sporefall, Transition Stage 1 → 2)
 - Return of Doctor Spores! ( Sporefall, Transition Stage 2 → 3)
Unfortunately, if the core is aligned, and all the biomes are at 100% Stage 3, there will be no more transitions until some time after the timer in the top right wears off.

After completing any transition encounter, you’ll Answer Your Personal Comlink again.
Step 8 – Explore the Base Camp
The base camp is not easily accessible, and doesn’t have a quicktravel point. The fastest way to get there is to quicktravel to the center of the map, then walk to the right and up (east then north).

You should be able to use the smaller blue workshop terminal now! This has some boosts you can buy that makes getting around the area easier, and protect you from freezing, acid, and sporefall. This is not part of the quest but nice to have access to. The Reputation vendor is also in this area.

After walking over to Base Camp, you’ll Answer Your Personal Comlink again.
Step 9 – Complete [MASTER 4] Orbital Core
In Base Camp, you should pick up the quest for [Master 4] Orbital Core.

You will need a total of four players who are also on or past this step – players who have not finished the earlier quests can not even enter the core area.
This is an incredibly difficult quest! The average player may not be able to defeat it. Orbital Core Quest Guide
After completing the 4-person Orbital Core quest, you’ll Answer Your Personal Comlink for a final time, and return to the Head Researcher!
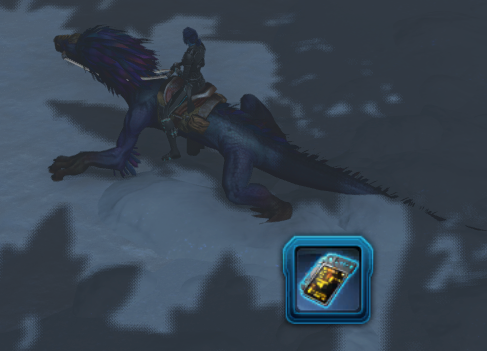
Rewards
SWTORISTA NOTES: What do you get from this? IDK yet :) Rewards are not on the public test server yet.
Quest Chain
- (Fly to the Dantooine Crash Site to start quest)
- Answer Your Personal Comlink
- Find the Head Researcher
- Travel to the Glacial Trespass Camp
- Complete “Glacial Encounters”
- Complete “Cryo Hazard”
- Complete “Cold, Hard Data”
- Upload Biome Data 7
- Travel to the Geothermal Disruption Camp
- Complete “Geothermal Encounters”
- Complete “Toxic Runoff”
- Complete “Stability Monitoring”
- Upload Biome Data
- Travel to the Sporefall Camp
- Complete “Sporefall Encounters”
- Complete “Spore Exposure”
- Complete “A Few Observations”
- Upload Biome Data
- Answer Your Personal Comlink
- Complete a Transition Encounter
- Answer Your Personal Comlink
- Explore the Base Camp
- Answer Your Personal Comlink
- Complete [MASTER 4] Orbital Core
- Return to the Head Researcher
 Questions or comments? Feel free to send me a message on Twitter


 Discord
  Email swtorista@gmail.com
 Bluesky @swtorista.com
 Reddit /u/swtorista
 Twitch Swtorista
 Youtube
 Patreon
 Twitter @swtorista