


 How to Craft
 Choose a Crew Skill
 Armormech
 Armstech
 Artifice
 Biochem
 Cybertech
 Synthweaving

 Gathering Guide
 Rare Materials Guide
 White Materials Guide
 Jawa Junk
 Augments
 Medpacs, Stims and Adrenals
 Synthweaving Crafting Tree


 Crafted Decorations
 Crafted Mounts
 Crafted Dyes
 Crafted Crystals
 Events Calendar
 Galactic Seasons
 PvP Seasons
 Bounty Event
 Double XP Event
 Feast of Prosperity
 Gree Event
 Life Day
 Nightlife Event
 Pirate Incursion Event
 Rakghoul Event
 Spring Abundance Festival
 Swoop Event

 Jedi Knight
 Jedi Consular
 Trooper
 Smuggler
 Sith Warrior
 Sith Inquisitor
 Bounty Hunter
 Imperial Agent
 Bounty Hunter
 Imperial Agent
 Jedi Consular
 Jedi Knight
 Sith Inquisitor
 Sith Warrior
 Smuggler
 Trooper
 Legacy Gear
 Lightsabers
 Double-Bladed Lightsabers
 Vibroswords
 Double-Bladed Vibroswords
 Blaster Pistols
 Blaster Rifles
 Sniper Rifles
 Blaster Cannons
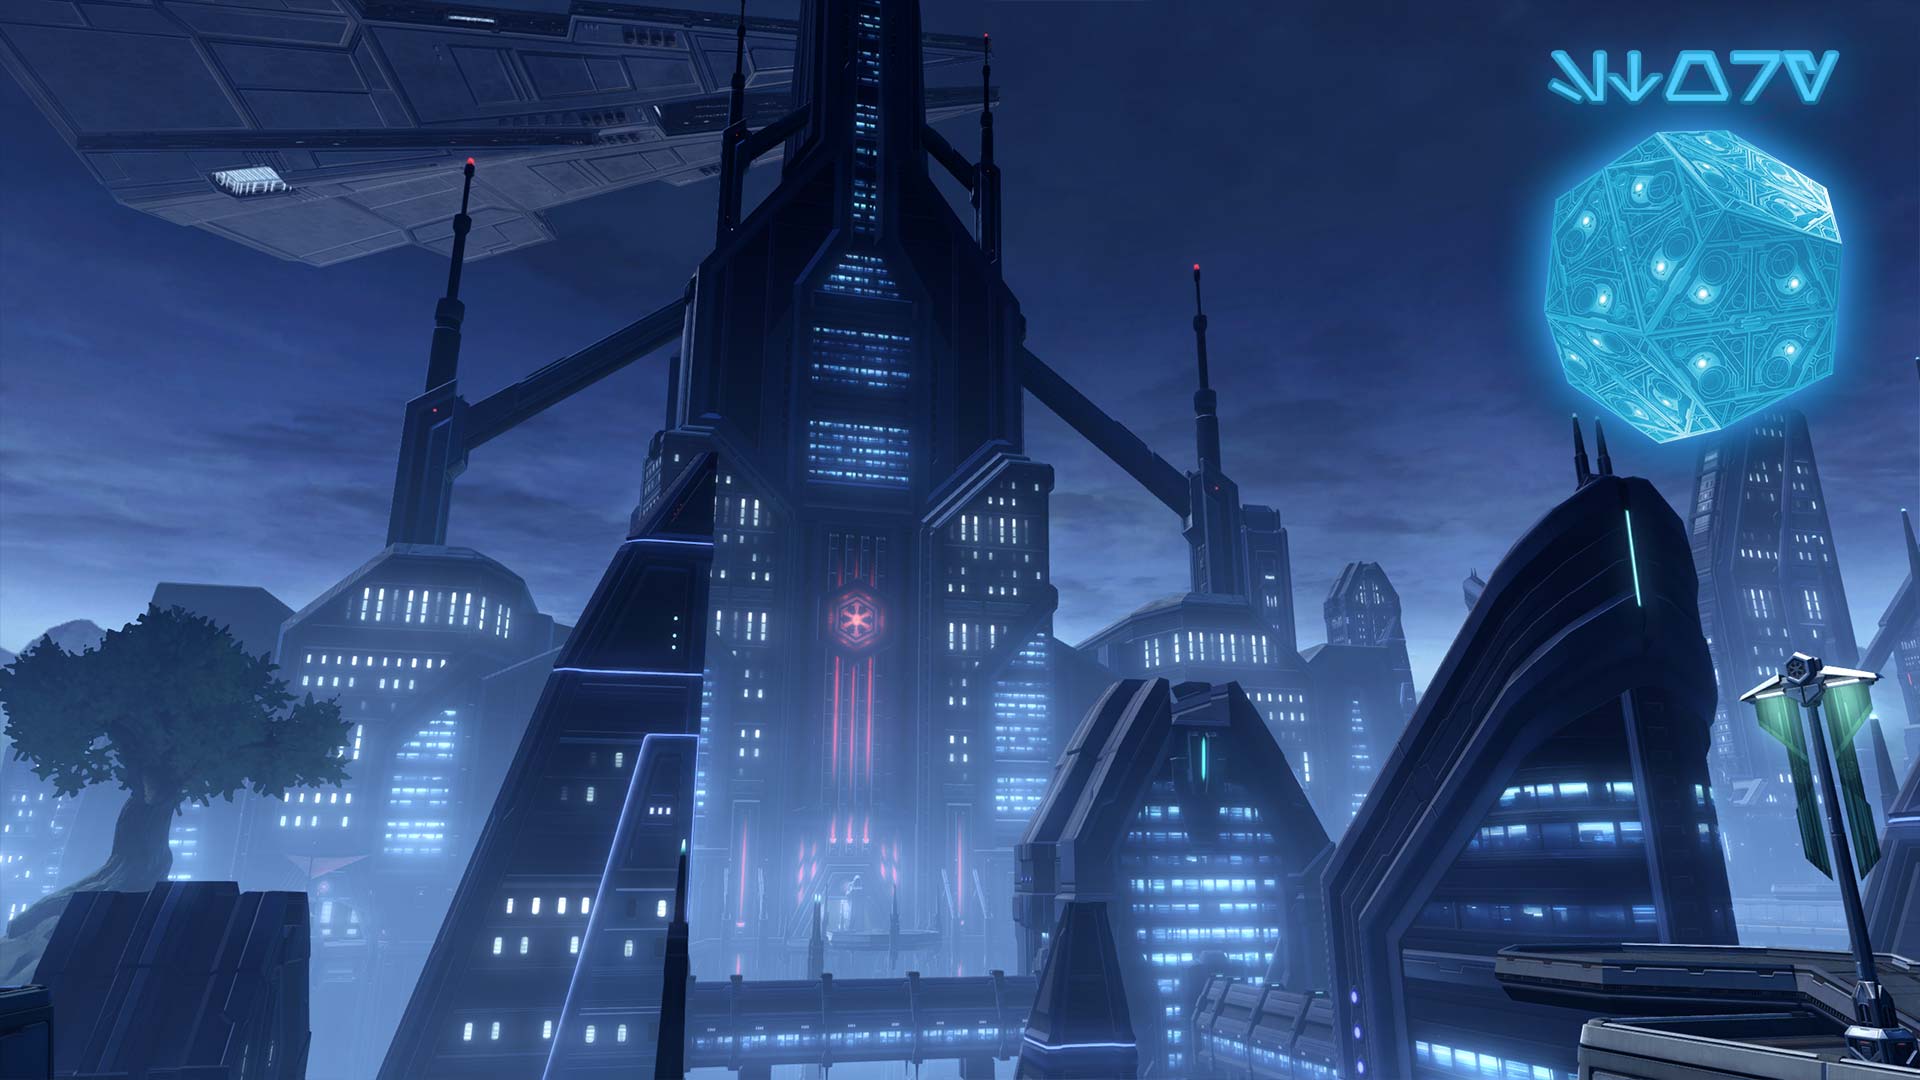
Dromund Kaas, the Seat of the Empire, is the second planet for all Imperial players.

Summary: The jungle planet Dromund Kaas is the capital world of the Sith Empire, and a place of power plays and dark secrets.
Dromund Kaas is a dark, rain-drenched jungle world and the capital planet of the Sith Empire. It is a place of power games, intrigue and subterfuge where Sith Lords, ambitious Imperial officers and others vie for prestige under the supreme will of Sith Emperor.
Discovered and colonized by the ancient Sith millenia ago, Dromund Kaas’s location was eventually lost. 1350 years ago, when the Jedi destroyed the original Sith Empire in the Great Hyperspace War, the future Sith Emperor fled with his followers into deep space and rediscovered the planet. After recolonizing it as the first world and capital of the newly reconstituted Empire, it was on Dromund Kaas that the last of the Sith layed low for more than 1300 years rebuilding their strength in secret. The headquarters of the Dark Council, the Imperial fleet and Imperial intelligence are based in Kaas City, and the planet also hosts a population of Mandalorians, the Empire’s allies.
Outside the safety of Kaas City and other sttlements, the surface of Dromund Kaas is covered in untamed, predator filled jungle and foot travel is heavily discouraged. The atmosphere has been ruined by the Emperor’s dark-side rituals and endless thunderstorms blanket the planet.
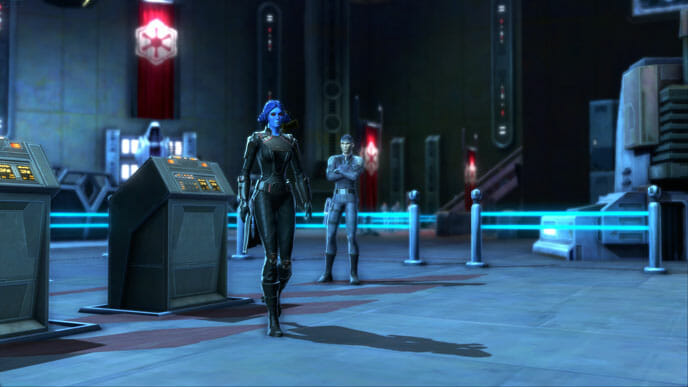
Summary: You arrive at Dromund Kaas and meet with Darth Baras, who reveals his powerful spy network and makes you his enforcer.
You arrive on Dromund Kaas, the Imperial Capital world where you are greeted by Darth Baras’s simpering slave, Sunder Ghettz in Docking Bay 0-17. After encouraging you to explore Kaas City, he asks that you tell Baras he performed his duties well. You can promise to do so, tell him you won’t, or even kill him if you wish, earning Vette’s sarcasm for not even leaving the spaceport before spilling blood on the planet. Darth Baras will forgive you if you do this, telling you it will intimidate his opponents to have such a ‘disagreeable weapon’.
In Kaas City, you enter the Imperial Citadel and seek Darth Baras in his chambers in the Sith Sanctum. He tells you that Dromund Kaas is the base for all of his most important operations and that you should consider it your new home.
Summary: You arrive at Dromund Kaas and are threatened by Darth Skotia, Lord Zash’s rival, and his trandoshan bodyguard.
You arrive at Dromund Kaas, Docking Bay 0-17 and check in at the arrivals console, where you encounter Zash’s rival, the cyborg Darth Skotia and his trandoshan bodyguard Skeesk. Skotia expresses regret that his apprentice failed to kill you and orders you to get out of his way. He cryptically asks that you tell Lord Zash that he is keeping his eye on her, knows what she is planning, and that only he has the key. You can object to his manner, but he claims you have no means to oppose him. You can ask Khem Val to eat him, but Val responds that Skotia is too much machine and would give him indigestion. Skotia and Skeesk leave and you travel to Kaas City to speak with Zash.
Summary: You arrive on Dromund Kaas and make your way to the Mandalorian Enclave to join the Great Hunt.
One way or another, you make it to Dromund Kaas and use the arrivals console in Kass Spaceport to register Mako and yourself with the Mandalorian Enclave. Mako suggests you keep a low profile to avoid local authorities and head straight to the Mandalorian Enclave in the Imperial Citadel. You take a taxi to Kaas City.
Summary: You arrive on Dromund Kaas and travel to Kaas City with Kalyio Djannis.
You and Kalyio (who has never been here before) arrive on Dromund Kaas at Docking Bay 0-17 and check in at the Spaceport arrivals console before taking a speeder to Kaas City, bound for Keeper and Imperial Intelligence.

Summary: You give a high ranking Sith Lord your impression of the Republic, based on your experiences on the Brentaal Star.
In the spaceport at Dromund Kaas, you are hailed by Lieutenant Mallohe who has an urgent message for you to deliver to the Sith Sanctum. Lord Kras is meeting with the Minister of War to make recommendations for the Empire’s next moves against the Republic. He requires a personal interview with someone involved in the recent fighting and Mallohe wants you to deliver some reports to him.
You travel to the Sith Sanctum in the Citadel in Kaas City. Lord Kras thanks you and asks for your opinion of the Republic forces you fought on the Brentaal Star. If you tell him the Republic are worthy opponents, he anticipates the glory of defeating them. If you tell him the Republic lack passion but are well organized, he admits the Sith are sometimes distracted by personal concerns. If you tell him the Jedi fight well but the men don’t, he surmises the Republic are spread too thin to defend everything with skilled fighters. If you tell him they are well equipped, he sees it as proof the Republc are secretly preparing for war, and if you tell him the Republic are useless in combat, he expects a quick victory. Either way he thanks you and leaves to study his reports. You can also be rude and refuse to do more than give him the reports.
Notes: You are only offered this mission if you first complete the Black Talon Flashpoint on veteran mode.

Summary: The landing becons around Kaas spaceport are driving the jungle beasts insane. You fix them.
Commander Rilan outside Dromund Kaas spaceport tells you that something is stirring up the beasts in the nearby jungle, threatening the route between the spaceport and Kaas City. An admiral was recently attacked and two commando teams have vanished attempting to clear the predators out. A distress call from one of the team leaders suggests that the spaceport landing beacons are emitting some kind of energy that is driving the beasts mad with aggression.
The beacons are necessary and can’t be destroyed, so you head into the jungles of the Spaceport Expanse and reroute their power manually, dealing with the beasts (Call of the Wild | Bonus Quest) as you go. You are successful, but Commander Rilan’s analysis shows that the beacons were deliberately sabotaged. He thanks you and transmits a report to Kaas City.

Summary: You deliver a report on jungle beasts attaking travellers en route to Kaas City.
There is a guard-post blocking the road from Kaas spaceport to Kaas city. Guard Kullin tells you that enough people have died enroute to the city, including VIPs, that Imperial Captain Tolto has ordered that the road be closed until the danger can be investigated. You can compliment him on protecting Imperial citizens or insult him for helping people stupid enough to wander in the jungles.
He and his team managed to get some holos and data readings of dangerous predators, but their runner is missing a leg from the experience. You agree to take the observation disks to Captain Tolto, stationed by the spaceport entrance, who is pleased and, if you are Sith, honoured by your notice. He says that he will warn people away from the path until cleanup squads can purge the jungles.

Summary: The Mandalorians are a coalition of mercenary clans who live for the glory of combat and are currently allied with the Empire against the Republic.
The Mandalorians are a loose association of mercenary clans with shared traditions who live for the challenge of combat and fight for glory against the strongest enemies they can find. United when there is need under a single leader, or Mandalore, the actions and allegiances of the Mandalorian clans have weighed heavily on Galactic events. Over 300 years ago they attacked the Republic in a conflict known as the Mandalorian Wars and were defeated by the Jedi Knight Revan.
After centuries of fragmentation, the clans would reunite once again during the Great Galactic War 40 years ago. Commanded by Mandalore the Lesser, who was secretly an Imperial puppet, they joined the battle against the Republic and caused significant damage.
Now under the rule of Mandalore the Vindicated, their Imperial allegiance is less certain. Though they continue to fight alongside the Empire, they do so for their own reasons, testing their mettle against the Republic and its Jedi Defenders. They maintain a presence and an official enclave on the Imperial capital of Dromund Kaas where they can often be found hunting the predators that stalk the untamed jungles.

Summary: You defeat the Mandalorian Deth Kregg and his followers for a reward.
At Tempest Outpost in the Riverfall Wilds, you meet a twi’lek Mandalorian hunter named Vort Norman. Vort tells you that a Mandalorian named Deth Kregg has issued a challenge. Everyone pays for the chance to take him on, and whoever succeeds takes the pot. You accept with a warning from Vort that Kregg has followers and that he once ripped the arms of a gundark when he got bored of shooting them. You proceed to his jungle encampment, defeat several of his fellow Mandalorians and use a signaling device in his tent to summon him to battle, whereupon you defeat him in single combat and earn the reward.
Notes: Like all Heroic quests, the ending conversation has been removed.

Summary: Slaves have taken key components from a lightning spire. You retrieve them and repair it before it explodes.
In the Wilds near Kaas City, Sergeant Torken has an emergency situation. Rebel slaves have mugged one of his teams in the jungle for supplies and weapons and ransacked a lightning spire for parts. The lighting spires were designed by Renigus Wight, a Commander in the Imperial Reclamation Service until 49 of his men were wiped out by a single lightning strike.
He created the spires to shield future Imperials as well as to power Kaas City. Unfortunately with the parts gone, this particular spire is building up dangerous amounts of energy; enough to destroy half of Kaas City should it explode. Torken’s men have either scattered or been killed by the slaves while trying to recover the parts and so he asks for your help.
You kill slaves near their riverside camp in the Riverfell Wilds and recover the spire modulator, spire overload shield and spire capacitor. You then head to the spire itself and repair it before it goes critical. Torken was about to call in evacuation orders for Kaas City and is greatly relieved. He opines that the rebels will think twice before attacking Imperial property again.

Summary: You clear out jungle beasts for an Imperial bounty.
In a small camp near Kaas City, Sergeant Molcarrus, Third Recon Company, is in charge of protecting Imperial slaves and scientists working in the aechaeological camps around Kaas City. Unfortunately jungle beasts have been eating his men. His requests for direct assistance have gone unanswered and Kaas City have merely placed a bounty on the creatures. Two Mandalorians responded and were promptly eaten.
You agree to help and move through the jungle collecting vine cat pelts and yozusk horns. You take them to Administrator Reese is Kaas City, who is less than happy that you brought rotting animal parts into her office but pays you the promised bounty. You can also tell her to send help when requested in the future instead of leaving the camps waiting. Molcarrus confirms that your efforts have thinned the predator population considerably.

Summary: You hunt down some Republic spies and kill them.
At a camp near Kaas City, Archaeologist Shellaster tells you about some recent trouble he has had with a crew of spacers. Apparently they wanted new uniforms so he sent them to the next camp over where Director Nashal often boasts of his superior equipment. The spacers sound suspicious so you follow them to the camp only to find the Imperial occupants massacred.
The lone survivor, Research Assistant Starforth, tells you the spacers attacked them while they were offering assistance. He believes they are Republic spies. Apparently they ransacked the camp for supplies and uniforms and stole identification from the Imperial bodies. They also found a map sketching out a hidden cave at the bottom of the nearby waterfall called Jungoran Maw.
You climb down to the base of the waterfall and enter the cave, where you kill the Republic troops and recover the uniforms, IDs and supplies for the Empire. Shellaster promises to spread word of your assistance and asks you not to tell his supervisor about the whole debacle. Starforth promises to spread word of your heroics.

Summary: Kaas City is the political and military heart of the Empire.
Kaas City is the political and military heart of the Empire, founded over 1300 years ago by the Sith Emperor himself who is believed to make it his home. Over the centuries its population has grown into the millions – both Imperials and slaves – and it has become both a thriving city and an impenetrable fortress. At its heart stands the imposing Citadel, home to the Sith Sanctum where Lords and Darths scheme for power and dictate the fate of the Empire. The Ministries of War, Intelligence and Logistics are also headquartered here and the Mandalorians, chief allies to the Empire, maintain an important enclave.
Summary: You oversee a prisoner transfer for Darth Baras, who has captured a Republic spy. He has sensed a grave threat to his spy network and begins to torture the captive, who has recently unmasked one of his most deeply embedded agents, for information.
He grants you the freedom to do as you please with anyone, ally or foe so long as you meet his directives and explains that he has painstakingly constructed a vast network of spies and agents embedded in both the Republic and the Sith Empire. Even the Jedi have been infiltrated. You are to be his enforcer, defeating his enemies, intimidating his rivals and protecting his interests.
He sends you to Kaas City Cargo Port B7, to oversee a prisoner transfer. He has no knowledge of incoming complications but believes it prudent to always believe one is being plotted against. You go to the port and meet Commander Lanklyn, who believes Baras to be overly paranoid in sending you.
However, it turns out Baras’s instincts were right, as the transfer is ambushed by two separate hired guns, a human named Slestack and a Houk named TuMarr. They clearly hate each other and you can manipulate them with well-chosen insults into fighting each other to the death while you leave with the cargo. You can also simply kill them yourself or persuade them to leave by threatening to eat them! Either way the prisoner is secured.
Baras has sensed the existence of a mysterious threat that could jeopardize and expose his network of spies, though he doesn’t know its nature. The delivered Republic agent, Grik Sonosan, was captured while investigating one of Baras’s most deeply embedded spies on Nar Shadaa, a man who should have been completely untraceable.
While Baras tortures him to discover the source of his intelligence, he sends you to the Unfinished Colossus, a gigantic statue in the Dromund Kaas jungle that is now the scene of a large scale slave revolt, to meet with a Commander Pritch and offer your assistance.
Summary: The Huntmaster informs you that too many people have arrived to claim the same spot in the Great Hunt and that you must compete with one another by taking down bounties on Dromund Kaas.
Crysta Markon, a human woman, welcomes you to the Great Hunt and is particularly pleased if you are and Mako make an all-female team. She also flirts with you if you are male. She offers her condolences for you having to put up with the foulness of Hutta and gets down to business.
Apparantly, there has been a mix-up; only one spot remains open in the Great Hunt but over three dozen hunters have sponsorships. She tells you to speak with the Huntmaster in the adjoining room who will explain the situation to you and the other hunters.
The Huntmaster, a male wookie who won his Great Hunt during the Great Galactic War, and his assistant Lek tell you that you must compete with one another by each taking down three bounties on Dromund Kaas. Anyone who gets all three will earn a spot in a final melee where you will fight one another for the final place. One hunter, Q’kal, leaves immediately, believing that hunting under the nose of the Imperial authorities is too dangerous.
You return to Crystal, who will be your handler for the duration.

Summary: Darth Jadus is the cold and brilliant Dark Council member who oversees Imperial Intelligence.
Darth Jadus is the Dark Council member most removed from the squabbles and power plays of the others. He believes in ‘the democratization of fear’, that hatred and Sith philosophy ought to be implanted in every being, no matter how lowly. Consequently he involves himself in the day to day runnings of the Empire and its citizenry far more than his peers, concentrating his influence through Imperial Intelligence. His servants are always non-sith uplifted to greatness and they possess a religious devotion to him.
As a man, he is an enigma, cold, ruthless and intelligent. He shows no emotion, even whilst engaging in the most calculated cruelty, and whatever dark passions may guide him can only be guessed at. In contrast to some of his peers, he believes in ability first and allows aliens to serve him freely. Many, including Imperial Intelligence, consider him second in power only to the Emperor.

Summary: You assist Imperial Intelligence with a cryptic series of deliveries.
Just inside the Kaas City entrance, you meet an Imperial Intelligence operative code named ‘Minder 20’. He cryptically tells you that as a new face on Dromund Kaas, there is a small window in which you can be useful to him. On his directions you meet a man named Manda in the Nexus Room cantina, telling him the ‘Lord of Sorrow’ sent you. Manda gives you a gambling chip and tells you to give it to a Chiss security officer standing by the bank. The Chiss gives you a package to give to an MK droid, warning you not to look at it. You give the package to MK-RU elsewhere in the city, who opines that if the Republic have not noticed this obvious sequence of events, they are not paying attention.

Summary: You disarm some terrorist bombs in Kaas City.
The mission board in Kaas City informs you that terrorists have targeted the plaza with bombs. Patrols have deactivated many of them but some remain. You search the area for bombs and take any you find to a bomb disposal unit to be destroyed. This done you return to the mission board for your reward.

Summary: Not realizing the Sith were killing them for sport, a Hunter assisted in the tagging of several Kaas City civilians. You help get him off the hook.
In Kaas City, an agitated man named Weng Wrightsyn tells you of a series of brutal murders. Seven Imperial subjects have been killed. Weng saw a bounty hunter following random people and tagging them with a strange device but the authorities are slow and won’t act without proof.
You talk to the hunter, Renegin, at the Mandalorian enclave who claims that a group of Sith hired him to organize ‘games’ for them. He tagged citizens on their behest and found out only later that the Sith were hunting them for sport. Refusing to take the blame for murders he didn’t commit, he asks for your help. He wants you to either tag Wrightsyn so that the Sith will eliminate him and his accusations, or tag some Sith acolytes in the city so that the Sith will attack them instead. Attacking Sith openly is a major crime even among Sith, and if you tag the acolytes, the Sith murderers are caught and executed.
If you tag Weng, Renegin expresses regret at having gotten him killed, but is pleased to be free of the accusations. If you tagged the Sith acolytes, Renegin thanks you profusely for your assistance, pleased that he could help make things right.

Summary: You help Darth Arctis recover some relics from his rival, Darth Hadra.
Walking the Initiate’s path near Kaas City, you find a recon droid. It relays that the Dark Council member Darth Hadra, administrator of Dromund Kaas, has laid claim to a trove of relics in a nearby shrine. Her rival on the council, Darth Arctis, has challanged her claim, believing that as head of the Sphere of Ancient Knowledge, Sith relics are his domain. Hadra has fortified her position with soldiers and acolytes. You enter her encampment South of Kaas City and cut through her forces, including a Lord Inath, looting them and searching containers for the stolen relics. Finally you seek her personal stash in order to lure out her apprentice, Lord Arosh, whom you kill along with her acolyte. That should teach Darth Hadra a lesson for defying the Empire!

Summary: A large number of slaves working on a giant Sith statue have rebelled and taken up arms in the nearby jungle.
In a bid to impress his master, Darth Vowrawn, the Sith Lord Qet shipped several hundred slaves from offworld to build a colossal statue in his honour, in the Dromund Kaas jungles near Kaas City. Unfortunately for the Empire, the slaves have organized the largest rebellion in Dromund Kaas history and are thriving in the nearby jungle. Although Imperial forces have contained the rebellion from reaching Kaas City, the Dark Council prefers to let it continue as a warning to overambitious Sith.

Summary: You prevent the rebelling slaves at the Unfinished Collusus from exposing Darth Baras’s involvement in the revolt, which he encouraged in order to embarass Darth Vowrawn for whom the Collosus is being constructed.
Commander Pritch informs you that the slave revolt at the Unfinished Colossus began when Darth Vowrawn’s apprentice, Lord Qet, brought several hundred slaves from off-world in order to build a colossal statue to his master. It seems that Darth Baras secretly arranged the revolt to discredit Vowrawn and the slaves are attempting to blackmail him with this information. Baras wants you to kill the slave captains and solve the problem, but Pritch does offer an alternative solution: some of the slave Captains are former criminals and have been selling their fellow slaves on the black market for a profit. If you can find the proof, then Pritch will be able to blackmail the Captains to keep quiet in turn.
You find the slave captains milling about by the Unfinished Colossus and either kill enough of them to sap the resolve of the others, or loot their footlockers and steal a slave Captain’s log. With or without the logs, you return to Pritch. He is suitably impressed and you return to Darth Baras.
Summary: You break into Darth Skotia’s secret base and steal a tablet that he is using to control his Trandoshan bodyguards.
You travel to Kaas City and report to Lord Zash inside the Sith Sanctum. She is annoyed and worried about Skotia, who feels that she goes where she doesn’t belong and has made every effort to obstruct her business on Dromund Kaas ever since she was an apprentice. Since you can’t begin the search for Tulak Hord’s power with Skotia breathing down your necks, someone has to kill him. Since Zash can’t afford the attention that comes with such a brazen power play, and since no-one would suspect a new apprentice capable of killing a Darth, that someone is you. Although you are doing the dirty work, she assures you if she rises in power, so will you.
Zash has a plan in place that will ensure Skotia’s destruction, and believes he is hiding an important relic near the Unfinished Colossas, a giant statue in the jungle that is the site of a large-scale slave revolt. To aid your search for this relic, you loot fragments of archaeological plans from slave engineers in the Colossus construction site. When you have enough for Zash to piece together the layout of the area, you contact her via holocomm and she uses the plans to detect a hidden underground base beneath the Colossus.
She explains that the tablet you seek is the symbol of leadership of an obscure trandoshan cult. The trandoshans believe it was a gift from their deity, the Scorekeeper. Whoever holds the tablet exerts control over Skotia’s trandoshan bodyguards. She warns you that the plans suggest Skotia’s apprentices are guarding his base and suggests you kill them.
You move through the Colossus Construction Access Tunnel near the base of the statue and into Darth Skotia’s secret bunker base. Fighting off his amy-sized forces (Bunker Busting | Bonus Quest), you disable base security by disabling a security station in the main chamber, killing Apprentice Irex, and also destroying three monitoring stations spread throughout the base, killing Apprentices Satik, Dumat and Quilon in the process. You now enter the Reliquary where you are confronted by and defeat Lord Ogathu, who guards the tablet which you retrieve.
Summary: You complete the first of your Dromund Kaas bounties by rescuing a kidnapped Republic nobleman.
Crystal Markon sets you the first of your three Dromund Kaas bounties, one she wouldn’t wish on anybody. In fact, one so difficult that she correctly percieves you must have powerful Mandalorian enemies. The target is a Republic noble called Altaca who was captured during an Imperial raid and mistakenly sold into slavery instead of ransomed back. He, and his fellow slaves, were ordered to construct a huge statue in the jungle, but they rebelled and took over the construction site. On behalf of his family, you are to go there and extract him, alive if possible, but dead if necessary as they will still pay half for his corpse. In order to help you take bounties alive, Crystal gives you an S86k carbonite gun with which you can freeze proespective targets for transport.
You arrive at the Unfinished Colossus and fight your way past the rebelling slave forces in the former construction site (Rebel Scum | Bonus Quest). Entering one of the tents in the slave camp, you find a datapad with a holorecording of an Imperial noble named Lady Dak-Ah. It appears to be a love letter to your target, Altaca. It looks like she has already sent someone before you to extract him from the camp and that they are both posing as brother and sister nobles, living it up in Kaas City and attending parties at the Nexus Room Cantina, which is your next stop.
On your way to the private room in the back of the Nexus Room Cantina, you are waylaid by an Imperial Sergeant Wallax. Wallax demands you hand over your weapons and as you argue, Taro Blood contacts him via holocom and gives away his allegiance by asking why you are still alive. His own squad begin to doubt the veracity of his actions and depending on what you say, may leave him to fight you alone. Either way you kill him and move on.
You find ‘Lord and Lady Dak-Ah’ in the private lounge and confront them with the facts of your bounty contract. Altaca, a useless fop, is shocked that his family are looking for him and realises he has been tricked into remaining on Dromund Kaas by Lady Dak-Ah, who has kept him as a pet. Lady Dak-Ah offers to make up the difference in bounty value if you kill him for her.
You have three options:
Agree and murder him, pocketing what his corpse is worth to his family plus Lady Dak-Ah’s payment.
Stick to your principles, freeze him and take him back alive. over her objections.
Kill Lady Dak-Ah herself before freezing Altaca. If you take this option he is actually upset, remembering how mysterious she seemed when he met her on Alderaan.
If he survives, Altaca later sends you a message from Alderaan, thanking you for sending him home. You return to the Mandalorian Enclave.
Summary: After meeting with Keeper and Darth Jadus, head of Intelligence and being assigned your personal handler, Watcher Two, You head for the Unfinished Colossus on the trail of an underground dissident movement and recover evidence.
Inside the headquarters of Imperial Intelligence, you find Keeper arguing with Darth Jadus, the Dark Council member who oversees Imperial Intelligence. It is clear no love is lost between them and that both see the agency as their domain. Jadus, who radiates dark power, is pleased with your work on Hutta and orders Keeper to use you for an upcoming mission before leaving. Keeper warns you that high ranking Sith connections are dangerous. He sends you to some nearby lockers where you pick up a vial of SLV-16 Serum.
In his office, Keeper debriefs you on your mission to Hutta. If you were either too violent or took risks to avoid violence altogether, he criticizes your performance. If you took the professional middle path, he is impressed. He asks why you joined Imperial Intelligence in the first place. You can reply either that you are an ardent patriot, in which case he calls you idealistic and implies you will be dissapointed, that you wanted some fun, or that you’d rather keep your reasons to yourself. He tells you Intelligence exists to do the jobs no-one else will and warns you not to expect glamorous work. He gives you your next assignment.
A cell of radical terrorists has been located in Kaas City and a major attack is believed imminent. Their plans must be discerned. All that is known is that they are Imperial citizens and not anarchists. Kalyio will accompany you and you are assigned a handler and personal mission coordinator, Watcher Two, who is the product of generations of selective breeding for intellectual abilities. She is impressed with your performance so far and looks forward to working with you. You can flirt with her if you are male. Your first lead on the terrorists is to be found at the Unfinished Colossus, the site of a major slave revolt in the Dromund Kaas jungles.
Before you leave, you speak with four operatives in the building to learn more about Imperial Intelligence (Understanding Intelligence | Bonus Quest).
Watcher Two is reluctant to share any details about herself but reveals that she enjoys her work and dislikes getting close to her agents as they usually die. She also warns you not to get between Keeper and Darth Jadus.
Lodenth Kashar, in the briefing room, seems out of place as a Duros working for the alien-hating Empire. He has no official designation but works as an analyst and alien profiler. He is the only alien assigned as a headquarters operative (there are more in the field) and believes it is incumbent on aliens (including you, if you are one) to meet a higher standard of loyalty in order to prove their worth. Kalyio considers him a bootlicker if she is with you.
Fixer Twelve is repairing some consoles. A seasoned veteran who used to be a field agent until he was wounded by a Jedi, now he assists with the maintenance of headquarters. He believes that serving the Sith and defeating the Empire’s enemies is the ultimate goal of all Imperial citizens and that loyalty to central authority is the ultimate virtue.
Watcher Three is a nervous junior operative of 6 months experience who was recruited from the Ministry of Logistics, where he managed HoloNet security. He explains the various designations used by Intelligence and warns you that when he first arrived, Keeper and Watcher Two were interrogating his predecessor for wanting to resign, and goes back to his work.
You leave, bound for the Unfinished Colossus.
When you arrive at the Imperial camp overlooking the Unfinished Colossus, you are contacted by Watcher Two and Lodenth Kashar, the alien analyst you met at HQ. Your job is to extract a Rodian slave, Jurithus, from the rebel camp. He was once owned by an anti-government radical who used him to carry messages to other dissidents. An overenthusiastic agent killed the owner, so Jurithus is your best source of information. The syrum you collected from HQ will allow you to interrogate one of the slave leaders and discern his location.
You cross the bridge linking the Imperial camp to the slave-held former Construction Site and fight your way to one of the slave leaders who is esconsed in a protected bunker. After taking out his guards and overpowering him, you inject him with the truth syrum. He enters a trance-like state and after some careful questioning, reveals that Jurithus is dead, killed fighting at the foot of the colossus. and that his corpse should carry the information you need. Before you go, you can murder the slave leader, convince him to surrender himself to Imperial troops, or simply leave him alone to wait for the syrum to wear off.
You fight your way past even more of the rebelling slaves to reach and loot Jurithus’s corpse, where you find an encrypted datapad which you upload to Imperial Intelligence. Lodenth Kashar tells you that the translation will take time, and puts you through to Keeper who relays a command to meet Darth Jadus in his chambers. You return to Kaas City.
Summary: You help Lord Drowl test a bioweapon on some rebelling slaves.
You meet Lord Drowl in a tent near the Unfinished Colossus where he has been sent to suppress the nearby slave rebellion. He plans to use the situation to test a toxic bioweapon called Quell, believing the agonizing death it causes will sap the remaining slaves of their will to resist. He tells you to see his assistant, Sergeant Slarin for a supply of the toxin. Slarin is not happy with the experiment, deeming it pointless and explaining that studies show increased suffering has no impact on the speed of surrender. Drowl is simply a sadist. Slarin feels that this trait is impeding the efficiency of the operation and he wants the assignment over as quickly as possible so that he may be reassigned to more important work. He asks you to up Drowl’s dosage in order to kill the slaves more quickly.
Whichever dosage you use, you move through the slave camps, injecting the quell into the four main water filtration units and destroying the slaves’ reserve water tanks. You also kill many slave workers to prevent the filtration system’s repair (The Direct Approach | Bonus Quest). If you used his toxin unaltered, Lord Drowl is exhilarated by Quell’s effects on both victims and survivors and says that he will recommend your services highly. If you used Sergeant Slarin’s dosage, he is very disappointed and confused by the results. Slarin mentions that Drowl is working on a new version of Quell.
Summary: You investigate rumours of a murderous cult within the rebelling slave population, and possibly recruit it for the Empire.
Ensign Corian Shye and others have noticed strange behavior among the rebelling slaves near the Unfinished Colossus; apparently some of them are ritualistically killing the others; coming by night, stabbing their fellow slaves and painting themselves in blood. High Command hopes a civil war can be encouraged between the slaves. Ensign Shye wants you to catch the cultists, take them down, and discover their motives.
You cut a bloody path through the slave-controlled construction site (Put the Rebels to Rest | Bonus Quest) and take a datapad from the body of one of the murderers which indicates a meeting point. You light a fire at the co-ordinates and Cult Leader Traga un-Vhol appears, calling himself leader of ‘the Unchained’. If you are Sith he is deferential and honoured by your presence. Believing that only Sith possess true freedom, he and his cult aspire to their strength through acts of bloodshed and murder of the weak. Although not force-sensitive, he believes that with your approval Imperial Command will take note and elevate him and his followers to a position of power as champions of the dark side. You can agree to take a datapad containing his proposal to the Empire, or you can express disgust at his actions and refuse.
If you refuse to take the datapad, Traga is shocked and disappointed. At this point you can convince him to surrender to the Empire, abandon his primative savagry and start learning the true Sith philosophy, or simply express your indifference towards him.
If you take the datapad, You can suggest to Ensign Shye that the Imperials make use of the cult. Otherwise Shye tells you another way will be found to disrupt the slave revolt, possibly an orbital strike if things get out of hand. Traga chooses to remain with the slaves, killing and gaining strength while he awaits the Empire’s word.

Summary: You blow up some drills captured by the rebel slaves and stop them from toppling the Unfinished Collosus.
At the Unfinished Colossus, you meet the Rattataki Mandalorian mercenary Vol Kolla. Lord Qet, who built the statue and whose slaves have revolted, has hired him to quietly put down the rebellion so he can save face. The slaves have captured several giant industrial drills with which they plan to topple the statue. Unfortunately they killed Vol Kolla’s best men who were sent in with explosives to destroy the drills. You fight through the slaves in the construction site and take a lift down into the Nalis Quarry where you recover the explosives and destroy the drills, fighting off waves of slaves until they detonate. Vol Kolla pays you for your trouble and expresses a desire to leave Dromund Kaas and find more men.
Notes: Like all Heroic quests, the ending conversation has been removed.
Summary: You root out and destroy some Kubaz Republic spies.
At the small Imperial Encampment off the Initiates Path, you meet Captain Jeelg with Imperial Reconnaissance. Jeelg believed that his men were plotting against him and unfortunately killed them all before realising they intended to throw a surprise party for his promotion. He wants to redeem himself by proving his theory that Kubaz Republic spies are cloaked in the jungle. These spies become visible only when lightning disrupts their stealth technology.
Skeptical, you enter the nearby jungle clearing and do indeed find Kubaz spies near the ruins of a Sith monument known as the Shadow Cairn. You kill some of their spotters (Clearing the Kubas | Bonus Quest) and plant lightning rods on handy boulders to attract discharges that reveal the spies. You kill them until you manage to loot a Kubaz holocommunicator. Captain Jeelg is delighted that he can prove to his superiors that his paranoia is justified afterall.
Summary: You meet with Darth Jadus, who tells you of his philosophy that fear and hatred must be instilled in every single citizen. He is leaving on his flagship, the Dominator, and expects you to crush the dissident movement before he returns.
You travel to the Sith Sanctum in Kaas City and meet with Darth Jadus. He is surrounded by brainwashed servants. After creepily demanding that you feel his power and allow it to corrupt you, he explains that unlike the majority of Sith who hold themselves above the mundane business of the Empire, he involves himself, believing that Sith philosophy, terror and hatred should be cultivated in every single citizen. He has chosen you personally to stamp out the dissident movement that threatens this grand plan because he believes your loyalty is unimpeached.
He warns you that people in the highest level of government sympathise with the dissidents and to trust no-one around you, including your own superiors. He is leaving on his flagship, the Dominator, with over a thousand dignitaries, diplomats and slaves, to show the galaxy his vision and expects you to have dealt with the dissidents when he returns. He warns you that he is eternal and his power over you is absolute. If you argue, he nearly kills you with force lightning as punishment.
Watcher Two contacts you via holocomm.
Summary: You help a Sith Lord summon and bind a sithspawn monster.
At the Wall, a giant fortification in the Dromund Kaas jungle, you meet Lord Shalath who sent her apprentices on a mission from which they didn’t return. Apparently they were to perform some kind of dark side ritual to summon a Sithspawn (a terrible creature created by Sith alchemy) so that she could bind it. You seek out the bodies of the fallen apprentices in the Malignant Bog and recover the runes of victory, power, strength, passion and freedom necessary for the ritual.
Passing through an ancient archway, you enter the Cave of Shadows where you approach a hidden altar. You activate the binding artifact within by meditating on the runes in the order they appear in the Sith code. Finally, you place the runes upon the altar to summon the Sithspawn which smashes out of a stone door behind the altar. You subdue it and return to Lord Shalath, who is pleased.
Notes: Like all Heroic quests, the ending conversation has been removed.

Summary: You are asked to investigate the Order of Revan, a cult within Imperial society. You travel to the Revanite compound and begin the trials of initiation, hoping to earn the right to meet with their master and expose him.
Near The Wall, a large defensive emplacement in the Dromund Kaas jungle, you are approached by Sandor, emissary of Darth Charnus. Sandor requires your assistance to investigate a dangerous cult, the Order of Revan, that has pervaded every stratum of Imperial society.
Sandor and his master have spent years painstakingly uncovering the Revanites and have exposed many. He wishes you to infiltrate the cult and uncover the identity of the Revanite leader. Sandor tells you the location of the Revanites’ secret compound and gives you a token that will mark you as a friend and hopeful initiate. From there you must earn their trust.
You travel through the deep jungle to the Revanite compound, where cult member Dzoun greets you and asks if you are lost. When you show him the token, he considers it proof that someone had great faith in you and welcomes you as an initiate. He tells you that here in the compound the faithful leave their duties to the Empire behind and immerse themselves in the mysteries of Revan. Acorrding to him, the Empire attempts to bury Revan as a minor historical figure out of fear of his influence, while the Revanite Master has preversed his true history so that it may be studied. Although still believing in the Empire’s ways, the Order of Revan seeks a more complex path to power and knowledge. Revan mastered both the light and the dark, war and peace and the Revanites seek to follow in his footsteps.
Dzoun bids you take part in a series of rituals designed to retrace Revan’s path to greatness. If you learn their ways and become a member of the order, you can meet with the master and expose them. First, you speak to Elder Revanite Jhorval.

Summary: The members of this secret Order worship the ancient force user Revan, a controversial and pivitol figure in both Jedi and Sith history. It is several hundred strong and comprises military officers, mercenaries and even powerful Sith meeting in secret..
The Order of Revan worships an ancient force user named Revan. As a young Jedi, Revan was a powerful and charismatic warrior who led the Republic to victory in the Mandalorian wars more than three centuries ago. Turning to the dark side along with his apprentice, Darth Malek, he became Darth Revan, a Sith who trained a hundred dark apprentices and launched his own war of conquest against the Republic. Eventually both Jedi and Sith turned against him but instead of being destroyed, Revan was reborn. Stripped of his power and memory, he was controversially retrained as a Jedi before finding his own path and destroying both Jedi and Sith in his travels. It is believed that he eventually journeyed to Dromund Kaas where he met his end.
The Order itself is believed to be several hundred strong, having recruited military officers, mercenaries and even powerful Sith Lords into its ranks. Low status or alien birth is no obstacle to membership, but personal power and fervor are everything. Some Revanites devote their lives to the cult’s teachings and exist outside of mainstream Imperial society; others study and meet in secret while maintaining ordinary lives. Originally the cult met openly in Kaas City, but as suspicions arose regarding its loyalty to the Emperor, it was forced to relocate and eventually built its current sanctuary deep in the Dromund Kaas jungles.
Summary: You undergo a trial of life and death, and receive a vision of Revan.
Elder Revanaite Jhorval asks if you are willing to die for the order. Whatever you say, he tells you that death freed Revan, as it unbound him from all oaths and promises. You must take part in a trial of death and be reborn, washing away your mistakes and promises both. You travel to a sacred cave in the nearby jungle and meditate. Suddenly lightning flashes through the cave and a vision of Revan appears before you! You fall unconscious for a time. Back in the compound, Elder Jhorval tells you that your past life is dead, buried in the cave and that you have been made anew. He tells you to savour the moment of rebirth and that your obligations to your past life no-longer burden you.
Next you speak with the Sith Ladra.

Summary: Lord Grathan is a renegade Sith Lord who has bunkered inside his fortified mansion.
Lord Grathan a renegade Sith Lord who has declared himself the thirteenth Dark Council member. Although his claim has not been widely recognized, he controls a substantial private army on Dromund Kaas and has ensconced himself in his heavily fortified mansion. His scientists continue to develop new cybernetics, droid, and weapon technologies which they produce at a frightening rate.
Summary: You are set the ‘Trial of the Past’, which in your case means retrieving Darth Revan’s mask from a rogue Sith Lord. You steal Darth Revan’s mask from Lord Grathan’s Estate and bring it back to the Order.
Ladra was once the personal assassin of a Sith Lord until she joined the Order of Revan. Now she kills for them, executing intruders and heretics but also guiding initiates. She sets you the ‘Trial of the Past’. Your task is nothing less than the recovery of Darth Revan’s legendary mask.
Over three centuries earlier, Revan, then known as the Revanchist, served as the charismatic leader of a band of Jedi crusaders during the Mandalorian wars. During the war, the Revanchists discovered the planet Cathar abandoned, the site of a massacre perpetrated by the Mandalorians. A force vision revealed that a single Mandalorian objected, choosing to stand with the Cathar and be killed. The Revanchist claimed her fallen mask from where it lay and re-named himself Revan.
The mask has somehow made its way to the private collection of the rogue Sith of Lord Grathan, Lada’s former master, and she wants you to steal it. You speak with Torrun, the Revanite curator, who tells you the exact location of the mask in Grathan’s artifact vault on the second level of the main compound. However, he also expresses concern about Ladra, whom he finds obsessed and unstable. He believes that Revan represents both light and dark, Sith and Jedi. Were the mask to fall into Ladra’s hands, he believes she would use it to corrupt Revan’s legacy and teach that he was only dark. He asks you to return it to him instead so that he may preserve the context in which it stands and keep it safe among a few trusted scholars.”
Fighting your way past Grathan’s substantial private army, you enter his complex and break into his vault, where you find several artifacts including the mask of Revan in pride of place. As you take the mask from its pedastal you trigger an alarm and are confronted by Grathan’s Relic Warden and Relic Guardians whom you kill. You fight your way back out of the manor and return to the Revanite camp.
If you return the mask to Terrun, he tells you he can feel Revan’s dark power and understands why Ladra was obsessed with it. He plans to secure it lest its darkness corrupt the Order’s perception of Revan, and until he feels ready to study it. If you return the mask to Ladra, she rejoices both in the damage you caused in Grathan’s Estate and the return of the mask, saying it will guide the Revanites forevermore. Torrun later confirms that she is building a shrine around it.

Summary: Working for Baras, you infiltrate the rogue Sith Lord Grathan’s manor and attempt to kill his son. His wife suggests you kill Lord Grathan instead and allow his son to assume his identity. You decide.
Returning to Darth Baras from the Unfinished Collosus, you find him exasperated. His prisoner is proving extremely difficult to break despite Baras’ considerable skill at torture, and has told him nothing. He sends you to meet with his apprentice Ba’al who is working undercover in the compound of rogue Sith Lord Grathan, trying to discover his weaknesses. Today he sent the ‘success’ signal and Baras wants you to find out what he knows. Baras recognizes a natural rivalry between you and Ba’al but asks that you tolerate Ba’al long enough to follow his instructions and deal with Lord Grathan.
Fighting or sneaking your way into the grounds of Lord Grathan’s manor, you meet with Apprentice Ba’al in the warehouse offices. Ba’al immediately insults you and calls you a senseless savage. Through his barely contained distaste, Ba’al tells you that Baras wants to show Grathan that he can be reached, and Ba’al has found the perfect method: kill his son and only child Beelzlit whom he has been keeping secret to protect.
You enter the main compound and destroy the elevator, main room and hallway monitoring stations before entering the Grathan family quarters on level 2. You find both Lady Cellvanta Grathan and Beelzlit present, both trained Sith. After defeating them both, Lady Grathan offers you an alternative: Instead of killing Beelzlit, she suggests that you kill Lord Grathan himself. Having married him for his power, she has wanted him dead for some time but is not strong enough to kill him. As Grathan was almost beheaded many years ago and remains concealed behind a mask in order to live, this presents the opportunity for Beelzit to pose as his father with Cellvanta ruling through him.
You may kill them both, in which case you are finished here, or you may agree to the plan. If you agree, you take a passcard from Cellvanta and use it to enter Lord Grathan’s private chambers on the second level of the compound and confront him. He senses his wife’s duplicity. Boasting about his power and mocking Lord Baras for being a passive observer he brands you a peon, dying for someone else’s cause. You kill him in combat and return to Cellvanta and Beelzlit, who are excited to take the mantle of power. If you like, you can sleep with Cellvanta before leaving (you can also creepily force Vette to watch).
When you return to Ba’al, he tells you that plans to kill you out of jealousy and to cover up your activities so he can retain his cover. He uses his position to summon Grathan’s guards against you. You kill them all, including Ba’al himself and return to Kaas City to speak with Darth Baras.

Summary: You complete your second Dromund Kaas bounty by capturing or killing the Sith daughter of an Imperial Admiral who has disgraced the family by joining Lord Grathan.
Apparantly the competition to enter the Great Hunt is fierce, several rivals have been knocked out already. Crystal knows little about your second bounty, only that it is a classified, red-flag request from an Imperial Admiral Faabaal and probably another attempt by Taro Blood to stack the deck against you. You travel to Fraabaal’s nearby office in Kaas City for the details.
His Secretary, the pompous Lieutenant Petrak initially refuses to allow you entry based on your appearance until Fraabaal emerges and disciplines him.
Admiral Fraabaal speaks of his faith in your abilities and gets right down to business; he wants you to kill his own daughter Vereta who was trained to be Sith, but is apprenticed to the rogue and disgraced Lord Grathan. Given the Sith love of extended feuds and clensings, he fears the consequences to his family should Grathan’s compound be raided and his daughter be discovered.
He believes a lone infiltrator can navigate Grathan’s heavily guarded compound and eliminate her discretely with no sign of his involvement. Mako remarks that most of Grathan’s top people also have prices on their heads and suggets you track them down while you are there for extra money you can use to prepare for the big melee. You head for The Wall, a defensive fortification near Grathan’s manor.
You break into Lord Grathan’s estate and enter the Central Compound, Level 2, where you kill three of his Estate Overlords for extra bounties (Grathan Bounty | Bonus Quest) and find Vereta Freaabaal. She is dissapointed that the encalve didn’t send a ‘real Mandalorian’ to kill her, and amused that you think she is in danger. You defeat her and prove her arrogance to be unfounded, shocking her into understanding that Lord Grathan has fed her empty promises about her power. Now you either kill her or freeze her and take her back to her father, a fate she considers worse, before returning to Admiral Fraabaal’s office.
You speak with Admiral Fraabaal in Kaas City and inform him of his daughter’s death or capture. If you killed her, he is gratefulf for any empathy you show but asks you to leave him with his thoughts.
If, on the other hand, you let her live, he is amazed that you deduced his inner termoil accurately and stopped him from making a mistake he would always regret. He plans to contain her until he can convince her to see reason and rewards you for your initiative.
Either way, you report back to Crysta Markon.
Summary: You break into Lord Grathan’s Manor and kill the inventor Theovor Mindak who is working with the dissidents, before downloading his files and discovering that the dissidents are nearly ready for a major attack.
Watcher Two tells you to enter the Nexus Room cantina in Kaas City and await further instructions. In the cantina, she informs you that she is monitoring the internet security cameras and that your job is to meet with Samara Mindak, the daughter of a Theovor Mindak, a prominent inventor and entrepreneur who is working with the anti-government radicals. Theovor is being sheltered by the rogue Sith Lord Grathan but Samara has access to his workshop in Grathan’s estate. She is not believed to be involved with the movement herself, and Intelligence thinks she can be incentivised to cooperate. You are authorised to kill her if needs be.
You speak to Samara in a private suite on the second floor where she is busy rejecting a man named Obenth. She acts the socialite and you have many different ways of persuading her to give you the codes you need. You can ask directly as an intelligence operative, in which case she asks for her father’s property and credits in return. You can agree to these terms, with Watcher Two’s approval, or you can threaten to delete her existing credit if she doesn’t help you. You can hurt her until she co-operates, but it isn’t necessary; a simple threat from the get-go will also work. If you’re male, you can charm the codes out of her. If you want to be really evil, you can kill her after she helps you, causing Oberth to flee in terror.
You break into Lord Grathan’s heavily fortified estate and kill a guardsman for a keycard that you will need to use in conjunction with Samara’s codes to acess Theovor’s workshop on the 2nd Level of the Central Compound. Once inside the workshop you confront Theovor Mindak. He believes you harmed his daughter for the codes (it may be true). He tells you that Imperial Intelligence abducted his wife one night and he that he never knew what happened, explaining his hostile attitude towards Imperial authority. He sets several prototype battle droids on you, which you defeat along with him.
After his death, you access his personal computer and holocomm with Watcher Two, who downloads the database. She cross-references his encrypted files with Jurithus’s datapad and discovers references to a large upcoming attack by the dissidents. You head back to base in Kaas City.

Summary: You discover Imperial troops lobotomised and placed in droid bodies by Lord Grathan, and decide whether to destroy them as an act of mercy or program them to serve the Empire.
At the defencive emplacement known as the Wall, you are scanned by Captain Sarnova and her droid who are worried about Grathan spies. Assured of your loyalty, she tells you that 20 of the 100 men assigned to the operation against the rogue Sith Lord Grathan have gone missing inside his complex and she wants them back. She has intel that Grathan has been moving prisoners into another wing of his estate and gives you directions, asking you to investigate.
Inside Grathan’s Manufacturing Plant, you find scientists, restraint tables and a droid called OHK-99. The droid speaks with a human voice and you realise Grathan has been butchering the captured soldiers and placing their brains in droids, reprogramming them for advanced intelligence and enhanced combat tactics. This droid used to be Ensign Tholver Shan. As he speaks he seems to be fighting his new programming. He tells you the other soldiers have already been fully reprogrammed and are beyond helping, even though they still think and feel. He begs you to use the nearby command console to send an overload signal that will kill them and end their suffering.
You can do as he asks, or you can take control of their battle programming and order them to report to ‘the Duchess’, as they call Captain Sarnova, for orders. If you send them back alive she is sickened by what Grathan has done. She tells you they will be used either for military research or possibly by Moff Ghorrin as a special strike team and that the best she can hope for is that their memories of being human fade with time. If you killed them, she is crushed, but expresses her gratitude at knowing what happened, before turning her attention to notifying their families and recruiting fresh troops.

Summary: You recover or destroy some experimental turret plans that have fallen into the hands of Lord Grathan.
On the Bridge connecting the Wall defensive outpost to the grounds of Lord Grathan’s manor, Captain Bryn needs your help. He is tasked with recovering some prototype turret plans that renegade Sith Lord Grathan has acquired so that the Empire can put them into mass-production, but his orders won’t allow him to enter Grathan’s compound. Eavesdropping on Grathan’s guards, he has learnt that the guardsmen wear security badges that mark them to the turrets as friendly targets. Apparently one guard forgot his and had to be scraped off the floor, so aquiring one would be wise.
You fight your way through Grathan’s private army (Grathan Assault | Bonus Quest (Stage 1 & Stage 2)) and use a field test console in the grounds to summon and destroy an experimental warbot and take its datacore for study (Grathan Assault | Bonus Quest (Stage 3)). You return the datacore to the mission dropbox at the Wall (Grathan Assault | Bonus Quest (final stage)). Penetrating deep into the central compound, you head underground to Level 2 and enter the weapons lab. The room is filled with many turrets shooting flame. After dealing with a few guards and defenses, you find a droid, PO-12, attached to some machinery in the lab. Apparently he’s a non-violent protocol droid who is forced thanks to a restraining bolt to control the turrets, which have been tested in front of him on living people. He can’t shut them down for fear of Lord Grathan, but if you remove his restraining bolt he can delete the plans which he has stored in his mind.
If you agree, the plans are erased and PO-12 waits to be restrained again or destroyed by Lord Grathan. If you refuse, then you download the plans and leave. If you return with the plans, Captain Bryn hails the future of Imperial anti-personnel weapons and looks forward to testing the turrets on the Republic. If you return without the plans (You can lie and say they were destroyed unavoidably or come clean.), he is angry and disappointed, fearing for his job after such a failure.

Summary: You steal, or pretend to steal, some of Grathan’s valuable research data for an information broker.
In a tent on the grounds of renegade Sith Lord Grathan’s estate, you meet Ismar Brengle, an ‘indentured’ scientist working for Grathan, who she despises. Three years ago, he secured her services by promising opportunities in interesting fields of study but made her a prisoner instead. Now she researches freakish creatures for Grathan’s advancement.
She is pleased to see you smashing up Grathan’s army and offers you a proposal. Grathan’s cybernetics research division has reached a major breakthrough: regenerating cybernetic implants. She wants to sell the information to a buyer who wants to create a cybernetic army and she asks you to steal the files for a 60% cut of the profits.
You send override signals from two remote terminals on the estate grounds and a third in a warehouse in order to activate the main terminal in the weapons lab. Breaking into the lab, you plant a dataspike on the terminal and are contacted remotely by the head of Grathan’s cybernetics research division, Lanniter Droge, who begs you not to steal his life’s work. As the director of project ARC (Automatic Regenerating Cybernetics) he wants to use the technology to create advanced prosthetics for war victims.
If you steal the data, he bemoans your lack of ethics and you return to Ismar. If you agree not to steal it, then you download some false data to give to Ismar, and Lanniter thanks you profusely for allowing him to continue to heal the sick with his work. Either way Ismar reacts the same, uploading the data to her contacts to be authenticated and promising to contact you later with your cut. If you gave her the real data, she contacts you with good news: A cyborg army is already under construction and your cut is well-earned.
Summary: You complete several interviews with various members of the Order of Revan to complete your initiation.
Another cultist, Raymon, tells you that you must show those in the Master’s inner circle that you can follow the ways of Revan and understand his teachings. He reminds you that Revan had allies from all walks of life – Just like the Revanites themselves. You must speak to three established Revanites who will test you with questions. If you fail to demonstrate sufficient understanding they will test you with strength instead.
You fight through the jungle beasts (The Pilgrim’s Path | Bonus Quest) to find the twi’lek Morrun Dokaas, or the ‘Lord of Beasts’ as the Revanites call him. He tells you that the master trained him, an alien, against the traditions of the Sith, as Revan himself once trained aliens in the ways of the Sith. He asks you why you believe Revan offered power to all. If you answer either that Revan believed everyone should aspire to power, or that he understood servants are more useful when they are powerful, you pass and he praises your wisdom. If you answer that Revan bestowed knowledge out of kindness, you fail and Morrun sets you a test of strength instead, pitting you against his pet beasts. He considers your victory sufficient to judge you worthy. Either way he sends you to your next inquisitor, a Mandalorian initiate and mercenary instructor called Ceta Far.
Out of honour and respect for his great victories over the Mandalorians centuries earlier, Ceta Far has joined the Order of Revan to ensure the survival of his memory as a great warrior and leader. She asks what you can do for the order. If you say that you can study and unearth Revan’s past, she approves, saying the Order already has enough warriors. If you boast of your strength or your talents at persuasion, she sends you to fight a squad of her clansmen who are camped nearby hunting the local wildlife. Whether you answer to her taste or defeat her warriors, she is satisfied and you move on.
This time you visit Imperial Major Pathel at the wall. More cheerful than the others, he prefers to keep his interviews informal. He asks if you think membership in the order will lead you to personal power and how the order should respond to the Dark Council’s efforts to root them out and accuse them of heresy. If you suggest guile or convincing the Empire that the Revanites are correct, he is pleased. If you suggest fighting the Empire directly, he tells you that Revanites are not traitors and calls security guards to attack you. If you defeat them he opines that although you have some misconceptions, you have a talent for destruction and can be of use to the order. Either way he sends you back to the jungle compound.
At the Revanite compound, Raymon tells you that you have completed your pilgrimage and been accepted by the Order’s inner circle. Dzoun agrees that although your initiation wasn’t easy, you met the challenge and showed that you can walk the path of Revan.
Summary: You meet with the Revanite Master who is revealed to be a female human Sith. She asks you to lie and tell Sandor that his own master, Darth Charnus is the Revanite leader. You do so, or tell the truth, allowing him to capture and torture the real master for information.
It is now time for the Revanite Master to complete your initiation personally. You go to the Master’s tent, where he contacts you via holocomm and congratulates you on your initiation. However, this holographic image is just a disguise, and the real Master, a female human Sith, arrives to greet you in person. She apologizes for the deception but reminds you how badly the Dark Council wants her dead and how much of a threat they perceive in the Order. She relates that many years ago on Korriban she stumbled upon the mysteries of Revan.
Revan eventually came to Dromund Kaas after his rebirth and many believe he was killed by the Sith Emperor. The Master is a conspiracy theorist who believes that Revan overcame the Emperor and has been ruling the Empire in secret for the last three centuries. Since the Emperor has grown silent and distant in recent decades, she believes the Dark Council have conspired to lock Revan away and seized power for themselves. She is aware of your meeting with Sandor and asks that you tell him the Revanite leader is his own master, Darth Charnus, putting her trust in you as a fellow Revanite to comply. She gives you one of Charnus’ amulets to convince Sandor but warns you to never return to the compound lest your allegiance be suspected.
You return to Sandor at the wall. If you lie and tell him that the master was a male Sith and that he possessed Darth Charnus’ amulet, he tells you that he will deal with his master personally and not to contact him again. If you tell him the truth: the master was a female Sith with black hair and distinctive tattoos, he discerns her identity as Tari Darkspanner, a Sith Lord known to Charnus. Sandor assures you the Dark Council will capture and interrogate her and crush the heretical Order of Revan once and for all.
Summary: Darth Thanaton is a member of the Dark Council and a very powerful Sith traditionalist.
Darth Thanaton, born Teneb Kel in 43BTC, was once a slave apprenticed to the disgraced Sith Lord Calpho, and fought hard to earn his place in the Empire. As a young man he tracked a renegade Sith named Exal Kressh who had discovered that the Emperor was planning to turn her and countless others into hollowed out puppets to contain his essance. Thanaton bargained his knowledge of the Emperor’s plans for a seat on the dark council.
A die-hard Sith traditionalist and veteran of the Great Galactic War, Thanaton seeks to uphold Sith precedents in matters of politics and dark side philosophy. He has no time for the machinations of upstarts like Lord Zash who eschew Sith customs in favor of their own deceptive power gains and he has great respect for the bulwarks of Sith culture and history as embodied in the ancient lords buried on Korriban. Over the decades, Thanaton has built a formidable power base and risen to command the Sphere of Ancient Knowledge as a Dark Council member.
Summary: You finally confront and kill Darth Skotia. Lord Zash is made a Darth and you begin tracking down the relics of Tulak Hord.
Lord Zash tells you the time has come to kill Darth Skotia, who stands between you and glory. Zash, meanwhile, will be attending a party in the Nexus Room cantina to create her alibi (It seems you alawys do the hard work).
You enter Skotia’s chambers and confront him. When he sets his bodyguards Skeesk and his brother Skarsk on you, you show them the relic, releasing them from his control. You can order the trandoshans to attack Skotia or tell them to leave, but they fight him anyway for enslaving them. Either way he throws them into the walls, killing them easily. Taking his slaves from him has made him angry and he plans to make you suffer. You use the cyber neutraliser on him and defeat him handily. Even as you mock him, he warns you to beware of Zash; to consider how many years she spent plotting his death. He tells you that you are nothing more than Zash’s hand and she will cut you off if it makes her stronger.
You travel to Lord Zash’s private room on level 2 of the Nexus Room cantina where she is hobnobbing with Lords Goss and Reyzek about a scandalous Mandalorian hookup, and report your success, much to her pleasure. She is contacted via holocomm by Darth Thanaton, one of the most powerful members of the Dark Council.
Thanaton is well aware that Zash is responsible for Skotia’s death, her alibi notwithstanding and he chastises her for being indiscrete. He orders her to report to his chambers for a dressing down. She asks you to meet her afterwards in Darth Skotia’s former chambers.
In the chambers you encounter Lord Kirnon and Lord Calaverous cleaning up the mess you left. Kimon wants to ask you about Zash and Skotia, scared by her apparent ability to be in two places at once. If you tell them you killed Skotia they refuse to believe you. Kirnon is worried by Zash’s rapid ascent and perfect murder plan while Calaverous is less concerned, seeing it as something to aspire to.
Darth Zash arrives in Skotia’s quarters and tells you that Skotia was Thanaton’s pet, but that the other members of the Dark Council were impressed and made Zash a Darth. Qualms about who is really doing all the work here notwithstanding, it is now time for you to finally begin tracking down the relics of Tulak Hord.
Summary: You uncover a plot by Lord Grathan to help an unknown party invade Kaas City.
In the Kaas City Expansion District, Captain Isen tells you he was sent to investigate unusual behavior among the droids working on the nearby construction site. After barely surviving an attack by one of them, he found a transmitter suggesting the droids are being controlled by an unknown party who is using them to broadcast Kaas City’s schematics to an off-planet location.
He wants you to disable and remove the transmitters from enough droids as to render the data unintelligible to whoever is collecting it. The data from the transmitters you collect points to the rogue Sith Lord Grathan as the culprit. He’s transmitting to somewhere everything an invading force would need to attack the city. Major Shellaster is en route to the probable invasion site with every soldier he can find. You rush across the bridge in the Kaas City Expansion and report to him.

Summary: You stop the exiled Lord Tytonus and her mercenary army from capturing Kaas City.
Major Shellaster in the Kaas City Expansion District tells you that transmissions have been sent offworld for the last three days and received by ships orbiting a nearby asteroid. They contained landing coordinates and codes to bypass the Dromund Kaas orbital defenses. Small shuttles have already begun to land mercenary troops commanded by the exiled Lord Tytonus, a rebel Sith who declared her own kingdom on the ancient Sith planet of Begeren.
With so many Imperial forces off-world, it is possible she could take the city. You are sent to disrupt her invasion. You hurry to the secret landing site in the jungle nearby and loot thermal detonators from mercenary demolitionists which you use to blow up their landing shuttles. You also personally destroy much of the enemy force in the process (Confronting the Enemy’s Forces | Bonus Quest).
Inside the mercenaries’ Field Command Base, you find Lord Tytonus along with her apprentices and acolytes, all of whom you kill before defeating her. Major Shellaster tells you although there is no hard evidence of Lord Grathan’s involvement, his guilt is well-known among people who matter and that his influence and followers will decrease as a result.
Notes: Like all Heroic quests, the ending conversation has been removed.

Summary: You investigate the dissapearence of a research team and recover some dark side artifacts.
Major Swaine Lothar of the Imperial Reclamation Service is stationed in the wildes below the Kaas City Expansion District. He tells you that his team uncovered several important artifacts at a dig in some caves near the Dark Temple before they started to hear and see strange noises and ominous figures. He told them to continue regardless and now they have not been heard from for several days.
You head to the cave but find the team dead and the relics gone. A holo-recording made by the expedition explains that crazed Imperials came from the temple and attacked them, drawn by the artifacts. You kill the crazed Imperial troops in the cave and on the nearby Dark Temple Approach, and retrieve the artifacts which you return to Lord Duen near the temple. He quarantines them for further study.

Summary: The ancient dark temple is filled with malevolent Sith spirits and possessed Imperial troops.
The Dark Temple on Dromund Kaas was built millennia ago during the time of the old Sith Empire by the Sith Lord Pharshol. When the Emperor led the reconstituted Empire to Dromund Kaas more than 1300 years ago, he claimed and expanded the ancient complex, using it as a burial place for his dead enemies, a resting place for dark side artifacts, and a place to conduct experiments and powerful dark side rituals. It was here that he drained the knowledge and life-essences from his most powerful enemies.
A nexus of dark side energy and the resting place of evil spirits, the temple has remained sealed for nearly 1000 years until several power hungry Sith unwisely trespassed with a large Imperial force and accidentally awoke the spirit of a powerful ancient Sith, Lord Kallig. Kallig died by ambush and, presumably unaware of his own death, has awoken the other spirits entombed within. The dark side energies unleashed have overwhelmed all those inside and the temple is now full of insane Imperial troops and researchers, many of whom are possessed by confused, long dead Sith, re-enacting ancient power plays within.

Summary: After you retrieve a hideous torture device from the Dark Temple, the captured spy reveals that the Jedi have a new padawan who can sense the hidden nature of a being. Her Master, an old enemy of Baras’ called Nomen Karr, has been using this power to expose his spies.
Back in Lord Baras’s chambers, you find him blind with rage at being unable to break his prisoner. If you tell him that you not only killed Grathan’s son but slept with his wife, you manage to cheer him up. He has no issue with you killing Ba’al, who had served his primary purpose. He commands you travel to the Dark Temple in a last attempt to interrogate the Republic spy.
When the Emperor claimed Dromund Kaas more than a millennium before, he conducted horrific experiments inside the temple, granting himself knowledge and immortality by extracting the minds and life essences from all of the great Sith Lords of his time using a device called ‘the Ravager’. Baras wants you to recover the Ravager so that he may use it to extract information from his Republic prisoner. You travel to the Dark Temple.
You fight your way inside the Dark Temple. Deep inside you enter the chamber where lies the ravager. Some of its components have been looted by the crazed Imperials within. You recover them and return to the ravager only to find Lord Vaccus, or rather the possessed human who thinks he is Lord Vaccus, waiting for you. Lord Vaccus was the sworn enemy of Lord Pharsol, the Sith who build the Temple thousands of years ago. He and Pharsol, confused and possessing the bodies of Imperials, have been re-enacting their ancient power-plays within the Temple. He wants the ravager to take revenge on Pharsol, so you deal with him and his followers before repairing it and escaping the Dark Temple bound for Kaas City.
In his chambers, Baras successfully uses the ravager on the prisoner and manages to discover the nature of the mysterious threat to his power-base. Before it liquifies his mind, Grik Sonosan tells you that a new Padawan with a unique ability has recently joined the Jedi order; she can sense the ‘true nature’ of any being, be it hidden darkness or untapped purity.
Darth Baras’s most hated enemy, Jedi Master Nomen Karr, who once infiltrated the Sith until Baras exposed him, is training and guiding the Padawan to expose Sith influence within the Republic.You also discover that she was found on Alderaan and trained on Tatooine. When the Padawan detected Darth Baras’s spy on Nar Shaddaa, Grek Sonosan was sent by the Jedi Council to verify the accuracy of her power. He also tells you that a second Republic agent has been sent to investigate another of her claims on the planet Balmorra. The threat she poses to Baras’s power base is obvious.

Summary: Aloysius Kallig is a long dead Sith Lord who once served Tulak Hord.
Lord Aloysius Kallig was an ancient Sith Lord of the old Empire who died more than 2000 years ago. In his time, he served as Tulak Hord’s number one general, leading his forces to numerous victories. When his influence began to threaten Tulak Hord, Hord had him assassinated and his body was entombed in the Dark Temple on Dromund Kaas.

Summary: Zash tells you tha the first relic of Tulak Horn lies deep inside the cursed Dark Temple here on Dromund Kaas. In the Dark Temple, you meet the spirit of the ancient Sith Lord Kallig. The spirit of Kallig reveals that you are his descendent. Millenia ago, he was betrayed by his master, Tulka Hord, who’s artifacts you now seek. He gives you the first artifact and bids you return the Kallig line to glory.
The first of Tulak Hord’s relics lies in the deepest chamber of the Dark Temple on Dromund Kaas itself. Darth Skotia held the key, but was unwilling to disturb the sleeping Sith spirits. Zash tells you that she had a dream that an apprentice of low origin humbled themselves before the Sith apparition that now haunts the temple, pacifying it. This is why she came to Korriban seeking an apprentice from among the slaves, though she admits she can’t be certain you are the one from her vision. She could be sending you to your death. Khem Val warns you that even Tulak Hord himself did not tangle with spirits. Zash gives you a glyph to grant you access to the innermost chamber and you head through the Kaas City Expansion District towards the Dark Temple.
You reach the Dark Temple, fighting your way past the crazed Imperials within, and use the glyph to enter the inner chamber. Inside you are confronted by the spirit of Lord Aloysius Kallig himself, the ancient Sith Lord who was awakened when the temple was recently disturbed.
Kallig reveals that it was your movements in the force that stirred him from his waking nightmare. He calls you blood of my blood; his descendent, though he is surprised enough time has passed that you don’t recognize who he is. Woken by the intruding Sith, he was initially unaware of his death, but when you grasped your first lightsaber, his senses returned to him. Now he believes that your strength will return the Kallig name to glory.
Generations ago, he was betrayed by a trusted friend, the Sith Lord who’s artifacts you seek: Tulak Hord himself. He bids you not make the same mistake. Treachery is the Sith’s endless game, as demonstrated by the microcosm of scheming would-be Sith inside the temple, and a game which you must win. He tells you that your nothingness as a slave had a purpose and when that purpose is exhausted you will go back to being nothing. Beware your master and apprentices and guard against being taken by surprise and you will become unstoppable.
He knows why you have come and gives you the artifact that he himself was responsible for taking from Tulak Hord long ago, though even he does not know what it does. You contact Zash via holocomm and arrange to meet her back in Skotia’s former quarters.
You find her hard at work reading everything she can find inside Darth Skotia’s chambers. Surprisingly, he had a curious intellect and a great deal of ongoing research. She takes the artifact and asks how you were able to pass the apparition of Lord Kallig. You can tell her the truth if you like, to which she agrees that you have an incredible destiny. If you tell her that Kallig warned you to be wary of betrayal, she tells you that she would never turn on her most valued apprentice…

Summary: With some complications, you complete your third bounty to gain admittance to the Great Hint by killing an Imperial Commander inside the Dark Temple at the behest of his disgruntled underling.
Crystal Markon has recieved word of your success with bounty #2. Apparantly one of your rivals has already finished all three of their bounties by poisoning an Imperial Moff! She tells you that bounty #3 was also most likely sent your way by someone who wants you out of the Great Hunt. It’s a top secret job for a Captain Medle in Imperial Intelligence. No other information provided.
Inside the Imperial Intelligence headquarters nearby, Captain Medle tells you of the crazyness that is Imperial Intelligence, a world of lies and secrets where everyone is judged and one button press could make you dissapear forever. He explains that he never wanted to be a spook, but was drafted after he did his job as a regular soldier a little too well. Asking you to keep it between you, he gives you your assignment.
The Dark Temple in the Dromund Kaas jungle has recently become a hotbed of evil dark side energies and awakened Sith spiris. A team lead by Medle’s Commander, Gargun, has gone missing. Unless they can be accounted for, the matter cannot be closed and he can’t take over the Commander’s position. He wants you to find them, kill them if they have survived, and return with their ID cards so that he can create easily explainable deaths for them.
Inside the Dark Temple, you eliminate the Imperial Intelligence team, who are still alive but driven insane by the Temple’s power, and recover their ID tags. Entering a side chamber, you find and speak to the leader of the team, Commander Gargun. Gargun has lost his mind and believes he is an ancient Sith Lord, Barel-Slathborn. He offers you Gargun’s ID card as a token of your meeting, or you can kill him (and his slaves) for it.
You return to Captain Medle in Commander Gargun’s office. He takes the ID tags but informs you that as the Sith would be displeased if they found out he sent an outsider into the Dark Temple, you are a liability and he has to kill you. After defeating him and his guards, he acknowledges the situation and gives you your promised payment. You can allow him to bargain for his life and aquire some technology, or you can kill him. If you kill him he seems almost grateful to be freed from the double-crossing and scheming of Intelligence work.
You report back to Crystal Markon in the Mandalorian Enclave.

Summary: You enter the Dark Temple and prevent the dissidents from rupturing power conduits beneath Kaas City.
Arriving at Intelligence HQ, a conference is called between Keeper, Watcher Two, Darth Jadus via linkup from the Dominator, yourself and others. Keeper explains that thanks to your efforts, the dissidents plan of attack is now known. They intend to overload the Kaas City power grid by rupturing the ancient power conduits that run beneath the city. The resulting explosions would kill hundreds and the blackout would leave the city vulnerable to further attacks.
Only one access point to the conduits is unguarded, and that is because it lies within the depths of the Dark Temple, the resting place of evil Sith spirits known to drive mad those who enter. The terrorists are desperate enough to try a suicide run on the conduit and Keeper wants to send a squad after them. Over his objections, Darth Jadus insists the temple remain undisturbed and that you must go alone.
You make the perilous journey to the Dark Temple and brave the insane possessed Imperials within to reach the power access cavern. Fighting your way through the terrorists (Clean Up the Temple | Bonus Quest), you disable the three detonator charges placed throughout the room, thrawting the plot, and killing the terrorist mastermind in the process. Making your way to the primary control console to check for additional explosives, you discover a wounded terrorist hiding behind some crates.
He is surprised you risked entering the Temple. He laughs when you call him a terrorist, saying the Empire applies that label to everyone they kill. He mentions other cells who will keep fighting on other planets and that the dissident movement is larger than you know. He asks you to kill him before the ghosts possess his mind. You can do as he asks, give him a medpac and let him go (in which case he promises to turn himself in out of graitutde), or if you are feeling nice and evil, stand and watch him get possessed and then kill him.
You leave the Temple for Kaas City.

Summary: You seal dangerous Sith spirits within the Dark Temple, and decide what to do with a cache of light-side knowledge left by a Sith who reformed before he was sealed inside.
Lord Alaric at the Warden Outpost fills you in on the situation in the Dark Temple, where an awakened Sith spirit has driven many Imperials insane. If the commotion were to wake the remaining spirits, the entire planet could be overrun. Luckily the burial chambers all share the same weakness; they can be sealed.
You enter the temple, braving the insane souls within and killing a great many of them (Bury the Insane | Bonus Quest). You recover a welding torch left by the team Alaric sent to accomplish this task before you, and go door to door on the temple mezzanine, fusing the 500 kilogram hinges on the tombs and ensuring the Sith ghosts remain trapped. You can hear them hammering on the doors from the other side as you work.
At one door you encounter an interactive hologram of the occupant, Kal’eth Ur, which gives you its construction date: 963 years ago. Kal’eth’s hologram tells you that like many others he was a born Sith who challenged the Emperor and lost. Before he was sealed away, he managed to make this hologram to transmit his secret knowledge to whomever was bold enough to unlock his tomb.
In life, Kal’eth Ur became disillusioned with the Sith philosophy of channeling the force through strong emotion and fear. Fear only begets more fear and so he grew to believe that the Sith philosophy of strength based on fear is circular and ultimately self-defeating; it claims to liberate but traps one perpetually within one’s own fear. Only when one stops seeking power, things, and the preservation of one’s own life, and meets the force with patience, humility and peace will one find true strength through the absence of fear.
Kal’eth’s fellow Sith purged his heretical ideas and only the hologram remains. He wishes you to take his teachings to the Sith so that they might be influenced for the better. You can preserve his knowledge and take the data, or you can destroy it. If you destroy it, Kal’eth Ur’s hologram is unconcerned and tells you striking down knowledge cannot kill the light. Lord Alaric is pleased but warns you not to underestimate the power and tenacity of the light side and it’s never-ending struggle to destroy the dark.
If you take the holocron and bring Kal’eth’s teachings back to Alaric, he is terrified of what they represent; the light has always sought to destroy the Sith. However, he decides to keep them locked away in a secure location in case the knowledge can be used in the future. You can also influence him to study them himself, by convincing him of the wisdom of studying enemy teachings.

Summary: You enter the Dark Temple and track down a rogue Mandalorian hunter.
The mission board at Outpost Warden offers a mission from the Dark Council. A legendary Mandalorian bounty hunter Valen Korik is wanted for murdering two Sith Lords in Kaas City. He has fled into the Dark Temple. You pursue him deep into the temple, fighting past various insane Imperials driven mad by the Temple’s dark power, and kill him and his Elite Hunter guards in the tomb where they have taken refuge.
Notes: Like all Heroic quests, the ending conversation has been removed.

Summary: You recover important data from a research team gone mad inside the Dark Temple, possibly aiding an Imperial who is pretending to be possessed to gain followers within.
At Outpost Warden, Captain Fizik asks you to find out what happened to the three separate expeditions he sent into the Dark Temple, none of which have returned. Many of the Imperial forces inside have gone insane and believe they are long-dead Sith. His men are expendable but he needs the data they were collecting on seismic activity in the area, as it is vital to construction efforts on Dromund Kaas.
In the depths of the temple you find Dorian, one of the slaves assigned to the expedition, still alive. He introduces himself as the Sith Lord Nil Venerous, master of the undying darkness. Actually, his possession and madness wore off a while ago and he has been continuing to pose as Venerous ever since to maintain his thrall over those who believe they are Venerous’s followers. Whether you see through his act or not, he offers you the data you seek in exchange for retrieving Nil Venerous’s symbols of power. You do this by killing and looting the people in the temple who believe they are Venerous’s enemies.
When you return the symbols to Dorian, he gives you the data and also asks that you tell Imperial Command to send more expeditions into the Temple so that he can gain more slave followers, promising to reward you if you do so. You return to Captain Fizak at Outpost Warden who is pleased to see the data. He plans to stop sending expeditions into the temple but you can convince him otherwise if you choose to help Dorian.

Summary: On behalf of a possessed Imperial who believes he is the Dark Temple’s builder, Lord Pharsol, you find the Sith who believes she is his apprentice, Anyarah, and either encourage this belief and convince her to return to him, or help her regain her true personality and leave the temple to recover.
Inside the Dark Temple, the spirit of an ancient Sith Lord, Kallig, has been awakened. Unaware of his death, his power has driven the Imperials within mad. You encounter a workman deep within who believes he is the ancient Sith Lord Pharsol who oversaw the temple’s construction millennia ago. ‘Lord Pharsol’ believes that Dromund Kaas is still uninhabited save for early colonists in the Dark Temple. In this time period, he and his forces did battle with the followers of ‘the Dark Path’, a philosophy founded by his rivals to lure away his students.
He believes his apprentice, Anyarah has been led astray by the Dark Path and wants you to retrieve her. You can try to convince him that he is a confused ghost trapped in a past that no-longer exists, but to no avail and if you question his power directly he blasts you with lightning. You travel to an area of the temple called ‘the Unquiet Chamber’ and defeat the possessed or insane Imperials who believe they are followers of the Dark Path (Clearing the Dark Path | Bonus Quest). Here you find the Sith who is possessed by the personality of Pharsol’s apprentice, Anyarah. She is not fully convinced she is Anyarah, but is questioning her memories of Kaas City and her sense of reality. She begs you to tell her the truth. Are her memories of Kaas City real? Or is she really Anyarah?
You can convince her that she really is Anyarah in which case she goes back to the workman who believes he is Pharsol. He tells you he is keeping her safe and marshalling his forces against the Dark Path, and rewards you. He also senses something strange, memories he can’t explain of a life outside the temple, but considers them delusions. You leave.
Alternatively you can help the Sith resist Anyarah’s influence, something she thinks is only possible because the dark force in the temple seems distracted. If you help her, she escapes, presumably to recover once she leaves the Temple, and you can tell Pharsol that she is dead, that you couldn’t find her, or the truth that she isn’t really Anyarah. Either way he is disappointed but acknowledges your efforts against the Dark Path and lets you go.

Summary: You learn that Baras’s spy on Nar Shaddaa remains compromised, and another of his spies on Balmorra is under investigation. Granted a personal starship, you leave to silence them both.
You now know where the Padawan was discovered and trained, that Baras’s top spy on Nar Shaddaa was under surveillance for some time, and that the Jedi are investigating another spy on Balmorra. Armed with these scant leads, you are granted a personal starship and ordered to depart Dromund Kaas. In your hangar, you are met by a Sith assassin, Ralesk, sent by either Lord Grathan’s son to kill you for ‘knowing too much’, or Lord Grathan himself for murdering his family. You dispatch him before boarding your ship, a shiny Fury-class Imperial Interceptor. On board you are met by your new personal droid, 2V-R8, who gives you a tour.
You contact Baras from your ship’s homocommunicator. He reiterates that Nomen Karr’s efforts to prove his padawan’s power and dismantle his spy network must be blocked. Your first task is to secure the integrity of Baras’s spy network by killing his compromised agents. You head to Balmorra.

Summary: Lord Zash wishes to conduct a powerful ritual involving Tulak Hord’s artifacts, but the tablets explaining it are spread throughout the galaxy. She grants you a starship and you leave to seek the second tablet on Balmorra.
Lord Zash has been studying the artifacts of Tulak Hord for a long time. She tells you the tablet that you have discovered confirms her belief in their ability to change everything. She claims that she has foreseen them vastly increasing your own personal power. Five tablets placed together describe a peculiar ritual used by Tulak Hord when he conquered Dromund Kaas many millennia ago. She believes that you alone will wield the ritual’s power, but you require the remaining tablets to decipher it.
Unfortunately they are spread across the galaxy, some hidden by Tulak Hord himself and some stolen from him by betrayers. Skotia’s research places one on Balmorra and one on Nar Shadda. Zash grants you a Fury-class Imperial Interceptor as a surprise gift and necessary tool, and after claiming it at the spaceport and meeting your new personal droid, 2V-R8, you set course for Balmorra.
(Continued on Balmorra)

Summary: Having earned your spot in the great melee, you emerge victorious as a bonafide Great Hunt contenstant.
Apparantly Taro Blood arrived and told everoyne you were dead; the melee to win the last Great Hunt place is about to start without you! You rush into the melee chamber to find the Huntmaster’s Assistant, Lek, explaining the rules. All weapons are allowed but you fight alone. Killing is not required but is well within the rules. After a short speech by the Huntmaster and some taunts from rival Iopiane Ratle, the battle commences.
Alongside Lopiane Ratle, your opponents include the human male Ory Lam, the Rodian Zeeba, the Gamorrean Partogg, and the Trandoshan Shada Hsskhor. You battle them in a circular arena and emerge as the last being standing to raptuous applause. Lek declares you the victor, but as the Huntmaster grants you your rightful place, Taro Blood appears and tries to block your entry by claiming that your credentials are false. Lek refuses him but also reminds you again that the Great Hunt rules prohibit you from fighting Taro directly. Taro Blood insults the Huntmaster and promises to kill you during the competition.
Lek and the Huntmaster explain the rules. The Great Hunt is convened by Mandalore himself to determine the most skilled hunter in the galaxy. You will be given a list of targets spread throughout the galaxy and you will be competing with at least one rival hunter for each. The hunters compete for the limited selection of prey and hunt each other at the same time until only one hunter and no prey remains. Although killing your rivals is typical, surrender is accepted as long as you elimiate them from the competition. Victory means fame, glory, wealth, and the chance to work directly for Mandalore himself.
You speak to Crysta Markon for further details.

Summary: You steal a personal starship and leave Dromund Kaas to begin the Great Hunt.
Crysta is impressed, but before you begin the Great Hunt you need a starship and tradition says you have to steal it. Crysta has one in mind, a smuggler’s ship in Kaas Spaceport. She tells you that your first two hunt targets are on Nar Shaddaa and Balmorra and that once you reach space, she will send you holorecordings with further details. Although your targets will be given to you, the idenity of your rival hunters will remain secret.
You travel to Kaas Spaceport, Docking Bay B-04 and are confronted by a spaceport security team. The Commander tells you he has already dealt with three ships stolen by Mandalorians this year and he is not impressed by your attempted thievery. Unsurprisingly, he reveals that Taro Blood tipped him off. Forced into a confrontation, you kill them and use the security door panel to slice your way into the hangar. Inside, you kill or avoid the spaceport hangar staff and slice the door to your new ship, a D5-Mantis Patrol Craft.
Before you enter, Mako asks you to promise you will kill Taro Blood to avenge Braden, who was like a father to her. Your ship comes with an onboard droid, 2V-R8 who was abused by his former owner and glad to serve you instead. After he gives you a tour, you leave the planet.

Summary: Darth Jadus has been assassinated and his flagship destroyed. After assisting with the capture of some terrorists attempting to flee Dromund Kaas, you witness an Empire-wide broadcast by the terrorist leader, the Eagle, vowing future attacks. You are given a starship and charged to travel the galaxy and dismantle his terror network.
You return to Intelligence headquarters to find a disaster in progress. While you were busy preventing the attack on the power grid, a simultaneous attack has destroyed the Dominator, Darth Jadus’s flagship and over three thousand people aboard. Wreckage is raining down over the city and all traffic has been grounded. Pacification units have been deployed to quel any civil unrest.
Watcher Three detects a starship attempting lift off with several dissidents aboard. Military squads are advancing to destroy the ship but Keeper wants it and the terrorists captured intact. He gives you a mouse droid and orders you to place it into one of the ship’s maintenance conduits. When the ship takes off, the droid can disable the hyperdrive and download the main computer, at which point the ship will be captured and those aboard interrogated.
You enter the Cargo Port A3 in Kaas City and shoot your way past the terrorist mercenaries guarding the ship (A Minor Inconvenience | Bonus Quest) before taking a position of cover and releasing the mouse droid, which enters the ship through an external conduit. You return to Keeper.
Keeper praises your work; the mouse droid has transmitted the contents of the terrorists’ computer and the situation appears calm. It is believed that one of the civilians on board the Dominator was the bomber. With Jadus dead, a power vaccum has formed and Imperial Intelligence will be busy maintaining stability during the ensuring internal wrangling.
At this point a transmission is recieved from the terrorist leader, a mysterious figure calling himself ‘The Eagle’. Addressing the entire Empire, he says that the Imperial government is corrupt and beset by wasteful power plays. After the Treaty of Coruscant, he says, Imperial citizens were promised an epoch of glory that never came. Darth Jadus was assassinated to show that even the Dark Council are not invulnerable and that change can be effected by ordinary citizens. He warns that agents are positioned and preparing to strike throughout the Empire and that the dissidents will not relent.
According to Keeper, the Eagle has been on Imperial radar for some time, but was clearly underestimated. After your exemplary performance, you are to head up the operation to dismantle the Eagle’s network. You will locate and eliminate his terror cells through infiltration, manipulation and assassination. You are formally designated Cipher Nine and outfitted with a personal starship and the authority to recruit others. Watcher Two will remain your liason to Intelligence HQ.
Before you leave you speak with Watcher Two in private. She is shaken by the Dominator’s destruction and wonders how she can torture a colleague without feeling a thing, but can’t handle three thousand dead strangers. She tells you that she’s starting to think of you as a friend. You can take things further and spend some time with her off-duty if you choose. Alternatively, you can question her statement about torturing a colleague but she is reluctant to discuss it (Watcher Two Relationship | Bonus Quest).
Notes: The final conversation with Watcher Two used to be a bonus quest called ‘Watcher Two Relationship’, but is now just dialogue.

 Questions or comments? Feel free to send me a message on Twitter

 Discord
  Email swtorista@gmail.com
 Bluesky @swtorista.com
 Reddit /u/swtorista
 Twitch Swtorista
 Youtube
 Patreon
 Twitter @swtorista