The Black Talon is the first Flashpoint for Imperial players.
Summary: Grand Moff Kilran is the Empire’s pre-eminent naval strategist and commander.
Grand Moff Rycus Kilran is revered as one of the greatest naval strategists in Imperial history. He once assumed command of a disorganized Imperial fleet and led it to an important victory when his Sith commander was killed mid-battle. Commander of the Fifth Fleet and second to the Minister of War, he also earned the title ‘The Butcher of Coruscant’ for his brutal strikes. Scarred holding his ground against a Jedi boarding party, he was granted the honorary title ‘Grand Moff’ after the Great Galactic War.
Summary: Satele Shan is a famous veteran of the Great Galactic War and the current Grand Master of the Jedi Order.
A descendent of the legendary Jedi Knight Bastila Shan, Satele Shan had much to live up to when she joined the Jedi Order. She and her master were present at the Sith’s return to Korriban at the start of the Great Galactic War 38 years ago, where she duelled the future Darth Malgus along with her Master, Kao Cen Darach, who was killed in the battle. As a Jedi Knight, she became a well-known war hero, leading Republic forces into many victorious battles and duelling Malgus a second time during the Battle of Alderaan, where she liberated the Republic defenders.
After the sacking of the Jedi Temple on Coruscant by Imperial forces 10 years ago, she followed the call of the force and rediscovered the ancient Jedi homeworld of Tython, where the Order have presently relocated. Due to this and her other accomplishments, she was made Grand Master of the Jedi Order. As the fragile Republic – Sith peace begins to crumble, she works to protect the innocents of the galaxy, often co-ordinating with the Republic Emergency Response Corps.
Summary: You use the Imperial transport ship, Black Talon, to board a Republic cruiser and silence a defector who carries Imperial secrets.
Outside the Dromund Kaas shuttle departure hangar on the Imperial fleet you are hailed by an Imperial Valet who informs you that you have been granted a berth on the Black Talon (by either Lord Zash, Darth Baras, Crysta Markon or Imperial Intelligence depending on your class) [Complete Flashpoint – The Black Talon]. The Black Talon is a Gage-class Imperial transport and will be considerably faster than the shuttle, which takes several days. His offer comes with a warning that the Black Talon passes through dangerous territory.
On board the Black Talon, you are welcomed by Lieutenant Sylas, the second in command, who tells you the trip should take no more than a day as the Black Talon makes the trouble-free Dromund Kaas run on a regular basis. If you are not Sith she also warns you not to cause trouble. She tells you that your droid is waiting for you in the conference room where they put it after picking it up with upgrades on Geonosis. Apparently it mentioned you by name. Although you don’t own a droid, you go to the conference room to see what it has to say.
The droid identifies itself as NR-02, an advanced protocol unit built for diplomacy, translation, manslaughter and calumniation. It puts you through to its master, Grand Moff Rycus Kilran. Moff Kilran has found you through a scan of the Black Talon’s passenger manifest and ordered NR-02 to faciiltate an introduction.
Six hours ago, a Republic warship called the Brentaal Star escaped from a border skirmish on the edges of Imperial space. The ship is carrying a very important passenger code-named ‘The General’. The Empire is unsure of the General’s identity, but believes that they possess Imperial military secrets of vital importance and must be captured or killed before the Brentaal Star delivers them to the Republic. Unfortunately Captain Revinal Orzik, commanding the Black Talon, has disobeyed the order to attack the Brentaal Star. Kilran wants you to deal with him and commandeer the ship before finding the Brentaal Star, boarding it and dealing with ‘The General’ yourself. He threatens to destroy the Black Talon if you show disinterest.
Willingly or otherwise, you travel to the Bridge. NR-02 comfortingly reassures you that any crew deaths will be strategically inconsequential. On route, you are challenged by a Lieutenant and some troopers guarding a forcefield. He tells you that the Command Deck is strictly off-limits. You can attack his squad outright. If you attempt to defuse the situation, NR-02, fearing that your window for intercepting the Brentaal Star is closing, attacks for you. After killing the Imperials, you move through the forcefield and storm the bridge.
Captain Orzik accepts responsibility for his disobedience, pleading that the Black Talon is ill-equipped to fight a Republic warship and that he wanted to avoid a suicide mission. If you want, you can order that the injured marines be treated, earning his thanks. You now make an important choice: Either you execute him for his disloyalty, turning over command to his second in command, Lieutenant Sylas, or you tell him the mission can succeed with your help.
If you kill him, the young Ensign Hetter is especially traumatised. However, Sylas immediately orders the attack on your command. If you spare him, he admits that he may be able to get you close enough to board the Brentaal Star, but reminds you that you would have to fight through an army of Republic soldiers to find the General, a task he warns you will be much harder than commandeering his own ship. As he has little choice, he reluctantly agrees to help.
The Black Talon emerges from hyperspace and immediately engages the Thranta-class Brentaal Star. Along with heavy turbolaser fire, the Brental Star launches hull-breaching transport pods and three shuttles with boarding parties. If you spared Orzik, he orders the pods shot down and advises that you head to the shuttle bay and repel the invaders. You completely decimate the Republic borders in the cargo deck (Drive Them Back | Bonus Quest) and defeat BOSS: Republic Sergeant Boran and his elite squad – The droid S1-M0, “Doc Simon”, Corporal Hattak and Private “Crosshairs” Keemos in the hangar.
If you killed Orzik, Sylas considers the transport pods to be a distraction and continues to engage the Brentaal Star directly. The pods make it to the ship and cut their way inside. Sabotage droids are now taking over the engineering level, damaging the secondary power systems. You move through the command and engineering decks as pods smash through the hull beside you. You cut a swath through the Republic droids (Destroy Sabotage Droids | Bonus Quest) and receive a desperate call from the chief engineer telling you the droids have locked the engineering crew out of the control room and are sabotaging the engines. You fight your way inside the Main Engine Room and save the ship by destroying the giant BOSS: Republic GXR-5 Sabotage Droid.
Whichever invasion you repelled, you return to the bridge. The Black Talon is damaged, but Orzik or Sylas compliment you on your defence. You have penetrated the Brentaal Star’s defences and will soon enter fighter range.
At this point the Black Talon is contacted by none other than the Grand Master of the Jedi Order, Satele Shan. Shan informs you that she is en route with 16 Republic vessels and asks you to retreat before more lives are lost. She has already crippled three Imperial dreadnoughts and claims to have no desire to risk the fragile peace between the Republic and the Empire any further. Unfortunately she insists on keeping ‘The General’ and the secrets he contains, rendering a conflict inevitable no matter what you say. After warning you to prepare to face a Jedi, she signs off.
If Captain Orzik is in charge he grants you supplies in the hold bound for Dromund Kaas. If Sylas is in charge, she tells you she has executed several marines (over the objections of the Ensign Brukarra, the security coordinator) for refusing to follow you to the Brentaal Star and gives you their equipment. Ensign Hetter begs you to believe the crew are trying to help. Either way, while the Black Talon engages the Brentaal Star in fighter to fighter combat, you head to the hanger and take a shuttle to board her.
You progress through the port hangar bay of the Brentaal Star and take an elevator to the transport deck, killing dozens of Republic troops (Crippled Defences | Bonus Quest (Stage 1 & Stage 2).
In the main security room, you kill the Brentaal Star’s security chief and use a holoterminal to contact the Black Talon. NR-02 puts you in contact with security coordinator Ensign Brukarra who informs you that Imperial marines are behind you and will hold each junction as you secure it. NR-02 informs you Republic troops are moving to protect the escape pods, leading him to believe they plan to evacuate the general. You engage and defeat the BOSS: Mon Calamari Special Forces Commander Ghuli and two medics protecting him in the Transport Deck Central Hub before taking a tram to the Engine Deck.
On the Engine Deck in the munitions depot, you disable the munitions power consoles to damage the Brentaal Star’s offensive capabilities (Crippled Defences | Bonus Quest (Stage 3)). This activates a fail-safe and summons a huge GXR-7 command droid which you defeat (Crippled Defences | Bonus Quest (Final Stage)).
When you attempt to open the generator room door, BOSS: Jedi Padawan Yadira Ban uses the force to keep it closed from the other side. She tells The General, whom she is protecting, to run to an escape pod while she bravely stands her ground. After some verbal sparring, including possibly offering her the chance to surrender, you duel and kill her.
You find ‘The General’, who was severely injured during the Black Talon’s attack, near the escape pods. He surrenders and tells you that he was an actual General in the Imperial military service who discovered that both the Republic and the Empire are building doomsday weapons. Seeking to avoid Galactic devastation in the next inevitable large-scale war, he defends his defection as an attempt to even the odds and create a stalemate. You may take him prisoner for the Empire, no doubt leading him to an unpleasant fate on Dromund Kaas, or you can kill him in cold blood.
The General dealt with, you take the port tram back to the port hangar deck and use the holoterminal there to contact the Black Talon. If Captain Orzik is in command, he congratulates you and informs you that he will make the jump to lightspeed as soon as you’re on board (before Republic reinforcements arrive). If you captured the General alive, he prepares a holding cell. If Lieutenant Sylas is in command, NR-02 asks you to return urgently while you can hear Lieutenant Sylas pleading with someone in the background not ‘to get us all killed’.
Narrowly avoiding a crashing Republic ship that flies through the bay doors and explodes in the hangar, you take a shuttle back to the Black Talon. If Orzik is still in command, he congratulates you on a successful mission, expressing surprise at your abilities and pleasure at both assisting an Imperial operation and being spared by you. If Lieutenant Sylas was in charge, you return to find the entire bridge crew dead. Ensign Hetter feared that you might execute anyone who failed to contribute to the mission and attempted to flee with several of the officers. Sylas objected and the ensuing firefight saw everyone killed.
Grand Moff Kilran contacts the Black Talon and is pleased with your work, even moreso if you captured the General alive. He tells you there are many other important operations in progress and that he will reward you and remember your assistance in the future. He tells you to enjoy the rest of your trip and hopes that when you reach the Imperial Capital on Dromund Kaas, you can see what the Empire is fighting for and be inspired.





 How to Craft
 Choose a Crew Skill
 Armormech
 Armstech
 Artifice
 Biochem
 Cybertech
 Synthweaving

 Gathering Guide
 Rare Materials Guide
 White Materials Guide
 Jawa Junk

 Augments
 Medpacs, Stims and Adrenals
 Synthweaving Crafting Tree


 Crafted Decorations
 Crafted Mounts
 Crafted Dyes
 Crafted Crystals
 Events Calendar
 Galactic Seasons
 PvP Seasons
 Bounty Event
 Double XP Event
 Feast of Prosperity
 Gree Event
 Life Day
 Nightlife Event
 Pirate Incursion Event
 Rakghoul Event
 Spring Abundance Festival
 Swoop Event

 Jedi Knight
 Jedi Consular
 Trooper
 Smuggler
 Sith Warrior
 Sith Inquisitor
 Bounty Hunter
 Imperial Agent
 Bounty Hunter
 Imperial Agent
 Jedi Consular
 Jedi Knight
 Sith Inquisitor
 Sith Warrior
 Smuggler
 Trooper
 Legacy Gear
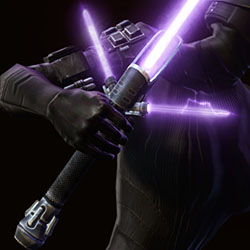 Lightsabers
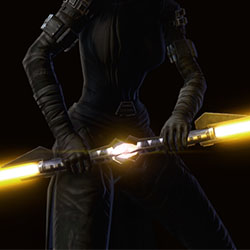 Double-Bladed Lightsabers
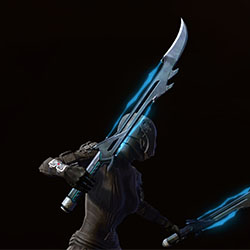 Vibroswords
 Double-Bladed Vibroswords
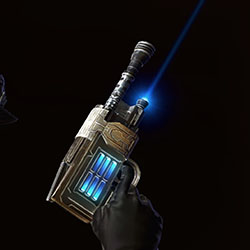 Blaster Pistols
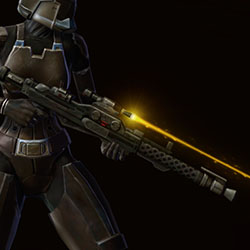 Blaster Rifles
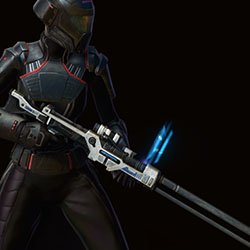 Sniper Rifles
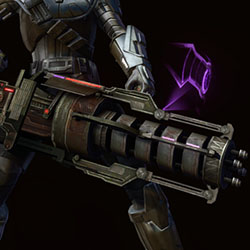 Blaster Cannons
 Questions or comments? Feel free to send me a message on Twitter

 Discord
  Email swtorista@gmail.com
 Bluesky @swtorista.com
 Reddit /u/swtorista
 Twitch Swtorista
 Youtube
 Patreon
 Twitter @swtorista