Contents
Eternity Vault
Story mode + Veteran mode
Droid

1 – Don’t run all the way up the snow ramp until we are ready! We’ll start by attacking the turrets, then back up to the ramp.
2 – Please STACK UP in front of the boss for group healing when he says “I have been armed with 24 distinct weapons technologies”.
3 – Stay out of red circles, and don’t stand in front of the boss’s face or you’ll get knocked back!
TANK – Face the boss towards the door behind him, so your back is facing a corner of the door.
Gharj

TANK – Take the boss to the far left of the platform and turn him away from the group. RANGED & HEALERS – Stand at the other far end of the platform. CLOSE-RANGE don’t stand in front of the boss
1 – When the boss SMASHES and put a cracked green circle on the ground, everyone run close to the boss. There will be a knock-back soon, aim your back towards the farthest edge of the platform so you are not knocked into the lava.
2 – The platform we are standing on will sink into the lava. Look for lava platforms to jump to the next platform. Don’t stay behind. If he’s jumping and slamming the ground, wait for between slams!
Pylons

1 – Left side of operation frame will go North, right side of operation frame will go South, group split in half. Don’t click anything yet!
2 – To solve puzzle, just keep clicking left blue button at the pylons, then click the middle button when the symbols line up and match left to right.
3- In story mode, one person can do the clicking, in veteran mode, you’ll need to take turns.
4 – The small enemies have a reflective shield. Stun or interrupt them!
Council

1 – Everyone fights one enemy. Look at enemy portraits info – Juggernauts are for tanks, Assassins for healers, Marauders are for DPS. Go find one and stand in front of it. Don’t click anything yet.
2 – DO NOT HELP YOUR TEAM MATES! No area attacks, no healing team mates, don’t move around too much.
3 – When you kill your enemy, you can do ONE ATTACK on a team-mates enemy to help them. Save it for someone struggling.
Soa

1 – Don’t run too far forward or you will start the fight! Soa starts with a shield, won’t take damage. Avoid nasty green puddles on the ground.
2 – We will need to return to where we start when Soa reaches 75% health as the floor will fall away! Run to the WEST if you get lost. Ranged stay where we start!
3 – To jump down the platforms, FOLLOW THE RAID LEADER! DO NOT RUN FORWARD ON YOUR OWN! There is an optimal pattern to jumping down and not dying. Stack up for healing. Heals yourself if you can.
4 – On middle floor, attack the blue glowing Mind Traps. If you see your name in red, look for a lightning ball and run in to it to explode it away from group.
5 – We will need to return to where we start when Soa reaches 29% health as the floor will fall away! Run to the WEST if you get lost.
5 – On final floor, TANK will need to drag Soa under the floating pillar. In story mode, blue circle on ground shows where, in veteran mode, use the shadow of the pillar. Don’t stand under location or you’ll get hit. When Soa kneels, everyone attack him ASAP until he shields again.
Karagga’s Palace
Story mode + Veteran mode
Boss

xxx
Boss

xxx
Boss

xxx
Boss

xxx
Boss

xxx
Explosive Conflict
Mode
Boss

xxx
Boss

xxx
Boss

xxx
Boss

xxx
Terror From Beyond
Story mode
Writhing Horror

1 – Don’t stand on the flowers or in the red puddles around the room! Stand behind the boss to attack.
2 – When you see the Jealous Male enemy appear, attack it. If you see Foul Offspring baby larva, attack them first. Otherwise, chase the big boss.
TANKS – Main tank turn the boss away from group. Off tank pick up the Jealous Male when the red text appears.
TANKS – (VETERAN MODE) Unlike story, swap bosses when the Jealous Male appears – offtank picks up boss, boss on Writhing Horror picks up Jealous male.
3 – (VETERAN MODE) We’ll take turns with one player standing in each red puddle that appears. Do not leave the puddle until offspring are dead.
4 – (VETERAN MODE) If you get the orange-yellow Corrosive Slime debuff, run to edge of room and cleanse yourself or be cleansed. Cleanse drops a yellow circle. Stay out of yellow circles.
5 – (VETERAN MODE) At 13% lots of small enemies appear. Ignore them, focus boss, use defensive cooldowns.
6 – (MASTER MODE) No major differences in Nightmare mode, everything just hits harder.
Dread Guards

1 – The kill order is HEIRAD (center enemy), then CIPHAS, then KEL’SARA.
2 – CIPHAS will jump and put up a purple shield, interrupt him.
3 – When the first enemy dies, green circles will appear on the ground. Try to stay out of them.
4 – When there is only one enemy left, if you get a GREEN BEAM on you, run away from the boss!
TANKS – HEIRAD can not be tanked. Swap tanks between CIPHAS and KEL’SARA when the “Pulverized” debuff on KEL’SARA’s tank gets high.
Operator IX

1 – Raid leader will assign you a color to click, pay attention! One player in each color will be clicking a button in the center of the fight, another will need to stand in center of the room and not move.
2 – The color order is BLUE -> ORANGE -> PURPLE -> YELLOW during the fight. When it’s your color’s turn do your assigned job. Ask if you don’t know what your job is!
3 – When it is not your color’s turn, look for two UNSHIELDED datacores around the edges of the room and kill them!
TANKS – Watch out for enemies coming out the door on the opposite side of the room, they will try and distract the button presser. Stun and taunt them to the center.
4 – When the boss droid appears, if you see colored circles on the ground, find one with your color and stand in it. He can’t be hurt when orange shield is up.
Kephess the Undying

1 – We just attack Kephess and nothing interesting happens until he reaches 50% health.
TANK – After 50% health, bring the boss to a glowing blue pillar.
2 – If you get a small ORANGE CIRCLE over your head, run to the blue pillar beside Kephess and right click it. Give other players a few seconds to run and right click it too. Then all players must step back to break pillar onto Kephess.
3 – At the end at 10% health, DPS stack on top of the boss, Healers and Tanks run around away from Kephess and orange circles.
Boss

(Raid leader needs to decide if they will split the group in half or have everyone on the same tentacle.)
1 – Do not run up to big boss! Stay near tentacles. Tank turn tentacles away from group. One healer stay near the back away from tentacles and move out of green spot puddles.
2 – DPS attack Unstable Larva when they appear from the water.
3 – After tentacles die, avoid Birthed Larva coming from the boss, running straight to the water!
4 – TELEPORTED! After three sets of tentacles die, we will be teleported. You can move between pillars by going through the portals. Attack tentacles on same pillar they are on, not from far away. Healers stay at top.
TANKS – Stay away from the DPS, on the outer higher pillars. You can choose to swap on the “Scream” attack. Step off of pillar if hit with green spit.
5 – Small enemies will appear on pillars after tentacles die, kill all Hypergate Irregularities as quickly as possible.
6 – After three sets of tentacles die, we attack the boss directly, distance does not matter. Spread out between pillars. Furious tantrum hurts, use defensive abilities. Tanks taunt any time boss is not on a tank.
Scum & Villainy
Mode
Boss

xxx
Boss

xxx
Boss

xxx
Boss

xxx
Boss

xxx
Dread Fortress
(Story notes only so far)
Nefra

TANKS – Bring Nefra near the steps, turn Nefra away from the group, and stack on top of eachother with your green circles. Move to the left together when red circles appear under you.
1 – Group stay behind the boss. Stay out of big red circles.
2 – One ranged DPS player should stand away from our group. Any volunteers?
HEALERS – Cleanse the green-colored “Voice of the Masters” debuff. It appears after Dread Master Besta makes fun of us in voice and after Nefra screams at the air.
Gate Commander Draxus

TEAM – I am dividing you in half, left side on the operations group go to the left stairs and right side on the operations group go to the right stairs.
MAIN TANK – Draxus will enter the fight at the stairs in the center. Turn him towards the stairs and save your single taunt for when he puts his hand in a fist in the air (he drops aggro.) Keep him turned away from the group.
1 – There are many enemies. In story mode we mostly just kill them. INTERRUPT Dread Guard Corruptor (human Sith Inquisitor holding a green lightsaber and is casting an ability called Mass Affliction) on the stairs. Later they will also appear in the back of the room.
HEALERS – If we fail to interrupt, cleanse as many green “Mass Affliction” debuffs as possible and be ready for big healing. If we have trouble we will assign interrupts to specific players.
2 – If you see an enemy putting up a large shield, fight it last, it is called a Bulwark.
3 – The Dismantler enemies have two lightsabers and may push you back if they are attacking you. If they push you, RUN AWAY ASAP.
TANKS – Taunt the double lightsaber Dismantlers immediately after they push someone.
4 – Large Guardian enemies will put down purple stuff on the ground – stay out of it. TANKS turn Bulwarks away from the group and run forward through the purple before it finishes casting. Can also interrupt it on story mode.
Grob’thok

1 – There is a magnet travelling along the ceiling. You can see its circle moving on the floor. Do not step in it.
2 – Stay behind the rancor, not in front.
3 – There will be lava on the floor. If the lava is dropping on you, keep moving away from the group. Look for red text.
MAIN TANK – When the rancor does “Pipe Smash”, drag him or push him under the magnet.
SECOND TANK – Pick up the smaller enemies and bring them to the boss.
Corruptor Zero

1 – Kill the Repair Droids first.
2 – When red circles appear, spread out.
3 –
Dread Master Brontes

TEAM – I am dividing you in half, left side on the left side enemies and right side on the operations group on the right side enemies.
1 – Attack smaller tentacle first, then bigger ones. TANKS, keep the tentacles turned away from the group. [how do we switch tentacles?]
2 – After big tentacles die, little “kissing” tentacles with lightning will come out of the ground. Do not stand between them!
3 – When Bestia appears, stand behind her. MAIN TANK, turn her towards the door.
4 – When Kephess appears, kill him first. SECOND TANK, go get Kephess when he appears.
[Healers cleanse nanites?]5 – After we fight Bestia [to a certain percentage?] do not stand between Bestia and the door! Stay out of giant lightning beam, but kill droids before lightning beam hits them.
TANKS – At the end, Bestia loses aggro a lot. Swap taunts back and fourth and bring her to the door.
Dread Palace
Mode
Boss

xxx
Boss

xxx
Boss

xxx
Boss

xxx
Boss

xxx
Ravagers
Mode
Boss

xxx
Boss

xxx
Boss

xxx
Boss

xxx
Boss

xxx
Temple of Sacrifice
Mode
Malaphar

xxx
Sword Squadron

xxx
Underlurker

xxx
Revanite Commanders

xxx
Revan

xxx
Gods From the Machine
Mode
Boss

xxx
Boss

xxx
Boss

xxx
Boss

xxx
Boss

xxx
Nature of Progress
Mode
Boss

xxx
Boss

xxx
Boss

xxx
Boss

xxx
Boss

xxx






 How to Craft
 Choose a Crew Skill
 Armormech
 Armstech
 Artifice
 Biochem
 Cybertech
 Synthweaving
 Gathering Guide
 Rare Materials Guide
 White Materials Guide
 Jawa Junk

 Augments
 Medpacs, Stims and Adrenals
 Synthweaving Crafting Tree


 Crafted Decorations
 Crafted Mounts
 Crafted Dyes
 Crafted Crystals
 Events Calendar
 Galactic Seasons
 PvP Seasons
 Bounty Event
 Double XP Event
 Feast of Prosperity
 Gree Event
 Life Day
 Nightlife Event
 Pirate Incursion Event
 Rakghoul Event
 Spring Abundance Festival
 Swoop Event

 Jedi Knight
 Jedi Consular
 Trooper
 Smuggler
 Sith Warrior
 Sith Inquisitor
 Bounty Hunter
 Imperial Agent
 Bounty Hunter
 Imperial Agent
 Jedi Consular
 Jedi Knight
 Sith Inquisitor
 Sith Warrior
 Smuggler
 Trooper
 Legacy Gear
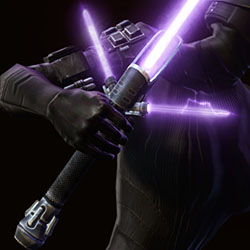 Lightsabers
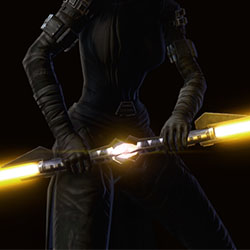 Double-Bladed Lightsabers
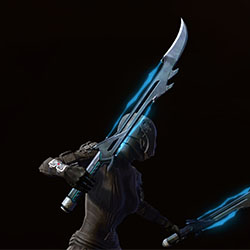 Vibroswords
 Double-Bladed Vibroswords
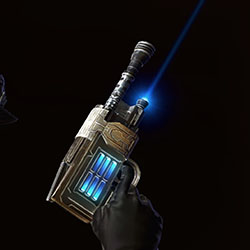 Blaster Pistols
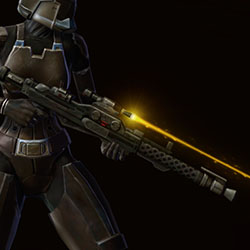 Blaster Rifles
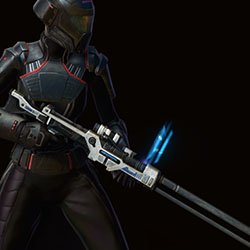 Sniper Rifles
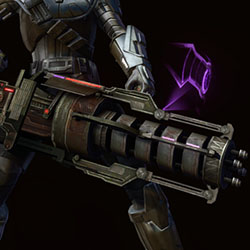 Blaster Cannons

 Questions or comments? Feel free to send me a message on Twitter







 Discord
  Email swtorista@gmail.com
 Bluesky @swtorista.com
 Reddit /u/swtorista
 Twitch Swtorista
 Youtube
 Patreon
 Twitter @swtorista