


 How to Craft
 Choose a Crew Skill
 Armormech
 Armstech
 Artifice
 Biochem
 Cybertech
 Synthweaving

 Gathering Guide
 Rare Materials Guide
 White Materials Guide
 Jawa Junk
 Augments
 Medpacs, Stims and Adrenals
 Synthweaving Crafting Tree


 Crafted Decorations
 Crafted Mounts
 Crafted Dyes
 Crafted Crystals
 Events Calendar
 Galactic Seasons
 PvP Seasons
 Bounty Event
 Double XP Event
 Feast of Prosperity
 Gree Event
 Life Day
 Nightlife Event
 Pirate Incursion Event
 Rakghoul Event
 Spring Abundance Festival
 Swoop Event
 Jedi Knight
 Jedi Consular
 Trooper
 Smuggler
 Sith Warrior
 Sith Inquisitor
 Bounty Hunter
 Imperial Agent
 Bounty Hunter
 Imperial Agent
 Jedi Consular
 Jedi Knight
 Sith Inquisitor
 Sith Warrior
 Smuggler
 Trooper
 Legacy Gear
 Lightsabers
 Double-Bladed Lightsabers
 Vibroswords
 Double-Bladed Vibroswords
 Blaster Pistols
 Blaster Rifles
 Sniper Rifles
 Blaster Cannons


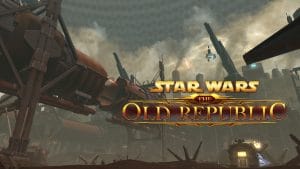
The Battle of Rishi is a Flashpoint in Star Wars: The Old Republic that you can run alone, with friends, or with other random players through the groupfinder.
Contents
Battle of Rishi

Revan’s forces have lured massive fleets from the Republic and the Empire into a trap! The only way to warn your allies of the infiltrators aboard their ships is to shut down the powerful signal jammer the Revanites are using to block all communications in the Rishi system. The path to the jammer is crawling with Revanite defenders. Fight your way to their camps in the Island Gorge.
How to Start
Battle of Rishi is a Flashpoint meant to be played later in the story, quite a while after your class story is completed. You can encounter it in the story part way through the Shadow of Revan expansion, replay it alone in Story mode, or play it outside of the story with a group in Story, Veteran or Master mode.

Use the tabs above for instructions for how to enter the flashpoint in the story line, and how to enter it in Solo (Story) mode, Veteran mode, and Master mode. The instructions are exactly the same Republic and Imperial side.
- Story: Lvl 55+
- Solo: Lvl 55+
- Veteran: Lvl 15-80
- Veteran Groupfinder: Lvl 53-80
- Master Mode: Lvl 50-80 †
- Master Mode Groupfinder: Lvl 80

Story Instructions
![]()
![]()


Requirements: To play the Battle of Rishi Flashpoint in the story, and receive all the special cutscenes related to the Flashpoint in the story, you will need to be level 55+ and be on the correct quest in the Shadow of Revan chain. If you are below this level, you can not play the story quest or associated quest line for this Flashpoint.
![]()
Timeline: In the story, this Flashpoint takes place early on in the Shadow of Revan storyline, on the planet Rishi. It does not make much sense plot-wise to play outside of the story.

Bring a Friend: If you want to bring a friend along for this Flashpoint in Story Mode to do the full story line, you easily can.
If they have not done the Battle of Rishi storyline, they can join you in a group and you can follow the exact same steps together as long as they are level 55+.
If they have already run the storyline, they’ll be able to join you in the cutscenes, by walking in the door after you on Rishi. Then after you finish that cutscene with them watching, you’ll be able to enter the Flashpoint, but your friend won’t have any quests so they can’t walk in behind you… tell them to go talk to the nearby Jerwoh Vhob alien questgiver and pick up the [Start Story Mode] quest and then they will be able to enter the Flashpoint with you.

They can also use the Solo tab in the Activity Finder to quickly join you once you are already inside the Flashpoint as long as they are level 55+.
![]()
Directions to the Story Quest for Battle of Rishi: Battle of Rishi’s one-time story quest is built in to the Shadow of Revan expansion storyline, once you are on the step called Frontal Assault.

If you have not yet run through the Shadow of Revans storyline, you can start it from the glowing blue terminal on your ship. You will then run through these missions on the planet of Rishi.
→ Welcome to Rishi
→ A Scoundrel’s Debt
→ Monkey-Lizard Business
→ The Cove Crier
→ In Plain Sight
→ Making a Mark
→ The Slavers
→ Broken Blades
→ Heart of the Aggressor
→ Torch’s Flame
→ Blood Hunt Flashpoint
→ The Revanites Revealed
→ Path of Betrayal
→ Lingering Hate
→ To Disrupt the Order
→ Frontal Assault
→ Battle of Rishi Flashpoint
Once you get to Frontal Assault, you’ll automatically be on the quest [STORY] Battle of Rishi, where you can travel to the Flashpoint entrance and walk in – no need to talk to the questgiver, as you should already be on the quest. The closest quicktravel is Raider’s Cove and run a bit north, then turn east.

If you play in Story Mode, you will also get a Combat Support Droid to help you.

If you lose him, you can re-summon him by left-clicking the blue symbol beside the Battle of Rishi quest.

If you can’t see that icon, you can also right-click the item in the Mission Items tab of your inventory.

![]()
Story Progress: [STORY] Battle of Rishi alone will not progress your storyline – it is simply the repeatable solo version. To work on the overarching story, you also need to be on the quest Frontal Assault as part of the Shadow of Revan on the step Complete Flashpoint: Battle of Rishi and then run the [STORY] Flashpoint: Battle of Rishi quest.

Lost the quest? If you lost the Frontal Assault / Shadow of Revan quest, head back to the terminal on your ship you started at to re-pick up the quest, but keep in mind this story-based introductory quest related to the Shadow of Revan is one-time-per-character. If you lost the ability to walk into the Flashpoint door, or lost the quest with the word Flashpoint in it, you can pick up the [STORY] Flashpoint: Battle of Rishi quest from the Jerwoh Vhob outside the flashpoint’s entrance.


Solo (Story) Instructions
![]()
You can also run this repeatable Flashpoint solo outside of the one-time story quest, at level 55+.

Activity Finder: The FASTEST and EASIEST way to get into the Battle of Rishi Flashpoint soo mode is with the Activity Finder. If you are level 55 or higher, click the icon of “three little people” on the bottom right of your screen which will open the Activity Finder Window.
Then choose the Solo tab in the Activity Finder.

On the solo tab, scroll down and find the listing for Battle of Rishi on the list under Flashpoints, select it, then click the green Travel button. This will take you right into the Flashpoint!
Bring a Friend: You are allowed to bring friends along for this Flashpoint, you do not have to do it alone even though it is considered soloable. Your friends must also be level 55+, be in a group with you, and then you can all use the Solo Tab of the Activity Finder to get into the Flashpoint, and it will put you together no matter where in the galaxy you started from.
![]()
There’s really no need to walk into the Flashpoint manually, but here are the instructions.
Manual Entry: To enter this Flashpoint manually, you must go to the Battle of Rishi’s Flashpoint entrance, which is located on the planet of Rishi, which you can fly to on your ship. The Flashpoint questgiver is named Jerwoh Vhob. If you don’t see the Solo version it means you are not yet eligible due to being below level 55. The solo, single-player repeatable mode will be called [Start Story Mode] from the questgiver. You can then walk in the nearby door and play the Flashpoint.
Step 1 – Get to Rishi, by flying there with your ship.

Step 2 – Walk to the Battle of Rishi entrance on the island to the north. The closest quicktravel is called Rishi Village. Look for Jerwoh Vhob the questgiver, and choose [Start Story Mode] to start the Flashpoint.
If you have never been there before, it is on an island – you’ll need to take a taxi. To get to the taxi, you’ll need to walk down the big dock ramp a bit after flying and landing on Rishi.

If you play in Story Mode, you will also get a Combat Support Droid to help you.
If you lose him, you can re-summon him by left-clicking the blue symbol beside the Battle of Rishi quest.
If you can’t see that icon, you can also right-click the item in the Mission Items tab of your inventory.
![]()
Story: [STORY] Flashpoint: Battle of Rishi alone will not progress your storyline – it is simply the repeatable solo version. To work on the overarching story, you also need to be on the quest Frontal Assault on the step Complete Flashpoint: Battle of Rishi and then run the [STORY] Flashpoint: Battle of Rishi quest. See the Story tab for more info.
Veteran – Republic Instructions
![]()
![]()
Battle of Rishi also has a repeatable 4-player Veteran version. It is meant to be completed by a group with any type of Republic characters in it, you do not necessarily need a tank or healer to complete it. You will likely also have good luck with 2 players and 2 companions, or 3 players and 1 companion.
Group Finder: If you want to queue up and enter Battle of Rishi in veteran mode through the group finder, you will need to be level 53-80 and not currently on any Battle of Rishi Flashpoint quests or it won’t show up as an option in the group finder. If you are level 53-80, click the icon of “three little people” on the bottom right of your screen which will open the Activity Finder Window. Then choose the Group tab in the Activity Finder.
Filter: If you want to specifically run Battle of Rishi and not a random Flashpoint, make sure to choose Veteran Flashpoints, then click the Filter button the right and narrow your choices down to just Battle of Rishi before pressing Join Queue. Joining the queue will put you in line to be matched with random players to play Battle of Rishi with.
Groupfinder flashpoints do NOT show the cutscenes. To see the cutscenes related to this Flashpoint, you must enter it manually by walking in the door.
Bring a Friend in the Groupfinder: You can queue up with a group of 2, 3, or 4 players in the group finder. If you have a full group of 4, it will bring you straight to the Flashpoint with your full group. If you have 2 or 3 players in your group, the group finder will match you with other random players until you have a full group – but you’ll always be paired with your friends who started off in your group, and will not be split up.
![]()
Story: [VETERAN] Battle of Rishi will not progress your storyline – it is simply the repeatable group version. If you are a low level, this is the only version that will show up on the actual Flashpoint questgiver in front of the entrance door – so don’t be confused and accidentally enter the group version if you are a low level, as it is not meant to be completed alone.
![]()
Veteran Manual Entry (Republic): To enter this Flashpoint manually, you must go to the Battle of Rishi’s Flashpoint entrance, which is located on the planet of Rishi, which you can fly to on your ship. The Flashpoint questgiver is named Jerwoh Vhob. If you don’t see the Solo version it means you are not yet eligible due to being below level 55. The solo, single-player repeatable mode will be called [Start Veteran Mode] from the questgiver. You can then walk in the nearby door and play the Flashpoint.
Bring a Friend Manually: Veteran Mode Flashpoints are not meant to be completed alone, though highly-skilled, highly-geared, high-level players might be able to. To bring friends along for this Veteran Flashpoint, they’ll need to pick up the Veteran Mode quest from the questgiver – or you can pick up the quest and share it with them, but they’ll still need to walk in the door manually. Characters walking in the door need to be level 15+.
Step 1 – Get to Rishi, by flying there with your ship.
Step 2 – Walk to the Battle of Rishi entrance on the island to the north. The closest quicktravel is called Rishi Village. Look for Jerwoh Vhob the questgiver, and choose [Start Veteran Mode] to start the Flashpoint.
If you have never been there before, it is on an island – you’ll need to take a taxi. To get to the taxi, you’ll need to walk down the big dock ramp a bit after flying and landing on Rishi.
Master – Republic Instructions
![]()
![]()
Master Mode is the hardest version of Battle of Rishi. It is meant to be completed by a high-level high-skilled group at level 80. Most teams will want a Tank, Healer and two Damage characters.
Group Finder: If you want to queue up and enter Battle of Rishi in Master Mode through the group finder, you will need to be level 80 and not currently on any Battle of Rishi Flashpoint quests or it won’t show up as an option in the group finder. If you are level 80, click the icon of “three little people” on the bottom right of your screen which will open the Activity Finder Window. Then choose the Group tab in the Activity Finder.
Filter: If you want to specifically run Battle of Rishi and not a random Flashpoint, make sure to choose Master Flashpoints, then click the Filter button the right and narrow your choices down to just Battle of Rishi before pressing Join Queue. Joining the queue will put you in line to be matched with random players to play Battle of Rishi with.
Groupfinder flashpoints do NOT show the cutscenes. To see the cutscenes related to this Flashpoint, you must enter it manually by walking in the door.
Bring a Friend in the Groupfinder: You can queue up with a group of 2, 3, or 4 players in the group finder. If you have a full group of 4, it will bring you straight to the Flashpoint with your full group. If you have 2 or 3 players in your group, the group finder will match you with other random players until you have a full group – but you’ll always be paired with your friends who started off in your group, and will not be split up. Your friends all need to be level 80 too.
![]()
Story: [MASTER] Battle of Rishi will not progress your storyline – it is simply the repeatable difficult group version.
![]()
Veteran Manual Entry: To enter this Flashpoint manually, you must go to the Battle of Rishi’s Flashpoint entrance, which is located on the planet of Rishi, which you can fly to on your ship. The Flashpoint questgiver is named Jerwoh Vhob. If you don’t see the Solo version it means you are not yet eligible due to being below level 55. The solo, single-player repeatable mode will be called [Start Master Mode] from the questgiver. You can then walk in the nearby door and play the Flashpoint.
Bring a Friend Manually: Master Mode Flashpoints are not meant to be completed alone, and are designed for level 80 players who are comfortable with their role and class. To bring friends along for this Master Flashpoint, they’ll need to pick up the Master Mode quest from the questgiver – or you can pick up the quest and share it with them, but they’ll still need to walk in the door manually while you’re in a group. Level 50-80 characters can technically enter Master Mode flashpoints, but all the enemies are level 80, and they will die very quickly.
Step 1 – Get to Rishi, by flying there with your ship.
Step 2 – Walk to the Battle of Rishi entrance on the island to the north. The closest quicktravel is called Rishi Village. Look for Jerwoh Vhob the questgiver, and choose [Start Master Mode] to start the Flashpoint.
If you have never been there before, it is on an island – you’ll need to take a taxi. To get to the taxi, you’ll need to walk down the big dock ramp a bit after flying and landing on Rishi.
Bosses
This Flashpoint has three boss fights – Rarrook and Marko Ka, Master Obai and Lord Vodd and lastly Shield Squadron Unit 1.
In story mode, and in Veteran Mode when you have multiple players you can use the medpacs scattered around the bosses. Right-click them to heal yourself.

The following boss info is mainly for story and Veteran mode – Master Mode tactics are not covered in this guide.
Wookiee Rarrook and Marko Ka

The first boss is made of two bosses. There will be a lot of circles and lines on the ground – try and stay out of as many as possible.

When you see the healing droids called S4-E support Droids, kill them first. They will have a green beam coming from them.

You want to try and kill the two bosses at roughly the same time.

When one boss dies, the other gets more powerful and triples the amount of circles or lines on the ground.

Right-click the blinking elevator to continue forward after the fight.

Master Obai and Lord Vodd

During the fight, bright red text will pop up about BALLS OF FORCE LIGHTNING.

Look around for the glowing balls of light, and run into them.

This will cause them to explode, making it so they never reach the tower, which is a good thing.

As always, try and stay out of any bad circles or triangles on the ground as much as possible.


Master Mode: In Master Mode, there is a small difference – there will be more lightning orbs, and at one point, five will come out all at once. If one person gets five stacks of lightning bubbles, they will automatically die, so your team needs to share bubble duty.

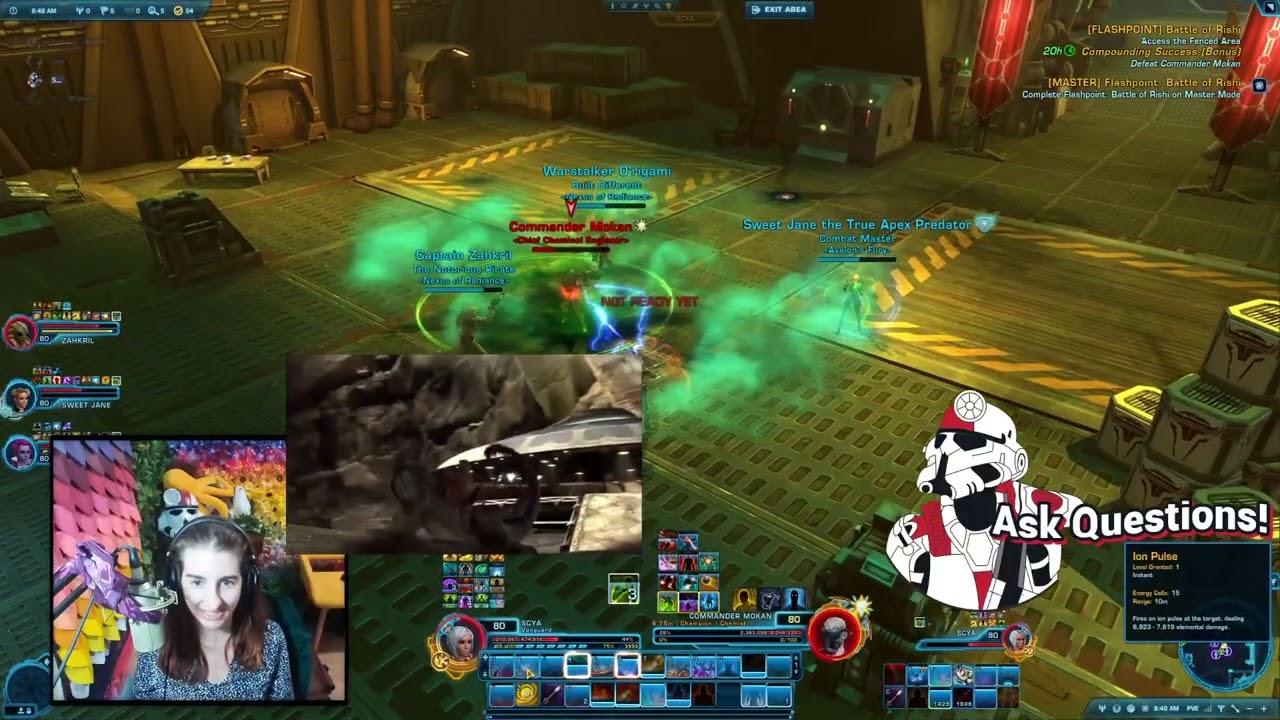
Bonus Boss – Commander Mokan – Master Mode Only

Commander Mokan is a fun but difficult bonus boss only available in the Master Mode version of Battle of Rishi if you have fully completed the Master Mode only bonus quest called Compounding Success.
Compounding Success (Bonus Quest)
- Destroy All Revanite Supply Caches x10
- Obtain Command Bunker Codes x2 (hidden glowing pads)

The bonus boss itself it located in a secret bunker to the north west whose door you can right-click if you have done the other bonus quest steps first.

If you don’t pay attention to this boss’s mechanics, your entire group will die. This is not a great fight for completely random groups. There are two ways to do the fight – using the syringes on the tables on the sides of the room, or bringing in two character who can help cleanse the tank (or a tank that can cleanse themselves plus another player who can cleanse them too).
The boss is going to do a “red gas” attack throughout the fight. If the red gas attack happens, and you do not have “3 stacks of green”, your character will die.

If you get “5 stacks of green”, you automatically die. The green debuff looks like a green man on a green background who is choking.
Green Triangle: The tank, or anyone standing in front of the boss, will get 3 stacks when he does his triangle green scatterblast attack. He does this about three times before the red gas attack, to the tank will need to be cleansed about twice each time the scatterblast happens. Cleansing only takes away one of your stacks, not all of them.

If you do not have enough cleansers (hopefully you have at minimum one through your healer), the tank can run over and use the RED syringes on the table to clear a stack, just keep in mind there is only a total of four in the room available. The tank will also need to co-ordinate with the group so the group is not on that side of the room, or they might get hit with the scatterblast when the tank runs towards the table. If you have two cleansers though, you can ignore the table all-together.

Green Circle: The boss will also randomly choose a player to put a green circle on, which will then drop on the ground. Standing in the circle for more than TWO SECONDS will give you a stack of green.

Red Gas Attack: After he does three rounds of the green triangle scatterblast attack, he will shortly after go his red gas attack, a casted ability called Compound 17 Release with a red-colored icon. This attack happens give or take every 40 seconds.

BEFORE this cast happens, likely shortly after the third green scatterblast, all members of the group will want to try and get a total three green stacks (and definitely not a total of five). If they are missing stacks, they can step into the green circles and stay there for two seconds before stepping out again, or they can use the GREEN syringes on the tables to the left and right by right-clicking it.
Here is a very funny short video of me and some friends learning how to run Mokan.
Shield Squadron Unit 1

Shield Squadron Unit 1 has some fun and important mechanics.

When the boss starts casting Electrical Megastorm, and there is a pulsing animation, you want to run to one of the two circles in the arena, and click the glowing blue terminal in front of it to shield yourself within the circle.

The activated shield is bright orange.

Group: Ideally, all members of your group will go to the same side. This can be hard to coordinate with a random group though, I think most people go to the left to start.
Solo: Your companion is really dumb and doesn’t know how to get inside the shield with you.

To save them, you need to ‘babysit’ them, and when they are standing in the lightning, you can run to the safety circle yourself, and then set them to “Passive” mode by clicking the icon of a blue man in a shirt crossing his arms in your companion abilities. Even better if you can click it as you run. This will cause them to follow you closely and not attack or heal. When it is safe, and the boss is done with its electricity, you can click the icon again to send them back into battle. They keybind for this ability is CONTROL+2 by default.

As always, try and stay out of any colorful circles on the ground, and also the big blue cross on the ground, as much as you can.
Master Mode: In Master Mode, the big difference is that you must alternate the two shields that you hide behind after the boss pulls you in. I think most groups all start left. If you split up, and activate both, the next time the shield phase happens, you won’t have any shields available. In Master Mode you also need to be mindful of the additional smaller enemies that show up and kill them.
Don’t forget to right-click the glowing blue terminal to finish the Flashpoint.

When you are ready to leave, right-click the glowing blue tower or use the EXIT AREA button.

Skips
Destroy Revanite Supplies: At the beginning of the Flashpoint, you can easily avoid many enemies by not charging towards the glowing blue supplies – you can right click them from pretty far away without the enemies noticing.
Stealth: You can stealth, un-stealth and re-stealth to destroy the Revanite Supplies from far away and don’t have to fight anything until the first boss.

Skips
What follows are a quick gallery of images depicting specific walking routes that may save you some time by avoiding enemies during the flashpoint – certain routes will be highlighted as the main “community routes” that you’ll probably see players in random activity-finder groups try to do – if you only practice one skip out of all of these, make it the community one! All of the following images are done without stealth or without a sleep dart/mind maze from a stealth character, so anyone can attempt them. If you fail to slip by unnoticed or see your team has attacked the enemies – always pull back from these routes and go back to help them defeat them! These may save time if everyone does them, but nothing makes a flashpoint slower than running ahead and not helping others to get out of combat again.
Solo Stealth: If you are playing Battle of Rishi alone and are on a Stealth character, you can skip many of the enemies – you’ll have to fight very little in this one.
Destroy Revanite Supplies: Before we get into skips, near the beginning of the Flashpoint, keep in mind you can easily avoid many enemies by not charging towards the glowing blue supplies – you can right click them from pretty far away without the enemies noticing.
Skip #1 – Community Skip

Right off the bat the first skip that you’ll see plenty of players do is simply hop off the docks and into the water to get around the first pack of enemies. By far the most common one.
Skip #2

This one may be a little less common but I was tempted to list it as a community skip because I’ve definitely seen people in public groups do it – when you pass the objective to reach the camps and it switches to destroying supplies, you can run up this ramp between two hostile packs. Destroy the first supply cache ahead of you, run up the ramp a little, break the second cache, then run along the cliff’s edge until you get in range of the third cache of camp #1. From here, you can hop down into the water that’ll be visible between the trees in the image, and continue on without fighting anything. Hug the cliff wall as you continue.
Skip #3

As you approach the second camp, you can run to the cliff wall on your left to get around this pack of enemies in the image above. Hop down behind the tree in the image and aim for the grass, as jumping on the nearby rock (out of frame here) can get you stuck. Past here, all three caches to shoot for the second camp objective can be reached by simply standing in the center of the open field and moving just barely close enough to interact.
Skip #4 – Advanced

On your way out of the second camp, there will be this pack imaged above in your way. You can skip this, amazingly without stealth, by hopping up on the rock ledge to the left and jumping over some rocks to get to the other side. The rocks here are all at very different angles and some may slide you down and into combat – the trick to doing this right is to look closely at the yellow arrow in the image – you need to jump onto and run up the slim rock ledge with some green moss growing on it. If you remember the green moss you’ll skip this correctly every time – for an “advanced skip” it’s on the easier side.
Skip #5 – Advanced

This one can be pretty common, but it’s also commonly messed up. Skip this whole bridge by sticking left and hugging the rock shelf and green grass that wraps around to the ramp leading to the first boss. By standing next to the ramp you will be VERY CLOSE to pulling the group nearby. Refer to the image in the bottom right corner here – it shows you exactly the highest point on the ramp that you can jump up onto. If you jump further right where it’s lower and easier, you will be too far right and the group will see you. As a general rule, you need to be jumping above the section of the ramp that has a change in the railing trim.
Skip #6 – Stealth Required

Normally we don’t talk about anything that requires stealth in these skip guides but this one is so commonly done it should be mentioned – during the “Slice the Access Stations” objective, you can send a stealther in your group through to slice the First Access Station by themselves. As in the image-in-image above, they can simply sneak behind the interactable terminal and use it as cover while they slice, so no revanites will see them. Then, they can stealth back out of the bunker and meet back up with you. Attack the second station together though, there’s no room behind it’s computer to hide and one sleep dart typically isn’t enough to hide from the guards.
Skip #7

On your way to station two, stick to the right hand wall and jump into the water to dodge enemies.
Skip #8 – Stealth Required

After station two is sliced you’ll get an objective to disable the force field. This is an identical objective to station one, meaning a stealther (if you have one) can pull the same cable chewing strategy as last time and disable it with no fighting. Work on Skip 9 while waitin’ for them!
Skip #9

On your way out as the force field goes down, run under this bridge and over the waterfall to get onto the main path without fighting.
Skip #10

As a final skip, after the AA guns are disabled you can get into the bunker without fighting the droids at the entrance simply by running behind the large tree in the image and jumping onto the huge metal foundation and dropping down on the other side of it.
Rewards
In addition to the usual rewards of XP, credits, gear and end-game currency, Battle of Rishi has the following rewards available.
Multi-state Mainframe Terminal
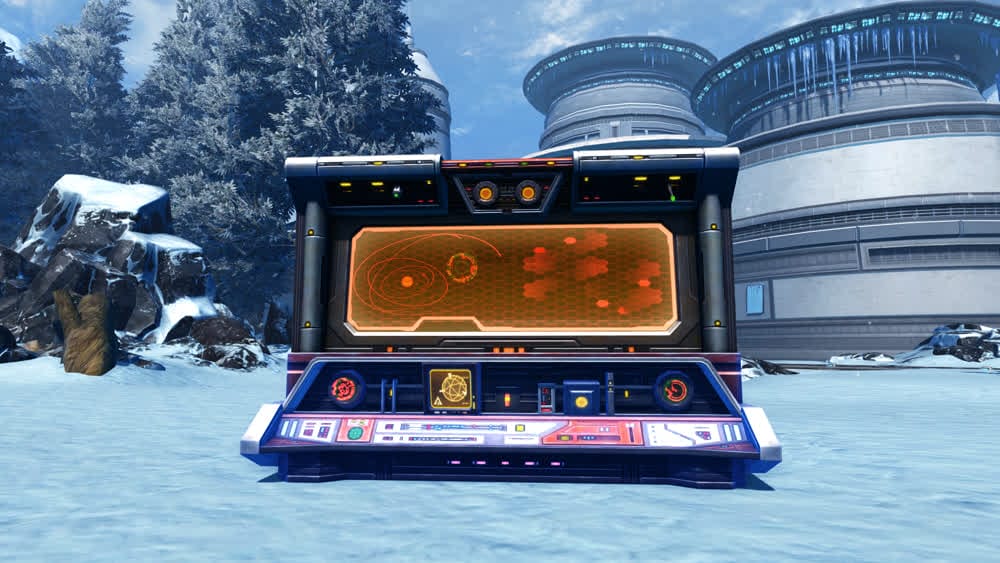
The Multi-state Mainframe Terminal decoration is an automatic reward for completing the repeatable solo-friendly [STORY] mode, picked up through the Activity Finder. It can also be bought and sold on the GTN.
Force Hound

The Force Hound is a rare drop from the Battle of Rishi Flashpoint. When it drops it is bound on pickup, so you will not be able to trade it between characters or buy/sell it on the GTN. Players reported it dropped in both story and master mode (so it likely drops in veteran too).
ST-7 Command Walker

The ST-7 Command Walker is a very rare drop mount. It seems to drop only from the Bonus Boss named Commander Mokan in the Master Mode version of the Battle of Rishi Flashpoint (not from the other bosses). There is a VERY similar version called the St-7 Recon Walker, which doesn’t have the rockets on the side, which is from the Cartel Market. It does seem buyable/sellable on the GTN.
Objectives
To Destroy Revanite Supplies, right click the glowing blue crates and cannisters scattered around the area.
To Access the Fenced Area, right-click the glowing blue panel beside the grated door, which will lead to the bosses. It is on the right of the door.

Access the Elevator is a glowing blue button on the wall near the elevator after Rarrook and Marko Ka.

- Reach the Revanite Camps
- Destroy Revanite Supplies at the First Camp
- Destroy Revanite Supplies at the Second Camp
- Access the Fenced Area
- Defeat Rarrook and Marko Ka
- Access the Elevator
- Reach the Revanite Bunkers
- Slice the First Access Station
- Slice the Second Access Station
- Deactivate the Force Field
- Access the Fenced Area
- Defeat Master Obai and Lord Vodd
- Reprogram the AA Cannons
- Use the Access Door
- Defeat Shield Squadron Unit 1
- Disable the Signal Jammer
 Questions or comments? Feel free to send me a message on Twitter


 Bluesky @swtorista.com
 Discord
  Reddit /u/swtorista
 Email swtorista@gmail.com
 Twitch Swtorista
 Youtube
 Patreon
 Twitter @swtorista