


 How to Craft
 Choose a Crew Skill
 Armormech
 Armstech
 Artifice
 Biochem
 Cybertech
 Synthweaving

 Gathering Guide
 Rare Materials Guide
 White Materials Guide
 Jawa Junk
 Augments
 Medpacs, Stims and Adrenals
 Synthweaving Crafting Tree


 Crafted Decorations
 Crafted Mounts
 Crafted Dyes
 Crafted Crystals
 Events Calendar
 Galactic Seasons
 PvP Seasons
 Bounty Event
 Double XP Event
 Feast of Prosperity
 Gree Event
 Life Day
 Nightlife Event
 Pirate Incursion Event
 Rakghoul Event
 Spring Abundance Festival
 Swoop Event

 Jedi Knight
 Jedi Consular
 Trooper
 Smuggler
 Sith Warrior
 Sith Inquisitor
 Bounty Hunter
 Imperial Agent
 Bounty Hunter
 Imperial Agent
 Jedi Consular
 Jedi Knight
 Sith Inquisitor
 Sith Warrior
 Smuggler
 Trooper
 Legacy Gear
 Lightsabers
 Double-Bladed Lightsabers
 Vibroswords
 Double-Bladed Vibroswords
 Blaster Pistols
 Blaster Rifles
 Sniper Rifles
 Blaster Cannons

The Dantooine Dynamic Encounters take place in a hazardous area of Dantooine, the Dantooine Biomes, where dangers like freezing, acid baths, lava and the mysterious sporefall poison can harm you before you ever even run into an enemy. As you rank up your Galactic Sustainability Institute Reputation, and explore the area, you’ll get access to a bunch of different buffs and unlocks that make the area easier. This guide is purely about the buffs and unlocks – if you want to learn about the area in general, visit the Dantooine Biome Dynamic Encounters Guide.

Contents
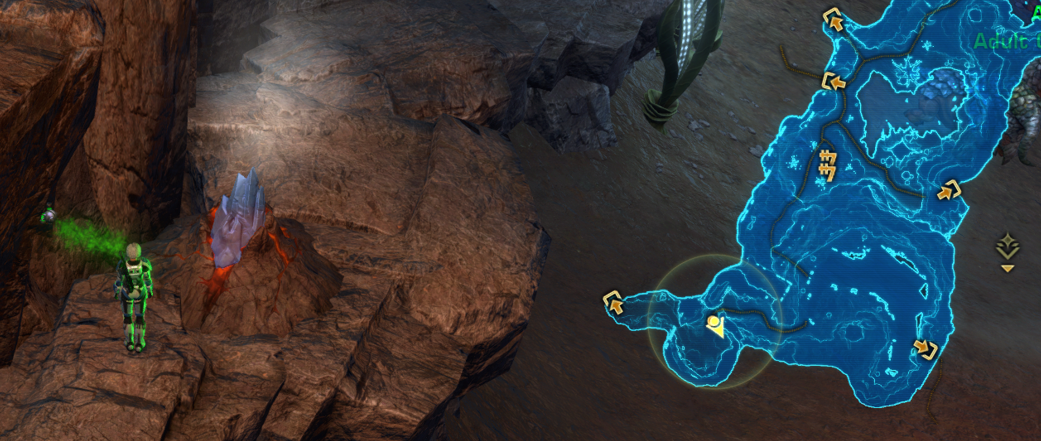
Buffs Map
Here is a map of many of the potential buff locations in the Dantooine Biomes. They move around and there’s usually one per “area” circled on my map.


Dantooine Buffs and Unlocks List
Here’s a quick list of the buffs and unlocks in the area! To learn more about each of these, see the detailed sections below the list.

As you rank up your Reputation, you start unlocking things that make the area easier:
-
- [Walk to the Perimeter Camp] Unlock the single Quicktravel point at the center of the map
- [Complete Transition Step of Wreckage on Dantooine] Be able to see and use the blue Mitigation Module terminal at the base camp
- [Outsider] Single-biome partial protection buff for 30 minutes from the blue terminals – 10,000 Credits
- [Newcomer] Single-biome partial protection buff for 1 hour from the blue terminals – 10,000 Credits
- [Friend] Be able to use the blue Mitigation Module terminals at the three area camps, not just the base camp
- [Friend] Single-biome partial protection buff for 2 hours from the blue terminals – 10,000 Credits
- [Friend] Contained Spore Bomb – Releases weaponized sporefall in a small area – affected targets will take increased damage from all sources only in the biomes area by about 10%, 50,000 Credits
- [Friend] Forward Camp Speeder Access – Enables access to the camp-to-camp speeders for 30 minutes – 25,000 Credits
- [Friend] Research Notes Temporary Buff – Single biome findable glowing blue object buff for 30 minutes – 30 minute combat buff once found – 35,000 Credits
- [Hero] Single-biome immunity full protection buff for 2 hours from the blue terminals – 10,000 Credits
- [Hero] Maintenance Tunnel Pass – Grants access to maintenance tunnels connecting the biomes and the ship for easier movement – 60,000 Credits
- [Champion] Sliced Security Card – Allows access to Jannimak Security Terminals in the biomes. Exact effect unknown. 250,000 Credits
- [Legend] Research Notes Permanent Buff- Single biome findable glowing blue object buff permanently – 30 minute combat buff once found – 2 mill Credits
There are also these around the area you may find and pick up to make things easier that do not require any Reputation rank:
-
- Crossover Buffs – Glowing blue objects you can right-click that are not a part of the Dynamic Encounter objectives – they look like small lava vents or spore flowers from a specific location after a transition, and give you a small combat boost lasting 30 minutes or until death
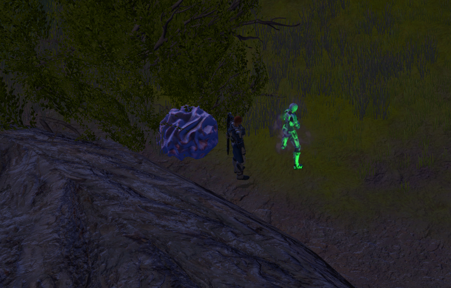
- Stims – Mysterious Stimpack & Unknown Adrenal – Small glowing green or yellow stims on the floor, clicking them gives you a small combat boost lasting 30 minutes or until death

If you are trying the Orbital Core, there are also these from the terminal in front of the core:
-
- [Hero] Defensive Adrenal, 200,000 credits for 1.5 hours
- [Champion] Offensive Adrenal, 200,000 credits for 1.5 hours
Dantooine Buffs List
 Unknown Adrenal (Yellow) found on the ground: Gives a combat boost, and you can bring it into the core, but it goes away when you die and you’d need to go re-find it.
 Mysterious Stimpack (Green) found on the ground: Gives a combat boost, and you can bring it into the core, but it goes away when you die and you’d need to go re-find it.
 Volcanic Residue from Crossover Buffs: Gives a combat boost, and you can bring it into the core, but it goes away when you die and you’d need to go re-pick-it-up
 Benign Spores from Crossover Buffs: Gives a combat boost, and you can bring it into the core, but it goes away when you die and you’d need to go re-pick-it-up
 Altered Flora from Crossover Buffs: Gives a combat boost, and you can bring it into the core, but it goes away when you die and you’d need to go re-pick-it-up
 Crystallized Energy from Crossover Buffs : Gives a combat boost, and you can bring it into the core, but it goes away when you die and you’d need to go re-pick-it-up
 Cryogenic Mitigation from the Mitigation Module: You can bring it into the core, and it persists death, but it does not help you at all with the bosses – only in the biomes.
 Mycelial Inoculation from the Mitigation Module: You can bring it into the core, and it persists death, but it does not help you at all with the bosses – only in the biomes.
 Toxic Runoff Protection from the Mitigation Module: You can bring it into the core, and it persists death, but it does not help you at all with the bosses – only in the biomes.
 Contained Spore Bomb from Reputation Vendor: Specifically says it is blocked in the core.
 Icy Infusion from Research: Gotten from the clickable blue crystals obtainable with the Glacial Research Notes at Friend rank or higher. Persists through death, 30 minutes, can be taken into the core. Periodically shedding excess ice, stunning enemies of Elite toughness or lower. Absorbing damage. – 25% damage reduction not more than every 2 seconds
 Weaponized Runoff from Research: Gotten from the clickable blue toxic cannisters obtainable with the Geothermal Research Notes at Friend rank or higher. Persists through death, 30 minutes, can be taken into the core. Dripping with caustic material. Periodically applies a damaging slow to enemies. Has a chance to instantly defeat Strong or weaker enemies at low health. Every 5 seconds, has a 33% chance of immediatly killing your enemy as long as they are a Strong (silver star) enemy or weaker. Every 5 seconds, also has a 33% chance of as long as they are an Elite (gold star) enemy or weaker. Every 5 seconds, also has a 33% chance of slowing an enemy by 50% for 10 seconds and doing damage as long as they are an Elite (gold star) enemy or weaker.
 Spore-Spangled from Research: Gotten from the clickable brain-shaped spore-coated masses obtainable with the Sporefall Research Notes at Friend rank or higher. The spores have burrowed in. Periodically gaining a heal over time effect and movespeed boost. Rarely, protects you from all damage for 5 seconds while at low health. If you are under 15%, it will protect you for 5 seconds for 100% of the damage you would have taken, but not more than once every 15 minutes though. Also has a 40% chance of healing you, for 1*BonusHeal + 3% of your health separately from the protection.
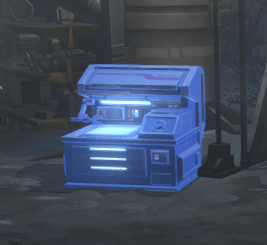
Hazard Mitigation Module
There are glowing blue workshop tables around the area called Hazard Mitigation Modules. When you first get to the area on your character, you may not see them at all – they start off as invisible and unusable.
Deep into the Wreckage on Dantooine quest, you will get access to the Hazard Mitigation Module in the Base Camp, after you have completed the Transition step of the quest. Later, when you reach the Friend Reputation Rank, you’ll also be able to use the Hazard Mitigation Modules at any of the three biome camps too, rather than having to go all the way back to the Base Camp.

You can only choose one biome to be protected from at a time, and how much protection you have access to depends on your Reputation rank.
- [Outsider] Single-biome protection buff for 30 minutes from the blue terminals – 10,000 Credits
- [Newcomer] Single-biome protection buff for 1 hour from the blue terminals – 10,000 Credits
- [Friend] Single-biome protection buff for 2 hours from the blue terminals – 10,000 Credits
- [Hero] Single-biome immunity full protection buff for 2 hours from the blue terminals – 10,000 Credits
These are the three biomes’ buffs you can choose from:
Cryogenic Mitigation: Protected from Cryogenic Saturation in Glacial Trespass area which freezes you over time when you stay still. Does not prevent the stronger version Extreme Cryogenic Saturation.
Mycelial Inoculation: Protected from Light Sporefall in the Sporefall area, which is the simple Blue/Green/Pink sporefall debuffs. Does not prevent Heavy Sporefall.
Toxic Runoff Protection: Protected from Toxic Runoff debuff in the Geothermal Disruption area. Does not prevent damage and death from Lava.
When you reach the Hero rank, you also unlock the immunity buffs, which will protect you from all forms of hazards in that biome.
Cryogenic Immunity: Protected from all forms of Cryogenic Saturation in Glacial Trespass area, including the Extreme Cryogenic Saturation.
Mycelial Immunity Protected from all forms of Sporefall in the Sporefall area, including the deadly pink Heavy Sporefall.
Geothermal Immunity Protected from all forms of Toxic Runoff in the Geothermal Disruption, including immunity to Lava.
Crossover Buffs
There are three combat-focused Crossover buffs: Volcanic Residue, Benign Spores, and Altered Flora.
I believe they become available when one biome progresses higher than the others – for example if the biomes are at stages 1, 1, and the third flips to 2, after the transition encounter finishes, or if the biomes become 2-2,-3, and they also come with a rare Dynamic Encounter attached to them, but the buffs stick around even after the encounter is finished, and stick around until the next full reset of the map back to 0%.

There are no requirements to use these buffs other than finding them. If the biomes are at 1-1-1, then there will be none around. If the biomes have any 2’s, there should be one crossover buff available – but you may need to check both locations for it. If the biomes have any 3’s, there may be one or even two buffs available, so check both places – there may be one in each. Since it’s hard to control who does what on the entire map, you can’t really control when or where these show up, but might as well pick them up if you need them! I am a little unsure exactly how it chooses the two to crossover – one crossover will be the biome that advanced ahead, but I’m unsure how the second is chosen – so just check both spots.
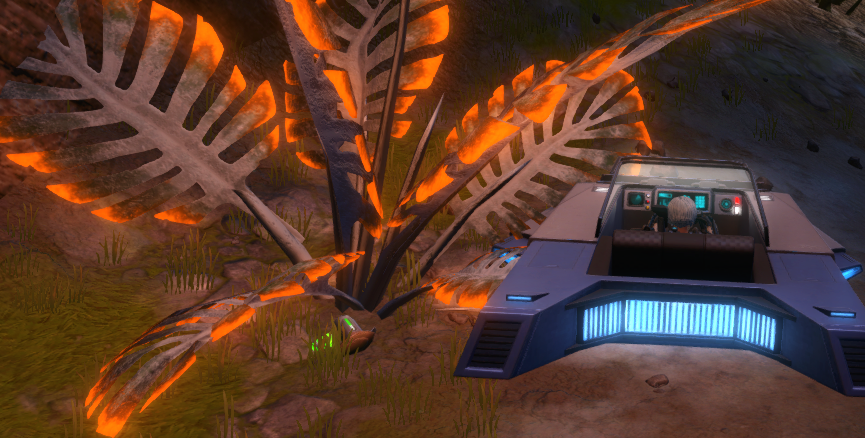
Frozen Vent
The Frozen Vents appear when the Natural Coolant Dynamic Encounter happens, and are the Crossover: Snow Into Geothermal buff.
Volcanic Residue (30 minute buff): Empowered by the frozen volcanic vents in the Glacial/Geothermic Ecotone.
- Modify stat Melee Defense, increase by 0.3
- Modify stat Ranged Defense, increase by 0.3
- Modify stat Force Resistance, increase by 0.3
- Modify stat Tech Resistance, increase by 0.3
- Set movement speed to 110%
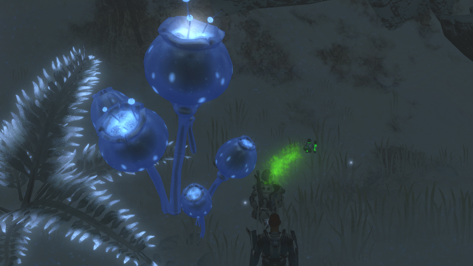
Frozen Spores

The Frozen Spores appear when the Frozen Spores Dynamic Encounter happens, and are the Crossover: Snow Into Sporefall buff.
I saw these when the Glacial biome was at Stage 3 at 100%, but the Sporefall area was only Stage 2. They have BLUE sparkles.

Benign Spores (30 minute buff): Empowered by the frozen spores in the Glacial/Sporefall Ecotone.
- Modify stat Endurance, increase by 5%
- Set movement speed to 110%
Infected Flora

The Infected Flora appears when the Petals in the Snow Dynamic Encounter happens, and seem like they are the Crossover: Sporefall into Snow buff.
I saw these when the Glacial biome was only at Stage 2, but the Sporefall area was Stage 3 at 100%. They have PINK sparkles.

Altered Flora (30 minute buff): Empowered by the altered flora in the Glacial/Sporefall Ecotone.
- Modify stat Activation Time Reduction, increase by 0.2
- Modify stat Channeling Time Reduction, increase by 0.2
- Modify stat instant reduction percentage, increase by 0.2
- Modify stat force regen rate modifier percentage, increase by 0.2
- Modify stat Pushback Modifier, increase by 1
- Set movement speed to 110%
This fourth one is from datamining – I was not physically able to find this. I’m not sure it exists, but may be the crossover Geothermal Into Snow for the Toxin Trouble encounter ans also may look like frozen vents:
Crystallized Energy (30 minute buff): Empowered by the crystallized toxins in the Glacial/Geothermic Ecotone.
- Modify stat Force Critical Chance, increase by 0.1
- Modify stat Tech Critical Chance, increase by 0.1
- Modify stat Melee Critical Chance, increase by 0.1
- Modify stat Ranged Critical Chance, increase by 0.1
- Set movement speed to 110%
Stims
There are two types of clickable stims hidden around the biomes that will give you a combat boost while you are in the biomes area. They stop working when you die and last 1 hour and 30 minutes once clicked. Only one person can click them, but there are often multiple around the biomes to find and I think they respawn somewhere else when you click them in one location.
Unknown Adrenal

Unknown Adrenal (Yellow) – Empowered while exploring the crash site.
-
- Modify stat Force Critical Chance, increase by 0.1
- Modify stat Tech Critical Chance, increase by 0.1
- Modify stat Melee Critical Chance, increase by 0.1
- Modify stat Ranged Critical Chance, increase by 0.1
Adrenal #1 – A – Sporefall Tree Jumping Pad

Adrenal #1 – B – Sporefall Tree Jumping Pad other spot

Adrenal #2 – A – Sporefall Dam of roots at river

Adrenal #2 – B – ?
Adrenal #2 – C – ?
Adrenal #3 – A – ?
Adrenal #3 – B – ?
Adrenal #3 – C – Near pink plant in the snow

Adrenal #4 – A – Glacial Trespass Cave – Glacial Frost Cave Bulbs


Adrenal #4 – B – Glacial Trespass Cave – Ledge

Adrenal #4 – C – ?
Adrenal #5 – A – ?
Adrenal #5 – B – ?
Adrenal #5 – C – Geothermal Crystal Cave – Purple Flower

Mysterious Stimpack
Mysterious Stimpack (Green) – Empowered while exploring the crash site.
-
- Modify stat Endurance, increase by 5%
- Modify stat Melee Defense, increase by 0.3
- Modify stat Ranged Defense, increase by 0.3
- Modify stat Force Resistance, increase by 0.3
- Modify stat Tech Resistance, increase by 0.3
Here are a few places I found them…
Stim #1 – A – Glacial Camp Area – Table with Speeder

Stim #1 – B – Glacial Camp Area – Tent Table at Camp

Stim #1 – C – ?
Stim #2 – A – Sporefall – Tunnel Orange Plant leading to Glacial area
Stim #2 – B – Sporefall – Tunnel Middle of the Pathway

Stim #2 – C – Sporefall – Little tent beside bedroll at Sporefall camp

Stim #2 – D – ?
Stim #3 – A – ?
Stim #3 – B – Sporefall – Tent Beside Stacked Rocks

Stim #3 – C – Sporefall – Maintenance Door in a log

Stim #4 – A – Geothermal Lava Cave – In front of a square crate box and octagon box

Stim #4 – B – Geothermal Lava Cave – Ledge

Stim #4 – C – Lava Cave Across Catwalk

Research Notes
These blue glowing items are hidden around the three different maps. When you try and right-click them, they say, “This is too dangerous to use without research notes!”

We don’t know exactly what these do yet, but we do know there is an item you can buy from the Reputation vendor at the Friend rank that is called ‘Research Notes’ for the different areas.

From the Reputation Vendor, these options can be seen for sale:
- [Friend] Research Notes Temporary Buff – Single biome findable glowing blue object buff for 30 minutes – 30 minute combat buff once found – 35,000 Credits
- [Legend] Research Notes Permanent Buff- Single biome findable glowing blue object buff permanently – 30 minute combat buff once found – 2 mill Credits
Supercooled Crystalline Shard (Glacial)

With the Research Notes purchased from the Reputation vendor at Friend rank or higher, you can look for the glowing blue crystals and right-click them to get the Icy Infusion buff, which you can use around the area or even bring into the core.
Icy Infusion from Research: Gotten from the clickable blue crystals obtainable with the Glacial Research Notes at Friend rank or higher. Persists through death, 30 minutes, can be taken into the core. Periodically shedding excess ice, stunning enemies of Elite toughness or lower. Absorbing damage. – 25% damage reduction not more than every 2 seconds
Location C1 –

Location C2 –

Location C3 –

Location C4 –

Location C5 –

Location C6 –

Location C7 –

Location C8 –

Location C9 –

Location C10 –

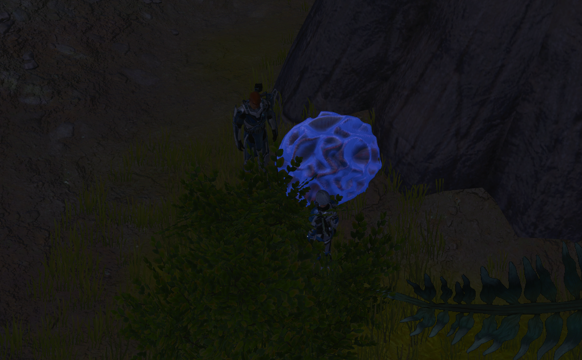
Spore-Coated Mass (Sporefall)

With the Research Notes purchased from the Reputation vendor at Friend rank or higher, you can look for the glowing blue brain-shaped spore-coated masses and right-click them to get the Spore-Spangled buff, which you can use around the area or even bring into the core.
Spore-Spangled from Research: Gotten from the clickable brain-shaped spore-coated masses obtainable with the Sporefall Research Notes at Friend rank or higher. The spores have burrowed in. Periodically gaining a heal over time effect and movespeed boost. Rarely, protects you from all damage for 5 seconds while at low health. If you are under 15%, it will protect you for 5 seconds for 100% of the damage you would have taken, but not more than once every 15 minutes though. Also has a 40% chance of healing you, for 1*BonusHeal + 3% of your health separately from the protection.
Location S1 –

Location S2 –
Location S3 –

Location S4 –
Location S5 –

Location S6 –

Location S7 –

Location S8 –

Location S9 –

Location S10 –

Location S11 –

Location S12 –

Location S13 –

Location S14 –

Ejected Sludge Container (Geothermal)

With the Research Notes purchased from the Reputation vendor at Friend rank or higher, you can look for the glowing blue cannisters and right-click them to get the Weaponized Runoff buff, which you can use around the area or even bring into the core.
Weaponized Runoff from Research: Gotten from the clickable blue toxic cannisters obtainable with the Geothermal Research Notes at Friend rank or higher. Persists through death, 30 minutes, can be taken into the core. Dripping with caustic material. Periodically applies a damaging slow to enemies. Has a chance to instantly defeat Strong or weaker enemies at low health. Every 5 seconds, has a 33% chance of immediatly killing your enemy as long as they are a Strong (silver star) enemy or weaker. Every 5 seconds, also has a 33% chance of as long as they are an Elite (gold star) enemy or weaker. Every 5 seconds, also has a 33% chance of slowing an enemy by 50% for 10 seconds and doing damage as long as they are an Elite (gold star) enemy or weaker.
Location G1 –

Location G2 –

Location G3 –

Location G4 –

Location G5 –

Location G6 –

Location G7 – camp?
Location G8 –

Location G9 –

Location G10 –

Maintenance Access Tunnels

As you explore the biomes you may notice these tiny doors that don’t open. I think these are a part of the Tunnel Maintenance Access, that allows you to more quickly get around the map once you have improved your reputation.
 From the Reputation Vendor there is an item called the Maintenance Tunnel Pass – Grants access to maintenance tunnels connecting the wreckage of the Jannimak to the surrounding biomes. Requires Champion rank and costs 60,000 credits.

When you are inside the ship, you can access all the of six tunnels.
- SPOREFALL ACCESS C
- ECOTONE ACCESS GS
- CENTRAL MAINTENANCE
- GLACIAL ACCESS W
- ECOTONE ACCESS 2G
- GEOTHERMAL ACCESS N
These will pop you out onto the outside biomes map at specific locations, which may allow you to get to different dynamic encounters faster.
This seemed a little unfinished on the test server, so I’m not sure of the details yet.
Security Terminals

There are also these strange Jannimak Security Terminals – they might not glow blue by default.

Three locations, one in each biome:
When you try to access one, they say, No authorized credentials found.

From the Reputation Vendor there is an item called the Sliced Security Card – Allows access to remote terminals installed by the Jannimak’s automated systems in the new biomes. The purpose of these terminals is unknown. Requires Champion rank and costs 250,000 credits.

They request you give them a Sliced Security Card, and they give you 3 Maintenance Access Codes.
So I’m wondering if you need these to access the maintenance tunnels or something else?
This seemed a little unfinished on the test server, so I’m not sure of the details yet. There may be something involving ‘Alter Experimental Parameters’ but we are unsure what that means exactly yet!
Orbital Core Buffs

There are also special buffs that are specifically only available when you are fighting the Orbital Core, offered from a small blue terminal in front of the core shuttle. Read more about these, and the other buffs in relation to the core, in the Orbital Core guide!
- Regulated Preservation Adrenal
- Regulated Aggression Adrenal
- Thermal Regulator
- Emergency Chemical Purge
- Hyphal Degeneration Stim
 Questions or comments? Feel free to send me a message on Twitter


 Discord
  Email swtorista@gmail.com
 Bluesky @swtorista.com
 Reddit /u/swtorista
 Twitch Swtorista
 Youtube
 Patreon
 Twitter @swtorista