


 How to Craft
 Choose a Crew Skill
 Armormech
 Armstech
 Artifice
 Biochem
 Cybertech
 Synthweaving

 Gathering Guide
 Rare Materials Guide
 White Materials Guide
 Jawa Junk
 Augments
 Medpacs, Stims and Adrenals
 Synthweaving Crafting Tree


 Crafted Decorations
 Crafted Mounts
 Crafted Dyes
 Crafted Crystals
 Events Calendar
 Galactic Seasons
 PvP Seasons
 Bounty Event
 Double XP Event
 Feast of Prosperity
 Gree Event
 Life Day
 Nightlife Event
 Pirate Incursion Event
 Rakghoul Event
 Spring Abundance Festival
 Swoop Event

 Jedi Knight
 Jedi Consular
 Trooper
 Smuggler
 Sith Warrior
 Sith Inquisitor
 Bounty Hunter
 Imperial Agent
 Bounty Hunter
 Imperial Agent
 Jedi Consular
 Jedi Knight
 Sith Inquisitor
 Sith Warrior
 Smuggler
 Trooper
 Legacy Gear
 Lightsabers
 Double-Bladed Lightsabers
 Vibroswords
 Double-Bladed Vibroswords
 Blaster Pistols
 Blaster Rifles
 Sniper Rifles
 Blaster Cannons

A Traitor Among the Chiss, sometimes known as ‘Copero’, is a Flashpoint in Star Wars: The Old Republic that you can run alone, with friends, or with other random players through the groupfinder.
Skips info to come!
Contents
A Traitor Among the Chiss

Representatives of the Chiss Ascendancy have a problem with a splinter faction. That splinter faction is working with the Alliance traitor. As your problems are aligned, you have come to Copero in the Chiss Ascendancy to deal with both problems.
How to Start
A Traitor Among the Chiss is a Flashpoint meant to be played later in the story, quite a while after your class story is completed. You can encounter it in the story part way through the War on Iokath / Traitor Arc storyline, replay it alone in Story mode, or play it outside of the story with a group in Story, Veteran or Master mode.

Use the tabs above for instructions for how to enter the flashpoint in the story line, and how to enter it in Solo (Story) mode, Veteran mode, and Master mode. The instructions are exactly the same Republic and Imperial side.
- Story: Lvl 70+
- Solo: Lvl 70+
- Veteran: Lvl 15-80
- Veteran Groupfinder: Lvl 70-80
- Master Mode: Lvl 70-80 †
- Master Mode Groupfinder: Lvl 80

Story Instructions
![]()
![]()


Requirements: To play the A Traitor Among the Chiss Flashpoint in the story, and receive all the special cutscenes related to the Flashpoint in the story, you will need to be level 70+ and be on the correct quest in the Traitor Arc quest chain. If you are below this level, you can not play the story quest or associated quest line for this Flashpoint.
![]()
Timeline: In the story, this Flashpoint takes place partway on in the Traitor story arc as the second Flashpoint, on the planet Odessen. It does not make much sense plot-wise to play outside of the story.

Bring a Friend?: You can NOT bring a friend of the A Traitor Among the Chiss Flashpoint that is part of the Traitor Arc storyline UNLESS that friend is on the exact same step quest A Traitor Among the Chiss as part of the Traitor Arc on the step Complete the A Traitor Among the Chiss Solo Flashpoint and then run the A Traitor Among the Chiss quest.
If they have not done the Traitor Arc storyline, they can join you in a group and you can follow the exact same steps together and do the Traitor Arc as long as they are level 70+ and meet the other quest requirements to start. Then you can walk into A Traitor Among the Chiss together.
If they have already run the storyline or are ineligible to start the Traitor Arc, they will NOT be able to walk into the Flashpoint behind you to help you.
Why can’t I get a friend to help? This is because this quest is a special one-time version of the A Traitor Among the Chiss Flashpoint – it is not the same as the [STORY], [VETERAN] or [MASTER] version you would pick up from the terminal. It is a unique fourth mode designed to be run alone and has special one-time cutscenes related to the Traitor Arc.
![]()
Directions to the Story Quest for A Traitor Among the Chiss: A Traitor Among the Chiss’s one-time story quest is built in to the Traitor Arc / War on Iokath storyline.

If you have not yet run through the Traitor Arc / War on Iokath storyline, you can start it from the glowing blue terminal on your ship. To start this questline, you need to have completed the fourth and fifth expansion (KOTFE and KOTET) and be at least level 70. Then you can start The Forgotten World (sometimes known as Iokath, and labelled the War on Iokath in the Eras tab) which will lead you through a series of quests on Iokath and eventually to the Crisis on Umbara quest, where you will speak to Lana on Odessen then run the Flashpoint.
→ The Knights of the Fallen Empire Expansion (KOTFE)
→ The Knights of the Eternal Throne Expansion (KOTET)
→ The Forgotten World (aka Iokath)
→ Shots Fired
→ The Lost Arsenal
→ Showdown on Iokath
→ Crisis on Umbara
→ A Traitor Among the Chiss
If you are on this step, you can use the Launch Mission button to get to Odessen quickly.

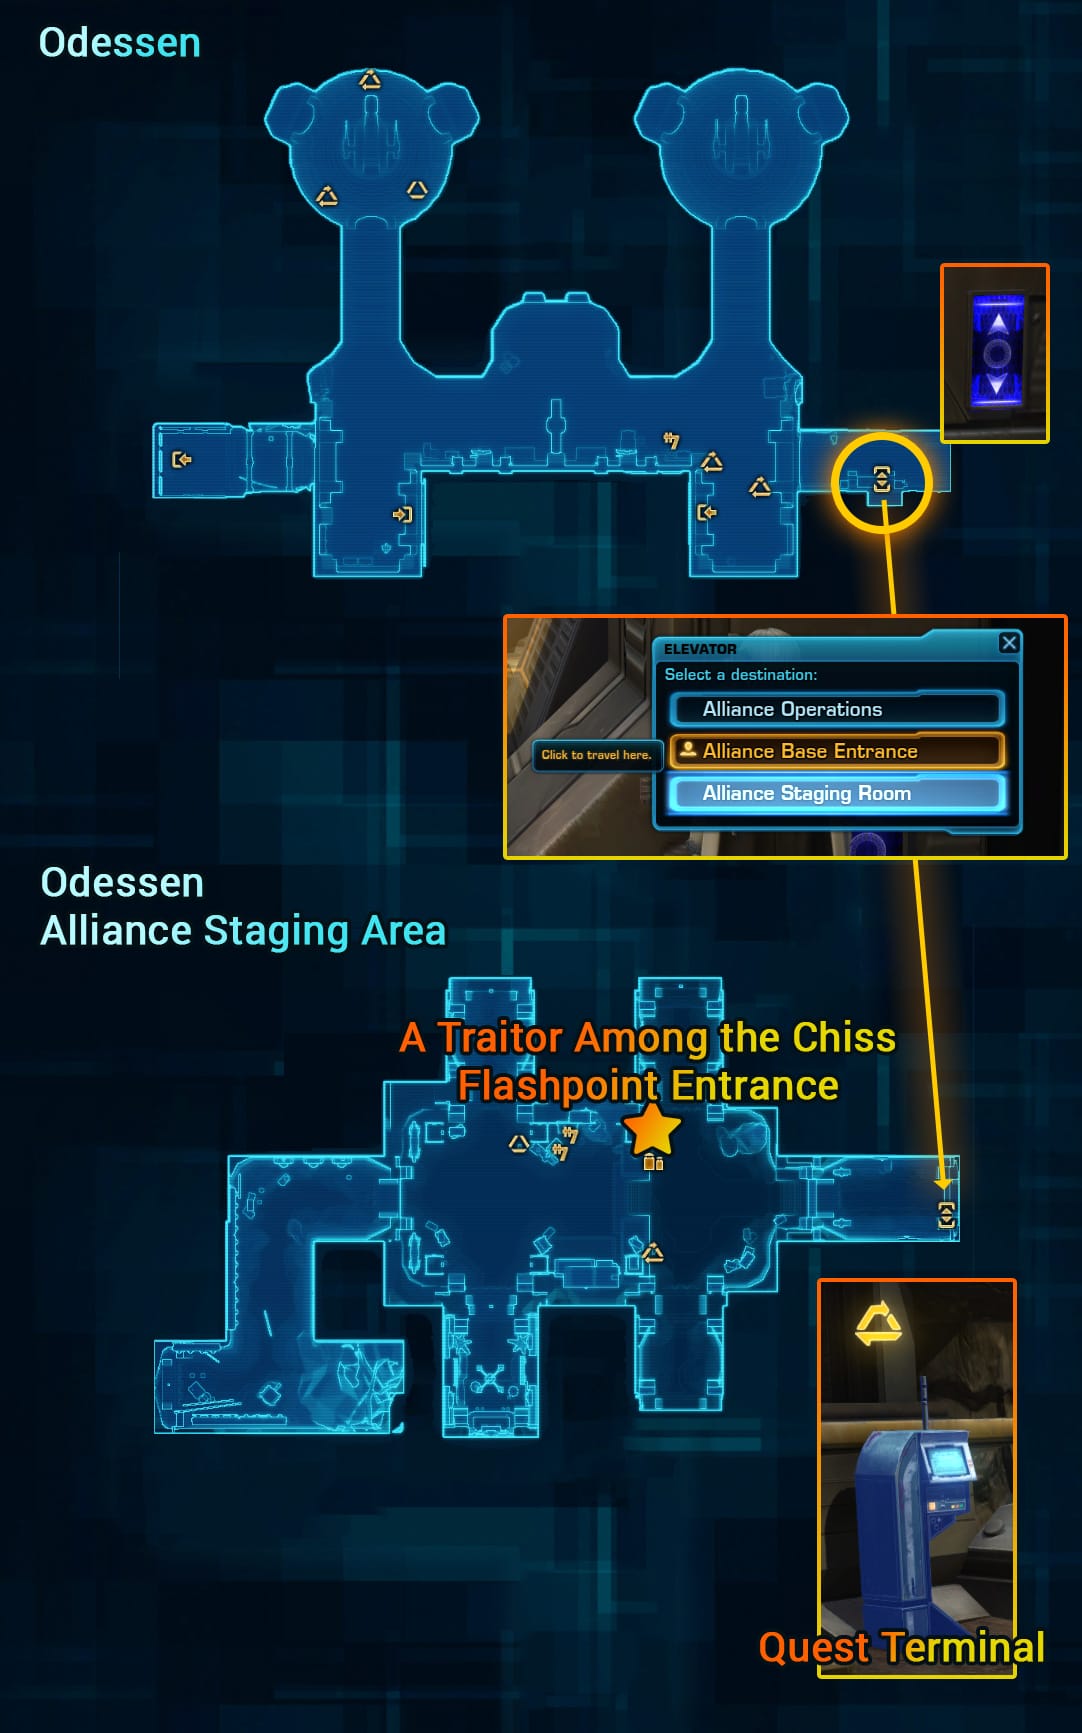
Once on Odessen, you can follow the purple markers to the elevator outside the base, and go to the Alliance Staging Room to meet with Lana.

The first step of the one-time A Traitor Among the Chiss story quest will lead you to the Staging Room – just walk in the door, and ignore the other quest boxes nearby.

Then you can talk to Lana.

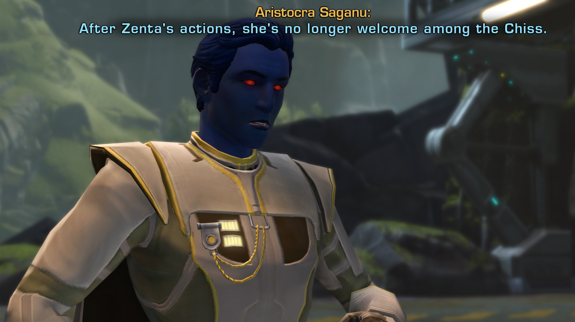
You’ll get to meek and talk to Aristocra Saganu in the cutscene.
Once you get to the quest literally called A Traitor Among the Chiss, after you speak to Lana, you’ll automatically be on the quest [SOLO-STORY] A Traitor Among the Chiss, where you can travel to the Flashpoint entrance and walk in – no need to use the quest terminal, as you should already be on the quest.

IMPORTANT! This is a special one-time version of the A Traitor Among the Chiss – it is called [SOLO-STORY] mode – it is not the same as the [STORY], [VETERAN] or [MASTER] version you would pick up from the terminal. It is designed to be run alone and has special one-time cutscenes related to the Traitor Arc. You must bring Raina Temple as your companion for this version of the Flashpoint, and can not summon a different companion.

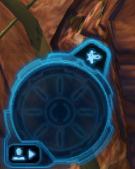
If she goes missing, you can re-summon Raina using the little arrow beside where her companion portrait would be.
When I stepped into this Flashpoint with my max-level but undergeared character, I could barely get through the first enemies I ran in to. I had to go pick up some very basic max-level gear before I could continue, which made a huge difference. If you are undergeared, you can likely already pick up some level 75 or 80 gear from the Supplies section of the Fleet.

![]()
Story Progress: [STORY] A Traitor Among the Chiss alone will not progress your storyline – it is simply the repeatable solo version. To work on the overarching story, you also need to be on the quest A Traitor Among the Chiss as part of the Traitor Arc on the step Complete Flashpoint: A Traitor Among the Chiss and then run the [SOLO-STORY] Flashpoint: A Traitor Among the Chiss quest.

Lost the quest? If you lost the A Traitor Among the Chiss quest, head back to the terminal on your ship you started at to re-pick up the Forgotten Worlds quest for the Traitor Arc, but keep in mind this story-based introductory quest related to the Traitor Arc is one-time-per-character. If you lost the ability to walk into the Flashpoint door, or lost the quest with the word Flashpoint in it, or lost the special [SOLO-STORY] quest, you can try resetting the A Traitor Among the Chiss quest under Fractured Alliances, and re-speaking to Lana in the staging area should automatically re-give you the [SOLO-STORY] quest.

If you accidentally abandoned the [SOLO-STORY] quest but are on the A Traitor Among the Chiss quest, you can also pick it up from the terminal. This is the only time the [SOLO-STORY] quest shows up on the terminal – it disappears after you complete it the first time, leaving only [STORY], [VETERAN] and [MASTER] modes available.
Here’s the map on how to get back to the Flashpoint on Odessen.
Solo (Story) Instructions
![]()

You can also run this repeatable Flashpoint solo outside of the one-time story quest, at level 70+.

Activity Finder: The FASTEST and EASIEST way to get into the A Traitor Among the Chiss Flashpoint soo mode is with the Activity Finder. If you are level 70 or higher, click the icon of “three little people” on the bottom right of your screen which will open the Activity Finder Window.

Then choose the Solo tab in the Activity Finder.

On the solo tab, scroll down and find the listing for A Traitor Among the Chiss on the list under Flashpoints, select it, then click the green Travel button. This will take you right into the Flashpoint!

Bring a Friend: You are allowed to bring friends along for this Flashpoint, you do not have to do it alone even though it is considered soloable. Your friends must also be level 70+, be in a group with you, and then you can all use the Solo Tab of the Activity Finder to get into the Flashpoint, and it will put you together no matter where in the galaxy you started from.
![]()
There’s really no need to walk into the Flashpoint manually, but here are the instructions.
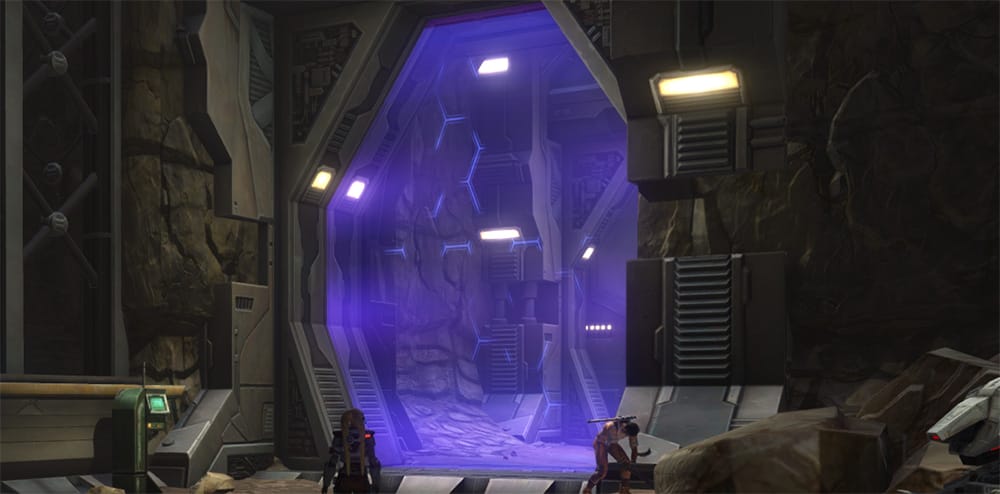
Manual Entry: To enter this Flashpoint manually, you must go to the A Traitor Among the Chiss’s Flashpoint entrance, which is located on the planet of Odessen, which you can fly to on your ship. The Flashpoint can be picked up from the A Traitor Among the Chiss terminal on Odessen, which you can get to by using the elevator to in the eastern area of the Odessan outside platform (not inside the base) and taking it to the Alliance Staging Room level on the lower floor. If you don’t see the Solo version it means you are not yet eligible due to being below level 70. The solo, single-player repeatable mode will be called [STORY] Flashpoint: A Traitor Among the Chiss from the terminal. You can then walk in the nearby door and play the Flashpoint.
Step 1 – Get to Odessen, by flying there with your ship.

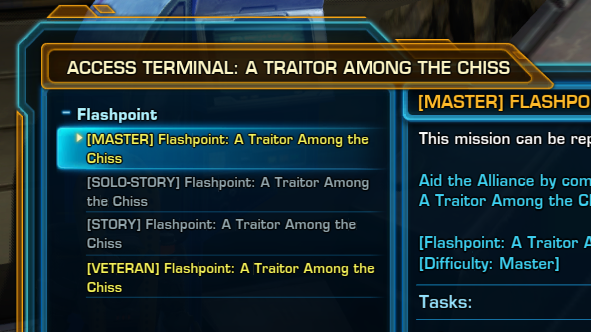
Step 2 – Take the elevator outside the base to the Alliance Staging Room level on the lower floor. Look for A Traitor Among the Chiss quest terminal, and choose [STORY] Flashpoint: A Traitor Among the Chiss to start the Flashpoint.
![]()
Story: [STORY] Flashpoint: A Traitor Among the Chiss alone will not progress your storyline – it is simply the repeatable solo version. To work on the overarching story, you also need to be on the quest A Traitor Among the Chiss on the step Complete Flashpoint: A Traitor Among the Chiss and then run the [SOLO-STORY] Flashpoint: A Traitor Among the Chiss quest – which is different than [STORY] Flashpoint: A Traitor Among the Chiss . See the Story tab for more info.
Veteran Instructions
![]()
![]()
A Traitor Among the Chiss also has a repeatable 4-player Veteran version. It is meant to be completed by a group with any type of Republic characters in it, you do not necessarily need a tank or healer to complete it. You will likely also have good luck with 2 players and 2 companions, or 3 players and 1 companion.
Group Finder: If you want to queue up and enter A Traitor Among the Chiss in veteran mode through the group finder, you will need to be level 70-80 and not currently on any A Traitor Among the Chiss Flashpoint quests or it won’t show up as an option in the group finder. If you are level 70-80, click the icon of “three little people” on the bottom right of your screen which will open the Activity Finder Window. Then choose the Group tab in the Activity Finder.
Filter: If you want to specifically run A Traitor Among the Chiss and not a random Flashpoint, make sure to choose Veteran Flashpoints, then click the Filter button the right and narrow your choices down to just A Traitor Among the Chiss before pressing Join Queue. Joining the queue will put you in line to be matched with random players to play A Traitor Among the Chiss with.
Groupfinder flashpoints do NOT show the cutscenes. To see the cutscenes related to this Flashpoint, you must enter it manually by walking in the door.
Bring a Friend in the Groupfinder: You can queue up with a group of 2, 3, or 4 players in the group finder. If you have a full group of 4, it will bring you straight to the Flashpoint with your full group. If you have 2 or 3 players in your group, the group finder will match you with other random players until you have a full group – but you’ll always be paired with your friends who started off in your group, and will not be split up.
![]()
Story: [VETERAN] A Traitor Among the Chiss will not progress your storyline – it is simply the repeatable group version. If you are a low level, this is the only version that will show up on the actual Flashpoint terminal in front of the entrance door – so don’t be confused and accidentally enter the group version if you are a low level, as it is not meant to be completed alone.
![]()
Veteran Manual Entry: To enter this Flashpoint manually, you must go to the A Traitor Among the Chiss’s Flashpoint entrance, which is located on the planet of Odessen, which you can fly to on your ship. The Flashpoint can be picked up from the A Traitor Among the Chiss terminal on Odessen, which you can get to by using the elevator to in the eastern area of the Odessan outside platform (not inside the base) and taking it to the Alliance Staging Room level on the lower floor. The Veteran repeatable mode will be called [VETERAN] Flashpoint: A Traitor Among the Chiss from the terminal. You can then walk in the nearby door and play the Flashpoint.
Bring a Friend Manually: Veteran Mode Flashpoints are not meant to be completed alone, though highly-skilled, highly-geared, high-level players might be able to. To bring friends along for this Veteran Flashpoint, they’ll need to pick up the Veteran Mode quest from the terminal – or you can pick up the quest and share it with them, but they’ll still need to walk in the door manually. Characters walking in the door need to be level 15+.
Step 1 – Get to Odessen, by flying there with your ship.
Step 2 – Take the elevator outside the base to the Alliance Staging Room level on the lower floor. Look for A Traitor Among the Chiss quest terminal, and choose [VETERAN] Flashpoint: A Traitor Among the Chiss to start the Flashpoint.
Master Instructions
![]()
![]()
Master Mode is the hardest version of A Traitor Among the Chiss. It is meant to be completed by a high-level high-skilled group at level 80. Most teams will want a Tank, Healer and two Damage characters.
Group Finder: If you want to queue up and enter A Traitor Among the Chiss in Master Mode through the group finder, you will need to be level 80 and not currently on any A Traitor Among the Chiss Flashpoint quests or it won’t show up as an option in the group finder. If you are level 80, click the icon of “three little people” on the bottom right of your screen which will open the Activity Finder Window. Then choose the Group tab in the Activity Finder.
Filter: If you want to specifically run A Traitor Among the Chiss and not a random Flashpoint, make sure to choose Master Flashpoints, then click the Filter button the right and narrow your choices down to just A Traitor Among the Chiss before pressing Join Queue. Joining the queue will put you in line to be matched with random players to play A Traitor Among the Chiss with.
Groupfinder flashpoints do NOT show the cutscenes. To see the cutscenes related to this Flashpoint, you must enter it manually by walking in the door.
Bring a Friend in the Groupfinder: You can queue up with a group of 2, 3, or 4 players in the group finder. If you have a full group of 4, it will bring you straight to the Flashpoint with your full group. If you have 2 or 3 players in your group, the group finder will match you with other random players until you have a full group – but you’ll always be paired with your friends who started off in your group, and will not be split up. Your friends all need to be level 80 too.
![]()
Story: [MASTER] A Traitor Among the Chiss will not progress your storyline – it is simply the repeatable difficult group version.
![]()
Master Manual Entry: To enter this Flashpoint manually, you must go to the A Traitor Among the Chiss’s Flashpoint entrance, which is located on the planet of Odessen, which you can fly to on your ship. The Flashpoint can be picked up from the A Traitor Among the Chiss terminal on Odessen, which you can get to by using the elevator to in the eastern area of the Odessan outside platform (not inside the base) and taking it to the Alliance Staging Room level on the lower floor. The Master repeatable mode will be called [MASTER] Flashpoint: A Traitor Among the Chiss from the terminal. You can then walk in the nearby door and play the Flashpoint.
Bring a Friend Manually: Master Mode Flashpoints are not meant to be completed alone, and are designed for level 80 players who are comfortable with their role and class. To bring friends along for this Master Flashpoint, they’ll need to pick up the Master Mode quest from the terminal – or you can pick up the quest and share it with them, but they’ll still need to walk in the door manually while you’re in a group. Level 70-80 characters can technically enter Master Mode flashpoints, but all the enemies are level 80, and they will die very quickly.
Step 1 – Get to Odessen, by flying there with your ship.
Step 2 – Take the elevator outside the base to the Alliance Staging Room level on the lower floor. Look for A Traitor Among the Chiss quest terminal, and choose [MASTER] Flashpoint: A Traitor Among the Chiss to start the Flashpoint.
Bosses
This Flashpoint has three boss fights – the Guardian Droid, Syndic Zenta, Valss the final boss and the Bonus Boss called Strike Team Walker.
In all modes you can use the medpacs scattered around the bosses. Walk over them to heal yourself – do not walk over them if you do not need them.
The following boss info is mainly for story and Veteran mode – Master Mode tactics are not covered in this guide.
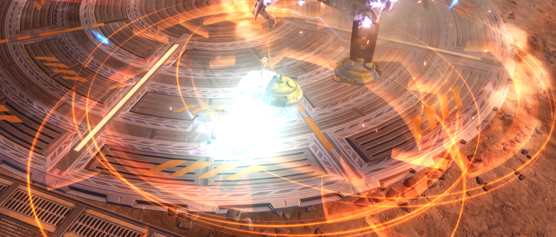
Guardian Droid

This is a bit of a chaotic boss and mostly requires that you watch your feet. Most groups focus the boss down and ignore the rest of the enemies. The trick is staying alive.

Avoid the red triangle of fire.
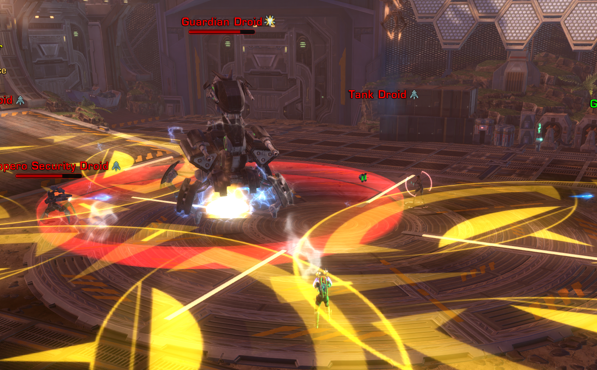
Find a safe spot when there’s giant yellow circles and avoid them.

Step out and stay out of the red circles as much as possible.
If the boss is attacking you, he has an attack called Heat Beam that might actually hurt – it is a casted ability with a blue beam of light. You might want to use a defensive during this attack if you are dying.
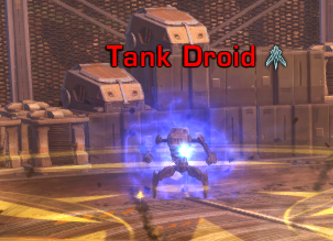
Master Mode: The main difference in Master Mode apart from everything hitting harder is a bunch of small Explosive Droids show up and explode into orange circles you need to also avoid.
Master Mode: If your group is struggling for space with all the mess on the ground, you can co-ordinate to attack one of the Tank Droids each time they respawn so you can have one space without a big yellow circle.
Syndic Zenta

Syndic Zenta is an upstairs/downstairs boss. Most groups focus on her and ignore the smaller enemies.
Zenta will eventually move upstairs. Right-click the glowing green circles to grapple hook up to her.
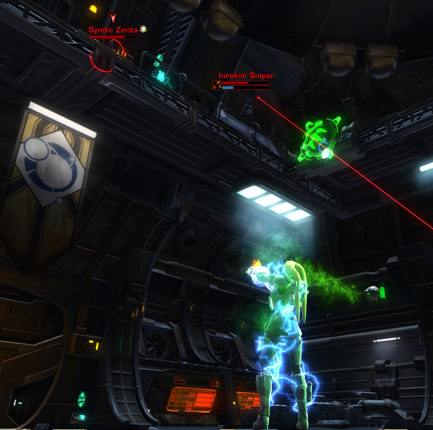
Stay out of her yellow-red circles as much as possible.

She has an ability called High-Powered Snipe that will knock you back frequently. Make sure to aim your back towards somewhere where you won’t be knocked off the walkways.

Step out and stay out of her red fire circles as much as possible.

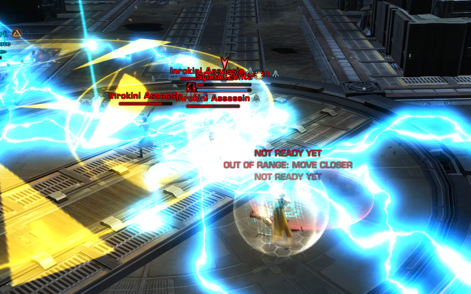
When she does blue lightning, kill her as quickly as possible.

Master Mode: This fight is not too different in Master Mode, except your team will need to take down the Medics that show up, as they will heal Zenta, even when she’s up high and they are on the floor.

Master Mode: In the final phase on the floor with lightning, you’ll also need to avoid the big yellow circles. If your group is dying in this phase, you can instead go “up” and wait out her lightning attack before attacking again.
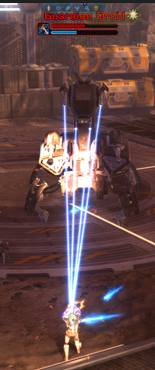
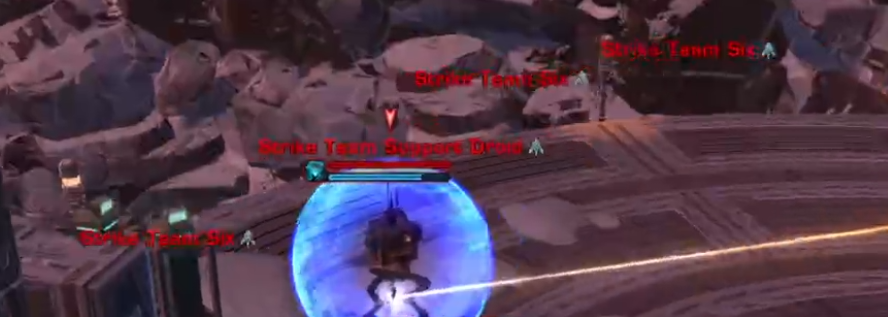
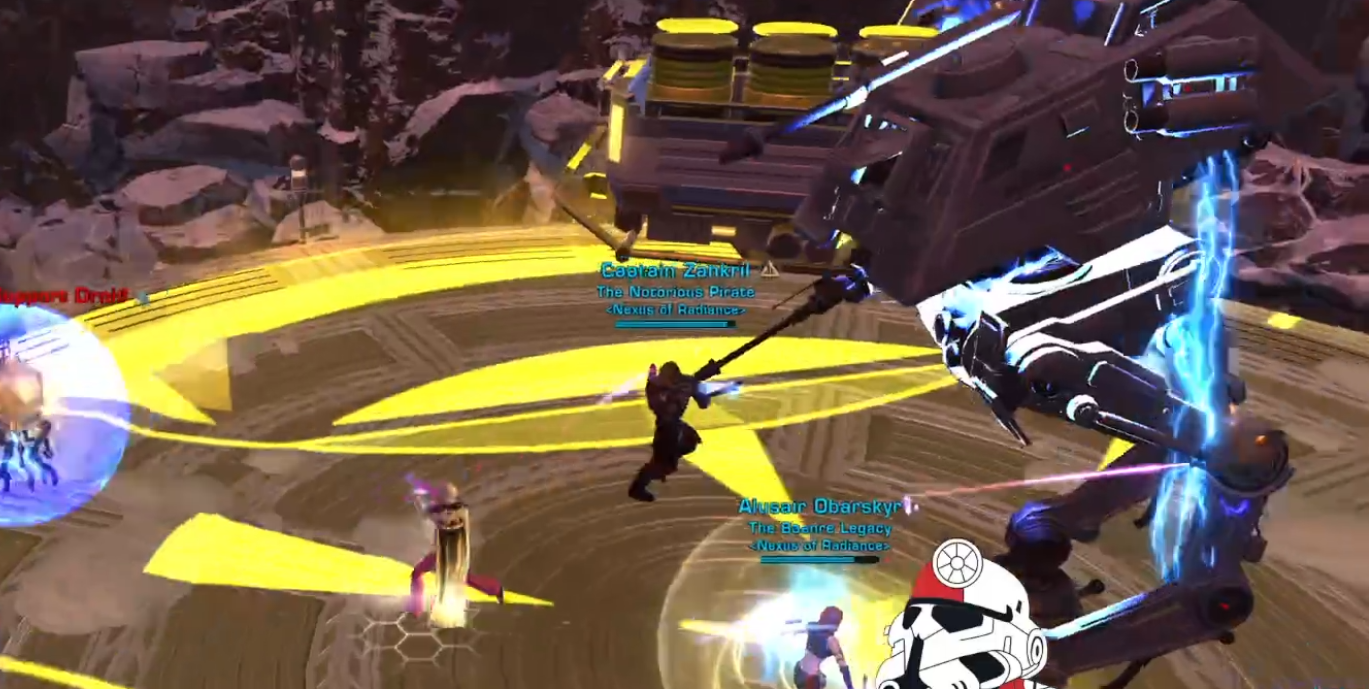
Bonus Boss – Strike Team Walker
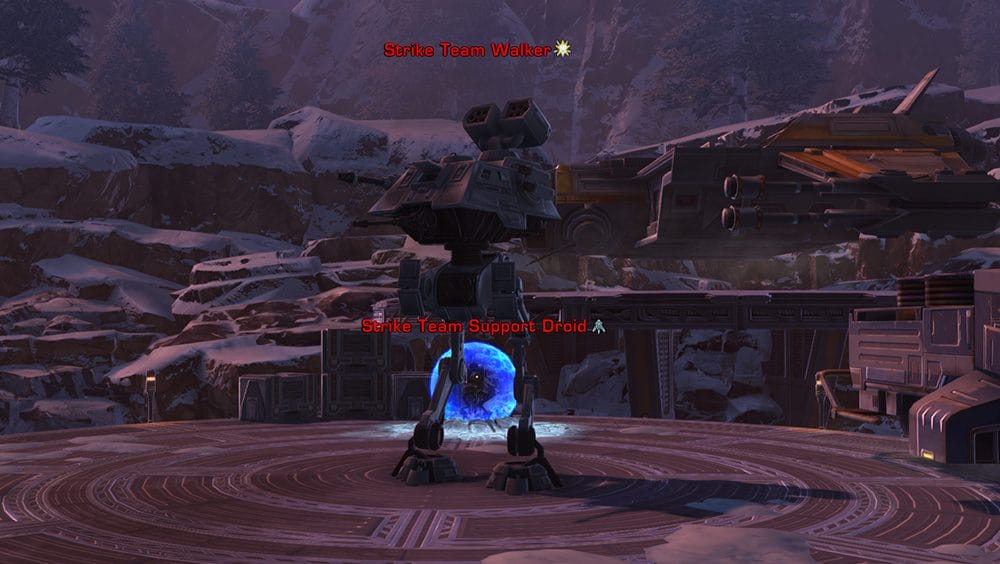
The bonus boss in A Traitor Among the Chiss is available in all modes – Story, Veteran and Master, and does not require a bonus quest to unlock – it’s just there when you go into the area where its platform is.
The bonus boss is right after the second boss, Syndic Zenta, but off the main quest path – go SOUTH in the short tunnel after the second boss instead of following the green arrows.
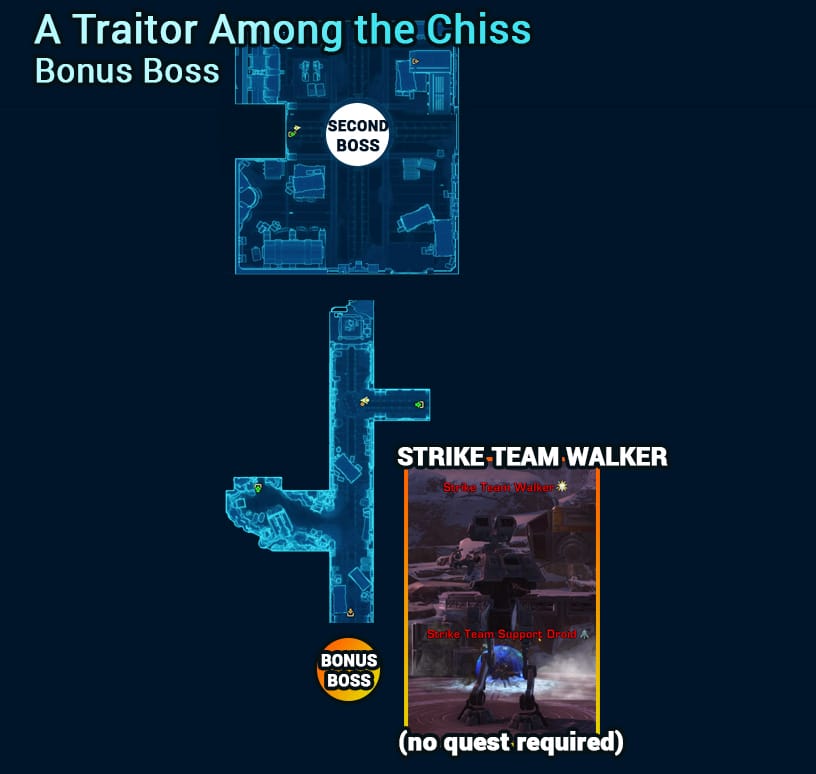
Look for the barrels on a tram and walk beside them. This will lead you south outside to the bonus boss.
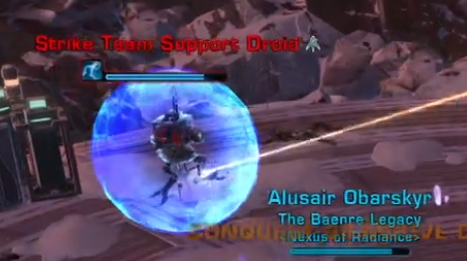
The Support Droid with the blue bubble can not be killed.

The idea is that it is making the bonus boss stronger when it uses its beam of light and Calibration ability – you can interrupt or stun it to stop the callibration.

But, in story mode, you can probably just focus on the boss, kill it, and ignore everything else.
Master Mode: This is one of the more difficult Master Mode Bonus Bosses in the game, and it will likely take even experienced teams a few tries, with less experienced teams practicing quite a few times before they get it.
Master Mode: The smaller droid with the blue shield needs to be interrupted – it does a lot of different abilities, but only one of them is very important, and that’s called “Repair”.
It will have a light blue icon. You can interrupt or stun the droid to stop it repairing the Walker – some classes can have up to three interrupts+stuns depending on their tree.

It is not the same as Calibrating, Orbital Laser, or Impulse, which the droid also does.


In our team, the tank did the first four Repairs alternating interrupts and stuns, with a DPS on standby to interrupt.
Master Mode: The smaller enemies show up in waves. You can kill or push off two, leaving one alive, and they won’t keep showing up.
Master Mode: Stay out of the small yellow circles, they will push you back.

Master Mode: When the BIG yellow circle shows up a bit later in the fight, you can not get out of it – it takes up the whole platform and will knock you back far. The only way to save yourself is to make sure your back is facing any of the barrels, so you don’t get pushed off.
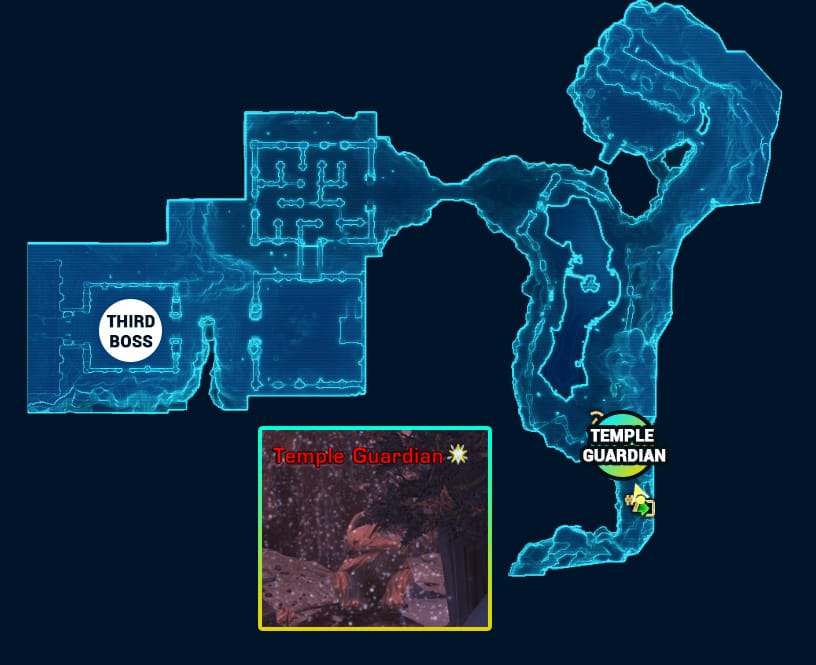
Temple Guardian Cat

You are not supposed to fight this large cat enemy – right click the blue basket of fruit, then left-click the temporary ability on your ability bar.

However, you can fight it for an achievement – it just has a lot of health and is strong.
Master Mode: There is no special achievement for fighting the cat on Master Mode, but if you want to fight it, your team will need to work together to interrupt Rend as soon as it shows up, and your healer will need to be ready for some big heals.
Steam Puzzle
To solve the steam puzzle, first activate the puzzle by right-clicking the single blue button under the steam pipes.
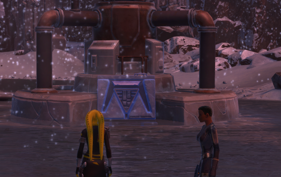
Then run up the hill to the right and right-click the farther button that glows aqua-blue.
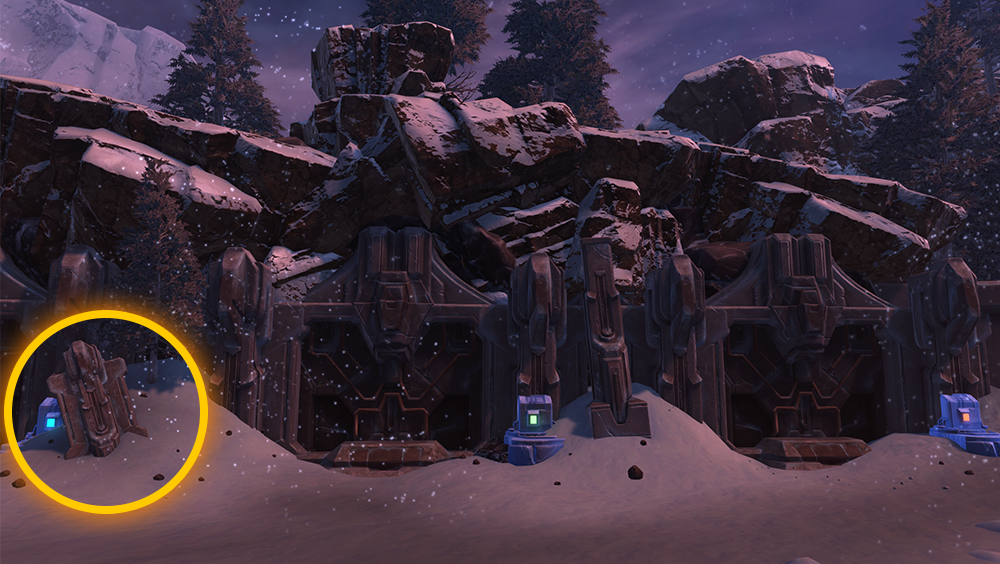
Then right-click the tiny blue button near the flame.

The return down the hill to the original steam pipes, and this will open the ice door.
There is then a maze to run through.
Most groups ignore the clickable buttons and just run through the maze, avoiding the red circles and enemies as much as possible.

When you reach the second steam puzzle, the solution is the vent opposite of the raised platform (center valve).
This will open the second ice door.

Boss 3 – Valss
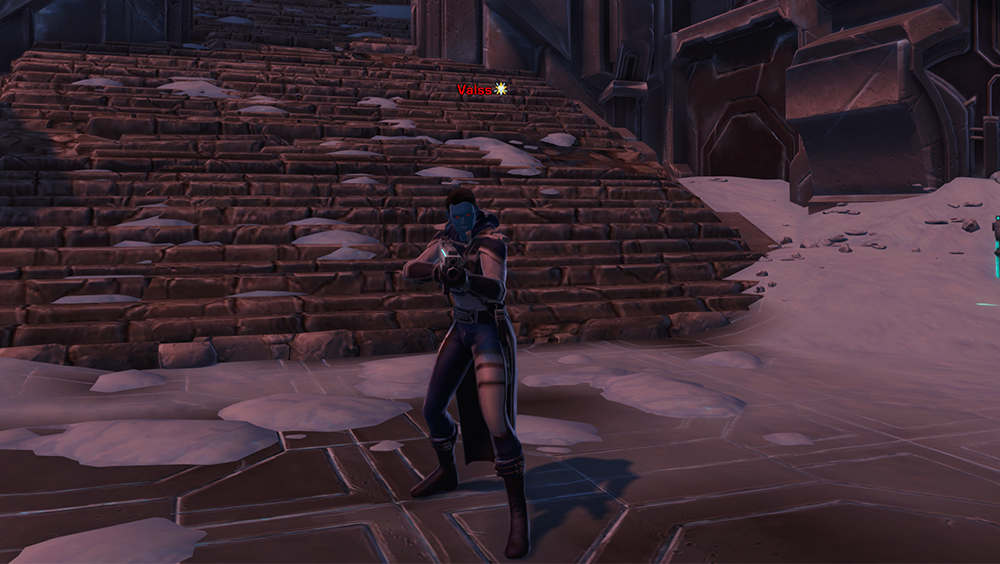
The final boss is Valss.
Stay out of his red circles as much as possible.

Step out of his red line if it is not focused on you.

Avoid his little tornadoes as much as possible.
Master Mode: This fight is mostly the same in Master Mode.
Master Mode

Master Mode Traitor Among the Chiss is a lot harder than the solo or Veteran version.
- The enemies are stronger and have more health.
- The Guardian Droid has a bunch of small Explosive Droids show up and explode into orange circles you need to also avoid.
- Syndic Zenta will have Medics that show up that will heal Zenta, even when she’s up high and they are on the floor. In the final phase, you’ll also need to avoid the big yellow circles.
- Valss the final boss is pretty much the same mechanics.
- The bonus boss, Strike Team Walker, is incredibly difficult, and is one of the harder bonus bosses in the game. It has a lot of new mechanics to learn.
Bonus Quests
A Traitor Among the Chiss has a LOT of bonus quests and hidden achievements. You do not need to do any of these to unlock the bonus boss.
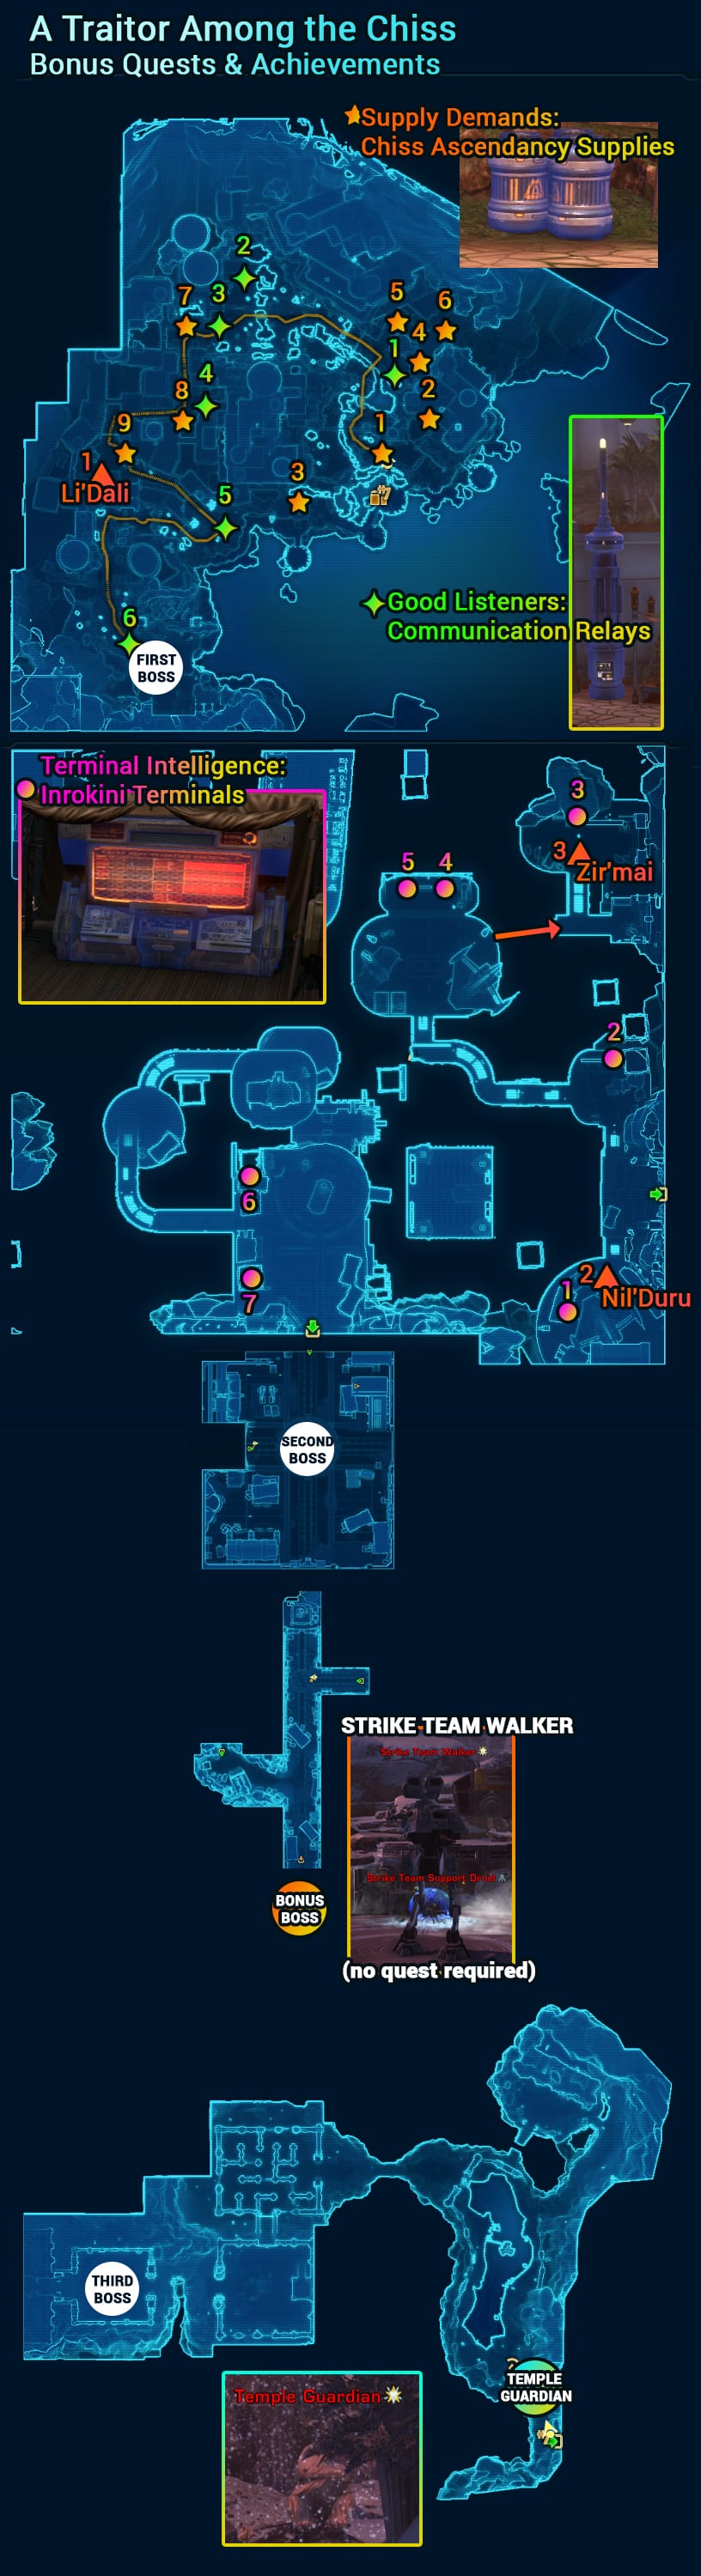
Supply Demands
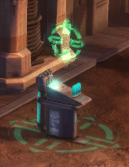
Destroy Chiss Ascendancy Supplies: 0/9 – This bonus quest just gives xp and credits, and the first time you complete it you get an achievement with a decoration reward.


Good Listeners
Plant Listening Devices on Communications Relays: 0/6 – This bonus quest just gives xp and credits, and the first time you complete it you get an achievement with a decoration reward.

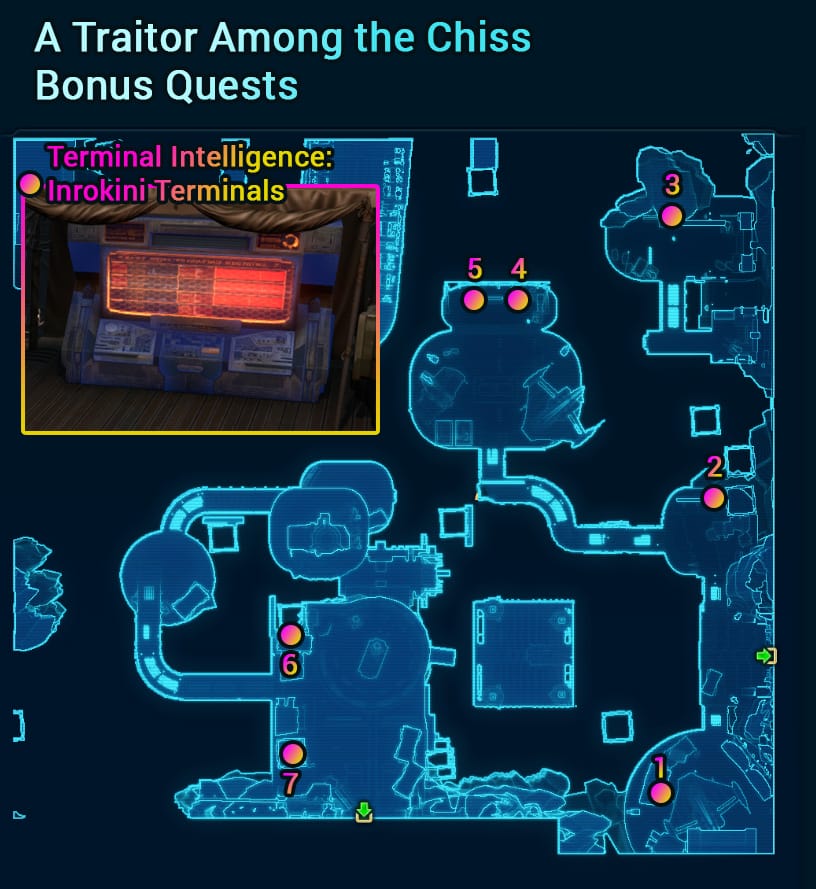
Terminal Intelligence
Slice Inrokini Terminals: 0/7 – This bonus quest just gives xp and credits, and the first time you complete it you get an achievement with a decoration reward. However I noticed it often doesn’t show up till right before the second boss and I have to back-track to get the terminals.
Achievement – Defeat the Operations Chiefs
Defeat the three Operations Chiefs in the A Traitor Among the Chiss flashpoint. Reward: 20 CC – These are three bosses that are off the main path.

#1 – Chief Security Officer Li’Dali

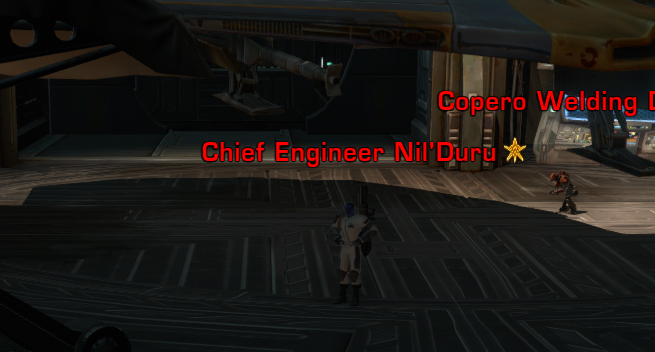
#2 – Chief Engineer Nil’Duru
#3 – Chief Scientist Zir’mai

Achievement – Overkill
Defeat the Temple Guardian in any difficulty mode in the A Traitor Among the Chiss flashpoint.
Achievement – Bane of Inrokini
Defeat 100 Inrokini Chiss enemies in any difficulty mode in the A Traitor Among the Chiss flashpoint.
Skips
Traitor Among the Chiss has some of the craziest skips available in the game. Groups may or may not use them because they are strange and obscure jumping paths!
What follows are a gallery of images depicting specific walking routes that may save you some time by avoiding enemies during the flashpoint. All of the following images are done without stealth or without a sleep dart/mind maze from a stealth character, so anyone can attempt them. If you fail to slip by unnoticed or see your team has attacked the enemies – always pull back from these routes and go back to help them defeat them! These may save time if everyone does them, but nothing makes a flashpoint slower than running ahead and not helping others to get out of combat again.
Solo Stealth: If you are playing Copero alone and are on a Stealth character, or are in a full stealth group, Copero is an awesome Flashpoint to stealth through – just don’t walk through any enemies and you can stealth through almost every enemy apart from the bosses. Players often speed-run this Flashpoint in stealth as the bosses drop a lot of nice decorations.
Skip #1 – Multi-Step Big Skip
The first skip is at the very beginning of the Flashpoint.

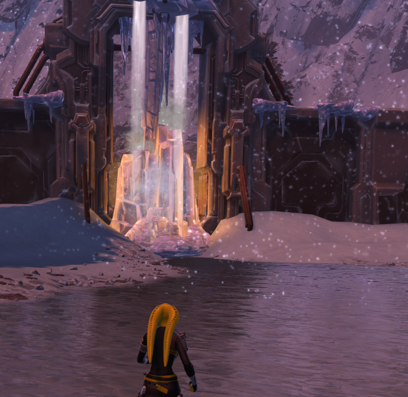
This skip is fairly advanced and the time it takes to learn may be longer than the usual run for some players – but when it becomes second nature can really speed up the outdoor city portion of the flashpoint. Start by running across the water instead of entering Copero City.
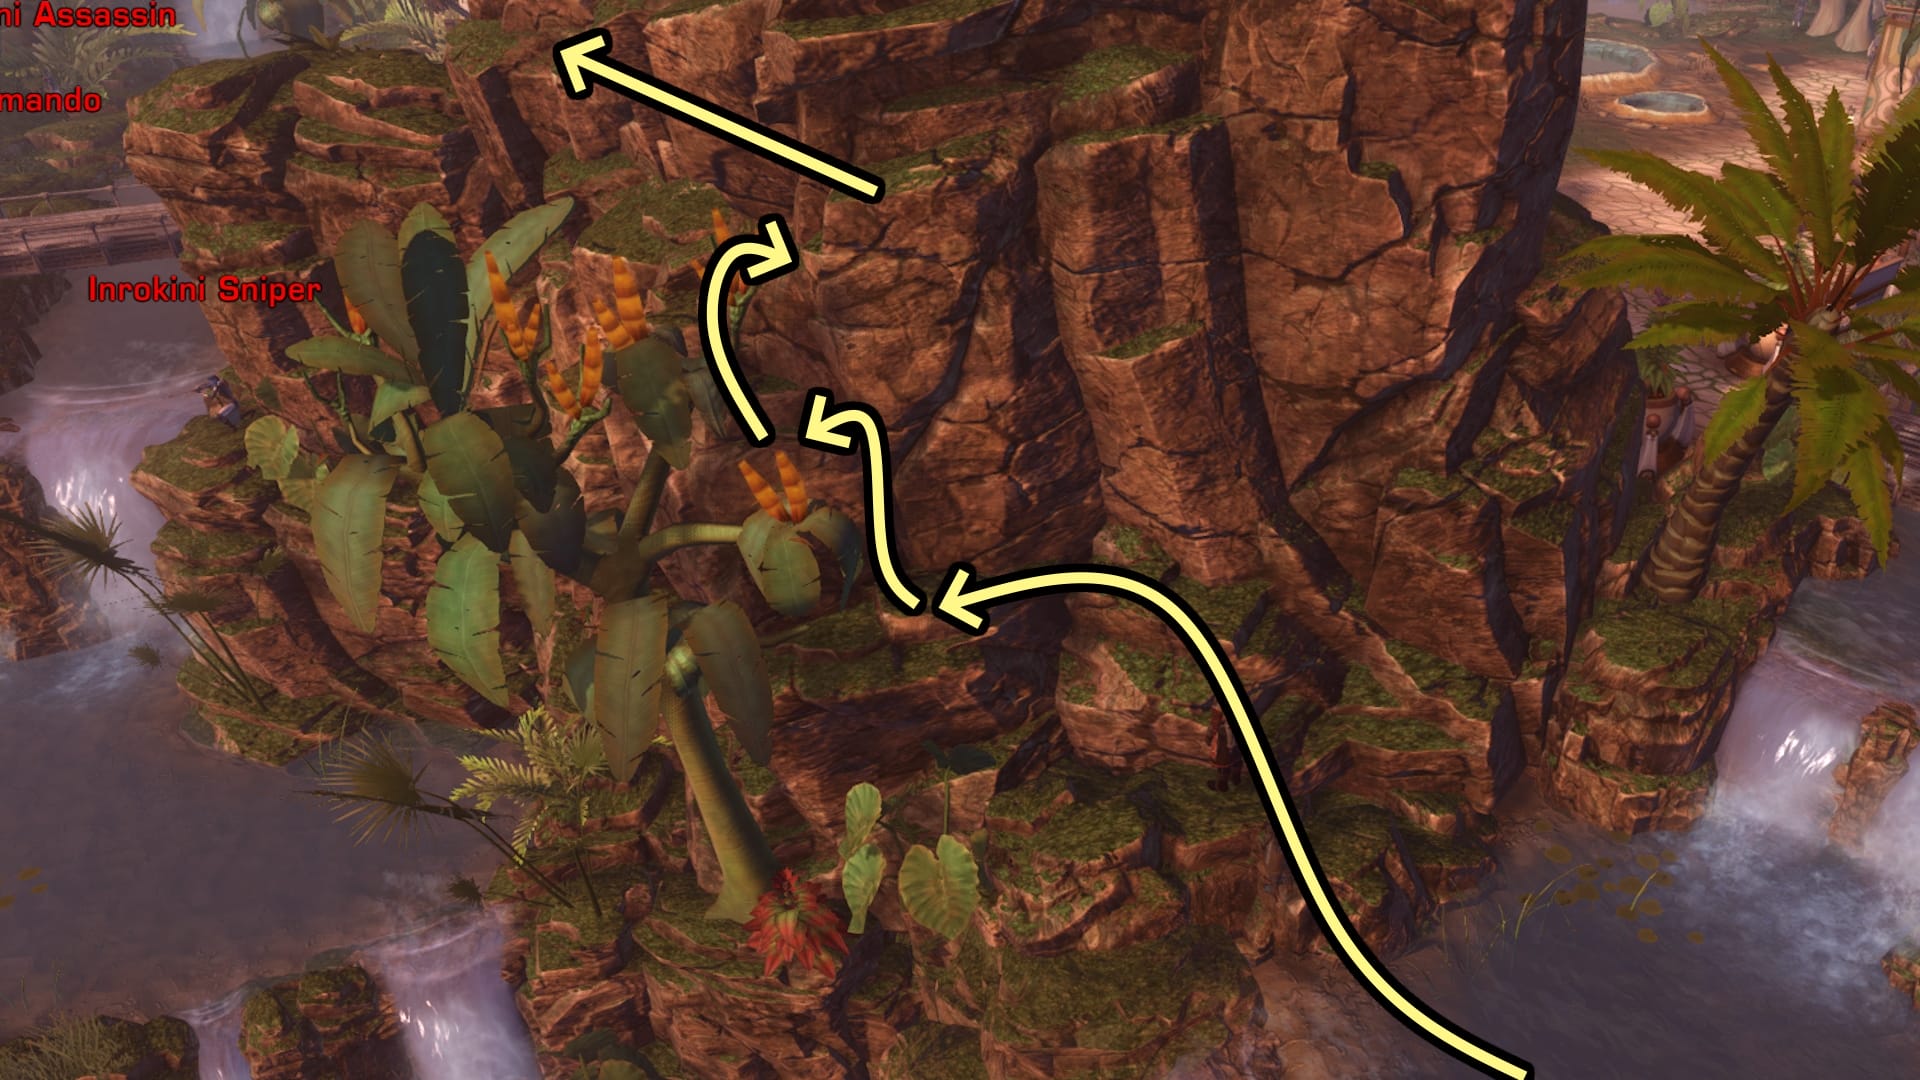
Once you’ve made it to this large rocky cliff is where things get tricky. Hop up onto the rocks out of the water, get near the tree, and jump up the cliff face. There’s an obvious green lip of ledge to stand on halfway up but you’ll find yourself pretty constricted by the overhanging tree – there’s actually a smaller razer thin lip of cliff to stand on just below it that lets you stand more to the right and out of the way of the tree. Then you can finish leaping up to the top of the cliff.

From the cliff, you can jump onto the archway over the street and cross it by leaping up onto the banner-like ornament and crossing it. From there, you can jump into the nearby tree and head down toward the waterfall in the “alley” between buildings. If you fall down here that’s okay – fight the 4 or 5 chiss that pull and then head towards the waterfall to continue the skip.

This part is trickiest for most. Jump to exactly at the meeting point between the pipes from the building and the rocks from the falls to get on. Then, jump up the rocks until you are as high as you can go next to the falls. From here, you leap INTO the waterfall, as theres a tiny little ledge just hidden inside of it. From there, you can cross the waterfall fully and hop up top. Briefly visit the left-hand buildings roof and then continue across more grassy cliffs to continue.
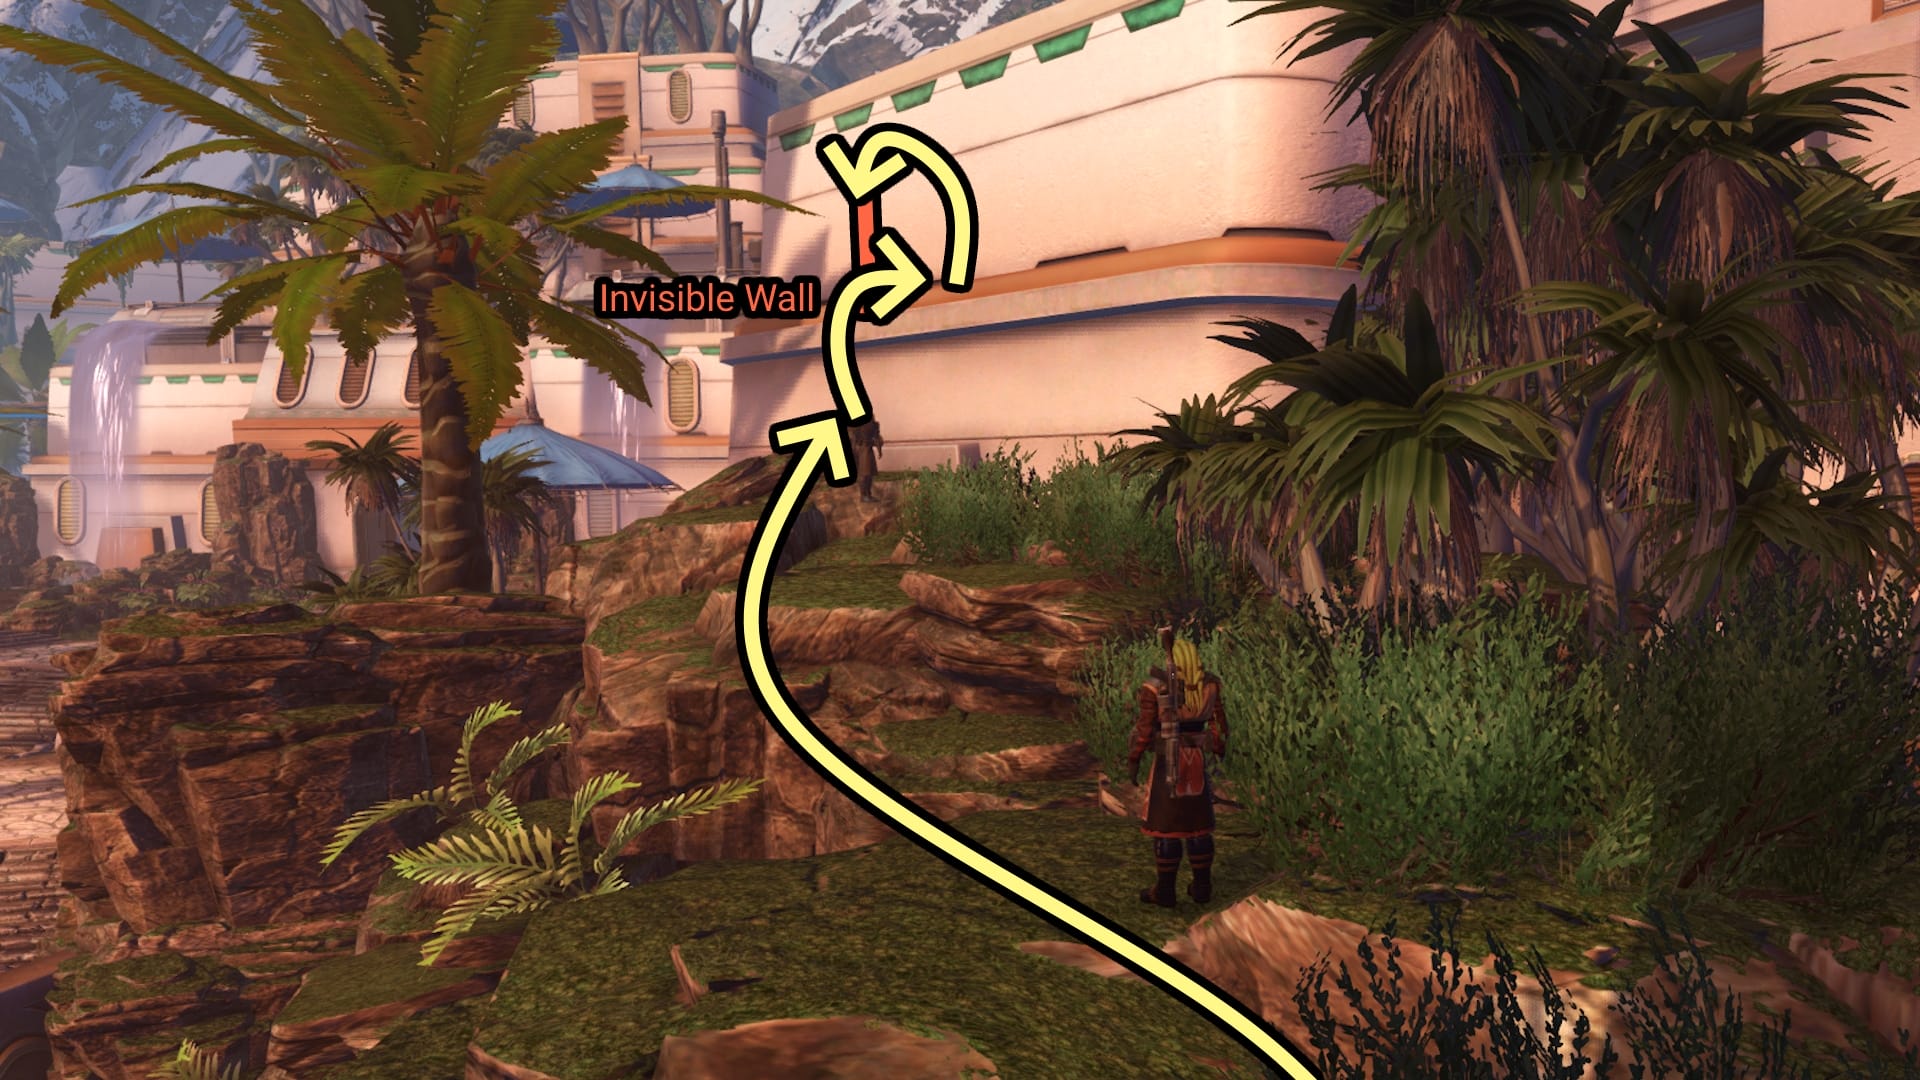
As you run along the cliff, you’ll see a rock here leading up to the next buildings wall. You’ll also immediately feel an invisible wall blocking your progress. Jump up to the lip of the building, and as you run into the invisible wall up here, you can actually hop right on top of it and go over, continuing past and around the lip of the building.

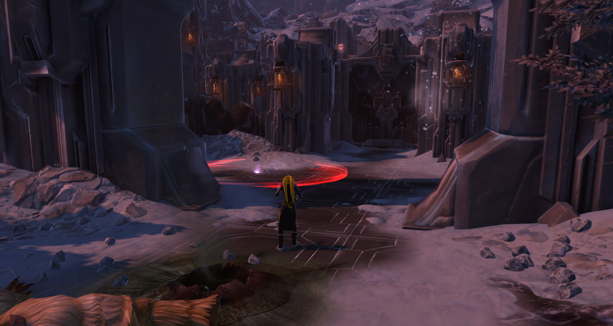
Congrats! From here you can drop down and start fighting. Judging by the map in this last image you manage to skip almost all of copero city on the way to the first boss.
Skip #2
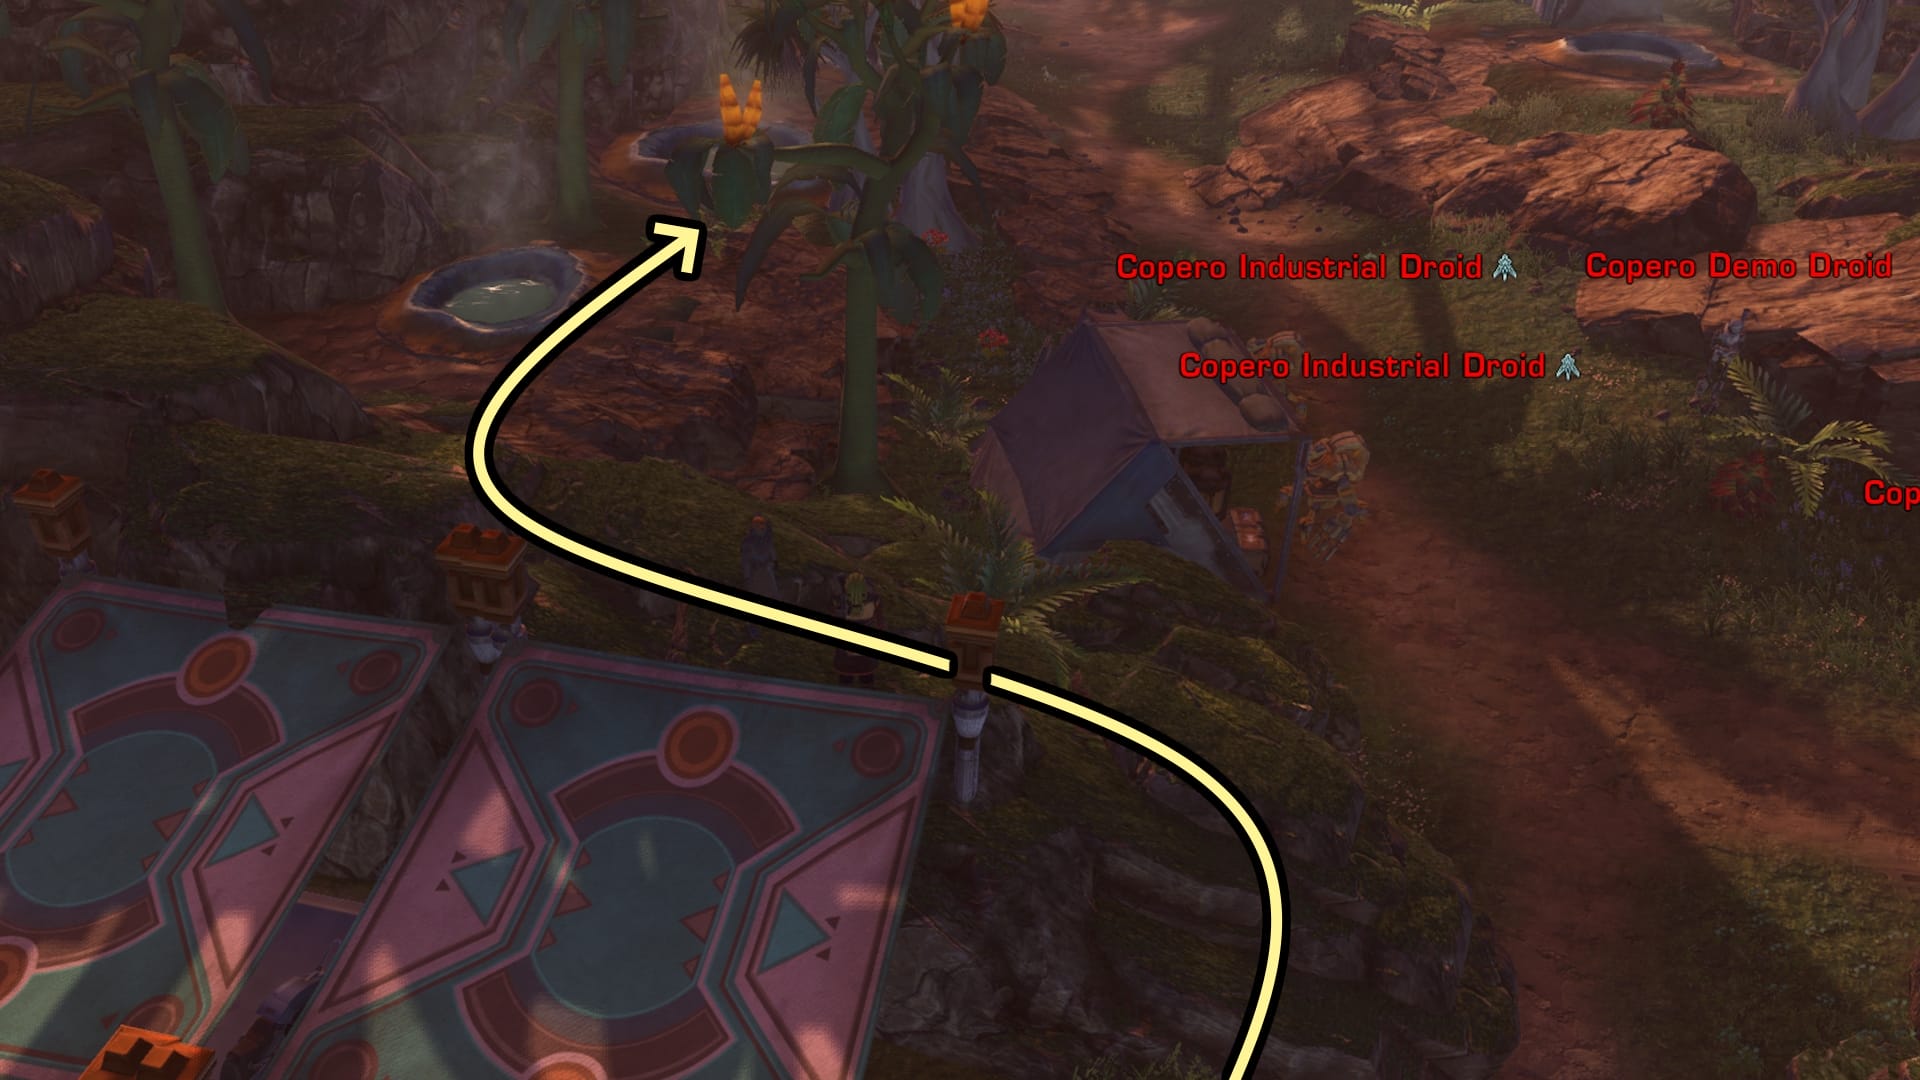
The last group of droids before the first boss can be skipped as well – just hop up and hug the pole from the vehicle awnings and head through the sulphur pits instead of fighting.
Skip #3

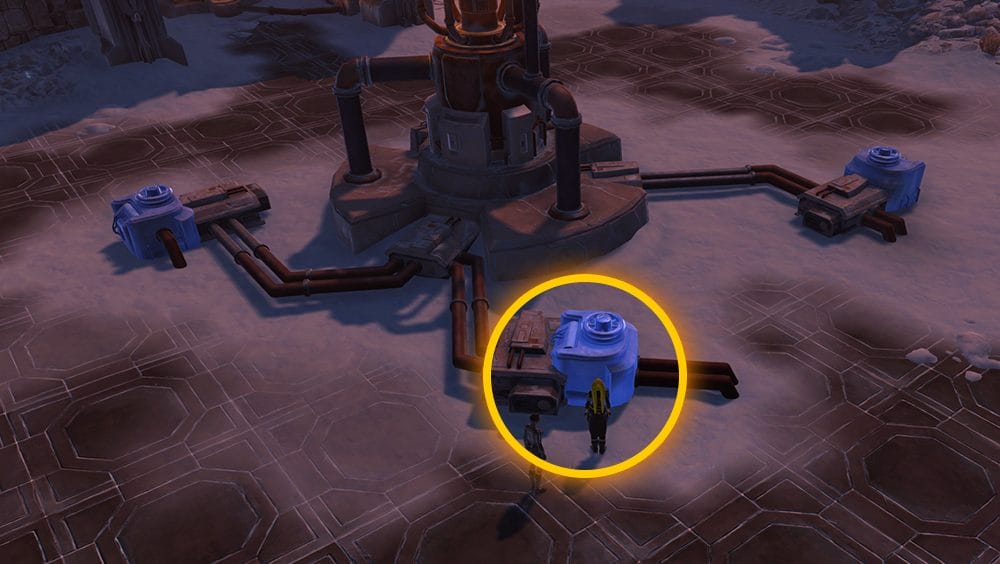
Inside the grappling hook-laden path indoors before the second boss, you can cut this corner early and run behind the equipment on the dock to keep hidden from the enemies on the other side. Run allllll the way to the back this way and don’t cut over towards the exit until you’re at the far wall. If you want to be doubly sure this skip works, jump from your walkway (over the railings) and behind the wall instead of walking around the lamp. The medic can sometimes see you if you don’t jump the corner.
Skip #4

Not exactly a skip, but make sure to grab the food and use the temporary ability to feed this huge guardian if you don’t want to waste time fighting it. There IS an achievement to fight it normally, but it can be formidable on higher difficulties. Keep that rend cast interrupted as soon as it starts. Otherwise, skip with the fruit!
To my knowledge, nothing else in this open snowy area is really skippable aside from the obvious – give the resting cats a wide berth in the ice area, push wampas off cliffs if you’ve got knockbacks, do the puzzles right (button on the left for the lever and pipe near the door after the maze) and that’s about it for Traitor Among the Chiss!
Rewards
In addition to the usual rewards of XP, credits, gear and end-game currency, A Traitor Among the Chiss has the following rewards available.
Ascendancy Soldier Armor Set

The Ascendancy Soldier set only drops from the A Traitor Among the Chiss’s first and second bosses, the Guardian Droid and Syndic Zenta, and they can even drop in story mode. If you are trying to get these pieces, every time you fight any of those bosses in any mode, you have a chance of either getting no pieces or getting a piece, and if you get a piece you only have a 1 in 6 chance of getting a specific piece… so it may take a while to collect the whole set! The pieces are Binds on Pickup, so you can not sell or trade them to another player, and they are unfortunately not legacy-bound.
- Ascendancy Soldier’s Belt
- Ascendancy Soldier’s Boots
- Ascendancy Soldier’s Bracers
- Ascendancy Soldier’s Gauntlets
- Ascendancy Soldier’s Greaves
- Ascendancy Soldier’s Tunic
Ascendancy Outcast Armor Set

The Ascendancy Outcast set only drops from the A Traitor Among the Chiss’s bonus and final boss, the Strike Team bonus boss and Valss at the end, and they can even drop in story mode. If you are trying to get these pieces, every time you fight any of those bosses in any mode, you have a chance of either getting no pieces or getting a piece, and if you get a piece you only have a 1 in 7 chance of getting a specific piece… so it may take a while to collect the whole set! The pieces are Binds on Pickup, so you can not sell or trade them to another player, and they are unfortunately not legacy-bound.
- Ascendancy Outcast’s Visor
- Ascendancy Outcast’s Breastplate
- Ascendancy Outcast’s Greaves
- Ascendancy Outcast’s Boots
- Ascendancy Outcast’s Gauntlets
- Ascendancy Outcast’s Belt
- Ascendancy Outcast’s Bracers
Random Drop Decorations
These decorations can drop from all over A Traitor Among the Chiss from any boss in any mode, including Story. All but one can also be bought and sold on the GTN.
Air Circulator
Air Circulator, drops from any boss in any mode, including Story
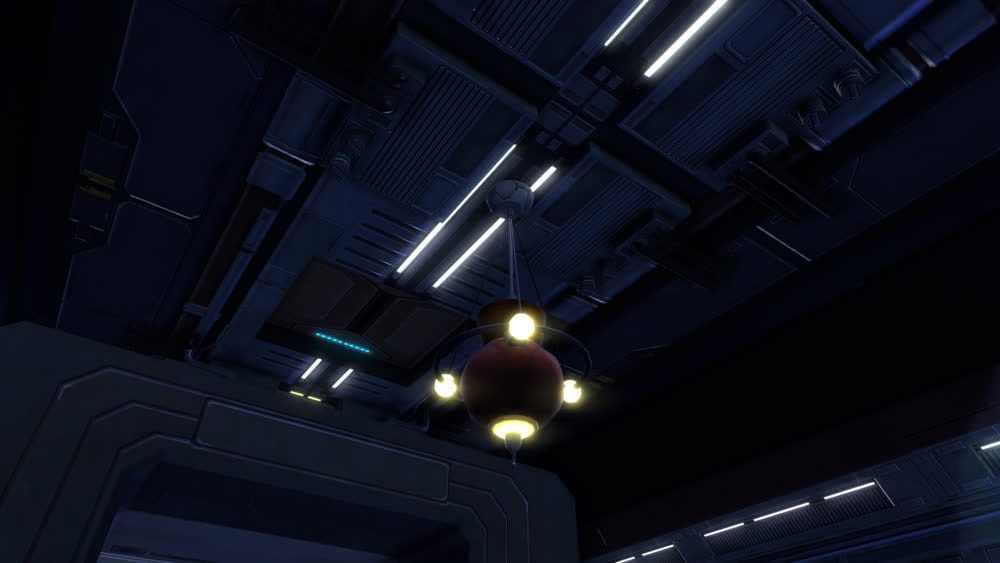
Ceiling Chain Light

Ceiling Chain Light, drops from any boss in any mode, including Story
Chiss Banner

Chiss Banner, drops from any boss in any mode, including Story
Copero Hanging Plant
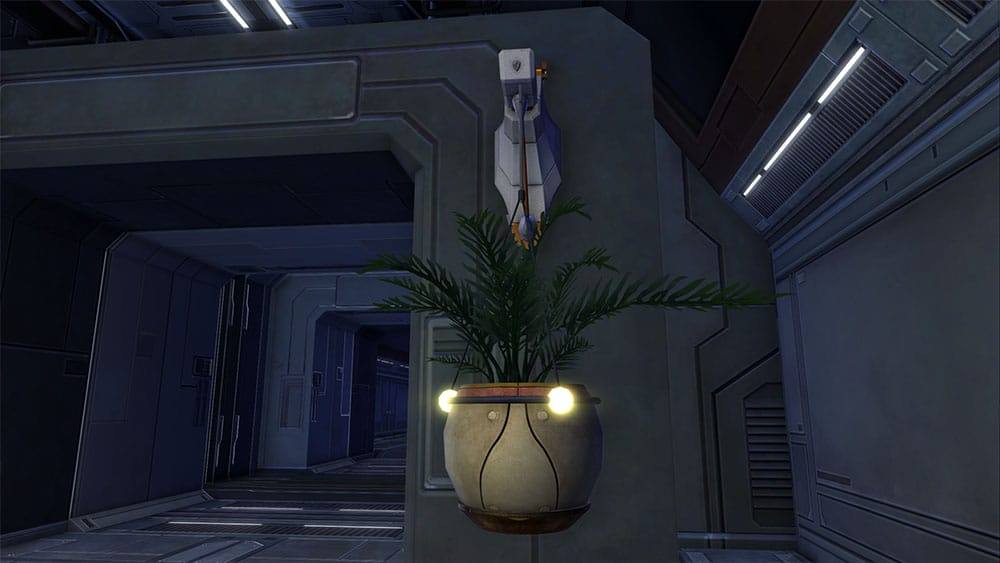
Copero Hanging Plant, drops from any boss in any mode, including Story
Copero Large Bar

Copero Large Bar, drops from any boss in any mode, including Story
Copero Large Fountain

Copero Large Fountain, drops from any boss in any mode, including Story
Copero Resort Light
Copero Resort Light, drops from any boss in any mode, including Story
Copero Resort Rug
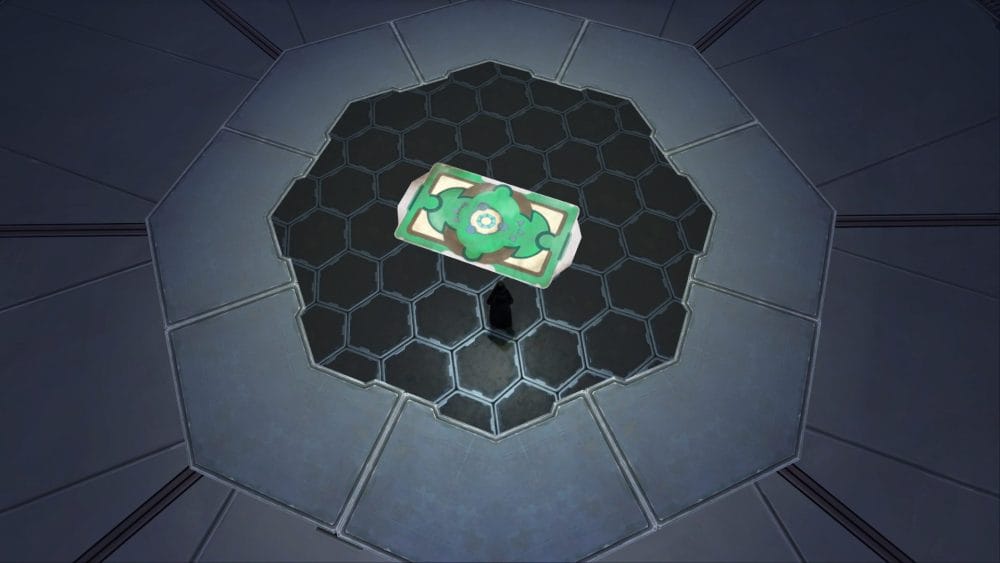
Copero Resort Rug, Strike Team Walker drop
Copero Wall Fountain
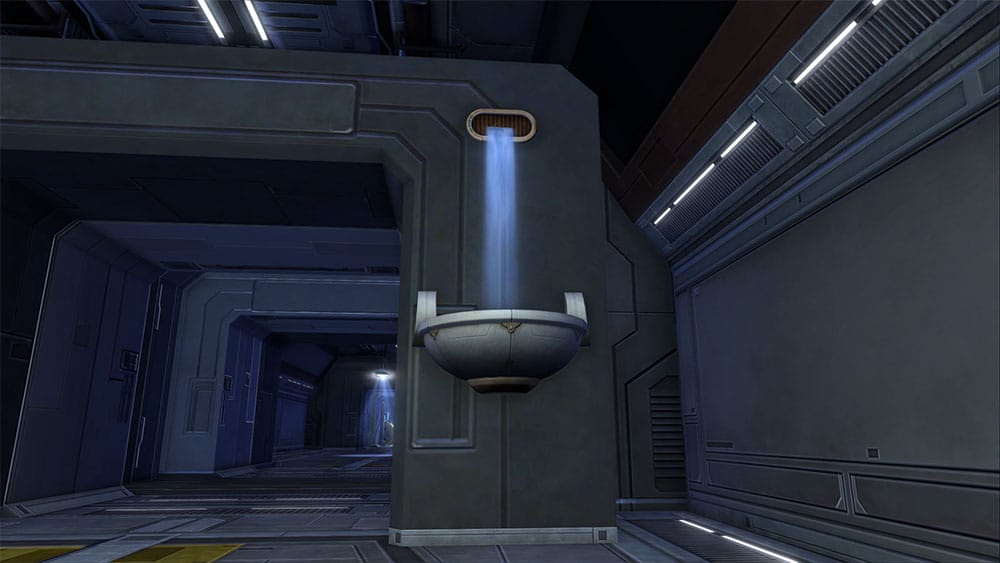
Copero Wall Fountain, drops from any boss in any mode, including Story
Paper Lantern

Paper Lantern, drops from any boss in any mode, including Story – can NOT be bought or sold on the GTN
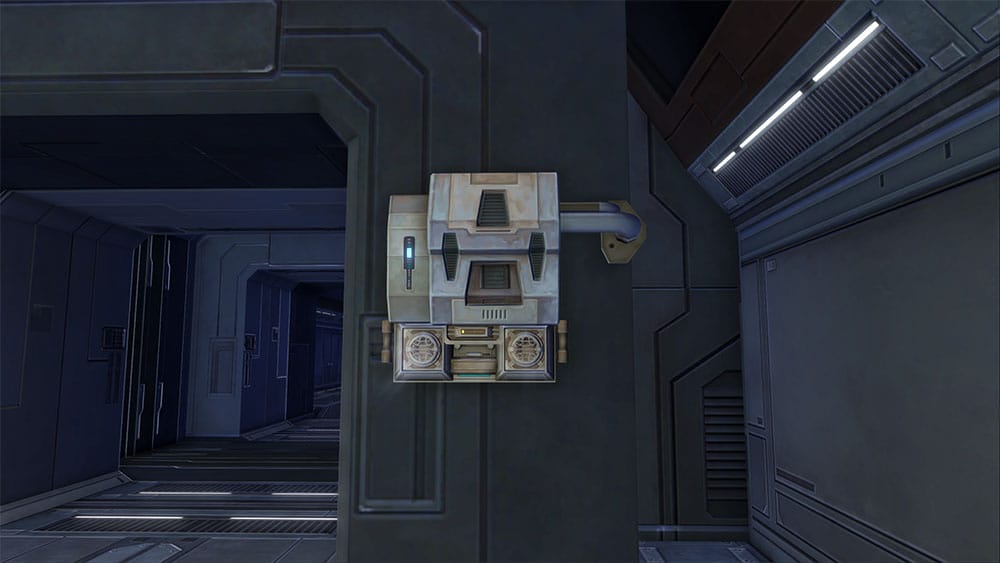
Power Control
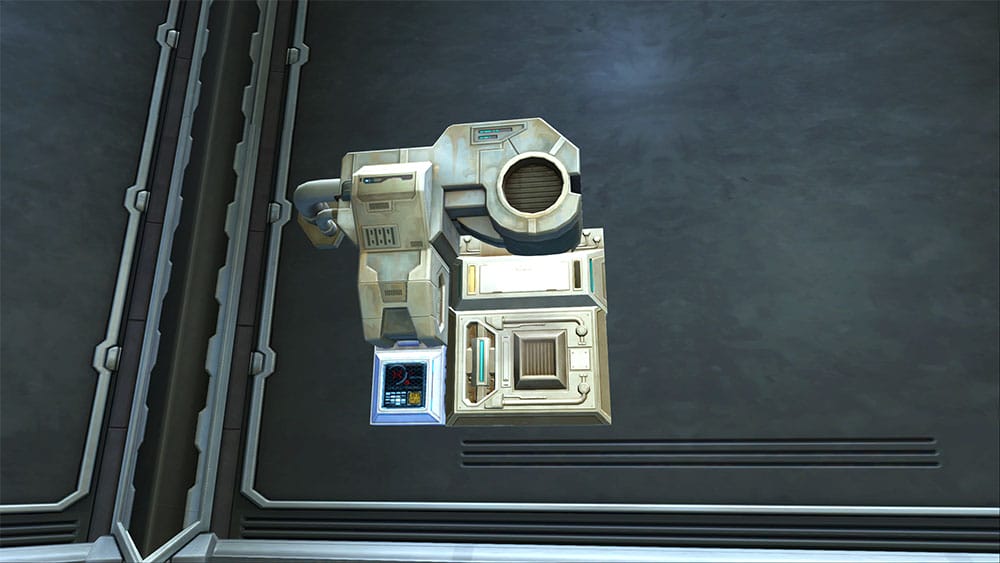
Power Control, drops from any boss in any mode, including Story
Steam Distributor

Steam Distributor, drops from any boss in any mode, including Story
Tree: Tropical Copero Palm

Tree: Tropical Copero Palm, drops from any boss in any mode, including Story
Copero Propaganda Poster
The idea is that you should be able to get ten of these Copero Propoganda decorations, and each of the five achievements gives you two copies of the Copero Propaganda Decoration. However, for whatever reason, instead of getting 2, you get 999 for completing one achievement.
- Defeat the Strike Team – Defeat the Strike Team in the “A Traitor Among the Chiss” flashpoint on story or veteran mode.
- Bane of Inrokini – Defeat 100 Inrokini Chiss enemies in any difficulty mode in the “A Traitor Among the Chiss” flashpoint.
- Supply Demands – Complete the bonus quest Supply Demands in the “A Traitor Among the Chiss” flashpoint.
- Good Listeners – Complete the bonus quest Good Listeners in the “A Traitor Among the Chiss” flashpoint.
- Terminal Intelligence – Complete the bonus quest Terminal Intelligence in the “A Traitor Among the Chiss” flashpoint.
Objectives
- Shuttle to Copero
- Get to the House Inrokini Stronghold
- Defeat the Guardian Droid
- Locate Syndic Zenta
- Defeat Syndic Zenta
- Make Your Way Further Into The Complex
- Reach the Ancient Ruins
- Discover a Way Past the Threshold Beast
- Discover a Way Further Into the Temple
- Make your Way Through the Temple Trials
- Discover a Way Past the Iced Over Archway
- Get to Theron Shan
- Defeat Valss
Lore

Partway through the flashpoint, you will run across a news terminal that automatically starts playing an audio news clip. Here is the two different announcements you might get from the Galactic Bulletin announcement on Copero. These bulletins will only make sense if you have reached the correct part of the storyline in the expansions.
Option 1, Acina is alive: Reeling from Chancellor Madon’s resignation and the loss of Supreme Commander Jace Malcom, the Republic has entered a state of political stagnation. Many speculate Sith Empress Acina will use this moment of weakness to push for the capture of the resource world known as Iokath. Radicals within the Senate urge Interim Chancellor Galena Rans to retaliate, but the complicated nature of current elections has slowed any progress. Meanwhile, more than two dozen Republic colonies have reported a raw materials crisis, halting the production of weapons and defense systems.
Option 2, Acina is dead: In the wake of Sith Empress Acina’s sudden death, former Dark Council member Darth Vowrawn has announced his ascension to the throne. The new Emperor Vowrawn has already issued controversial orders to halt any progress on the resource world of Iokath, prompting public outcry. Insiders say he might be using this time to gather strength for an attack on the Republic and its Eternal Alliance partner, but those rumors are not confirmed. Whether the Emperor’s methods will prove beneficial to the two dozen Imperial worlds in a resource crisis remains to be seen.
 Questions or comments? Feel free to send me a message on Twitter


 Discord
  Email swtorista@gmail.com
 Bluesky @swtorista.com
 Reddit /u/swtorista
 Twitch Swtorista
 Youtube
 Patreon
 Twitter @swtorista