


 How to Craft
 Choose a Crew Skill
 Armormech
 Armstech
 Artifice
 Biochem
 Cybertech
 Synthweaving

 Gathering Guide
 Rare Materials Guide
 White Materials Guide
 Jawa Junk
 Augments
 Medpacs, Stims and Adrenals
 Synthweaving Crafting Tree


 Crafted Decorations
 Crafted Mounts
 Crafted Dyes
 Crafted Crystals
 Events Calendar
 Galactic Seasons
 PvP Seasons
 Bounty Event
 Double XP Event
 Feast of Prosperity
 Gree Event
 Life Day
 Nightlife Event
 Pirate Incursion Event
 Rakghoul Event
 Spring Abundance Festival
 Swoop Event

 Jedi Knight
 Jedi Consular
 Trooper
 Smuggler
 Sith Warrior
 Sith Inquisitor
 Bounty Hunter
 Imperial Agent
 Bounty Hunter
 Imperial Agent
 Jedi Consular
 Jedi Knight
 Sith Inquisitor
 Sith Warrior
 Smuggler
 Trooper
 Legacy Gear
 Lightsabers
 Double-Bladed Lightsabers
 Vibroswords
 Double-Bladed Vibroswords
 Blaster Pistols
 Blaster Rifles
 Sniper Rifles
 Blaster Cannons


Shield Tech Powertech Tank Bounty Hunter Class Guide (6.0)
Powertech Tank Guide
If the best defense is a good offense, the Mercenary’s got the most intimidating defense in the galaxy.
In this guide we’ll be going over how to play a Bounty Hunter Powertech Tank including when and how each ability should be used, tips and tricks, and some basics about gearing up. The powertech tank is the easiest to learn of the three imperial tanks, and defensively takes advantage of the powertech’s various tech-based shields.
 Your master PT tank for this guide is Nyyah, “I’ve been playing SWTOR since launch with a single long break from 1.1 to 1.7 and started PT/VG tanking in 2.0 for no real reason but stuck with it because it’s the most fun tank class to me and I always enjoyed the challenge of playing it in difficult content, so it is my go to tank class whenever I have to tank. I consider myself a Concealment main though. Outside of playing SWTOR I enjoy theorycrafting. A lot.” This guide was also reviewed by Khazad, who has also written a very indepth PT tank guide here!

Abilities
The Shield Tech Powertech Tank’s role is to keep themselves and their group alive through technology-based shields a healthy use of their flamethrower. As a tank, the Powertech tank will constantly want to keep their enemies’ attention, by using their taunt abilities, Neural Dart and Sonic Missile, and by turning up the heat by using their attack abilities that generate threat.
The Shield Tech Powertech uses a combination of useful mechanic abilities, defensive abilities, and damage abilities to keep themselves and their team alive.
Mechanical Abilities
Powertechs have some clever tricks to help keep themselves and their group alive.
Let’s start by going over the Powertech tank’s mechanical abilities.
| Icon | Ability Name | Level | Type | Description |
|---|---|---|---|---|
| Hunter's Boon | 2 | Class Buff | Hunter's Boon is your class buff – it gives an hour long boost to health to your group or to any other character you cast it on. | |
| Recharge and Reload | 2 | Regen | If you're low on health between fights, you can use Recharge and Reload to regenerate health - but it only works outside of combat. | |
| Shatter Slug | 5 | Knockdown | Shatter Slug knocks down up to 8 weaker enemies within 8 meters. | |
| Determination | 9 | Stun Breaker | Determination is your stun breaker. If you are stunned and can’t move, you can use this ability to unstun yourself. | |
| Electro Dart | 12 | Hard Stun | Electro Dart is your short 4-second hard stun – you can use it on weaker enemies to stop them from running around, from casting abilities, or just to keep them out of the fight for a few seconds. | |
| Neural Dart | 14 | Taunt | Neural Dart is your taunt. A taunt forces most enemies to attack you, and only you, for six seconds, and also increases the chance they'll continue attacking you afterwards. As a tank, in a group fight it's your job to keep the enemy's attention, because unlike your other team members, you have stats and the abilities that will help keep you alive and allow your team members to focus on defeating the enemy. Apart from taunts, you can keep the enemy focused on you with what's known as threat or aggro, which means using your abilities in a way that aggravates your enemy to continue attacking you. The higher your threat, the less likely a team member is going to catch the enemy's attention. | |
| Guard | 16 | Guard | Guarding another player reduces the chances of the enemy attacking them. The guarded player also takes 5% less damage, but players mainly use guard on a team mate who is often attracting the attention of the boss enemy - either a strong healer or DPS character - not the weakest player who needs "extra protection". | |
| Quell | 18 | Interrupt | Quell is your interrupt. Every class has an interrupt ability that allows them to interrupt an enemy while they are casting. This can be useful when fighting low-level enemies as many abilities can be interrupted, and in some max-level fights interrupts are a mandatory part of combat. Castbars that fill up from left right are called channels and can be interrupted and the ability will be stopped, but castbars that go from right to left deal damage the entire time they are casting. | |
| Sonic Missile | 20 | Group Taunt | Sonic Missile is your group taunt, commonly know as an AOE taunt. It will force all enemies within 8 meters of your target to attack only you for six seconds, similar to your single-target Neural Dart ability. | |
| Grapple | 22 | Pull | Grapple allows you to pull an enemy to you, and also generates a lot of threat. Although this does not work against most boss enemies, you can still use it to gain threat. | |
| Hydraulic Overrides | 26 | Speed Boost & Movement Immunity | Hydraulic Overrides boosts your movement speed by 30% for 6 seconds, but more importantly, during that time it also gives you immuity to movement impairing effects like being slowed or immobilized, knockdowns and most other ability that will send you flying. | |
| Stealth Scan | 36 | Stealth Detection | Stealth scan let's you search for stealthed enemies and reveal them if they are in the ability's area. | |
| Translocate | 42 | Teleport | Translocate is a goofy ability that lets you swap places with another player. Anyone you switch with is ignored by most enemies, cannot be leapt to or pulled, and are immune to interrupts and ability activation pushback until they use an aggressive or healing ability. This ability is rarely ever used but is fun for pranking group members. | |
| Carbonize | 46 | Group Stun | Carbonize is your group stun and stuns up to 8 enemies around you for 2 and a half seconds. | |
| Jet Charge | 59 | Leap | Jet Charge is your leap - it allows you to instantly jump forward to an enemy within range. |
Defensive Abilities
The Powertech tank has a a pretty wide variety of different shields and defensive abilities.
| Ability Name | Level | Type | Description | |
|---|---|---|---|---|
| Energy Shield | 14 | Shield | Energy Shield is your simple standard shield that increases your damage reduction by 25%, and as a powertech tank it lasts 15 seconds. | |
| Kolto Overload | 32 | Low-Health Heal | Kolto Overload is your heal, but it only heals you once your health is at 35% or lower. You trigger Kolto Overload, then if your health reaches below 35% within the next 60 seconds or if it's already below 35%, Kolto Overload will quickly heal you up to 35% or slightly higher. | |
| Power Yield | 72 | Stacking Shield | Power Yield is a stacking shield that increases your armor rating by 40% for 10 seconds. Whenever you take damage, an additional stack of Power Yield is applied, up to 5 times for a max of 200%, and you can use it about once per minute. As a bonus it also gives you a stacking damage boost. | |
| Heat Blast | 26 | Shield & Threat | Heat Blast is one of your key defensive abilities you'll be using often as a Powertech tank. Heat Blast increase your shield absorption by 30% for 6 seconds, vents 10 heat, and creates a high amount of threat, but you can only use it when you have 3 stacks of the Heat Screen buff. | |
| Explosive Fuel | 50 | Defense + Offense Buff | Explosive fuel is your offensive and defensive buff and increases ranged and tech critical hit chance by 25% for 15 seconds, and as a shield tech powertech, increases your defense and resist chance by 35%. | |
| Oil Slick | 10 | Accuracy Reduction | Oil Slick creates a pool of oil around you, and any enemies in it have a 15% melee and ranged accuracy loss, and are also slowed. Explosive Fuel and Oil Slick make a great defensive combination. | |
| Sonic Missile with Sonic Rebounder Utility | 20 | Group Protection | Although your Sonic Missile is primarily your group taunt, if you choose the Sonic Rebounder utility it also becomes a defensive ability, and will protect all friendly targets in its area of impact excluding you, reflecting the next direct, single-target attack back at the attacker. | |
| Close and Personal | 15 | (Passive ability) | As a powertech, you'll also have the Close and Personal passive ability, and you receive direct damage from area attacks, you'll automatically vent 2 heat and heal for 2.5% of your total health up to once every 3 seconds. |
Damage Abilities
Although the Powertech tank should be focusing on tanking rather than doing damage, using certain abilities efficiently can actually raise the Powertech tank’s survivability, and help keep threat with enemies.
| Icon | Ability | Level | Description |
|---|---|---|---|
| Rocket Punch | 2 | Rocket Punch deals an up close hard hit to your target, and is an important part of building up your defensive shields. | |
| Rail Shot | 6 | Rail Shot is a powerful ability, but is not always available, and is also an important ability for building up your defensive shields. | |
| Shoulder Cannon | 51 | Your Shoulder Cannon lets you shoot 4 missiles that stack up over time. | |
| Firestorm | 58 | Firestorm is your ability that does a ton of damage, on a long-range cone in front of you. | |
| Flame Burst | 2 | Flame Burst does a medium amount of damage, but it doesn't have the perks of the other abilities | |
| Flame Sweep | 12 | Flame Sweep does damage to up to 8 enemies all around you. | |
| Deadly Onslaught | 8 | Deadly Onslaught is a powerful multi-target attack you can choose where to place. | |
| Rapid Shots | 2 | Rapid Shots is your basic attack. | |
| Explosive Fuel | 50 | Explosive fuel is your offensive and defensive buff. | |
| Vent Heat | 2 | Vent Heat helps you vent heat. | |
| Thermal Sensor Override | 42 | Thermal Sensor Override makes your next ability generate no heat. |
Rotation / Priority System
Using your abilities efficiently can help you survive longer, do more damage and gain more threat. This efficiency is gained by using abilities in an order that causes them to amplify each other. This order is sometimes called a rotation or a priority system – what abilities take priority over others.
Opener
Your opener is the ideal set of abilities you will use in order as a Powertech tank during the beginning of a fight to gain the most threat with an enemy, and to set up your success for the rest of the fight.
| # | Icon | Ability | Description |
|---|---|---|---|
| 0 | Shoulder Canon | Before the fight starts, you can pre-load your Shoulder Canon - it will stay up and available for about 5 minutes after you use it. | |
| 1 | Grapple | You'll start the fight by using your Grapple Hook. Even if your enemy can't be pulled to you, Grapple Hook generates a high amount of threat. | |
| 2 | Jet Charge | If your enemy didn't come to you, use Jet Charge to get to them. | |
| 3 | Explosive Fuel | While you are jumping in, use Explosive Fuel to increases the ranged and tech critical hit chance for your damage abilities by 25%. | |
| 4 | Firestorm | Your first attack will be Firestorm, which does a lot of damage. | |
| 5 | Shoulder Cannon (Missile #1) | Immediately after using Firestorm, you can launch your first Shoulder Cannon missile. | |
| 6 | Neural Dart | Immediately after using your missile, you'll use your single taunt, Neural Dart, to gain threat. One really useful thing to know is that it's better to cast your taunt 4 meters or more away from the center of your target (not 4m from the edge of your target, which is what the meter measurements on your quickbars show) - this will help you keep threat better than if you do it up close - so take a quick step back before taunting! As a PT tank, many of your abilities have a range of up to 10 meteres, so don't be afraid to step back. (info) | |
| 7 | Rocket Punch | Your next attack will be Rocket Punch, this will make Rail Shot useable for a short period after you punch your target. | |
| 8 | Shoulder Cannon (Missile #2) | Immediately after using Rocket Punch, you can launch your second Shoulder Cannon missile. | |
| 9 | Rail Shot | Next up is Rail Shot, a powerful ability that isn't always available. | |
| 10 | Shoulder Cannon (Missile #3) | Immediately after using Rail Shot, you can launch your third Shoulder Cannon missile. | |
| 11 | Rocket Punch (if reset, super rare) or Firestorm (if proc’d late, rare) or Flame Burst | Next up is Rocket Punch, if it happens to be available, or Firestorm if it's procced and sparkling on your quickbar, and if neither of those are available, use Flame Burst. | |
| 12 | Shoulder Cannon (Missile #4) | Next is our fourth and final Shoulder Canon. | |
| 13 | Firestorm (if proc’d late, rare) or Flame Burst | Our final opener attack will be Firestorm, if it's procced and sparkling, or Flame Burst if it's not. | |
| 14 | Sonic Missile | The last move in our opener is Sonic Missile, our group taunt, to be used immediately after Firestorm. Much like your single-taunt, you should take a small step backwards to be further than 4 meters away from the boss before you taunt with sonic missile. | |
| always | Heat Blast | On top of all that, Heat Blast should be used any time during your opener when it's available! |
Single Target
Your single-target rotation / priority system is a list of abilities you should use after your opener, and for the rest of the fight. These abilities shouldn’t be used one after another – instead, abilities higher up the list take priority over those at the bottom.
| # | Icon | Ability | Description |
|---|---|---|---|
| 0 | Shoulder Cannon | Your Shoulder Cannon is a special type of attack that gradually loads 4 missiles on your back over time. Once you've got a missile loaded, you can launch a missile off of the global cooldown - this means you can use shoulder cannon even when all your other abilities are not available, and you can use it immediately before or after your other abilities. You can even use Shoulder Canon while you are stunned! Shoulder canon should be used as often as possibly, especially when you have Explosive Fuel up, as it increases ranged and tech critical hit chance by 25%. | |
| 0 | Heat Blast | Heat blast is another ability you can use immediately before or after any ability and should be used as often as possible - it's best to use it when you are expecting a major spike of damage. Heat Blast is only useable when you have 3 stacks of Heat Screen, earned by shielding an attack, or by using your Rocket Punch, Rail Shot or Rapid Shots abilities. You'll be using Rail Shot and Rocket Punch to build it up yourself, and hoping it will also passively build up as you shield attacks. As a bonus, building Heat Screens also reduces the cooldown of Heat Blast by a second. | |
| 1 | Firestorm (not sparkling) | Firestorm is your ability that does the most damage. One of your passive abilities called Flame Engine has a 50% chance to cause Firestorm's cooldown to be reset if you do direct damage: so you can use an unsparkling Firestorm, then use Rocket Punch and Rail Shot which will hopefully trigger that chance, and if it does you can use Firestorm again much faster than you could normally plus get the bonus from it sparkling! This won’t happen often, usually just in the opener and after some downtime. Rotationally, this will occur very rarely. | |
| 2 | Rail Shot (when useable) | Rail Shot is a powerful ability , but can only be used on enemies who are incapacitated targets or who are suffering from periodic damage, which you can cause by using Rocket Punch, which will shock your target for six seconds. It also gives you a stack of Heat Screen you'll be stacking up so you can use Heat Blast, and then a stack of Shield Enhancer, which will increase your defense. | |
| 3 | Rocket Punch | Rocket Punch deals a hard hit to your enemy. It also gives you a stack of Shield Enhancer and a stack of Heat Screen. | |
| 4 | Firestorm (if sparkling) | Firestorm is your ability that does the most damage, and when it's sparkling, it costs no heat, and deals 40% more damage! | |
| 5 | Flame Burst (if sparkling) | Flame burst is your filler attack ability and you'll be using it a lot. Ideally, you'll want to use it after you use Jet Charge, because Jet Charge grants you the ability to use Flame Burst twice without spending heat. You'll know if Flame Burst is free if it's sparkling on your quickbars. | |
| 6 | Jet Charge | If none of the above are available, you can also do a quick runaway from the boss and Jet Charge back in to give yourself two free Flame Burst attacks. | |
| 7 | Flame Burst | But, if you can't do that, you can still use Flame Burst as your filler attack, it will just cost heat. | |
| 8 | Rapid Shots | And last on the priority list is, Rapid Shots, your basic attack that helps you manage your available heat when you are running low, as it does not cost heat. |
Multi Target / AOE
Your multi-target / AOE rotation / priority system is a list of abilities you should use after your opener, and for the rest of the fight. These abilities shouldn’t be used one after another – instead, abilities higher up the list take priority over those at the bottom.
Firestorm while it’s sparkling is your best AOE damage ability, Deadly Onslaught is awesome but expensive for heat, Flame Sweep is your filler, Shatter Slug is great for its knockdown.
| # | Icon | Ability | Description |
|---|---|---|---|
| 0 | Heat Blast | Much like your single-target rotation, you'll be using Heat Blast as often as it's available, off the global cooldown. | |
| 1 | Firestorm (procc'd, sparkling) | Firestorm will be your heavy-hitter for AOE damage, and if you want to be especially efficient, you can use the same trick we talked about in the single-target rotation by using a direct damage attack - some of teh abilities that have a 50% chance of triggering this include your circular Flame Sweep ability and your Deadly Onslaught abilities, which will make the next Firestorm cost no heat, and deals 40% more damage. | |
| 2 | Deadly Onslaught | Deadly Onslaught also does a lot of damage, but it also costs a lot of heat, so you can use your Thermal Sensor Override before you use Deadly Onslaught to conserve heat - it makes your next ability cost no heat. Don't forget you also have your Vent Heat ability which quickly reduces your heat. | |
| 3 | Flame Sweep | Flame Sweep will be your main AOE ability - but spamming Flame Sweep can overheat you quickly. When possible, you can Jet charge to enemies before or during a fight to get two free rounds of Flame Sweep, just like you get two free Flame Bursts against single enemies. | |
| 4 | Shatter Slug | Shatter Slug can be useful when your targets are spread across more than a 5m radius since it has a long travelling distance, otherwise Flame Sweep is always superior for damage and threat. If you're fighting enemies that can be knocked down, Shatter slug is very useful as it will reduce the damage you take while your enemies are knocked down. | |
| 5 | Rail Shot | Rail Shot is a single-target attack, but using rail shot will trigger Ion Cylinder and Ion Overload on nearby enemies. In small groups of adds, or in single-target plus additional enemies scenarios this allows for higher single-target DPS with some AoE sprinkled in. Ion Overload also generates extra threat. |
Utilities
Lastly, let’s take a look at your utilities. These are abilities that you choose, and you unlock more options as you level up. At max level you have 24 different options to choose from. There’s no perfect set of utilities, instead skilled powertech tanks choose their utilities based on the type of fight their going in to. If you just want a quick set of utilities to choose from, here’s my general recommend utilities list.
Recommended Utilities
| Icon | Utility | Description | |
|---|---|---|---|
| Iron Will | Reduces the cooldown of Determination by 30 seconds and the cooldown of Hydraulic Overrides 10 seconds. | Great for mobility and cheesing mechanics/knockbacks. More stun breaks come in handy on a lot of trash pulls. | |
| Reflective Armor | When Close and Personal is triggered, it will also deal elemental damage to the attacker if the attacker is within 10 meters. | Free fluff damage every time you take AoE damage on top of the healing received from Close and Personal. | |
| Engulfing Flames | Increases Flame Sweep damage by 25%. | More damage on your spammable AoE ability, very good against stacked enemies | |
| Pneumatic Boots | Increases movement speed by 15%. | More speed is always useful, especially on fights with a lot of repositioning. With Hydraulic Overrides available, this is however a utlity point we can spare a lot of times to free up a point that we can invest in something else instead. | |
| Pyro Shield | When activated, your Energy Shield ignites in a blaze, lashing attackers for elemental damage while it remains active. This effect cannot occur more than once each second. | Pretty good fluffing utility. Very strong on Izax | |
| Sonic Rebounder | Sonic Missile protects all friendly targets in its area of impact, excluding you, granting Sonic Rebounderm which reflects the next direct, single-target attack back at the attacker. | Can't always be utlizied but when it can it is just an amazing utility. Free defensives for everyone and free damage. | |
| Liquid Cooling | When Thermal Sensor Override is activated, it vents 10 heat over the next 5 seconds and immediately increases threat towards all current enemies by a small amount if Ion Gas Cylinder is Active, or reduces threat towards all current enemies if Ion Gas Cylinder is not active. | 10% threat gain, 1 free ability and heat venting. Very good. | |
| Overdrive | Hydraulic Overrides increases movement speed by an additional 45% while active. | Awesome for kiting or getting to other places. Combined with Torque Boosters, this will grant insane mobility | |
| Combustion Chamber | Power Yield increases damage done by an additional 2% when attacked while Ion Gas Cylinder is being utilized and refreshes its duration when attacked while Ion Gas Cylinder is not being utilized. Power Yield cannot last longer than 30 seconds. | Allows for up to 20% damage increase while Power Yield is active. |
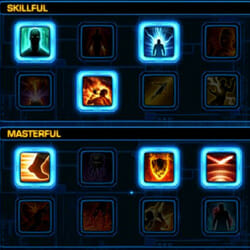
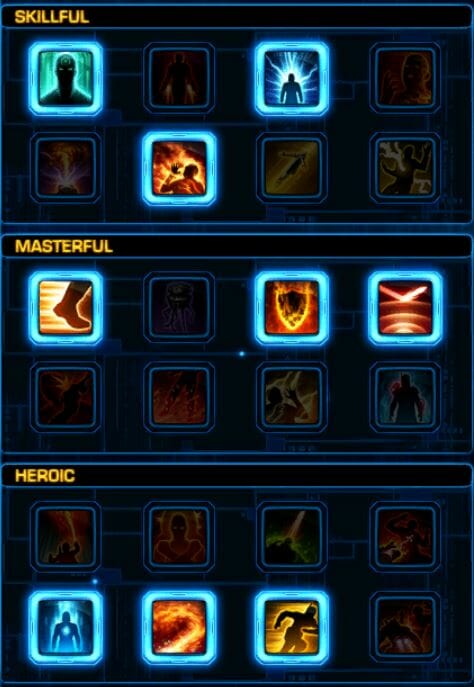
All Utility Options
Utilities are a series of abilities that you can choose from for your Advanced Class. On the list below, these utilities have been rated for their use in difficult boss fights in Operations, the most difficult group content in the game. However, if you are playing solo, playing less difficult content, or PvPing, you’ll want to read the descriptions of the utilities carefully and instead either choose ones that sound fun, or choose ones that seem useful for the type of content you like to play.
- Tier 1 Skillfull – You must choose 3 Skillful utilities before the next tier is unlocked
- Tier 2 Masterful – You must choose a total of 6 Skillful or Masterful abilities before the next tier is unlocked
- Tier 3 Heroic – You can choose a max of 3 utilities in the Heroic category
| Icon | Utility | Tier | Tier | Rating | Description | |
|---|---|---|---|---|---|---|
| Iron Will | 1 | Skillful | Very good | Reduces the cooldown of Determination by 30 seconds and the cooldown of Hydraulic Overrides 10 seconds. | Great for mobility and cheesing mechanics/knockbacks. More stun breaks come in handy on a lot of trash pulls. | |
| Gyroscopic Alignment Jets | 1 | Skillful | Usuaully not worth taking | You vent 20 heat when stunned, immobilized, knocked down or otherwise incapacitated. Additionally, your next Tech ability deals 10% extra damage or healing. | Mainly useful in PvP, very rare uses in PvE. | |
| Reflective Armor | 1 | Skillful | Very good (when AoE damage is existent) | When Close and Personal is triggered, it will also deal elemental damage to the attacker if the attacker is within 10 meters. | Free fluff damage every time you take AoE damage on top of the healing received from Close and Personal. | |
| Suppressive Tools | 1 | Skillful | Not worth taking | Magnetic Blast, Flame Burst, and Flame Sweep reduce the movement speed of affected targets by 25% for 3 seconds. Additionally, Neural Darts slows the target by 50% for 6 seconds. | Mainly useful in PvP | |
| Bracer Propellant | 1 | Skillful | Usuaully not worth taking | Increases the range of Flame Burst and Magnetic Blast by 2 meters and the radius of Flame Sweep by 1 meter. | Very strong on Izax and while kiting bosses, occasionally useful when (off) DPS'ing from range to give the raid space | |
| Engulfing Flames | 1 | Skillful | Awesome (when there is more than one target) | Increases Flame Sweep damage by 25%. | More damage on your spammable AoE ability, very good against stacked enemies | |
| Accelerated Reel | 1 | Skillful | Usuaully not worth taking | Reduces the cooldown of Grapple by 10 seconds. | Very rare uses in PvE and when it's somewhat useful the benefit is very insignificant. | |
| Prototype Electro Surge | 1 | Skillful | Usuaully not worth taking | Reduces the cooldown of Electro Dart by 15 seconds. | Mainly useful in PvP | |
| Pneumatic Boots | 2 | Masterful | Good | Increases movement speed by 15%. | More speed is always useful, especially on fights with a lot of repositioning. With Hydraulic Overrides available, this is however a utlity point we can spare a lot of times to free up a point that we can invest in something else instead. | |
| Adaptable Assailant | 2 | Masterful | Usuaully not worth taking | Grapple immobolizes the target for 3 seconds. In addition, the cooldown of Stealth Scan is reduced by 5 seconds, and any targets it reveals are immobilized for 3 seconds and increases the movement speed of all allies within the scan area, excluding yourself, by 50% for as long as they remain within it and for 6 seconds after it expires or they leave the area. | The speed increase has some niche uses (e.g. Dxun Holding Pens) which makes this utility very good at times, outside of that it's pretty bad | |
| Pyro Shield | 2 | Masterful | Good | When activated, your Energy Shield ignites in a blaze, lashing attackers for elemental damage while it remains active. This effect cannot occur more than once each second. | Pretty good fluffing utility. Very strong on Izax | |
| Sonic Rebounder | 2 | Masterful | Awesome | Sonic Missile protects all friendly targets in its area of impact, excluding you, granting Sonic Rebounderm which reflects the next direct, single-target attack back at the attacker. | Can't always be utlizied but when it can it is just an amazing utility. Free defensives for everyone and free damage. | |
| Hitman | 2 | Masterful | Situational | Reduces the cooldown of Quell by 2 seconds. Additionally, damage taken while stunned is reduced by 30% for Shield Tech, and damage taken from area effects is reduced by 30% for Pyrotech and Advanced Prototype. | Strong on interrupt intensive fights and fights with lots of stuns. Those are pretty rare though. Very good on Izax. | |
| Mutilating Shards | 2 | Masterful | Pretty weak | Shatter Slug reduces the movement speed of all affected targets by 75% for 15 seconds. This effect can only occur once every 30 seconds. | Slows aren't very useful in PvE | |
| Enhanced Paralytics | 2 | Masterful | Situational | Increases the stun durations of Electro Dart by 1 second and Carbonize by 0.5 seconds. | Stuns can sometimes be utilized as cooldowns or to get the raid more time. Pretty good for stunning orbs on Brontes and on trash/add heavy fights | |
| Efficient Suit | 2 | Masterful | Very Situational | Allows Kolto Overload to be activated while stunned and causes Kolto Overload to purge stun effects when activated. This will not work against other types of incapacitating effects or scripted stuns, which are often used by Flasgpoint and Operation bosses or other special non-player characters. In addition, increases the range of Grapple and Shoulder Cannon by 10 meters and eliminates the heat generated by Electro Dart and Carbonize. | Very useful on NiM Brontes (Grapple range), or when Solo tanking Titan 6 (additional stun break). Other than that it's mainly useful in PvP | |
| Pressure Overrides | 3 | Heroic | Not worth taking | Explosive Fuel grants Pressure Overrides while active, increasing the range of Flame Burst, Magnetic Blastm Shatter Slug, Deadly Onslaught, Heat Blast, Energy Blast, Immolate and Scorch by 20 meters. | Pretty bad, at least we don't have to worry about considering this over another heroic utility | |
| Torque Boosters | 3 | Heroic | Good | Increases the duration of Hydraulic Overrides by 4 seconds. | Awesome for kiting and cheesing mechanics/knockbacks. Can prevent 2 knockbacks from Blaster in a row at the start | |
| Shield Cannon | 3 | Heroic | Situational at best | Damaging a target with your Shoulder Cannon missiles heals you for 3% of your total health. | 12% healing is almost insignificant, but can ocassionally be useful during progression when survival is an issue. If it healed for more or wasn't heroic I'd argue that it's decent. | |
| Reel and Rattle | 3 | Heroic | Not worth taking | Grapple deals tech damage to pulled targets and grants Reel and Rattle, causing your next Rocket Punch or Flaming Fist against the pulled target to deal 20% additional kinetic damage and stun the target for 1.5 seconds. This effect lasts for 6 seconds. | This is actually a decent utility, but competes with other heroic utlities which makes it sadly a very niche pick | |
| Liquid Cooling | 3 | Heroic | Good | When Thermal Sensor Override is activated, it vents 10 heat over the next 5 seconds and immediately increases threat towards all current enemies by a small amount if Ion Gas Cylinder is Active, or reduces threat towards all current enemies if Ion Gas Cylinder is not active. | 10% threat gain, 1 free ability and heat venting. Very good. | |
| Combustion Chamber | 3 | Heroic | Good | Power Yield increases damage done by an additional 2% when attacked while Ion Gas Cylinder is being utilized and refreshes its duration when attacked while Ion Gas Cylinder is not being utilized. Power Yield cannot last longer than 30 seconds. | Allows for up to 20% damage increase while Power Yield is active. | |
| Overdrive | 3 | Heroic | Very Good | Hydraulic Overrides increases movement speed by an additional 45% while active. | Awesome for kiting or getting to other places. Combined with Torque Boosters, this will grant insane mobility | |
| Battering Ram | 3 | Heroic | Not worth taking | Using Jet Charge grants Battering Ram, resetting the cooldown of Jet Charge and increasing movement speed by 30% for 6 seconds. While Battering Ram is active, Jet Charge may be used once within 10 meters of the target and deals 50% additional damage but does not cause an additional interrupt, immobilize or charge. This effect cannot occur more than once every 15 seconds. | Pretty bad, at least we don't have to worry about considering this over another heroic utility |
Gear
Apart from learning to play your powertech tank, one way to improve your survivability is by improving your gear.
Gearing Basics

Moddable pieces of gear
There are two types of gear in the game – moddable, and unmoddable. Moddable gear is gear you can change the stats of, while unmoddable gear is static gear with the stats attached directly to the piece of armor. For endgame gearing, you will want to have 9 pieces of moddable armor:
Your other pieces of gear, including your earpiece, implant, relics, and tactical item can never be modded.
The stats of moddable pieces of gear are made up by the modifications in the gear. Modifications are individual parts that make up each piece of armor – most pieces of armor have an Armoring, a Mod, and an Enhancement. You can mix and match these modifications to either upgrade your stats, or to create a different combination of stats.
![]()
![]()
![]()
Moddable Gear
- Chestpiece
- Helm
- Gloves
- Belt
- Pants
- Boots
- Bracers
- Mainhand
- Offhand (Shield Generator)
Show Detailed Item Tooltips: To see the stats of the individual modifications in a piece of gear when you roll over it with your mouse, you can activate this setting: press the ESC key > Preferences > User Interface > Show Detailed Item Tooltips. When you hover your mouse over a piece of armor, it will show the individual stats of the Armoring, Mod and Enhancement.
Upgrade Gear: To modify a gear piece, CTRL+ RIGHT CLICK on it. This will open the Modification window. To add a mod to a piece of armor, right click on it from your inventory while the modification window is up, and click apply. To remove a mod in a piece of armor, right click on it in the modification window. You can accept or reject the removal in case you clicked something by accident.
Being able to move modifications to other pieces becomes helpful as you build up your set of gear. If you receive a second pair of gloves, it might not be as good as the pair you have on… but the individual modifications and enhancements in the second pair of gloves still might be better than the mods you have in your helm or boots.
Before level 75, you don’t need to worry too much about gearing, and you can buy new modifications every few levels in the supplies section of the fleet.
Powertech Tank Gear
When gearing up your Powertech Tank at level 75, you’ll want to focus on the Endurance, Shield and Absorb stats which will help keep you alive. Endurance gives you more health, and Shield and Absorption helps you take less damage. In some fights it is better to have more endurance, in others it is better to have more mitigation of damage with Shield and Absorption. Tank-focused gear always has defense in it, and tanks will always have more defense than they need due to the stats that are built in to all tanking modifications.
Stats in modification items have primary, secondary and tertiary stats. As a general rule, you will only have to make a serious choice about what tertiary stat you want to have. (An enhancement will have you choose between Shield and Absorb, but Power and Defense won’t be part of that pool as they aren’t tertiary).
- Primary (Mastery and Endurance) – Tanks choose Endurance
- Secondary (Defense and Power) – Tanks are meant to choose Defense – but Power is sometimes more useful
- Tertiary (Alacrity, Crit, Accuracy, Shield, Absorb) – Tanks choose Shield or Absorb depending on what stats they need to adjust
Some tanks also choose to focus on trading defense for offense.
How to Get Gear at Level 75Here is some more advice on gearing from Nyyah:
Gearing is always a complex topic for tanks, but there is this famous figurative saying: “All roads lead to Rome”. Different methods will work, there isn’t just a single way. There is no right, there is no wrong (with a few exceptions of course). That’s the first thing everyone needs to understand.
Most importantly, tanks need to feel comfortable in what they are doing, if they feel comfortable adding some DPS gear, and if survival is not an issue, then there is nothing wrong in doing so. However, if they struggle surviving or if healers have a hard time keeping them alive, they should get tankier. It’s that simple.
Personally, I’d always recommend mitigation over a DPS increase to any beginner, since mitigation works in all content while Veteran’s Edge and Bolster add a lot of free damage to tanks in level synced content.
Additional damage can be gained by utilizing sets (e.g. Right Price), tacticals (e.g. Superheated Fuel), amplifiers (Tech Wizardry) and utilities (e.g. Combustion Chamber) effectively or by fooling the bolster system.
If survival is not an issue simply zone into an instance while being a DPS and DPS bolster will be applied to you. Once you respec to tank you will keep the DPS bolster at the cost of roughly 20k HP.
Beginners should focus on staying alive, holding threat, performing mechanics and supporting the group with every utility at their disposal before worrying about dealing more damage.
Surviving, no matter if new or level synced content, is mainly achieved by shielding. Opting for ~50% Shield Chance, while keeping Absorb at about the same ratio is a must. Shield Chance reduces your spikiness significantly while Absorb reduces the amount of damage taken when shielding attacks. In level 75 content Endurance is another important stat, especially during progression. With that in mind, let’s look at gear options:
Earpiece and Implants:
Sund Tech Proficient MK-19 (Shield Rating) and Sund Tech Warding MK-19 (Absorb Rating) implants and earpieces are very good choices, but the Absorb ones are slightly better than the Shield ones in my opinion. I would only stay away from Systech Shield and Absorb pieces and InterroTek Absorb pieces, they are pretty bad in comparison. Every other implant or earpiece is ok though, and using any of them won’t hurt. Sha’tek Bastion MK-19 or Sha’tek Bulwark MK-19 are slightly better than Sund Tech pieces in level synced content.
The advantage of using Absorb implants and earpieces is the possibility to swap them out for DPS ones, as you don’t really want to lower your Shield Chance. Not like I’d recommend that to beginners, but at least you would be prepared for later if you choose to add DPS left side pieces.
Relics:
Sha’tek Relics of the Shield Matrix MK-19 and/or Sha’tek Relics of Avoidance MK-19 are your best picks in any content.
Alternatives are:
Sha’tek Relic of the Shrouded Crusader MK-19 – on demand mitigation
Sha’tek Relic of Reactive Warding MK-19 – RNG mitigation
Sha’tek Relic of Focused Retribution MK-19 – only in level 75 content, more DPS and health, less mitigation
Sha’tek Relic of Serendipitous Assault MK-19 – only in level 75 content, more DPS and health, less mitigation
Sha’tek Relic of Devastating Vengeance MK-19 – any content, more DPS (and more health in level 75 content), less mitigation
Crystals:
Indestructible (Endurance) crystals in level 75 content.
Eviscerating (Critical Rating) crystals in level synced content.
Armorings/Barrel:
Resistive Superior Armorings/Barrel 80 or Resistive Superior Armorings/Barrel 80 R-1 will give you the most amount of Endurance possible. In level synced content any armoring or barrel of item rating 306 will work just fine.
Mods:
In level synced content Superior Warding Mods 80R-20s are technically the best choice as Mastery and Endurance don’t matter.You will gain the highest amount of Defense Rating possible and Defense is the only stat on mods that will do anything for you. Outside of level synced content you have plenty of options:
Superior Warding Mod 80 – 313 Endurance, 339 Defense, 387 Mastery
Superior Warind Mod 80A – trades 118 Defense for 26 Endurance and 64 Mastery
Superior Warind Mod 80AR-20 – trades 45 Defense and 14 Mastery for 58 Endurance
Superior Warding Mod 80B/BR-1 – trades 54 Defense and 48 Mastery for 96 Endurance
Superior Warding Mod 80R-1 – trades 38 Mastery for 34 Endurance
Superior Warding Mod 80R-7 – trades 23 Mastery for 27 Endurance
Superior Lethal Mod 80B – trades all Defense and 48 Mastery for 96 Endurance and 285 Power (DPS)
Superior Lethal Mod 80BR1 – trades all Defense and 40 Mastery for 36 Endurance and 347 Power (DPS)
Superior Lethal Mod 80R-2 – trades all Defense and 18 Mastery for 359 Power (DPS)
You are going to end up with a lot of Defense Rating, trading any of it for another stat can be helpful, the choice is just personal preference..
Enhancements and Augments:
The choice between Absorb Rating and Shield Rating depends entirely on your left side pieces and other gear pieces with Absorb Rating and Shield Rating. As mentioned before, your goal should always be ~50% Shield Chance if not even higher while having Absorb at about the same percent.
Vigilant and Steadfast Enhancements 80 trade Defense Rating for a lot of Endurance making these two enhancements the most desirable ones in level 75 content.
Immunity Superior Enhancements 80R-1 and Sturdiness Superior Enhancement 80R-1 have the most Shield or Absorb Rating out of all enhancements, making them the best pick in level synced content.
Bastion Superior Enhancement 80 and Bulwark Superior Enhancement 80 are the most balanced ones and can be useful in both 75 and level synced content, giving a fair trade of Endurance, Defense Rating and Shield/Absorb Rating.
Advanced Absorb Augments 74 and Advanced Shield Augments 74 will give you plenty of Shield and Absorb Rating, Endurance and Power. They are the best choice in level 75 content.
In level synced content Advanced Shield Augments 45 and/or Advanced Absorb Augments 45 are already sufficient.
Some additional information about DPS gearing:
If you choose to add some DPS gear, keep in mind that Alacrity Rating is better than Critical Rating outside of the Explosive Fuel window when investing at least 1213 (I’d recommend a bit more, like 1250) stats into it, which would lower the Global Cooldown to 1.4 seconds instead of 1.5 seconds as well as reducing the cooldowns of Vent Heat and Explosive Fuel which will lead to even more more DPS. Additionally, it also lowers the cooldown of Heat Blast and builds Heat Screens faster as you attack faster which in return allows for more uptime on Heat Blast’s Absorb Shield which makes you tankier.
Every single point after investing 1213-1250 stats into Alacrity Rating should go into Critical Rating. When investing less than 1213 stats, Critical Rating is always superior.
Using Superheated Fuel instead of Thermal Screen will also grant an equal if not higher DPS gain than trading 1000 Absorb Rating for Critical Rating, while maintaining better tankiness.
As for the neverending argument of Lethal Mods over Warding Mods: this is a very tricky topic in 6.0. You get free Power in any level synced content, which can be even higher if you fool the bolster system as I explained above, making any investment into Power questionable outside of the few level 75 content pieces we currently have.
Bolster will always set your Power to a pre-set value, no matter if you have 0 Power or 10000 Power,
This pre-set is based on Bolster’s target item ratings:
250 item rating for Master Mode Gods from the Machine
Tank: 2983 Power / DPS: 4441 Power
242 item rating for all Veteran Mode and Master Mode operations
Tank: 2557 Power / DPS: 3837 Power
238 item rating for all Story Mode operations
Tank: 2301 Power / DPS: 3487 Power
236 item rating for all Master Mode Flashpoints
Tank: 2423 Power / DPS: 3661 Power
232 item rating for all Veteran Mode Flashpoints
Tank: 2239 Power / DPS: 3393 Power
It’s these tiny things that matter, and why I’m not a big fan of everyone being so obsessed over DPS gear on tanks. Don’t get me wrong, I love Alacrity, I love Power, I love Critical Rating, but I don’t like carrying 10 different sets around or spending millions of credits moving modifications in and out of gear. In my humble opinion, there just isn’t enough content at this point to make Lethal Mods worth it, but as I said earlier, there is no right or wrong. In the end, the choice is yours.
Amplifiers:
Amplifiers are yet another tricky topic. Most amplifiers can be good in one operation, but in the next one they can be almost useless. Personally, I don’t even worry about them at this point and just kept the first gold Amplifier I received on all my Armorings.
The two most universal ones are Aural Resistance and Tech Wizardry.
Aural Resistance reduces damage taken from area effects including Tech, Force, Melee and Ranged damage while Tech Wizardry increases the damage dealt by all your Tech attacks. You will always get something out of these. Looking at the pure gain, Tech Wizardry is absolutely superior to all other amplifiers and is the only one giving a meaningful boost on every encounter in every content. However, it only increases your damage but not your tankiness. With the recent removal of Veteran’s Edge in Nightmare Mode both got even more valuable. I’d recommend Aural Resistance over Tech Wizardry at this time if you only want to run one set.
Amplifiers that can provide a bigger boost, but are sadly limited to certain encounters are Periodic Resilience, Reinforced Armor, Force Protection, and Tech Aegis.
Periodic Resilience reduces damage taken from periodic effects (DoTs). This includes both Force and Tech periodic damage. This is absurdly strong on Colossal Monolith, but outside of this particular encounter I don’t feel like there is much use for this amplifier.
Reinforced Armor reduces damage taken from Melee and Ranged attacks. This includes single target and AoE. Most bosses base attacks are either Melee or Ranged, while some have additional special Melee or Ranged attacks making this amplifier somewhat strong. You have Defense Chance though, every time you defend an attack, this amplifier doesn’t do anything for you. It’s still very strong on Apex Vanguard, The Huntmaster, Mutant Trandoshan Squad, Holding Pens, Nahut, or Esne and Aivela.
Force Protection reduces damage taken from Force attacks, which makes it strong in the Dread Palace and on Brontes as well as Hateful Entity. This includes single target, AoE and periodic Force damage.
Tech Aegis reduces damage taken from Tech attacks, which makes it strong in Gods from the Machine.This includes single target, AoE and periodic Tech damage.
Lastly, there is Fortuitous Redoubt. It creates an absorb shield that lasts for 5s after you successfully defend an attack. I’m having mixed feelings about this one. It is the only amplifier that works against every damage in the game which makes it pretty decent, but at the same time you only get the benefit after defending an attack which makes this amplifier not proc if a boss has no Melee or Ranged attacks or if they have long cooldowns or if you simply to not defend enough attacks. Running high Defense is a must to get the most out of this amplifier.
Apart from getting the best gear you can with tanking stats, you’ll also want to pick a tactical item and a set bonus to work on earning.
Set Bonus
A set bonus is a special type of gear bonus that gives your Shield Tech bounty hunter a boost in battle, like making some of your abilities stronger or making them usable more often. The more pieces of set bonus gear you collect, the more bonuses you will get. Set bonuses only exist on the pieces of armor that you can “wear” – Head, Chest, Hands, Legs, Boots, Belt and Bracers.
Set Bonus Recommendations
| Image | Set Bonus Name | Source | Set Bonus Effects | Reason |
| (no pic) | Emergency Power | Dxun (added 6.0.1) - Not Available From Vendor | (2) +2% Endurance (4) Energy Shield’s duration is increased by 5 seconds. (6) Activating Power Yield grants a major absorb shield for 3 seconds. | Favorite - Going off reports from players who got the set the absorb shield can absorb over 500k damage, which makes this set insanely strong on many fights. |
 | Right Price | Conquest or from the Tech Fragment Vendor | (2) 2% Mastery (4) Explosive Fuel increases damage done by 20% while Ion Gas Cylinders is being utilized and increases damage reduction by 10% while Ion Gas Cylinder is not being utilized. (6) Each time you take damage while under Power Yield, the cooldown of Explosive Fuel is reduced by 3 seconds. | Good - Right Price does a solid job of utilizing Power Yield, offering both: better offense and defense. This set requires proper use of Power Yield and Explosive Fuel, which may be a little rough for a beginner.I am currently running this if I’m not running Squad Leader. |
 | Squad Leader | Daily / Weekly Missions or from the Tech Fragment Vendor | (2) 2% Endurance (4) Whenever you take damage with Energy Shield, a weaker shield is applied to nearby allies for 3 seconds. | Good - A very easy to get situational 4 set which has amazing utility: 10% damage reduction for everyone whenever you get attacked while Energy Shield is active. This is a very good progression set to help out your team in fights where the raid is taking high amounts of damage. |
 | The Victor | Conquest or from the Tech Fragment Vendor | (2) 2% Mastery (4) Defeating an enemy increases your movement speed by 75% for 8 seconds. This effect cannot occur more than once every 8 seconds. (4) Defeating an enemy heals you for 20% of your maximum health. This effect cannot occur more than once every 8 seconds. | Speed Running - The Victor’s set is a very good farming/speed running set (e.g. flashpoints) especially when combined with DPS enhancements and left side. I started to use this recently and love it. |
 | Meteor Brawler | Operations or from the Tech Fragment Vendor | (2) 2% Endurance (4) Shockstrike and Stockstrike’s Energy cost is reduced by 4. Energy Blast, Shockstrike, and Tactical Surge increase damage dealt by 10% for 15 seconds, this effect cannot occur more than once every 30 seconds. (6) Activating Battle Focus gives you Ionfall for the duration of Battle Focus. During this time, dealing damage with Ion Squall, Ion Pulse, Tactical Surge, Stockstrike, or Shockstrike builds up to 7 stacks of Ionfall. When Battle Focus ends, it detonates dealing elemental damage to all enemies around that scales with Ionfall stacks. After it explodes, your energy-using abilities cost 50% less heat for 20 seconds. | DPS - From a tank point of view this set doesn’t offer anything valuable. It’s a pure DPS increase. It’s not bad, it’s not good either. |
Set Bonus Options
| Image | Set Bonus Name | (2) Piece Set Bonus | (4) Piece Set Bonus | (6) Piece Set Bonus | Vendor | Source |
|---|---|---|---|---|---|---|
 | Apex Predator | +2% Mastery | (Mercenary) Activating Power Shot, Tracer Missile or Rapid Scan increases the critical chance of your next Power Shot, Tracer Missile or Rapid Scan by 10%. Stacks up to 5 times but is removed on 6th stack. | Dealing damage with Power Shot or Tracer Missile and healing with Rapid Scan grant a stack of Power Step, stacking up to 5 times. At 5 stacks, your next Power Shot, Tracer Missile or Rapid Scan is more effective and generates no Heat. | Not Available From Vendor | Dxun Operation |
 | Notorious | 2% Mastery | (Mercenary) Power Surge grant Precision Targeting, increases armor penetration by 10% for 6 seconds. This effect cannot occur more than once a minute. | Power Surge gets an additional charge. | 3,000 Tech Fragments + 1 million credits | Operations |
 | Tech Medic | 2% Mastery | (Mercenary) Onboard AED becomes an instant-cast. | Chaff Flare heals all allies around you. | 3,000 Tech Fragments + 1 million credits | Conquest |
 | Concentrated Fire | 2% Mastery | (Mercenary) Gaining a stack of Supercharge increases your critical chance by 10% for seconds. This effect can only occur once every 10 seconds. | Doing damage or healing an ally has a 5% chance to build a Supercharge can only occur once per 3 seconds. | 3,000 Tech Fragments + 1 million credits | PvP |
| Emergency Power | +2% Endurance | (Powertech) Energy Shield’s duration is increased by 5 seconds. | Activating Power Yield grants a major absorb shield for 3 seconds. | Not Available From Vendor | Dxun Operation | |
 | Veteran Ranger | +2% Mastery | (Powertech) Searing Wave makes all targets vulnerable to Shoulder Cannon for 5 seconds. | Each Shoulder Cannon rocket has a 75% chance to trigger an additional rocket. When Shoulder Cannon is put on cooldown, it applies Autocannon to you for 60 seconds, firing a rocket at your current target whenever you deal damage. This additional rocket can fire once every 10 seconds. | Not Available From Vendor | Dxun Operation |
 | Strategist | 2% Endurance | (Powertech) Carbonize’s cooldown is reduced by 10 seconds. | Carbonize vents 5 heat for each enemy it hits. | 3,000 Tech Fragments + 1 million credits | PvP |
| Right Price | 2% Mastery | (Powertech) Explosive Fuel increases damage done by 20% while Ion Gas Cylinders is being utilized and increases damage reduction by 10% while Ion Gas Cylinder is not being utilized. | Each time you take damage while under Power Yield the cooldown of Explosive Fuel is reduced by 3 seconds. This effect cannot occur more than once every 3 seconds. | 3,000 Tech Fragments + 1 million credits | Conquest |
| Meteor Brawler | 2% Endurance | (Powertech) Flaming Fist and Rocket Punch's Heat cost is reduced by 4. Heat Blast, Flaming Fist, and Magnetic Blast increase damage dealt by 10% for 15 seconds, this effect cannot occur more than once every 30 seconds. | Activating Explosive Fuel gives you Firefall for the duration of Explosive Fuel. During this time, dealing damage with Searing Wave, Flame Burst, Magnetic Blast, Rocket Punch, or Flaming Fist builds up to 7 stacks of Firefall. When Explosive Fuel ends, it detonates dealing elemental damage to all enemies around that scales with Firefall stacks. After it explodes, your heat-using abilities cost 50% less heat for 20 seconds. | 3,000 Tech Fragments + 1 million credits | Operations |
 | Game Plan | 2% Mastery | (Bounty Hunter) When your Kolto Overload’s Health Monitor is triggered for the first time, it deals damage back to the enemy who damaged you. | 3,000 Tech Fragments + 1 million credits | PvP | |
 | Hunter Killer | 2% Endurance | (Bounty Hunter) Stealth Scan also applies Stealth Protection to you, scanning a small area around you. | 3,000 Tech Fragments + 1 million credits | Conquest | |
| Squad Leader | 2% Endurance | (Bounty Hunter) Whenever you take damage with Energy Shield, a weaker shield is applied to nearby allies for 3 seconds. | 3,000 Tech Fragments + 1 million credits | Daily / Weekly Missions | |
 | Woads Instinct | 2% Mastery | (Bounty Hunter) Thermal Sensor Override gains 2 charges. | Not Available From Vendor | Crafted | |
 | Amplified Champion | (Generic) The Amplified Champion’s set has same amplifiers pool as an armoring, hilt or barrel, so you can boost your combat stats even more than normal, though the highest boosts are not available. The trade-off is that this set has no actual set bonus ability like normal set bonus pieces. Vew Amplifier Info & Chart | 3,000 Tech Fragments + 1 million credits | Conquest | ||
 | Avenger | 2% Endurance | (Generic) Increases your damage dealt by 3% while you Guard an ally. | 3,000 Tech Fragments + 1 million credits | PvP | |
 | Berserker | 2% Critical Rating | (Generic) Increases all damage dealt by 3% and all damage taken by 6%. | 3,000 Tech Fragments + 1 million credits | Operations | |
 | Dying Precision | Increases critical rating by 3% while health is below 50% | (Generic) Increases critical rating by 5% while health is below 50% | Increases critical rating by 10% while health is below 50% | Not Available From Vendor | Onderon Reputation Vendor |
 | Preserver | +2% Shield Rating | (Generic) Passively regenerate 1% of maximum health every 10 seconds. | Not Available From Vendor | Corellia Flashpoint | |
 | Rapid Response | Increases alacrity rating by 3% while health is below 50%. | (Generic) Increases alacrity rating by 5% while health is below 50%. | Increases alacrity rating by 10% while health is below 50%. | 3,000 Tech Fragments + 1 million credits | Operations |
 | Stationary Grit | 2% Alacrity Rating | (Generic) Increases damage dealt by 3% while not moving or increasing armor rating by 10% while moving. | 3,000 Tech Fragments + 1 million credits | Daily / Weekly Missions | |
 | Stimulated | 2% Alacrity Rating | (Generic) Increases Mastery by 5% while under the effects of a stimpack. | 3,000 Tech Fragments + 1 million credits | Flashpoints | |
 | Taskmaster | 2% Alacrity Rating | (Generic) Significantly increases the attack and activation speed of your companion. | 3,000 Tech Fragments + 1 million credits | Daily / Weekly Missions | |
 | The Entertainer | 2% Endurance | (Generic) Entering combat improves nearby allies, increasing their mastery, endurance, and rate of experience point gain. This effect is removed when combat ends. | 3,000 Tech Fragments + 1 million credits | Daily / Weekly Missions | |
 | The Final Breath | Reduces damage taken by 2% while health is below 50%. | (Generic) Reduces damage taken by 3% while health is below 50%. | Increases defense rating by 10% while health is below 50%. | 3,000 Tech Fragments + 1 million credits | Daily / Weekly Missions |
| The Victor | 2% Mastery | (Generic) Defeating an enemy increases your movement speed by 75% for 8 seconds. This effect cannot occur more than once every 8 seconds. | Defeating an enemy heals you for 20% of your maximum health. This effect cannot occur more than once every 8 seconds. | 3,000 Tech Fragments + 1 million credits | Conquest |
 | Trishins Retort | 2% Endurance | (Generic) Shielding an attack causes your shield to overload, dealing 1002 – 1502 damage to up to 8 enemies within 5 meters. Your shield can only overload in this manner once every 3 seconds. | 3,000 Tech Fragments + 1 million credits | Daily / Weekly Missions | |
Tacticals
Tactical items are a special type of gear that can drastically change one of your existing abilities, or give you a boost in combat. You can only equip one tactical item at a time, but you can switch them out between fights.
Tactical Recommendations
| Icon | Tactical Name | Class | Tactical Ability | Comments | Vendor | Source |
|---|---|---|---|---|---|---|
| Thermal Screen | Bounty Hunter | Heat Screen now stacks up to 6 times. Activating Power Yield immediately generates 6 Heat Screens and finishes the cooldown of Heat Blast. | General Favorite - Thermal Screen is indeed a very solid pick. I run this Tactical on almost everything. | 3,000 Tech Fragments + 1 million credits | Flashpoints | |
| Durasteel Wall | All | Successfully parrying, deflecting, or dodging an attack while under 80% health increases your damage reduction by 1% for 5 seconds. Stacks up to 3 times. | Easy-to-earn - Durasteel Wall is a good starter tactical until one gets Thermal Screen. | 3,000 Tech Fragments + 1 million credits | Daily / Weekly Missions | |
| The Life Warden | All | Taking damage below 20% health will rapidly heal you for a large amount. 10-minute cooldown. | More Health - Life Warden is a very good.substitute when actual survival is more important than lowering sustained DTPS. (e.g. VM Xeno, VM Monolith or in general when solo tanking/pugging or most importantly when your girlfriend chooses to DPS instead of healing you) | 3,000 Tech Fragments + 1 million credits | Conquest | |
| Oil Fire | Bounty Hunter | Oil Slick makes targets susceptible to Firestorm. For each enemy affected by Oil Slick hit with Firestorm, your damage reduction is increased by 2% and the cooldown of Oil Slick is reduced by 1.5 seconds. | AOE - Oil Fire - even though not working properly - is still pretty good for AoE trash pulls. 20% increased damage on Firestorm and the cooldown reduction for Oil Slick are pretty handy, although not really that great. I suggest putting this on for trash pulls when Superheated Fuel is on cooldown. | 3,000 Tech Fragments + 1 million credits | Operations | |
| Superheated Fuel | Bounty Hunter | Explosive Fuel increases all Flame attacks critical chance by 100%. | DPS - Superheated Fuel can be very strong when survival is not an issue and one simply wants more DPS without having to swap gear, e.g. FP bosses. Also very good on trash pulls. | 3,000 Tech Fragments + 1 million credits | Flashpoints |
Tactical Options
| Icon | Tactical Name | Class | Advanced Class | Combat Proficiency | Tactical Ability | Vendor |
|---|---|---|---|---|---|---|
 | NEW in 7.1: Gyroscopic Stabilizers | Bounty Hunter | Mercenary | Arsenal | Reduces the cooldown of Death From Above by 20 seconds. Death From Above deals 25% more damage to targets affected by your Tracer Missile's Heat Signature. | 3,000 Tech Fragments + 1 million credits |
| Burning Bright | Bounty Hunter | Mercenary | Arsenal | Dealing damage with Blazing Bolts increases the damage of your next Priming Shot, stacking up to 4 times to 100%. | 3,000 Tech Fragments + 1 million credits | |
| Primed Ignition | Bounty Hunter | Mercenary | Arsenal | Priming Shot causes its target to burn. Blazing Bolts, Heatseeker Missiles, Priming Shot, and Tracer Missile all tick its damage. | 3,000 Tech Fragments + 1 million credits | |
 | NEW in 7.1: Kolto Vapors | Bounty Hunter | Mercenary | Bodyguard | The Kolto Pods left by Kolto Missile last a second longer and heal for an additional 5%. | 3,000 Tech Fragments + 1 million credits |
| HP-5 Dart Device | Bounty Hunter | Mercenary | Bodyguard | Kolto Shot applies a lingering heal over time effect to its target. | 3,000 Tech Fragments + 1 million credits | |
| Running Rapid Restoration | Bounty Hunter | Mercenary | Bodyguard | Rapid Scan can be cast while moving and heals an additional 10%. | 3,000 Tech Fragments + 1 million credits | |
 | SC-4 Treatment Scanner | Bounty Hunter | Mercenary | Bodyguard | Progressive Scan heals for an additional 5% and generates Supercharge stacks while channeled, up to 4 stacks for a completed channel. | 3,000 Tech Fragments + 1 million credits |
 | NEW in 7.1: Magnetic Resonance | Bounty Hunter | Mercenary | Innovative Ordnance | Exploding Thermal Detonator early with Mag Shot causes your next Power Shot to deal additional Elemental damage. | 3,000 Tech Fragments + 1 million credits |
| Continuous Fire | Bounty Hunter | Mercenary | Innovative Ordnance | Sweeping Blasters and Death From Above refresh and tick your Incendiary Missile burn and Serrated Shot bleed. This effect can only occur once every 2.5 seconds. | 3,000 Tech Fragments + 1 million credits | |
| Energized Charges | Bounty Hunter | Mercenary | Innovative Ordnance | The duration of Innovative Ordnance’s Supercharge Gas and Supercharged Burn are doubled, and their effectiveness is improved. | 3,000 Tech Fragments + 1 million credits | |
| Cool Your Jets | Bounty Hunter | Mercenary | All | Rocket Out vents 20 heat and immobilizes enemies around you for 2 seconds as you leave. | 3,000 Tech Fragments + 1 million credits | |
| Jettison | Bounty Hunter | Mercenary | All | Jet Boost increases your movement speed by 50% for 3 seconds. For each enemy hit with Jet Boost, the cooldown of Hydraulic Overrides is reduced by 3 seconds. | 3,000 Tech Fragments + 1 million credits | |
| Power Cycle | Bounty Hunter | Mercenary | All | When you use an ability with Power Surge, that ability is not put on cooldown. | 3,000 Tech Fragments + 1 million credits | |
| Hotswap | Bounty Hunter | Powertech | Shield Tech | Translocating a guarded target gives them a large amount of damage reduction for 6 seconds, taunts enemies, and places a benign presence on you. After 6 seconds, you swap back. | 3,000 Tech Fragments + 1 million credits | |
| Oil Fire | Bounty Hunter | Powertech | Shield Tech | Oil Slick makes targets susceptible to Firestorm. For each enemy affected by Oil Slick hit with Firestorm, your damage reduction is increased by 3% and the cooldown of Oil Slick is reduced by 1.5 seconds. | 3,000 Tech Fragments + 1 million credits | |
| Thermal Screen | Bounty Hunter | Powertech | Shield Tech | Heat Screen now stacks up to 6 times and Heat Blast or Payday only consumes 3 Stacks on use. Activating Energy Yield immediately generates 6 Heat Screens and finishes the cooldown of Heat Blast or Payday. | 3,000 Tech Fragments + 1 million credits | |
| NEW in 7.1.1: Powered Detonator | Bounty Hunter | Powertech | Advanced Prototype | Thermal Detonator remains dormant on the target for 12 seconds, and can be detonated by Magnetic Blast, Energy Burst, or Railshot. Depending on which is used, a different effect is applied. Magnetic Blast: Slows the target by 50% for 10 seconds. Energy Burst: The cooldown of Rocket Punch is reset your next Rocket Punch costs no heat. Railshot: Your next Shoulder Cannon missile deals 20% more damage. | 3,000 Tech Fragments + 1 million credits | |
| NEW in 7.3: Energized Vambrace | Bounty Hunter | Powertech | Advanced Prototype | Gaining an Energy Lode stack increases Retractable Blade's bleed and Magnetic Blast's damage by 5% for 10 seconds. Stacks up to 4 times. | 3,000 Tech Fragments + 1 million credits | |
| Flame Detonation | Bounty Hunter | Powertech | Advanced Prototype | Dealing Damage with Searing Wave or Flame Sweep to a target affected by a pre-exploded Thermal Detonator causes it to explode, creating a large explosion and dealing damage to all nearby enemies. | 3,000 Tech Fragments + 1 million credits | |
| Explosive Weaponry | Bounty Hunter | Powertech | Pyrotech | During Explosive Fuel Flaming Fist, Flame Burst and Immolate do damage to all nearby targets and Searing Wave hits twice. | 3,000 Tech Fragments + 1 million credits | |
| Flame Dissipation | Bounty Hunter | Powertech | Pyrotech | When Superheated Flamethrower reaches or refreshes to 2 stacks, it applies Flame Dissipation to you, lowering the cost of Searing Wave by 3 heat. Stacks up to 5 times and is consumed by Searing Wave at 5 stacks. When consumed, Flame Dissipation increases your elemental damage by 10% for 20 seconds. | 3,000 Tech Fragments + 1 million credits | |
| Superheated Fuel | Bounty Hunter | Powertech | Pyrotech | Explosive Fuel increases flame attack critical chance and critical hit damage by 25%. | 3,000 Tech Fragments + 1 million credits | |
| Flying Fists | Bounty Hunter | Powertech | All | Rocket Punch and Flaming Fist now have a range of 10m. | 3,000 Tech Fragments + 1 million credits | |
| Neural Trigger | Bounty Hunter | Powertech | All | Dealing damage to an enemy affected by your Neural Dart roots them for 2 seconds and ends the taunt. | Crafted / GTN, schematic from S3T-BNS Vendor | |
| A Breath of Fresh Air | All | All | All | Every third activation of your basic attack restores 10% of your Class Resource. | Not Available From Vendor, Onderon Reputation | |
| Biorhythm | All | All | All | Dealing Damage increases all healing done. Healing increases all damage done. Stacks up to 5 times, only one effect can be active at a time. | Not Available From Vendor, Onderon Reputation | |
| Durasteel Wall | All | All | All | Successfully parrying, deflecting, or dodging an attack while under 80% health increases your damage reduction by 1% for 5 seconds. Stacks up to 3 times. | 3,000 Tech Fragments + 1 million credits | |
| Krall’s Accord | All | All | All | Cycles between buffing Mastery, Accuracy, Power, Defense, Critical, Absorb, Alacrity, and Shield. In that order. | Not Available From Vendor, Onslaught Storyline | |
| Luck Always Changes | All | All | All | Your critical chance with Melee, Ranged, Tech, and Force attacks is increased by 1% each second. This effect resets on a successful critical hit. | Not Available From Vendor, Corellia Flashpoint | |
| Overwhelming Offense | All | All | All | Dealing damage increases all damage done for 2 seconds. Stacks up to 5 times. | 3,000 Tech Fragments + 1 million credits | |
| Reliquary of Time | All | All | All | Reduces the cooldown of on use Relics by 5%. | 3,000 Tech Fragments + 1 million credits | |
| Rolling Boil | All | All | All | Increases Mastery by 5% for 5 seconds when a Relic triggers. | 3,000 Tech Fragments + 1 million credits | |
| The Life Warden | All | All | All | Taking damage below 20% health will rapidly heal you for a large amount. 10-minute cooldown. | 3,000 Tech Fragments + 1 million credits | |
| REMOVED in 7.0: Sonic Heal | Bounty Hunter | Powertech | All | Sonic Missile heals all allies around its target. | Not Available | |
| REMOVED in 7.0: Second Contract | Bounty Hunter | Powertech | All | Grapple gets two charges and finishes the cooldown of Rocket Punch and Flaming Fist. | Not Available | |
| REMOVED in 7.0: Powerlode | Bounty Hunter | Powertech | Advanced Prototype | Power Yield instantly builds 4 Energy Lodes. Getting critically hit while under Power Yield builds an Energy Lode. | Not Available | |
| REMOVED in 7.0: Missile Backblast | Bounty Hunter | Mercenary | All | Missile Blast knocks its target back and refunds 10 heat. | Not Available | |
| REMOVED in 7.0: Thermonuclear Fusion | Bounty Hunter | Mercenary | Arsenal | Fusion Missile spreads your Tracer Missile’s Heat Signature to the targets it damages, as long as it damages at least one target already affected by your Heat Signature. Heatseeker Missiles fire additional missiles to nearby targets affected by your Heat Signature. | Not Available | |
| REMOVED in 7.0: Rocket Fuel Vapors | Bounty Hunter | Mercenary | Bodyguard | Kolto Missile grants a stack of Supercharge for each target it hits. Supercharged Gas heals all nearby allies when activated. Kolto Missile’s cooldown is extended by 4 seconds. | Not Available | |
| REMOVED in 7.0: Magnetized Shrapnel | Bounty Hunter | Mercenary | Innovative Ordnance | Explosive Dart now remains dormant on the target for 12 seconds. Mag Shot detonates it, dealing double its standard damage to the primary target. | Not Available |

 Discord
  Email swtorista@gmail.com
 Bluesky @swtorista.com
 Reddit /u/swtorista
 Twitch Swtorista
 Youtube
 Patreon
 Twitter @swtorista