

Lightning Sorcerer Sith Inquisitor Class Guide
Last Updated for lvl 75, Updated 6.0 Onslaught Expansion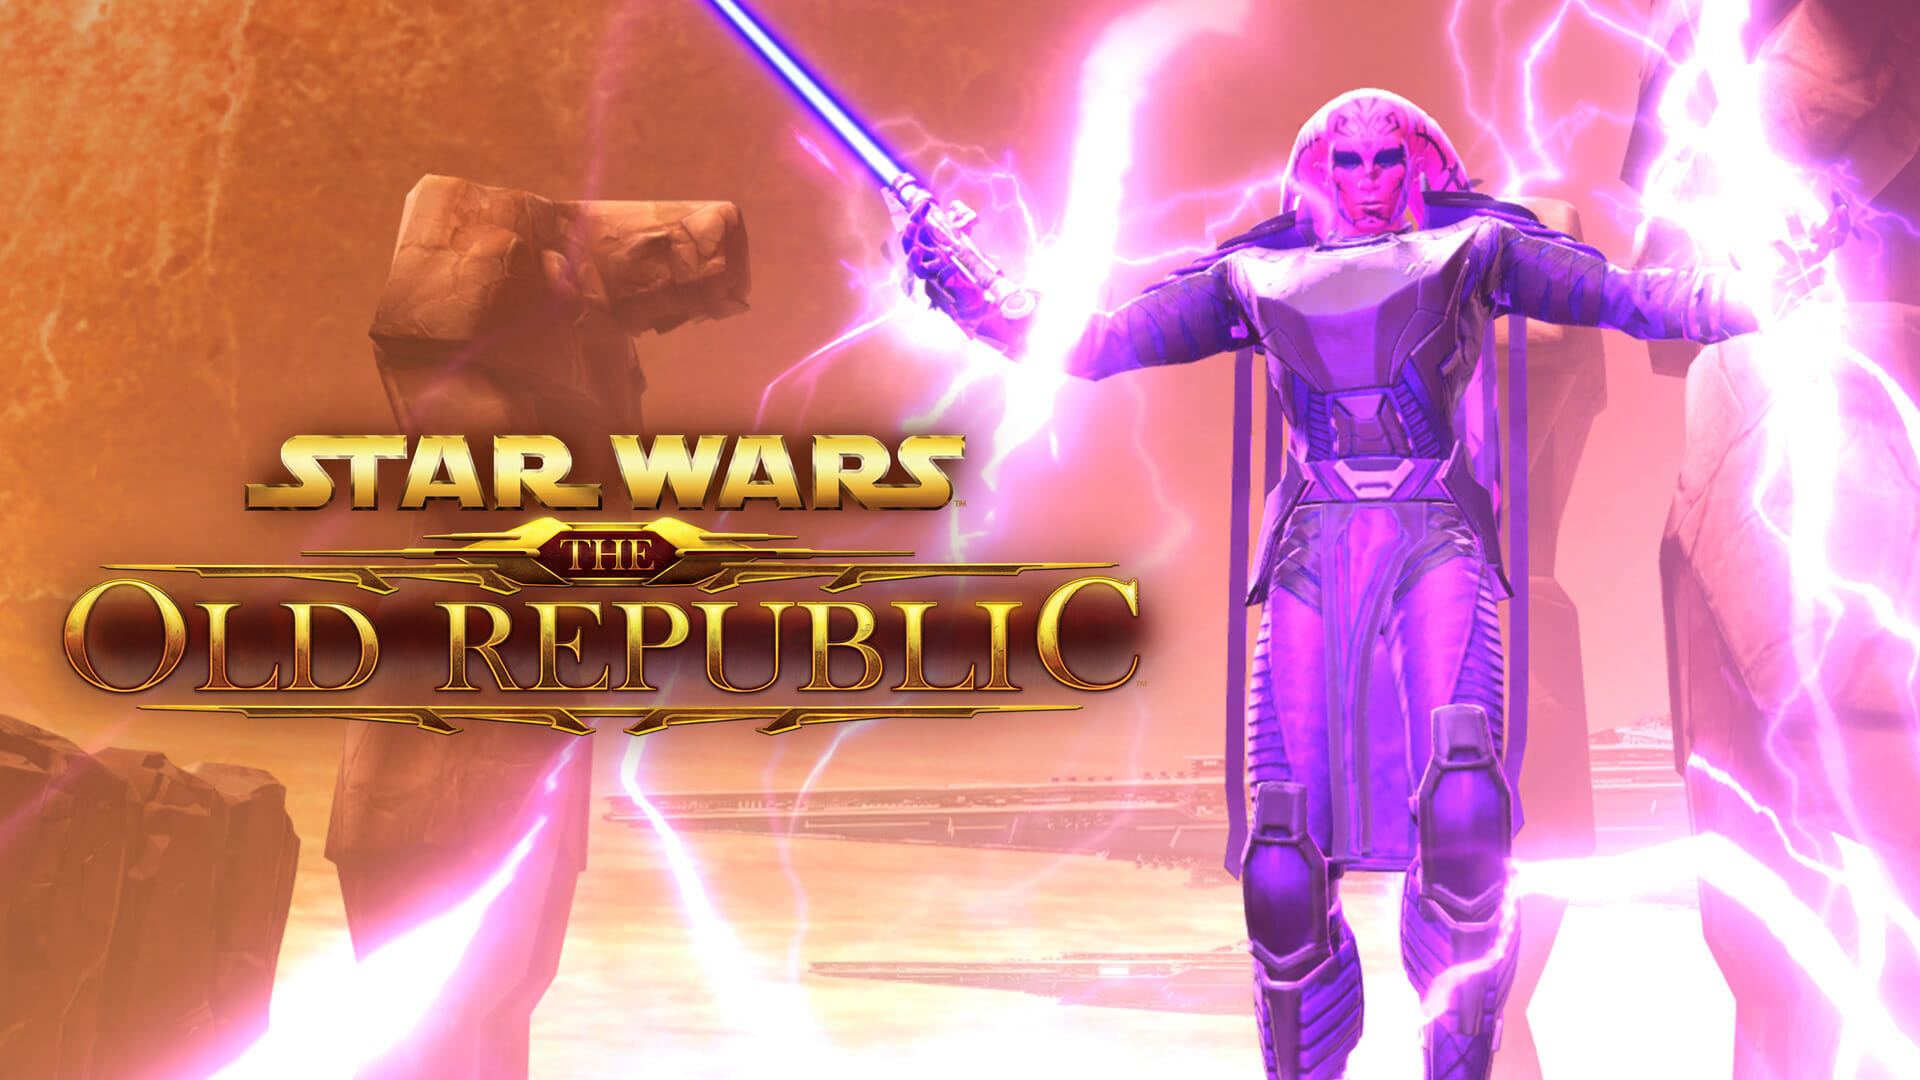
Lightning Sorcerer Guide
The Dark Side holds dangerous secrets – and immense power for those who dare to uncover them. The Sorcerer reaches into the darkest corners of the Force to harness volatile energies that can wreak devastation on their enemies, and the air around a Lightning Sorcerer crackles with dark energy.
In this guide we’ll be going over how to play a Sith Inquisitor Lightning Sorcerer including when and how each ability should be used, tips and tricks, how to be a great sorc in group content, and some basics about gearing up.
The Lightning Sorcerer Sith Inquisitor’s role is to electrocute their enemies with a powerful combination of Sith lightning attacks and insidious afflictions. As a DPS, the Lightning Sorc will want to focus on casting their abilities at an incredible speed by chaining their lightning attacks in a way that causes them to cast immediately and by taking advantage of their alacrity-increasing Polarity Shift buff.
 Your master Lightning sorc for this guide is Sion. Click here to view Sion’s version of their Lightning guide. If you have questions, you can contact them on discord – but please make sure to read this guide and their own guide in full first!
 Abilities
The Lightning Sorc’s abilities focus around the use of Force Lightning to do damage to their enemies, but they also have some useful defensive and mechanical abilities.
Mechanical Abilities
The Lightning Sorcerer’s job in a fight is mostly to do as much damage as possible, so a majority of their abilities involve dishing out lightning damage, but they do have a lot of useful abilities they can use to stay alive longer and to help their teammates in a group fight.
Let’s start by going over the lightning sorc’s mechanical abilities.
| Icon | Ability Name | Level | Type | Description |
|---|---|---|---|---|
| Mark of Power | 1 | Class Buff | Mark of Power is your class buff – its gives an hour long boost to damage to your group or to any other character you cast it on. | |
| Seethe | 1 | Regen | If you're low on health between fights, you can use Seethe to regenerate health - but it only works outside of combat. | |
| Overload | 3 | Push | Overload is your push. A knockback can be useful when you’re playing solo as it can keep melee enemies away from you if you’re taking too much damage, or you can use it to push enemies off of cliffs. As fun as it is, don’t use it in group fights – this often frustrates other players who are trying to group enemies up to take them down faster. | |
| Electrocute | 5 | Hard Stun | Electrocute is your short 4-second hard stun – you can use it on weaker enemies to stop them from running around, from casting abilities, or just to keep them out of the fight in general. | |
| Whirlwind | 7 | Crowd Control / Soft Stun | Whirlwind is your crowd control soft stun - you can use it to stun weaker enemies for 8 seconds, but it breaks on damage, so only use it on enemies you’re not going to hit soon. | |
| Unbreakable Will | 9 | Stun Breaker | Unbreakable Will is your stun breaker. If you are stunned and can’t move, you can use this ability to unstun yourself. | |
| Force Speed | 16 | Speed Boost | Force Speed is your speed boost. It helps you move faster. You can use it for fun while running around, to get to a strategic location in battle faster, or most importantly to run out of stuff that’s hurting you. | |
| Jolt | 18 | Interrupt | Jolt is your interrupt. Every class has an interrupt ability that allows them to interrupt an enemy while they are casting. This can be useful when fighting low-level enemies as many abilities can be interrupted, and in some max-level fights interrupts are a mandatory part of combat. Castbars that fill up from left right are called channels and can be interrupted and the ability will be stopped, but castbars that go from right to left deal damage the entire time they are casting. | |
| Force Slow | 22 | Slow | Force Slow is your slow, and slows your enemy’s movement speed by 50% for 6 seconds. This can be used to keep Melee enemies away from you as you move farther away, or to slow down enemies who are running away. | |
 | Expunge | Lvl 24+ | Cleanse | Expunge is your cleanse. Cleanses remove negative debuffs from the target – so if you are taking damage over time from a debuff ability an enemy has attached to you, you can cleanse yourself – or a friend! The Sorcerer’s cleanse only works on Mental or Force debuffs, and in difficult fights there are often abilities that are impossible to cleanse. |
 | Extrication | 34 | Pull | Extrication is your pull, you can use it to pull allies and group members to you. This is for saving allies/party members from damage if they can’t move, or pulling someone to safety who may not be paying attention, or saving your companion from AOE damage or being overwhelmed. |
 | Cloud Mind | 30 | Threat Drop | Cloud Mind is your threat drop. It will cause enemies to lose interest in you, at least for a short time. This is most useful if you’re getting attacked during group fights when your tank is supposed to be taking the damage, or when your companion is set to tank. |
 | Reanimation | Lvl 50+ | Revive | Reanimation is your revive and allows you to bring fallen group members back to life. While in combat, your group can only use revive abilities once every 5 minutes. |
 | Phase Walk | 59 | Teleportation | Phase walk is your teleport. You first stand in the location you want to place your portal, then you can activate it again from up to 60 meters away to be teleported back to your original location. The portal lasts for five minutes, so players often put this down in a strategic location during a difficult fight, or use it to help friends when hunting for datacrons! |
Defensive Abilities
The lightning sorcerer also has some nice defensive tricks up their sleeve.
| Icon | Ability | Level | Type | Description |
|---|---|---|---|---|
 | Force Barrier | Lvl 51+ | Immunity Shield | Force Barrier is your special shield, and make you immune to damage and effects for ten seconds – the only catch is that if you move or break the channel early, your barrier will go away. Once it wears off you will also receive a temporary defensive bonus. In solo fights, this is great to use when combined with Heroic moment to heal while in your barrier, and in group fights it might give your healer just enough time to keep you alive – you won’t be able to use any other abilities while channeling Force Barrier. You can only use this ability once every three minutes, so in long fights, use it wisely! |
 | Static Barrier | Lvl 14+ | Shield | Static Barrier is your shield that lasts 30 seconds and absorbs a high amount of damage. You can use this on yourself or another player, and it has a 20 second debuff during which it can not be reapplied. |
 | Cloud Mind (with Suppression utility) | Lvl 30+ | Shield & Threat Drop | Cloud Mind is your threat drop, but if you take the Suppression utility ability, it can also act as another defensive ability by increasing damage reduction by 25% for 6 seconds. |
 | Unnatural Preservation | Lvl 18+ | Self-Heal | Unnatural preservation is your self-heal – you can only use it to heal yourself. |
 | Dark Heal | Lvl 6+ | Heal | Sorcerer’s have two heals, though they are mainly designed for healers, not for lightning sorcerers. The two bonus heals are Resurgence and Dark Heal, which can be used on yourself or another player. |
 | Resurgence | Lvl 12+ | Heal-Over-Time | Resurgence heals you for less up front, but heals you more over time. Once again, not really for lightning sorcerers. |
Damage Abilities
| Icon | Ability | Level | Description |
|---|---|---|---|
 | Affliction | 16 | Affliction does damage to your target for 18 seconds. Your goal is to always have your target afflicted, as not only does it do good damage, but it also makes your target take more damage from your Thundering Blast ability. As a lightning sorc, Affliction's timer is reset by Crushing Darkness and Chain Lightning as long as the timer has not already expired, so you do not have spend Force to re-cast Affliction if you are using Crushing Darkness and Chain Lightning at the right times. |
 | Crushing Darkness | 10 | Crushing Darkness also does damage over time for 6 seconds. Crushing Darkness makes its targets Vulnerable, which means you'll do more damage to them while Vulnerable is active, and your Shock ability does extra damage while your target is Crushed. |
 | Thundering Blast | 26 | Thundering Blast is your most important damage ability - since you cast Affliction on your target earlier, Thundering Blast will now automatically do extra damage as is it crits on targets affected by Affliction. |
 | Lightning Flash | 42 | Lightning Flash is a quick attack which also reduces the activation time of your next Crushing Darkness attack by half a second - you'll get the reduce activation time if you have the Force Flash buff from Lightning Flash. |
 | Chain Lightning | 10 | Chain Lightning, a fun ability that delivers an arc of lightning that deals damage to up to 8 targets within 8 meters of the first target, and as a Lightning Sorc it also overwhelms your targets, making them take an additional 10% damage from area attacks, and it also immobilizes all weaker targets for 0.5 seconds and slows all weaker targets by 50% for 6 seconds. Chain lightning is primarily a multi-target attack, but it's also very useful against single targets as it will refresh your Affliction on your target without you having to recast it. |
 | Lightning Bolt | 58 | Lightning Bolt is the staple and most common ability for the Lightning Sorcerer. In addition to doing damage, it also increases your force regeneration and increases your damage reduction by giving you stacking buffs. |
 | Force Storm | 4 | Force Storm is large-radius attack that can hit up to 8 targets and deals a bonus stun to weaker enemies. It's great for multiple targets, but unlike chain lightning, it's not useful in single-target fights. |
| Volt Rush | 72 | Volt Rush is an attack that does damage to your target and gives you a stacking buff. Unfortunately, Volt Rush is not an ability worth using at all as a Lightning Sorc, as you have so many other better abilities available. | |
 | Shock | 1 | Lastly, Shock is a simple lightning attack that does bonus damage if the target is Crushed from Crushing Darkness. |
The lightning sorc also has some abilities that help buff their damage abilities.
| Icon | Ability | Level | Description |
|---|---|---|---|
 | Polarity Shift | 28 | Polarity Shift buffs you - you cast it on yourself and it grants you a 20% boost to alacrity for ten seconds. It also gives you immunity to being interrupted for the next 15 seconds which allows you to simply dish out damage. As a Lightning Sorc, while Polarity Shift is active, you're twice as likely to get lucky and have your Chain Lightning, Lightning Flash, or Lightning Bolt abilities do extra damage. |
 | Recklessness | 8 | The other one is Recklessness, which grants you 2 charges of Recklessness, which increases the critical chance of your attacks by 60%. Each time a direct ability critically hits or each time a channeled ability is activated, 1 charge is consumed. Lasts 20 seconds. |
| Unlimited Power | 56 | Unlimited Power boosts you and any of your group members stats by 10% for 10 seconds. | |
| Force Speed | 16 (36) | Force Speed gives 2 stacks of Convection which allows Lightning Strike and Lightning Bolt to be activated instantly. | |
 | Consuming Darkness | 20 | Consuming Darkness restoring 40 Force, but if you are playing your lightning sorc correctly, you should never run out of Force. |
| Advanced Kyrprax Critical Adrenal | 75 | (Item) Increases critical rating for 15 seconds on use. | |
| Sha'Tek Relic of the Primeval Fatesealer | 75 | (Item) Increases alacrity for 30 seconds on use. |
Rotation / Priority System
Using your abilities efficiently can help you survive longer, do more damage and gain more threat. This efficiency is gained by using abilities in an order that causes them to amplify each other. This order is sometimes called a rotation or a priority system – what abilities take priority over others.
Opener
Your opener is the ideal set of abilities you will use in order as a Lightning sorc during the beginning of a fight to do the most damage, and to set up your success for the rest of the fight.
| # | Icon | Ability | Description |
|---|---|---|---|
| 1 |  | Crushing Darkness | Your opener starts with Crushing Darkness, which will do damage over six seconds. |
| 2 | Force Speed | Second is Force Speed which gives 2 stacks of Convection which allows Lightning Strike and Lightning Bolt to be activated instantly. But more importantly, if you have the Gathering Storm set bonus, then you use Polarity Shift immediately after using Force Speed, Polarity Shift lasts an extra 10 seconds. It also makes your next direct Force attack deal 20% increased damage, so we'll combine it with our strongest hitting attack, Thundering Blast, as our next Force attack a few abilities further in our opener. |
|
| 3 |  | Polarity Shift | Third is your very powerful damage boost Polarity Shift, which grants you a 20% boost to alacrity and immunity to being interrupted. This allows you to cast your abilities a lot quicker. |
| 4 | Sha'Tek Relic of the Primeval Fatesealer | Fourth, this isn't an ability, but if you have a Primeval Fatesealer relic, you'd use it next to increase your alacrity even more. | |
| 5 |  | Affliction | Next it's time to cast Affliction, which does damage over time. We shouldn't have to re-cast it later, because our Crushing Darkness and Chain Lightning abilities will refresh its timer. |
| 6 | Advanced Kyrprax Critical Adrenal | Next, if you have a Critical Adrenal, you would use it to increase your critical chance so you can do more damage. | |
| 7 |  | Recklessness | Next you'll use Recklessness, which drastically increases your critical chance which will help you do more damage. |
| 8 |  | Unlimited Power | Next is your Unlimited Power ability, which increases your stats and the stats of your entire group. You might choose to save this ability for later in a fight where you need to do a lot of damage in a short period of time. |
| 9 |  | Thundering Blast | Next is your first outright attack - Thundering Blast will now automatically do extra damage as it crits on targets affected by Affliction which you cast earlier. |
| 10 |  | Lightning Flash | Next is Lightning Flash, a quick attack that reduces the activation time of your next Crushing Darkness. |
| 11 |  | Force Barrier | Next is Force Barrier - a fun trick you can use: cast it and quickly break it, don't just stand there waiting for your Force Barrier to wear off. When Force Barrier breaks, it will make Force Speed available again if you chose the Surging Speed utility. |
| 12 |  | Shock | Next, Shock does 35% extra damage to targets who are crushed. Your target should still be Crushed at this point, so we'll sneak Shock in while it's still up. |
| 13 |  | Chain Lightning | Next is Chain Lightning. Since we used Thundering Blast earlier, Chain Lightning will be sparkling, which means it can be cast immediately. |
| 14 |  | Lightning Bolt | Next up is Lightning Bolt. Lightning Bolt as a Lightning Sorc increases your Force regeneration rate by 10% for 10 seconds. This buff is called Charged Reaction and stacks up to 3 times. As a bonus, Lightning Bolt also gives you a buff that increases your damage reduction, called Fulgurous Fortification, which also stacks three times. Knowning about these awesome buffs means we'll use Lightning Bolt three times in a row in our opener. |
| 15 |  | Lightning Bolt | Lightning Bolt 2/3 |
| 16 |  | Lightning Bolt | Lightning Bolt 3/3 |
| 17 | Force Speed | Next is your Force Speed ability if you have the Gathering Storm set bonus makes your next Force attack deal 20% more damage. | |
| 18 |  | Thundering Blast | Next is Thundering Blast to do some heavy damage. |
| 19 |  | Chain Lightning | Next is Chain Lightning, since using Thundering Blast made Chain Lightning cast immediately. |
| 20 |  | Crushing Darkness | Next is Crushing Darkness for some more damage over time. |
| 21 |  | Lightning Flash | Next is your quick Lightning Flash ability. |
| 22 |  | Shock | Next is Shock, which does 35% extra damage to targets who are crushed. |
| 23 |  | Thundering Blast | Next is Thundering Blast for another dose of heavy damage. |
| 24 |  | Chain Lightning | And lastly, Chain Lightning again, since using Thundering Blast made Chain Lightning cast immediately. |
Single Target
Your single-target rotation / priority system is a list of abilities you should use after your opener, and for the rest of the fight. These abilities shouldn’t be used one after another – instead, abilities higher up the list take priority over those at the bottom.
| # | Icon | Ability | Level | Description |
|---|---|---|---|---|
| Always |  | Affliction | Lvl 16+ | Affliction is not part of your priority abilities, but your target should always be afflicted. As long as you are keeping up with your Crushing Darkness and Chain Lightning abilities, your enemy will stay afflicted without you having to re-cast Affliction on them. |
| #1 |  | Thundering Blast | Lvl 26+ | Your first priority ability is Thundering Blast, and it should be used immediately any time it is available, because it has a long cooldown and does a great burst of damage when you cast it on an afflicted target. |
| #2 |  | Crushing Darkness (when procced) | Level 10+ | Your second priority is Crushing Darkness, but only when it is “procced” by Force Flash which is triggered after you cast your Lightning Flash ability – you’ll know it’s procced if Curshing Darkness's icon sparkles on your quickbars. |
| #3 |  | Lightning Flash | Lvl 42+ | Your third priority is Lightning Flash, since it will grant you Force Flash which helps you cast Crushing Darkness faster. (Important! Once you have the Stormwatch tactical, Lightning Flash actually moves up above Crushing Darkness in the priority list.) |
| #4 |  | Shock (when procced) | Lvl 1 (68+) | Your fourth priority ability is Shock, but only while Crushing Darkness is applied to your target, as a Lightning Sorc, Shock gains a 35% extra damage boost to targets who are crushed – the rest of the time, Lightning Bolt does more damage. |
| #5 |  | Chain Lightning (when procced) | Lvl 10+ | Your fifth priority is Chain Lightning, as long as it is procced and is sparkling on your quickbars, which it usually is. Chain Lightning is procced when you use Thundering Blast, Lightning Bolt, or Lightning Storm, and these make Chain Lightning cast immediately and cost 50% less Force, so it’s a waste to use it if it’s not procced and sparkling on your quickbars. |
| #6 |  | Lightning Bolt | Lvl 58+ | Your final priority is Lightning Bolt, which is your standard filler ability when you aren’t sure what else to use. When you see this procced and it’s sparkling on your quickbars, it means it will be cast immediately. This is from one of your passive abilities called Subversion, which has a chance to trigger any time you take damage – but since you can’t control that, unlike your other procced abilities, you use it even if it’s not sparkling. |
 Funnily enough, at high levels, the Lightning Sorcerer doesn’t really need to use the Force Lightning ability they get around level 2 as they end up having so many other better lightning abilities available.
There are some other abilities you’ll want to keep in mind while dealing out damage.
| Icon | Ability | Description |
|---|---|---|
 | Polarity Shift | Polarity Shift is your strongest attack boost. By itself, it gives you a nice 20% alacrity boost, which means you'll be able to cast your abilities faster, but if you have the Gathering Storm set bonus it becomes even more powerful. The 4-piece bonus causes Force Speed to make your next Force attack deal 20% more damage and Force attacks deal 20% more damage while Polarity Shift is active. With the 6-piece set bonus, activating Force Speed reduces the cooldown of Polarity Shift by 10 seconds, and using Polarity Shift immediately after adds 10 seconds to its duration. This makes Polarity Shift with the set bonus an ability that you'll want to use whenever it's available, and always worth combining with Force Speed. Having Polarity Shift active as often as possible makes your other abilities flow smoother, faster, and do more damage. |
 | Recklessness | Recklessness grants you 2 charges of Recklessness, which increases the critical chance of your attacks by 60%. Recklessness can be combined with Polarity Shift for the best results, and the attack abilities you should use with Recklessness are always Thundering Blast and Lightning Flash if possible, if you don't have Lightning Flash available then use it on Chain Lightning. |
| Unlimited Power | Unlimited Power, which increases the stats of your entire group, has a long cooldown, so you can either use it at the beginning of a fight, or if you know the fight well, save it for a point where your group needs to do a lot of damage in a short period of time. | |
| Force Speed | Force Speed gives 2 stacks of Convection which allows Lightning Strike and Lightning Bolt to be activated instantly, and as we talked about before, if you have the 6-piece Gathering Storm set bonus, you'll want to activate Polarity Shift immediately after using Force Speed to make Polarity Shift last longer so you can do more damage. | |
 | Consuming Darkness | Consuming Darkness restoring 40 Force, but it makes you Weary, reducing your Force regeneration rate by 2 for 10 seconds. As long as you are using your lighting abilities well, you shouldn't have to use Consuming Force at all. |
| Advanced Kyrprax Critical Adrenal | (Item) You can use an Adrenal to increase your critical rating for 15 seconds on use, and you should be using one any time you have it available during the fight, but it is generally better to save it until you have Polarity Shift active. | |
| Sha'Tek Relic of the Primeval Fatesealer | (Item) You can use a Primeval Fatesealer relic to increase your alacrity for 30 seconds on use. It's also best to use it when you have Polarity Shift active, and to use it whenever it's available. |
Multi Target / AOE
| Icon | Ability | Level | Description |
|---|---|---|---|
 | Chain Lightning (when procced) | Lvl 10+ | Chain lightning delivers an arc of lightning that deals damage to up to 8 targets within 8 meters of the first target, so it’s ideal for fighting many enemies and is one of your AOE (area of affect) priority abilities – just make sure to only use it after it’s procced and sparkly on your quickbar to take advantage of the immediate cast a reduced Force cost we talked about earlier, which you should be able to easily trigger by using Force Storm.. |
 | Force Storm | Lvl 4+ | Your other AOE priority ability is Force storm, a large-radius attack that can hit up to 8 targets and deals a bonus stun to weaker enemies. |
There are a few ways of going about this depending on the priority of the group of adds that are being killed. However, regardless of the scenario you want to prioritize Chain Lightning and Force Storm. If they will die pretty quickly this is all you want to do. If there is a higher health add in among lower health ones, then you can throw in Affliction and Thundering Blast and then continue with Chain Lightning and Force Storm.
For area-of-affect where there are 2 targets that you are cleaving between, maintain Affliction on both, maintain force damage debuff on both, and use Lightning Flash on the target with crushing Darkness on it. If attempting to burn your targets evenly, hard cast Chain Lightning into Thundering Blast and a procced Chain Lightning. You can swap targets every Thundering Blast to keep the damage even. If prioritizing one target and simply cleaving onto the other, focus all of your single target abilities onto the primary target.
As far as hard casting Chain Lightning is concerned, if it will hit 2 or more targets, it is a damage gain, so don’t hesitate to do it.
Part of the skill in Lightning is being able to maintain alacrity buffed Affliction on multiple targets throughout a fight. Traditionally this has been done by alternating Crushing Darkness and Chain Lightning between targets to maintain the dot while not wasting GCDs manually reapplying Affliction.
Utilities
Utilities are a series of abilities that you can choose from for your Advanced Class. On the list below, these utilities have been rated for their use in difficult boss fights in Operations, the most difficult group content in the game. However, if you are playing solo, playing less difficult content, or PvPing, you’ll want to read the descriptions of the utilities carefully and instead either choose ones that sound fun, or choose ones that seem useful for the type of content you like to play. For example, there’s some fun utilities like Backlash that make your static barrier shield explode, or Enfeebling Strike which replaces your basic lightsaber attack – both of these are fun changes to your abilities, and while neither are good for Operations or other difficult content, they could be fun for running Heroics.
- Tier 1 Skillfull – You must choose 3 Skillful utilities before the next tier is unlocked
- Tier 2 Masterful – You must choose a total of 6 Skillful or Masterful abilities before the next tier is unlocked
- Tier 3 Heroic – You can choose a max of 3 utilities in the Heroic category
Recommended Utilities
These are the utilities I’d recommend taking in to Flashpoints and Operations. They’re the most generally useful, focusing on fortifying your defenses to keep you alive.

| Icon | Utility | Tooltip |
|---|---|---|
| Sith Defiance | Increases damage reduction by 3%. | |
 | Tempest Mastery | Increases the damage dealt by Force Storm by 25%. |
| Empty Body | Increases all healing received by 5%. Does not affect stolen life. | |
| Suppression | Activating Cloud Mind grants Suppression, which increases damage reduction by 25% for 6 seconds. | |
| Dark Resilience | Reduces the damage taken by the target of your Extrication by 25% after you extricate them. Additionally increases the healing done by Unnatural Preservation by 30%. | |
| Surging Speed | Reduces the cooldowns of Force Speed by 5 seconds, Force Slow by 3 seconds, and Force Barrier by 30 seconds. In addition, Force Speed lasts 0.5 seconds longer, Polarity Shift increases your movement speed by 100% while active, and the active cooldown of Force Speed is finished when Force Barrier ends. | |
| Shapeless Spirit | Reduces all damage taken while stunned by 30%. Additionally, reduces damage taken from area effects by 30%. | |
 | Force Mobility | Thundering Blast, Innervate, and Force Leech may be activated while moving. |
| Unnatural Vigor | Unnatural Preservation increases your damage reduction by 15% for 6 seconds. Additionally, reduces the cooldown of Unnatural Preservation by 5 seconds. |
Fun Leveling Utilities
If you’re finding you’re not dying a lot while exploring the open world or leveling, try these out. This “for fun” build has less of a focus on defensives, and takes advantage of the ability to stun weaker enemies. You also get a new ability called Enfeebling Strike that lets you use your lightsaber attack to immobilize enemies that are too close. Make sure to also use your Static Barrier on yourself often with this build – fun things happen while you are attacked and after your barrier ends.

All Utility Options
| Icon | Utility | Tier | Tier | Rating | Tooltip | Description |
|---|---|---|---|---|---|---|
| Force Suffusion | 1 | Skillful | Not Worth Taking | Overload heals you and up to 7 affected allies for 40-49. | Not really worth taking as a dps. | |
| Sith Defiance | 1 | Skillful | Awesome | Increases damage reduction by 3%. | Always take this. Any free damage reduction is welcome. |
|
 | Tempest Mastery | 1 | Skillful | Good | Increases the damage dealt by Force Storm by 25%. | With the current setup of utilities, this is just default unless there is something better to take in tier 1. |
| Empty Body | 1 | Skillful | Awesome | Increases all healing received by 5%. Does not affect stolen life. | Always takes this. Increased healing received is always good. | |
 | Dizzying Force | 1 | Skillful | Not Worth Taking | Reduces target's accuracy by 20% for 8 seconds after Whirlwind ends. Additionally, your Whirlwind affects up to 2 additional standard or weak enemies within 8 meters of the target. | PvP/leveling utility. Not worth taking. |
| Dark Speed | 1 | Skillful | Not Worth Taking | Dark Heal increases the movement speed of the target by 50% for 6 seconds. This effect cannot occur more than once every 12 seconds. | This is more of a PvP healer utility, and situational at that. It won’t do anything for you in PvE. | |
| Corrupted Flesh | 1 | Skillful | Useful for non-cleanseable dots fights | Reduces the damage taken from all periodic effects by 15%. | You can take this on fights with non-cleansable damage-over-time | |
 | Torturous Tactics | 1 | Skillful | Useful but only in some fights | Lowers the cooldown of Electrocute by 10 seconds. In addition, targets stunned by your Electrocute deal 25% less damage for 10 seconds when Electrocute wears off. | Extremely situational. This is mainly a PvP ability, but it is useful in mitigating damage from energy spheres in Brontes in Veteran Mode / Master Mode. |
| Suppression | 2 | Masterful | Awesome | Activating Cloud Mind grants Suppression, which increases damage reduction by 25% for 6 seconds. | Very useful for mitigating large hits. Always take this. | |
| Dark Resilience | 2 | Masterful | Awesome | Reduces the damage taken by the target of your Extrication by 25% after you extricate them. Additionally increases the healing done by Unnatural Preservation by 30%. | Useful because of the increased healing to Unnatural Preservation. I take this on most fights to alleviate some of the healing on myself. | |
| Conspiring Force | 2 | Masterful | Not Worth Taking | Targets affected by your Affliction are slowed by 30% for its duration. | PvP Utility. Not useful in PvE |
|
| Lightning Barrier | 2 | Masterful | Usually not worth taking | Your Static Barrier crackles with electricity, shocking attackers for 145 energy damage when it absorbs direct damage to you. This effect does not affect Static Barriers placed on allies and cannot occur more than once each second. | Extremely niche utility. Can be used to fluff damage on some fights. Still underwhelming compared to our main choices in this tier. | |
| Surging Speed | 2 | Masterful | Awesome | Reduces the cooldowns of Force Speed by 5 seconds, Force Slow by 3 seconds, and Force Barrier by 30 seconds. In addition, Force Speed lasts 0.5 seconds longer, Polarity Shift increases your movement speed by 100% while active, and the active cooldown of Force Speed is finished when Force Barrier ends. | Always take this utility. It is a flat damage increased due to the cooldown reduction on force speed as well as the force speed reset on Force Barrier coupled with Force Barrier cooldown reduciton. | |
| Backlash | 2 | Masterful | Usually not worth taking | Static Barriers you place on yourself erupt in a flash of light when they end, blinding up to 8 nearby enemies for 3 seconds. This effect breaks from direct damage. | ||
| Haunted Dreams | 2 | Masterful | Not Worth Taking | If your Whirlwind breaks early from damage, the target is stunned for 2 seconds. In addition, Whirlwind activates instantly. | Not useful in PvE content. | |
| Electric Bindings | 2 | Masterful | Usually not worth taking | Overload binds its targets in electricity, immobilizing them for 5 seconds. Direct damage dealt after 2 seconds ends the effect prematurely. | Mostly a PvP utility. It is useful in some situations, such as NiM Styrak. | |
| Emersion | 3 | Heroic | Good for fights where slowed | Force Speed grants Emersion, removing all movement-imparing effects and granting immunity to them for the duration. | Good for fights where you need to break out of slows. Most useful fight for this is Cartel Warlords. | |
| Shapeless Spirit | 3 | Heroic | Awesome | Reduces all damage taken while stunned by 30%. Additionally, reduces damage taken from area effects by 30%. | An absolute must take on every fight. 30% AoE and Stun damage reduction. What more could you want? | |
 | Force Mobility | 3 | Heroic | Awesome | Thundering Blast, Innervate, and Force Leech may be activated while moving. | This should be taken on every fight. Increased mobility is always a good thing. |
 | Galvanizing Cleanse | 3 | Heroic | Not Worth Taking | Expunge grants Galvanizing Cleanse, making your next ability with an activation time activate instantly. The effect cannot occur more than once every 30 seconds and lasts for up to 15 seconds. | This is just a bad utility for a dps. Never take this. |
| Corrupted Barrier | 3 | Heroic | Not Worth Taking | Your Static Barrier, Force Barrier, and Enduring Bastion heal you for 1% of your total health every second for as long as they last. This healing scales up to 4% with the charges for Enduring Bastion. | PvP Utility. Not worth taking in PvE. | |
| Unnatural Vigor | 3 | Heroic | Good | Unnatural Preservation increases your damage reduction by 15% for 6 seconds. Additionally, reduces the cooldown of Unnatural Preservation by 5 seconds. | This is a good one to take. This provides another small damage reduction cooldown, and lets you get more of your amazing self heal with a reduced cooldown. | |
 | Shifting Silhouette | 3 | Heroic | Ok | Using Phase Walk to return to its marked location grants Shifting Silhouette, keeping you from being leapt to or pulled and making you immune to interrupts and ability activation pushback for the next 10 seconds. Additionally, the cooldown of Phase Walk is reduced by 15 seconds and all defenses are increased by 30% for the duration of Shifting Silhouette. | The reduced cooldown is nice but not necessary in PvE. The increase to defense is nice, but it really isn’t worth taking on any fight. |
| Enfeebling Strike | 3 | Heroic | Not Worth Taking | Strike the target with your lightsaber, dealing damage and immobilizing it for 3 seconds. When the immobilization effect ends, the target is slowed by 50% for 6 seconds. Replaces Saber Strike. | PvP utility. This is completely useless in PvE. |
Gear
Although the Sith Inquisitor is a master of the Force and doesn’t need a weapon or armor to shoot lightning from their fingertips, you can upgrade your gear’s stats to do more damage and use Tactical Items and Set Bonuses to change the way your normal abilities work.
Gearing Basics

Moddable pieces of gear
There are two types of gear in the game – moddable, and unmoddable. Moddable gear is gear you can change the stats of, while unmoddable gear is static gear with the stats attached directly to the piece of armor. For endgame gearing, you will want to have 9 pieces of moddable armor:
Your other pieces of gear, including your earpiece, implant, relics, and tactical item can never be modded.
The stats of moddable pieces of gear are made up by the modifications in the gear. Modifications are individual parts that make up each piece of armor – most pieces of armor have an Armoring, a Mod, and an Enhancement. You can mix and match these modifications to either upgrade your stats, or to create a different combination of stats.
![]()
![]()
![]()
Moddable Gear
- Chestpiece
- Helm
- Gloves
- Belt
- Pants
- Boots
- Bracers
- Mainhand
- Offhand (Focus)
Show Detailed Item Tooltips: To see the stats of the individual modifications in a piece of gear when you roll over it with your mouse, you can activate this setting: press the ESC key > Preferences > User Interface > Show Detailed Item Tooltips. When you hover your mouse over a piece of armor, it will show the individual stats of the Armoring, Mod and Enhancement.
Upgrade Gear: To modify a gear piece, CTRL+ RIGHT CLICK on it. This will open the Modification window. To add a mod to a piece of armor, right click on it from your inventory while the modification window is up, and click apply. To remove a mod in a piece of armor, right click on it in the modification window. You can accept or reject the removal in case you clicked something by accident.
Being able to move modifications to other pieces becomes helpful as you build up your set of gear. If you receive a second pair of gloves, it might not be as good as the pair you have on… but the individual modifications and enhancements in the second pair of gloves still might be better than the mods you have in your helm or boots.
How to Get Gear at Level 75Lightning Sorcerer Gearing
Sion’s guide to gear your Sorc: 6.0 has made optimizing gear both easier and harder due to the large amount of options for mods and enhancements as well as most content being level synced to 70. As a result of this, here are some things that need to be understood.
- Level synced content caps your endurance, mastery, and power.
- Changes to stat formulas means you have less crit percentage than at the end of the last expansion, forcing you to get crit from other sources
- Certain relics that used to be standard are no longer desirable as their procs will provide no real benefit
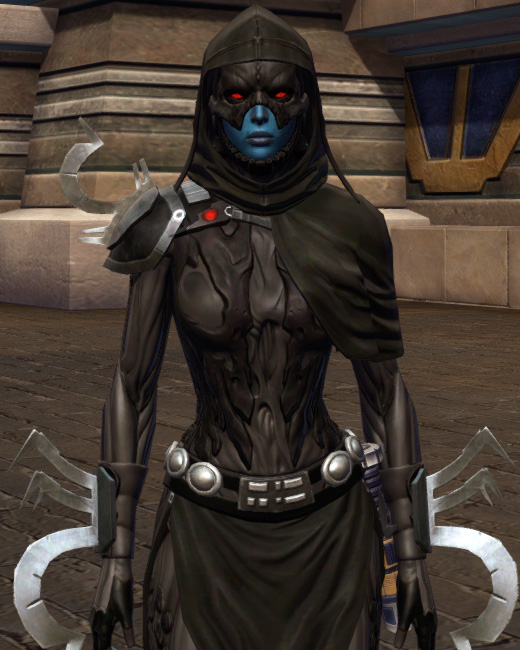
With all of this in mind, here are the stat values and gear pieces that I recommend for Lightning in full 306 gear and advanced 74 augments*:
- Alacrity – 10.5%, 1901 rating, 2x Sha’tek Quick Savant MK-19 implants, Sha’tek Quick Savant MK-19 earpiece, 1 Nimble 80 R-19 enhancement, 2x alacrity augments
- Accuracy – 110%, 1590 rating , 1 Initiative R-18 enhancement, 1 Initiative R-19 enhancement, accuracy stim, 5x accuracy augments
- Critical – 40.18%, 2671 rating, 3x Adept 80 enhancement, 7x critical augments, 2x critical crystals
- Mods – 80-R2 (these trade 18 mastery for 20 power, and so have 2 more overall stat)
- Relics – Sha’tek Relic of Devastating Vengeance, Sha’tek Relic of Primeval Fatesealer, Sha’tek Relic of Focused Retribution (only used in Dxun operation, replaces Primeval Fatesealer)
- Implants and Earpiece – Sha’tek Quick Savant Mk-19
- Amplifiers – 1% Force Sensitivity
- Adrenal – Advacned Kyrprax Critical Adrenal
* These gear suggestions are subject to change as I have not had sufficient time to do the level of testing necessary for me to have absolute confidence that these stats are BiS.
Set Bonus
A set bonus is a special type of gear bonus that gives your Lightning Sorcerer a boost in battle, like making some of your abilities stronger or making them usable more often. The more pieces of set bonus gear you collect, the more bonuses you will get. Set bonuses only exist on the pieces of armor that you can “wear” – Head, Chest, Hands, Legs, Boots, Belt and Bracers.
Set Bonus Recommendations
| Image | Set Bonus | Source | Set Bonus Effects | Reason |
|---|---|---|---|---|
 | Gathering Storm | 3,000 Tech Fragments + 1 million credits or Operations | 2 - 2% Mastery 4 - Force Speed makes your next Force attack deal 20% more damage and Force attacks deal 20% more damage while Polarity Shift is active. 6 - Activating Force Speed reduces the cooldown of Polarity Shift by 10 seconds. Using Polarity Shift immediately after adds 10 seconds to its duration. | Polarity Shift is by far your best offensive cooldown. With the Gathering Storm set bonus, you must make sure you use Polarity Shift within 10 seconds of activating Force Speed as not having the extra 10 seconds of Polarity Shift from the set bonus is a massive DPS loss. Use this ability on cooldown as long as you have the set bonus buff. This ability makes our rotation flow smoother, faster, and do more damage. |
Set Bonus Options
| Image | Set Bonus Name | (2) Piece Set Bonus | (4) Piece Set Bonus | (6) Piece Set Bonus | Vendor | Source |
|---|---|---|---|---|---|---|
 | Death Knell | 2% Mastery | (Assassin) The cooldown of Recklessness is reduced by 15 seconds. Whenever you consume a charge of Recklessness you gain a stack of Reckless Critical, making your next Assassinate or Maul critically hit. Stacks up to 3 times. | Whenever you consume a charge of Recklessness you gain a stack of Reckless Slaughter, increasing your melee damage done by 10% for 30 seconds. Stack up to 3 times. | 3,000 Tech Fragments + 1 million credits | Conquest |
 | Efficient Termination | 2% Endurance | (Assassin) Spike’s stun and slow effects last for an additional second. | Using Spike grants you 10% damage reduction for 6 seconds. | 3,000 Tech Fragments + 1 million credits | Conquest |
 | Saber Master | 2% Mastery | (Assassin) Reduces the cooldown of Overcharge Saber by 20 seconds. | Killing an enemy during Overcharge Saber refreshes the duration of Overcharge Saber. Can occur up to 5 times during one Overcharge Saber. | 3,000 Tech Fragments + 1 million credits | Conquest |
 | Shadow Purger | 2% Endurance | (Assassin) Severing Slash immobilizes the target for 2 seconds. | Using Severing Slash while under Force Shroud lowers the targets accuracy and extends the duration of Force Shroud by 2 seconds. | 3,000 Tech Fragments + 1 million credits | Operations |
 | Murderous Revelation | 2% Mastery | (Assassin) Overcharge Saber and Force Cloak reset the cooldown of Phantom Stride. | Using Phantom Stride from stealth grants Shadowcraft, increasing your critical hit chance by 100% for 6 sesconds. | Not Available From Vendor | Crafted |
 | Rebuking Assault | +2% Endurance | (Assassin) Each target hit by Severing Slash reduces the cooldown of Mind Control and Mass Mind Control by 1 second. | Each target hit by Severing Slash extends Deflection’s duration by 1 second. | Not Available From Vendor | Dxun Operation |
 | Empowered Restorer | 2% Alacrity | (Sorcerer) Dark Heal’s critical chance is increased by 10%. | Dark Heal heals for 20% more if you have a Consuming Darkness or Reverse Corruption stack and consumes 1 stack upon use. | 3,000 Tech Fragments + 1 million credits | Conquest |
 | Revitalized Mystic | 2% Alacrity Ratiing | (Sorcerer) Reduces cooldown of Innervate by 1.5 seconds. | Healing a target with another ability while Resurgence is active on them has a chance to cause an extra Resurgence tick for half. Refreshing Resurgence on a target refunds some force. | 3,000 Tech Fragments + 1 million credits | Conquest |
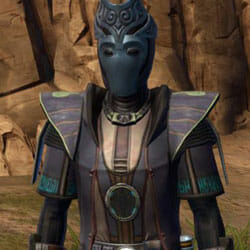 | Endless Offensive | +2% Mastery | (Sorcerer) Volt Rush deals 10% more damage | Energize now stack up to 3 times. Force Speed immediately recharges one Volt Rush ability charge. | Not Available From Vendor | Dxun Operation |
 | Gathering Storm | 2% Mastery | (Sorcerer) Force Speed makes your next Force attack deal 20% more damage and Force attacks deal 20% more damage while Polarity Shift is active. | Activating Force Speed reduces the cooldown of Polarity Shift by 10 seconds. Using Polarity Shift immediately after adds 10 seconds to its duration. | 3,000 Tech Fragments + 1 million credits | Operations |
 | Controller | 2% Endurance | (Sith Inquisitor) Killing the enemy affected by Whirlwind before it’s cooldown ends resets the cooldown of Whirlwind. | Not Available From Vendor | Crafted | |
 | Decelerator | 2% Mastery | (Sith Inquisitor) Force Slow now has 2 charges. Using Force Slow on an enemy already under the effect of Force Slow slows them by an additional 20% and extends the duration. | 3,000 Tech Fragments + 1 million credits | PvP | |
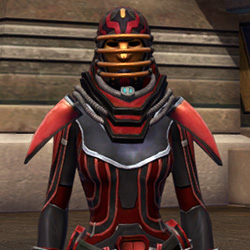 | Dire Retaliation | 2% Endurance | (Sith Inquisitor) Overload increases your damage reduction by 10% for 10 seconds. Getting attacked during this time causes your next Force attack to critically hit. This effect can only occur once every 10 seconds. | 3,000 Tech Fragments + 1 million credits | Conquest | |
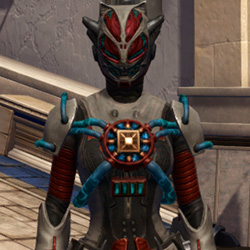 | Soulbenders | 2% Mastery | (Sith Inquisitor) Electrocute’s stun lasts an additional 2 seconds. | 3,000 Tech Fragments + 1 million credits | Daily / Weekly Missions | |
 | Amplified Champion | (Generic) The Amplified Champion’s set has same amplifiers pool as an armoring, hilt or barrel, so you can boost your combat stats even more than normal, though the highest boosts are not available. The trade-off is that this set has no actual set bonus ability like normal set bonus pieces. Vew Amplifier Info & Chart | 3,000 Tech Fragments + 1 million credits | Conquest | ||
 | Avenger | 2% Endurance | (Generic) Increases your damage dealt by 3% while you Guard an ally. | 3,000 Tech Fragments + 1 million credits | PvP | |
 | Berserker | 2% Critical Rating | (Generic) Increases all damage dealt by 3% and all damage taken by 6%. | 3,000 Tech Fragments + 1 million credits | Operations | |
 | Dying Precision | Increases critical rating by 3% while health is below 50% | (Generic) Increases critical rating by 5% while health is below 50% | Increases critical rating by 10% while health is below 50% | Not Available From Vendor | Onderon Reputation Vendor |
 | Preserver | +2% Shield Rating | (Generic) Passively regenerate 1% of maximum health every 10 seconds. | Not Available From Vendor | Corellia Flashpoint | |
 | Rapid Response | Increases alacrity rating by 3% while health is below 50%. | (Generic) Increases alacrity rating by 5% while health is below 50%. | Increases alacrity rating by 10% while health is below 50%. | 3,000 Tech Fragments + 1 million credits | Operations |
 | Stationary Grit | 2% Alacrity Rating | (Generic) Increases damage dealt by 3% while not moving or increasing armor rating by 10% while moving. | 3,000 Tech Fragments + 1 million credits | Daily / Weekly Missions | |
 | Stimulated | 2% Alacrity Rating | (Generic) Increases Mastery by 5% while under the effects of a stimpack. | 3,000 Tech Fragments + 1 million credits | Flashpoints | |
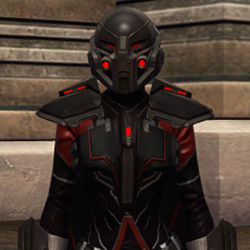 | Taskmaster | 2% Alacrity Rating | (Generic) Significantly increases the attack and activation speed of your companion. | 3,000 Tech Fragments + 1 million credits | Daily / Weekly Missions | |
 | The Entertainer | 2% Endurance | (Generic) Entering combat improves nearby allies, increasing their mastery, endurance, and rate of experience point gain. This effect is removed when combat ends. | 3,000 Tech Fragments + 1 million credits | Daily / Weekly Missions | |
 | The Final Breath | Reduces damage taken by 2% while health is below 50%. | (Generic) Reduces damage taken by 3% while health is below 50%. | Increases defense rating by 10% while health is below 50%. | 3,000 Tech Fragments + 1 million credits | Daily / Weekly Missions |
 | The Victor | 2% Mastery | (Generic) Defeating an enemy increases your movement speed by 75% for 8 seconds. This effect cannot occur more than once every 8 seconds. | Defeating an enemy heals you for 20% of your maximum health. This effect cannot occur more than once every 8 seconds. | 3,000 Tech Fragments + 1 million credits | Conquest |
 | Trishins Retort | 2% Endurance | (Generic) Shielding an attack causes your shield to overload, dealing 1002 – 1502 damage to up to 8 enemies within 5 meters. Your shield can only overload in this manner once every 3 seconds. | 3,000 Tech Fragments + 1 million credits | Daily / Weekly Missions | |
Tacticals
Tactical items are a special type of gear that can drastically change one of your existing abilities, or give you a boost in combat. You can only equip one tactical item at a time, but you can switch them out between fights.
Tactical Recommendations
| Icon | Tactical Name | Tactical Ability | Comments | Vendor | Source |
|---|---|---|---|---|---|
| Stormwatch | Lightning Flash applies Stormwatch to its targets. For the next 10 seconds, whenever the target takes damage to Affliction, Crushing Darkness, or Thundering Blast a lightning bolt is called down upon the target, dealing energy damage. | Favorite Stormwatch is our go-to single target tactical. It provides a large DPS increase so long as you maximize the amount of ticks you get per activation. Swapping targets or applying Stormwatch to a target that is close to dying is a massive DPS loss and should never be done. | 3,000 Tech Fragments + 1 million credits | Flashpoints | |
| Elemental Convection | Volt Rush triggers Lightning Storm when activated. Chain Lightning gives you Volt Flux, causing your next Volt Rush to arc to multiple targets for the next 10 seconds. | Elemental Convection is area-of-effect tactical for Lightning, but it is pretty underwhelming. We lose huge amounts of damage by not taking Stormwatch from the start. Couple this with the fact this requires you to use Volt Rush, and this tactical is very unappealing. In fights that are pure area-of-effect where there are always a lot of adds that will die fast, this is probably better, but there are very few of those fights, and for any sustained cleave scenario it is better to play Madness. Even for most fights with add cleave, Stormwatch is most likely better because you are focusing a main target while trying to cleave other targets down at the same time. | 3,000 Tech Fragments + 1 million credits | Flashpoints |
Tactical Options
| Icon | Tactical Name | Class | Advanced Class | Combat Proficiency | Tactical Ability | Vendor |
|---|---|---|---|---|---|---|
| All for One | Sith Inquisitor | Sorcerer | Corruption | Revivification's pool concludes with a burst of dark Force energy, healing up to 8 allies within it. | 3,000 Tech Fragments + 1 million credits | |
| One for All | Sith Inquisitor | Sorcerer | Corruption | Roaming Mend heals up to 5 targets instead of 4. | 3,000 Tech Fragments + 1 million credits | |
| Metaphysical Mender | Sith Inquisitor | Sorcerer | Corruption | Volt Rush heals an ally within 20 meters of the damaged enemy. This healing scales up with each charge of Empowered, and Empowered charges also reduce the Force Volt Rush consumes by 30% per charge. (Previously called Storm’s Succor.) | 3,000 Tech Fragments + 1 million credits | |
| Elemental Convection | Sith Inquisitor | Sorcerer | Lightning | Volt Rush triggers Lightning Storm when activated. Chain Lightning gives you Volt Flux, causing your next Volt Rush to arc to multiple targets for the next 10 seconds. | 3,000 Tech Fragments + 1 million credits | |
| Eyrin’s Haste | Sith Inquisitor | Sorcerer | Lightning | Force Speed grants an additional Convection stack. 3 Convection stacks allow Thundering Blast to be activated instantly, consuming all stacks. Lightning Bolt deals 10% more damage and Thundering Blast deals 20% more damage while Convection is active. | 3,000 Tech Fragments + 1 million credits | |
| Stormwatch | Sith Inquisitor | Sorcerer | Lightning | Lightning Flash applies Stormwatch to its targets. For the next 15 seconds, whenever the target takes damage to Affliction, Crushing Darkness, or Thundering Blast a lightning bolt is called down upon the target, dealing energy damage. | 3,000 Tech Fragments + 1 million credits | |
| Ticking Force-Bomb | Sith Inquisitor | Sorcerer | Lightning | Forked Darkness now has a greater chance to activate on Crushing Darkness and Crushing Darkness deals more damage each time it ticks. | 3,000 Tech Fragments + 1 million credits | |
| Mystic’s Ruthless Blade | Sith Inquisitor | Sorcerer | Madness | Demolish deals 20% more damage on initial hit. Additionally, under Polarity Shift, Demolish resets the cooldown of Force Leech and causes the next Force Leech to activate instantly. | 3,000 Tech Fragments + 1 million credits | |
| Tempest of Rho | Sith Inquisitor | Sorcerer | Madness | Lightning Strike has a 100% chance and Force Lightning has 50% chance to cause Creeping Terror to tick an additional time whenever they deal damage. | 3,000 Tech Fragments + 1 million credits | |
| The Rushdown | Sith Inquisitor | Sorcerer | Madness | When Force Lightning generates 4 stacks of Wrath you gain Wrath Rush, allowing your next 3 Volt Rushes to deal 25% more damage and cost 50% less force. Volt Rush consumes all stacks of Wrath. | 3,000 Tech Fragments + 1 million credits | |
| Endless Barrier | Sith Inquisitor | Sorcerer | All | Activating Unnatural Preservation removes Static Barrier’s Deionize effect from you. | 3,000 Tech Fragments + 1 million credits | |
| An Explosive Return | Sith Inquisitor | Sorcerer | All | Returning to your Phase Walk marker causes a force explosion around you, dealing damage to any enemies around. | 3,000 Tech Fragments + 1 million credits | |
| Cleanse the Agony | Sith Inquisitor | Sorcerer | All | Consuming Darkness lowers the cooldown of Expunge by 3 seconds. | Crafted / GTN, schematic from S3T-BNS Vendor | |
| A Healing Hand | Sith Inquisitor | Sorcerer | All | Extrication now heals you and the target and makes your next Resurgence free. | 3,000 Tech Fragments + 1 million credits | |
| Ancient Tome of Exar Kun | Sith Inquisitor | Assassin | Darkness | Wither generates Redirected Wrath stacks for every enemy it hits, increasing your Shield Absorption and damage reduction by 2% per stack for 5 seconds. In addition, Maul deals 10% more damage to targets affected by Wither's slow effect. | 3,000 Tech Fragments + 1 million credits | |
| Shroud of a Shadow | Sith Inquisitor | Assassin | Darkness | Using Force Shroud while Dark Ward is active consumes Dark Ward and extends the duration of Force Shroud by .25 seconds for each Dark Ward stack consumed. | 3,000 Tech Fragments + 1 million credits | |
| Ward of the Continuum | Sith Inquisitor | Assassin | Darkness | Dark Ward now has 10 charges and Dark Bulwark can no longer restore charges. Consuming a charge of Dark Ward increases defense chance by 1%. This effect stacks up to 10 times and lasts for 20 seconds or until Dark Ward is reactivated. | 3,000 Tech Fragments + 1 million credits | |
| Blade of the Elements | Sith Inquisitor | Assassin | Deception | The critical hit chance of Reaping Strike is increased by 50% per Voltage stack. Critically hitting with Voltaic Slash reduces the cooldown of Reaping Strike by 1.5 seconds. | 3,000 Tech Fragments + 1 million credits | |
| May Cause Injury | Sith Inquisitor | Assassin | Deception | Gaining a stack of Induction causes your next Discharge to arc to multiple targets. | 3,000 Tech Fragments + 1 million credits | |
| The Awakened Flame | Sith Inquisitor | Assassin | Deception | When Ball Lightning deals damage, it causes its target to become electrified, dealing energy damage over 6 seconds. | 3,000 Tech Fragments + 1 million credits | |
| Quick Escalation | Sith Inquisitor | Assassin | Hatred | The critical chance of Leeching Strike is increased by 10%. Critically hitting with Leeching Strike resets its cooldown and grants Hungering Blade, increasing the critical chance and Force cost of your next Leeching Strike. Stacks up to 3 times. | 3,000 Tech Fragments + 1 million credits | |
| Severance Pay | Sith Inquisitor | Assassin | Hatred | Death Field does more damage to slowed targets and finishes the cooldown of Severing Slash. | 3,000 Tech Fragments + 1 million credits | |
| Two Cloaks | Sith Inquisitor | Assassin | All | Force Cloak has 2 charges. | 3,000 Tech Fragments + 1 million credits | |
| Jerra’s Persistence | Sith Inquisitor | Assassin | All | Phantom Stride gains 2 charges. | Crafted / GTN, schematic from S3T-BNS Vendor | |
| Traumatizer | Sith Inquisitor | Assassin | All | Maul and Low Slash inflict trauma for 15 seconds, reducing all healing the target receives by 20%. | 3,000 Tech Fragments + 1 million credits | |
| Two Time Trouble | Sith Inquisitor | Assassin | Hatred | Creeping Terror has a 100% chance to tick an additional time when you deal damage with Assassinate and a 60% chance to tick an additional time when you deal damage with a non-basic melee attack. Does not trigger additional healing. | 3,000 Tech Fragments + 1 million credits | |
| Chant of Regeneration | Sith Inquisitor | Assassin | All | Recklessness increases your Force regeneration greatly for a short time. | 3,000 Tech Fragments + 1 million credits | |
| Friend of the Force | Sith Inquisitor | Assassin | All | Force Shroud also applies to any ally you are guarding. | 3,000 Tech Fragments + 1 million credits | |
| A Breath of Fresh Air | All | All | All | Every third activation of your basic attack restores 10% of your Class Resource. | Not Available From Vendor, Onderon Reputation | |
| Biorhythm | All | All | All | Dealing Damage increases all healing done. Healing increases all damage done. Stacks up to 5 times, only one effect can be active at a time. | Not Available From Vendor, Onderon Reputation | |
| Durasteel Wall | All | All | All | Successfully parrying, deflecting, or dodging an attack while under 80% health increases your damage reduction by 1% for 5 seconds. Stacks up to 3 times. | 3,000 Tech Fragments + 1 million credits | |
| Krall’s Accord | All | All | All | Cycles between buffing Mastery, Accuracy, Power, Defense, Critical, Absorb, Alacrity, and Shield. In that order. | Not Available From Vendor, Onslaught Storyline | |
| Luck Always Changes | All | All | All | Your critical chance with Melee, Ranged, Tech, and Force attacks is increased by 1% each second. This effect resets on a successful critical hit. | Not Available From Vendor, Corellia Flashpoint | |
| Overwhelming Offense | All | All | All | Dealing damage increases all damage done for 2 seconds. Stacks up to 5 times. | 3,000 Tech Fragments + 1 million credits | |
| Reliquary of Time | All | All | All | Reduces the cooldown of on use Relics by 5%. | 3,000 Tech Fragments + 1 million credits | |
| Rolling Boil | All | All | All | Increases Mastery by 5% for 5 seconds when a Relic triggers. | 3,000 Tech Fragments + 1 million credits | |
| The Life Warden | All | All | All | Taking damage below 20% health will rapidly heal you for a large amount. 10-minute cooldown. | 3,000 Tech Fragments + 1 million credits | |
| REMOVED in 7.0: Slow Mercy | Sith Inquisitor | Sorcerer | Madness | Death Field spreads Force Slow’s effect. Demolish hits all nearby targets affected by your Deathmark and Force Storm does 15% more damage to targets affected by your Deathmark. | Not Available | |
 | REMOVED in 7.0: Go to Sleep, Go to Sleep! | Sith Inquisitor | Assassin | All | Mind Trap can now affect up to two targets at once. | Not Available |


 How to Craft
 Choose a Crew Skill
 Armormech
 Armstech
 Artifice
 Biochem
 Cybertech
 Synthweaving

 Gathering Guide
 Rare Materials Guide
 White Materials Guide
 Jawa Junk

 Augments
 Medpacs, Stims and Adrenals
 Synthweaving Crafting Tree


 Crafted Decorations
 Crafted Mounts
 Crafted Dyes
 Crafted Crystals
 Events Calendar
 Galactic Seasons
 PvP Seasons
 Bounty Event
 Double XP Event
 Feast of Prosperity
 Gree Event
 Life Day
 Nightlife Event
 Pirate Incursion Event
 Rakghoul Event
 Spring Abundance Festival
 Swoop Event

 Jedi Knight
 Jedi Consular
 Trooper
 Smuggler
 Sith Warrior
 Sith Inquisitor
 Bounty Hunter
 Imperial Agent
 Bounty Hunter
 Imperial Agent
 Jedi Consular
 Jedi Knight
 Sith Inquisitor
 Sith Warrior
 Smuggler
 Trooper
 Legacy Gear
 Lightsabers
 Double-Bladed Lightsabers
 Vibroswords
 Double-Bladed Vibroswords
 Blaster Pistols
 Blaster Rifles
 Sniper Rifles
 Blaster Cannons


 Discord
  Email swtorista@gmail.com
 Bluesky @swtorista.com
 Reddit /u/swtorista
 Twitch Swtorista
 Youtube
 Patreon
 Twitter @swtorista